Belle Dress

Petticoat Layer 2: Attaching the Godets

It’s time to attache the godets to the first layer of the petticoat.

First, I positioned the ring of godets around the petticoat and pinned them in place. It took a bit of repositioning to get them to lay the way I wanted them to.

img_2786

I made sure to pin all the way around the top layer of the godets. I also took care to ensure that when I pinned the godet was attached only to the first layer of the petticoat and not the hoop skirt.

img_2793

Once the godets were securely pinned in place, I lifted the entire petticoat off the dressform.  Using a straight stitch I then sewed the top of the godets to the first layer of the petticoat. I sewed along the zigzag shaped path formed by the tops of the godets, near the serged edge. By sewing just along the top edge, the bottom of the petticoat will be able to flow freely.

img_2794

Success! The second layer of the petticoat is complete. It is already looking so poofy!

2018-11-23-18-10-41

Belle Dress

Petticoat Layer 2: Assembling the Godets

Once the godets were completed it was time to sew them together. This took a bit of planning. To determine where to sew the godets I needed to arrange them on my hoop.

First, I had to decide how high I wanted them to reach. Conveniently for me, they were just tall enough for the tops to be aligned with one of the hoops on the petticoat. I decided to pin the godets on one third of the petticoat to figure out the best placement.

I used Yellow pins to divide the third of the hoop into 4 sections. There will be 4 godets in each third of the hoop for a total of 12. I spit each of these sections in half using a different colored pin. (So, each pin separates an 8th of the hoop section I am working on.)

2018-11-17-18-30-53

On my petticoat the third of the hoop measured 32 inches. So each quarter is 8 inches, and each center point (or eighth) 4 inches from there.

2018-11-17-18-32-47

The peaks of the godets will align with the multi colored pins (not the yellow). I pinned the godets in place.

2018-11-17-18-33-54

The next step was to determine where the godets would need to be attached to each other. Having the godets side by side allowed me to find where they would naturally meet when lying flat against the first layer of the petticoat. On my godets, this point measured 6.5 inches down from the peak of the godet.

2018-11-17-18-39-13

Next, I removed the godets from the hoop so they could be assembled together. With right sides together I aligned two godets along one side, beginning at the peaks. Then I measured 6.5 inches down from that peak and sewed from there to the bottom of the ruffle. I used about a 1/4 inch seam allowance, just to the inside of the serged edges.

img_2776

Here is what a few godets looked like when sewn together.

img_2778

And here is all twelve! Can you believe this is only a single layer of the petticoat!

img_2780


Belle Dress

Petticoat Layer 2: Sewing Godets

Now that the godets and ruffles have been cut out, it is time to sew them together. The first thing to do was to stay stitch the godets. As Traybuff mentioned in one of her youtube videos, there can be quite a bit of stretch along the bias, and I didn’t want to have to worry about the petticoat falling out of shape. As a result, I decided to stay stitch four lines on the godets.

I stay stitched using a 2.5 stitch length on each straight edge. I also stitched two more lines at approximately 22.5 degrees and 67.5 degrees in relation to the 90 degree corner. My brain works in math terms, but if you don’t speak math, imagine three lines extending from the corner that would separate the panel into quarters. Stitch on the first and third lines, not the halfway point. I didn’t measure this, I just estimate while sewing.

2018-11-17-13-13-54

The stay stitching seemed to work well, and when I serged later, it definitely helped the godets hold their shape and prevent excessive ruffling.

Up next was gathering the ruffle. I did the gathering on the serger. I am not terribly experienced with sergers, so it took quite a bit of playing to find settings that worked for my fabric. I have found it very helpful to keep a Serger Setting Log. This catalogs all of the settings I use for different fabrics and functions. Tracking the information is so beneficial. Now, once I have tested and retested fabric to find the perfect feed, tension, and stitch length, I don’t have to do so again. I will be ready to go the next time I face a similar sewing challenge. Here is what my ruffles looked like after gathering.

2018-11-17-13-13-41

Next I attached the godets to the ruffles on the serger. (I tried using a gathering foot to simultaneously gather the ruffles and attach them to the godets, but despite numerous attempts I just couldn’t get my serger to gather enough without gathering the godet as well. In the end, doing this process separately worked best for me.)

Finally, after attaching the ruffles I serged along the two straight sides to finish the raw edges.

2018-11-23-07-58-32

The godets are now ready to be attached together!


Belle Dress

Petticoat Layer 2 – Godets

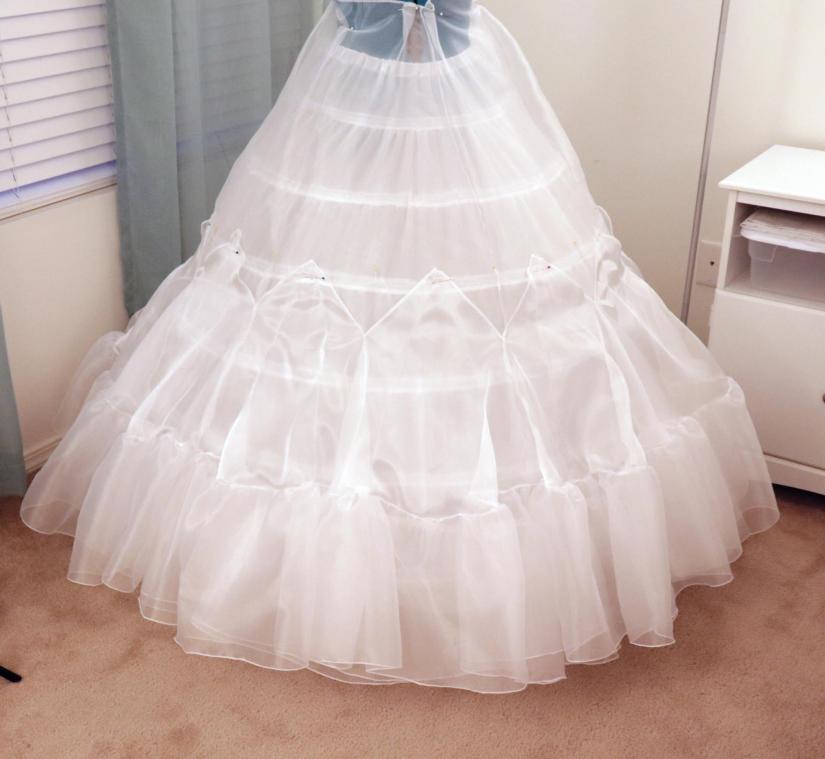
Now that the first layer of the petticoat is complete it is time to work on the second layer!

The second layer is constructed much differently from the first. Rather than adding a full length skirt for this layer, it is formed using a series of godets, triangular sections of fabric, each with a ruffle attached to the bottom.

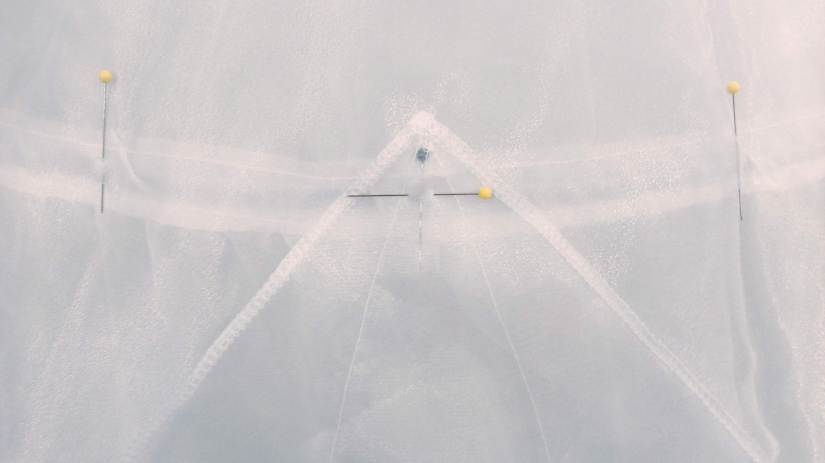
Here is a quick peak to give you an idea.

2018-11-17-18-41-26

The image only shows a few of the triangles pinned in place. Eventually, all of these sections will be sewn together and then attached to the bottom overlay section from the first layer of the petticoat.

A quick note on design. I am using this petticoat to create a Belle dress inspired by the animated Beauty and the Beast film. As a result, my petticoat is constructed mainly from white organza. If you are making a replica of the Cinderella dress from the live action film, you may want to consider changing your fabric within the petticoat. To achieve that beautiful look with a wide range of blues you will want to use more than just a single color of fabric for the petticoat. Maybe change with each layer, or even within the layer. You could use different shades of blues, purples, and shimmer fabrics to create an amazing assortment of layers within your petticoat.

Godets

The size of the godets can vary based on the size of your petticoat. I decided to make my triangular sections 18 inches tall with 12 inch ruffles. I plan to use 12 godets sections in layer 2. Here was my plan.

2018-11-22-07-12-01

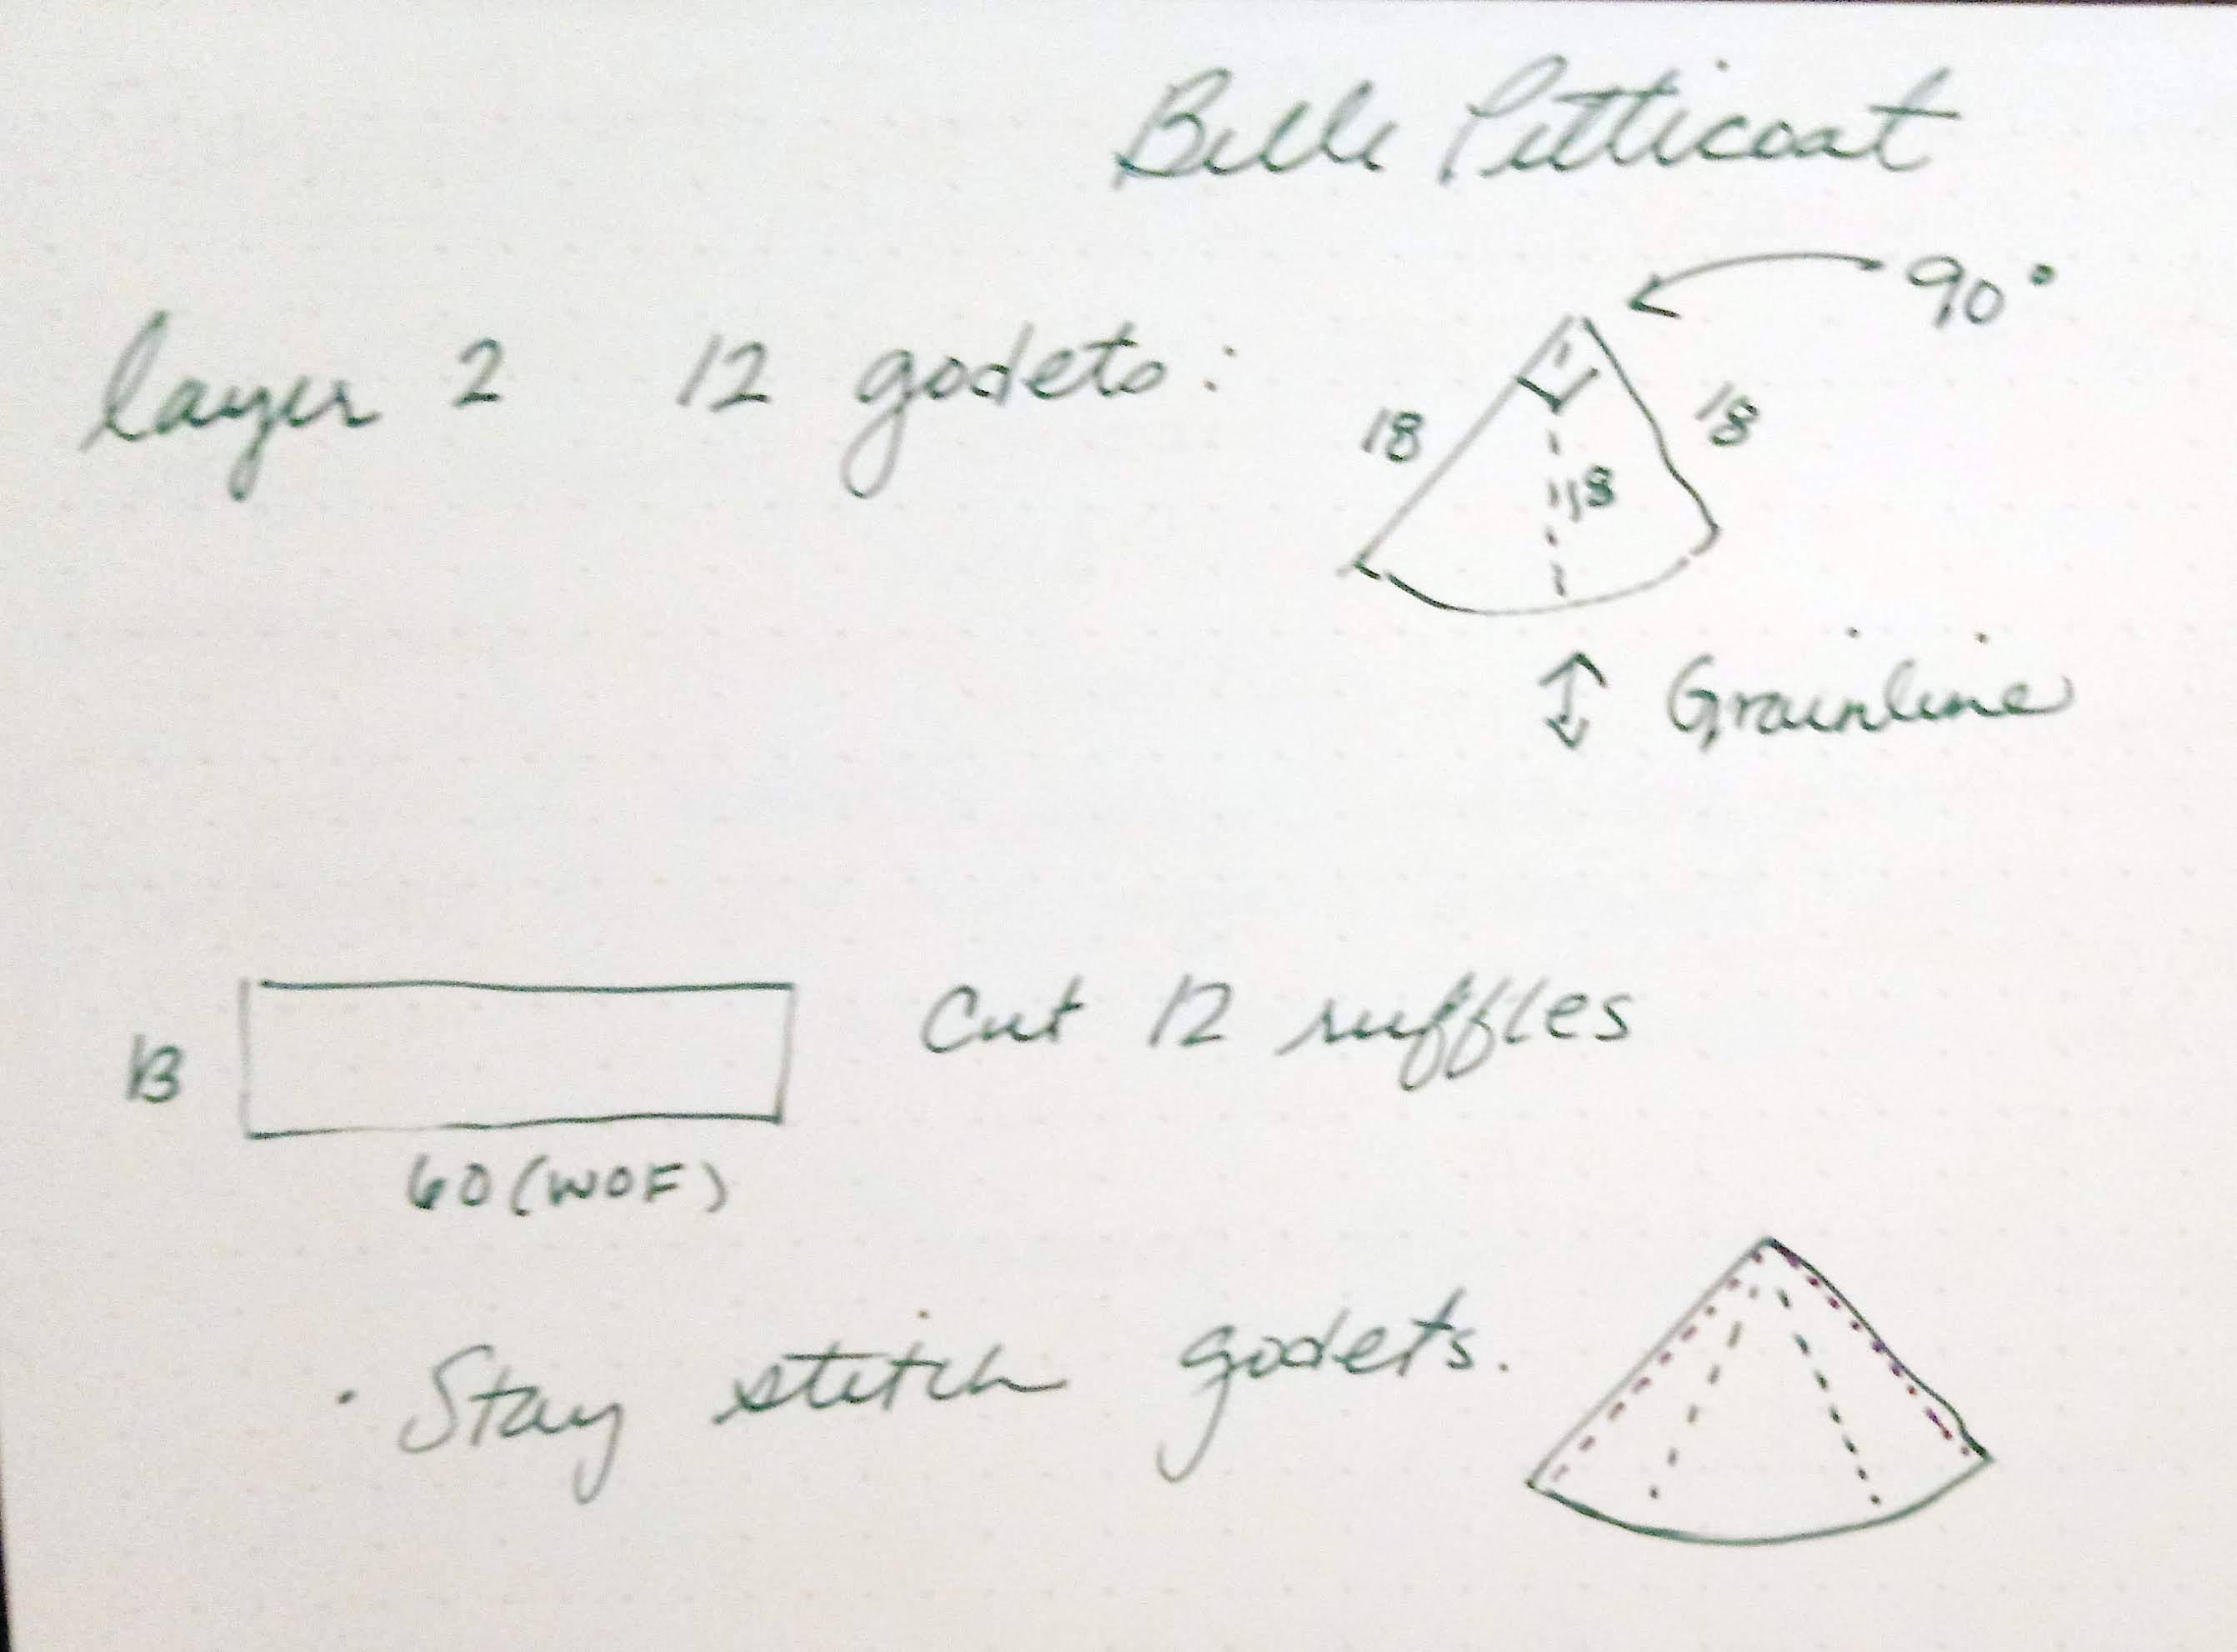
Next, I went to work making the pattern for the godets. Using Swedish Tracing Paper and my handy 6 x 24 acrylic ruler on top of my cutting mat, I created a right angle along the edge and marked 18 inches from that point both horizontally and vertically.

2018-11-04-17-45-20

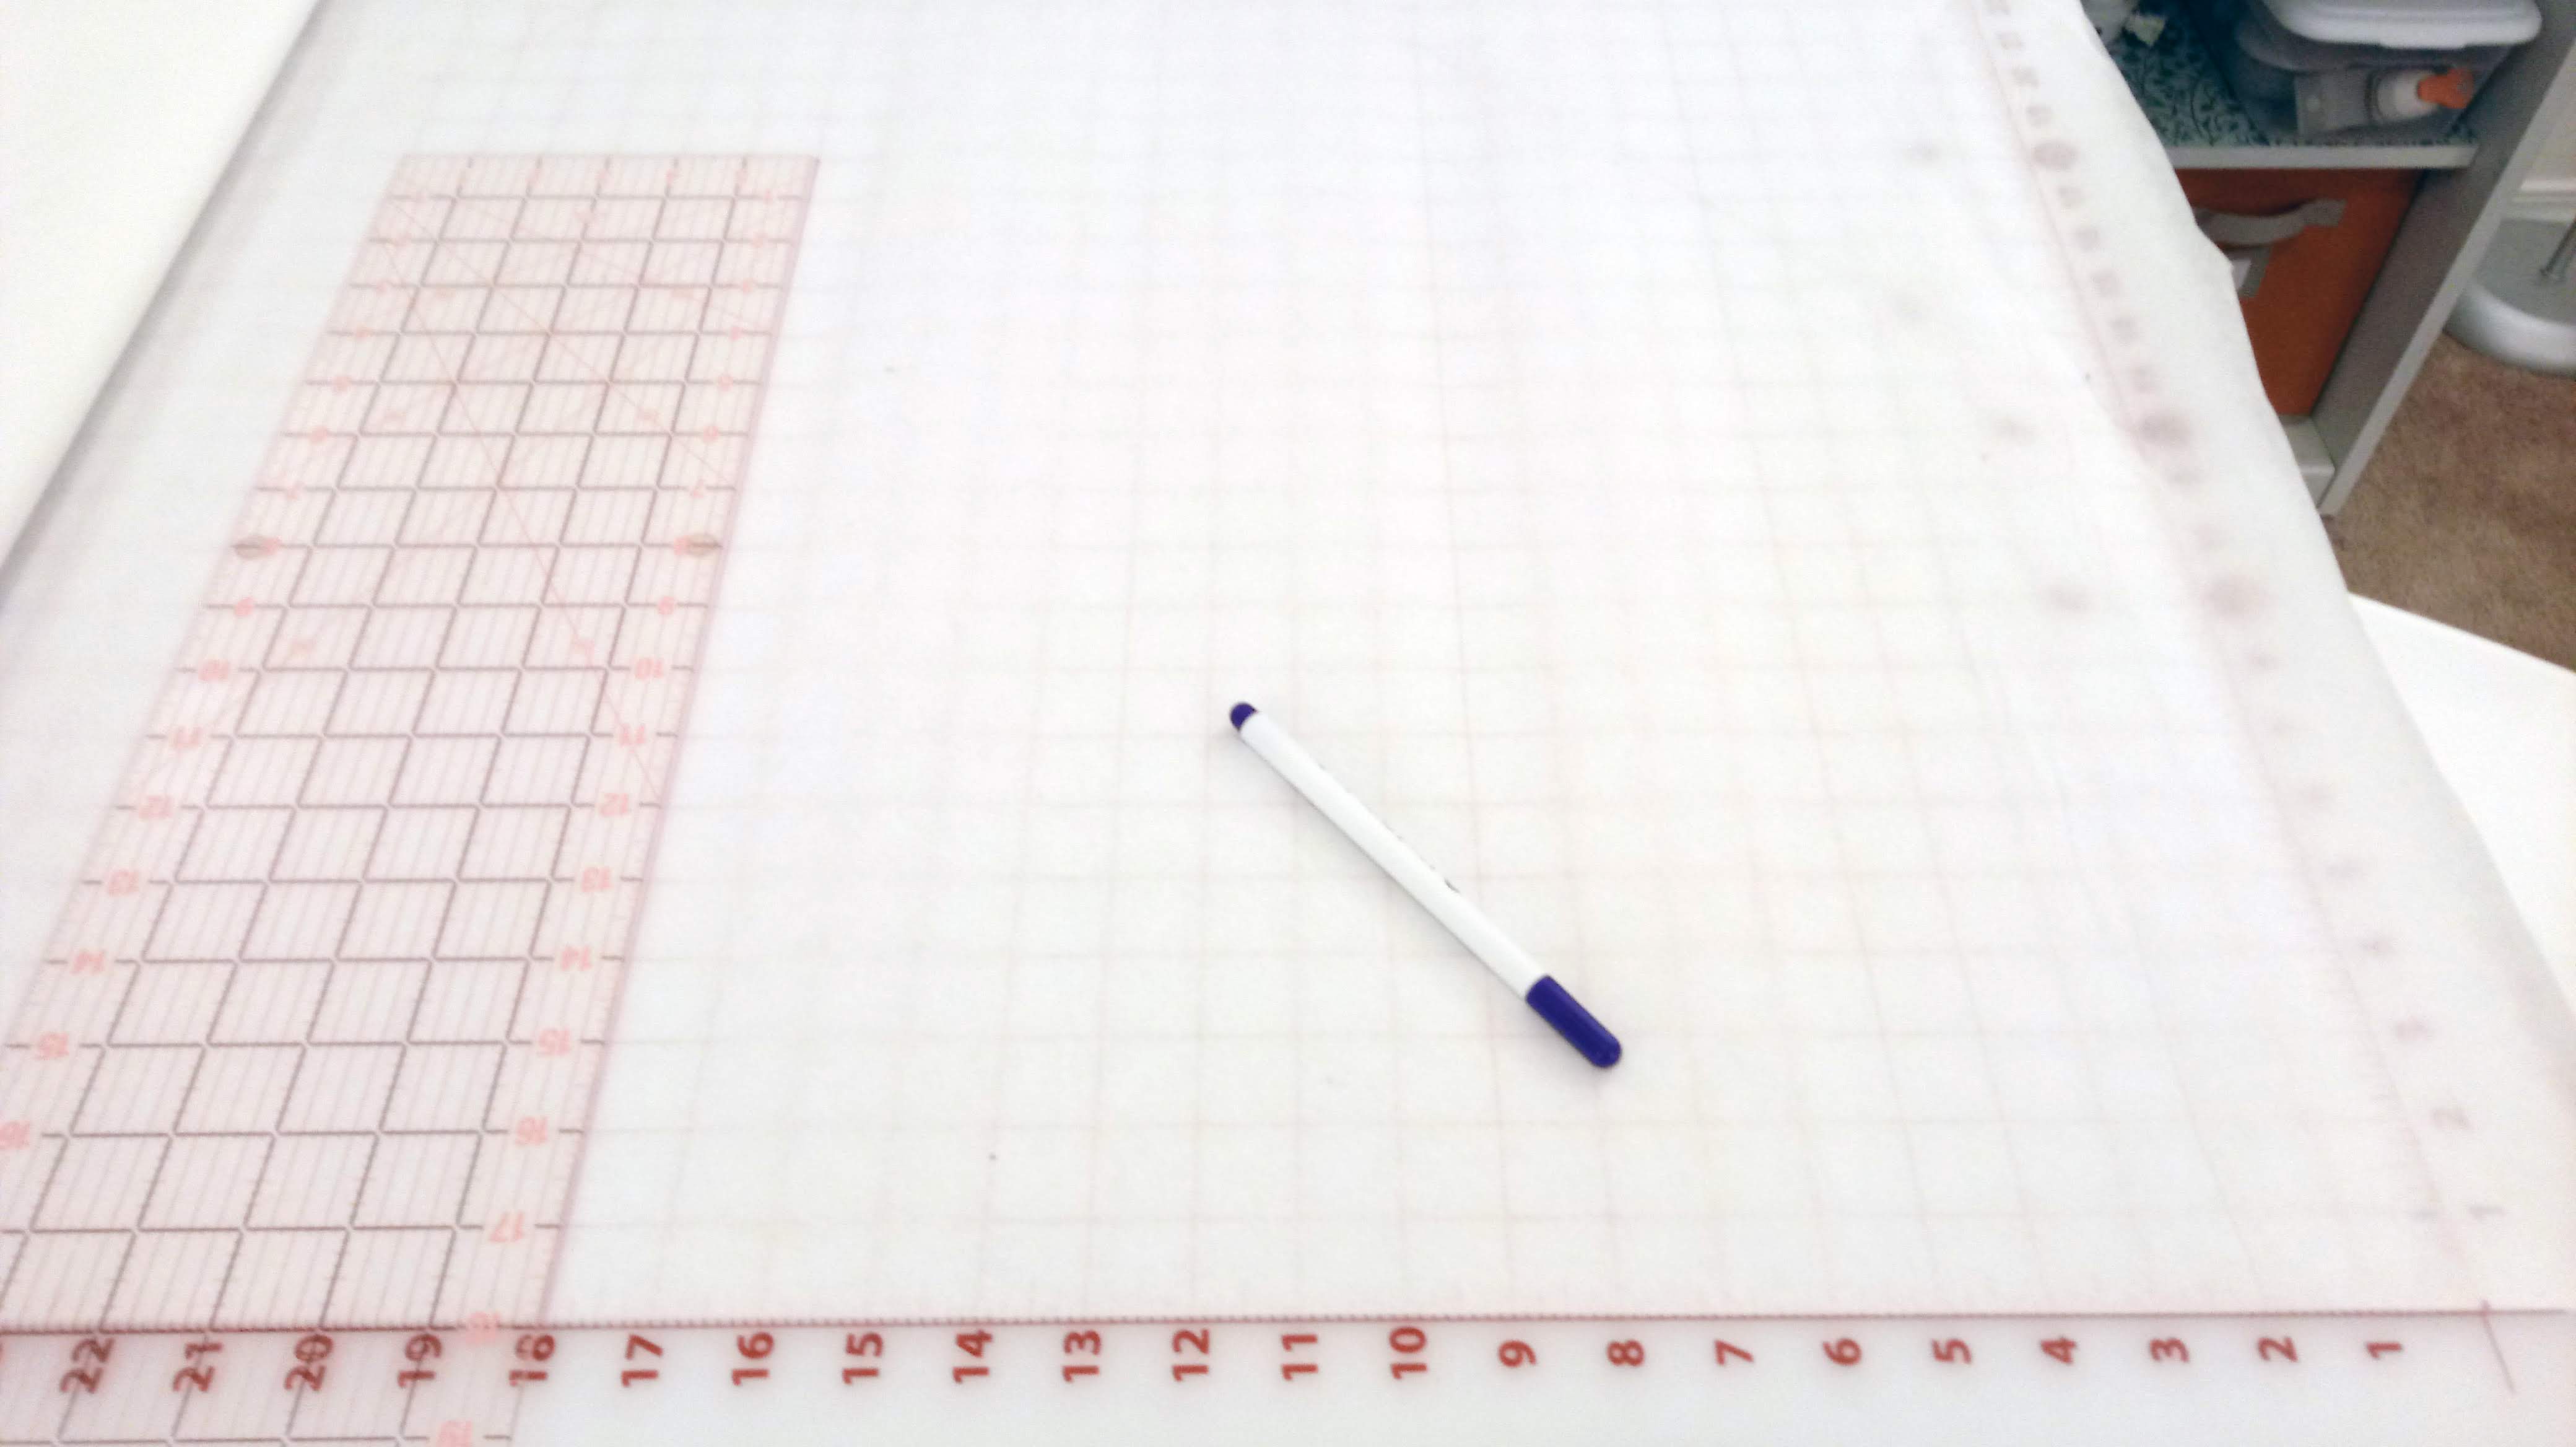
Next I angled the ruler from that corner (the right angle), measuring 18 inches, creating a series of dots from one end point to the other.

2018-11-04-17-46-18

You can see my dots a little more clearly here.

2018-11-04-17-47-32

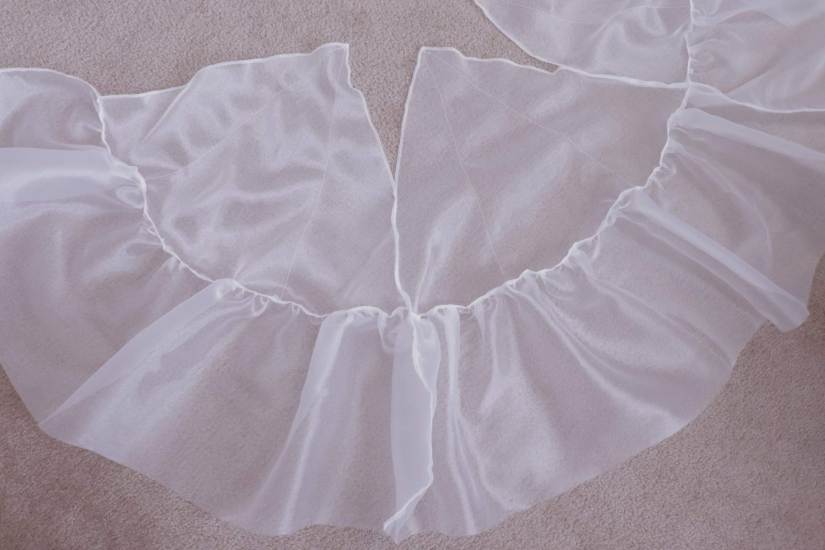
I connect the dots to create the curved hem and cut out the pattern.

2018-11-04-17-48-29

I used my pattern piece and cut out 12 triangular godets from my fabric.

2018-11-04-18-00-13

I also cut out 12 rectangles, 13 inches by the width of fabric ( 60 in).

2018-11-04-18-35-43

Altogether, the second layer of the petticoat took about 7.5 yards of fabric.

Detail Summary:

Layer 2

Fabric used: Casa Organza White. 58 inch width.

Purchased: $1.27 per yard. Joann+ (Had to purchase 40+ yards for this price)

Amount of fabric used: 7.5 yards

Number of Godets: 12

Godet Radius: 18 inches

Length of Bottom Curve: ≈ 30 inches

Ruffle: Cut 12 Rectangles, 13in  x Width of Fabric. One rectangle used per ruffle.

Next time, I will explain how I sewed the godets!

Belle Dress

Continuing the Petticoat

I cut three panels to create the overlay. If I had to do so again, I would give myself a few more inches of leeway in the seam allowances. To save fabric, two of the panels were cut on the fold, but the third wasn’t. I used the split panel for the center back. I sewed the panels together and draped it over my dress form. The result is the image from the previous post.

The waist was a little big, but I plan to gather the top edge when inserting the waistband later.

Adding the Ruffle

To complete the first layer of the petticoat I wanted to add two ruffles to the bottom of the overlay.

Cut five 26″ by Width of Fabric (≈ 60″) rectangles. Next I sewed them together along the short edges with my serger creating a very long chain ≈ 300″ long. Then I finish the both long edges on the serger using a rolled him.

Folding the rectangle in half (creating a double layer 13″ x 300″ rectangle, I gathered the folded edge. I wanted my ruffles to be 12 inches wide on the finished petticoat. This worked out well.

img_0354

A note on serging. I serged using woolly nylon thread in the looper. This seemed to work well and gave the hem a nice finished look.

After gathering I attached it to the bottom of the overlay and joined the ends.

Here was the result.

img_03551

And the first layer of the petticoat is finished!

Belle Dress

Making a Princess Dress

I teach a sewing class, and this year one of my students wanted to make a princess dress. Not just any dress, the Cinderella dress from the live action film! Yes, quite the project.

To ensure that I would be able to help her with the project, I knew I would need to make one as well. However, I had already made a Cinderella dress some years ago, and as I prefer the original Cinderella design, I didn’t really need another. So, my solution…making a Belle dress! While I made a Belle dress for a friend in the past, I don’t have one of my own, so this was the perfect opportunity. Since the designs of the two dresses are so similar, the difference between the two construction wise will be slight.

So, for the next few months I will be working along with my student to make a massive ball gown!

We are following the Youtube tutorial for the Cinderella Petticoat put together by Traybuff who did an excellent job of explaining how her Cinderella dress was constructed and showing the process.

The Fabric

A word on fabric. This project requires massive amounts of fabric! More than 100 yard for the Cinderella version of the dress! I anticipate to use 40+ yards just for the petticoat.

img_0344

As a result, cost is a huge consideration. If you are able check out Joann+, the bulk purchasing site through JoAnn Fabric. I was able to purchase the fabric for the petticoat for less than $2 a yard. I chose to use their Casa Organza fabric. You have to be on their Joann+ site to view the value pricing, and they do not have all of the colors available for bulk ordering. Also, they DO NOT ACCEPT RETURNS! Be confident in your purchase before ordering. I found this out the hard way. The “Sunshine” yellow displayed online looked much different than what I received. I got “sunshine” when I was expecting a very pale yellow based on the photos. But…after purchasing 40 yards…we will make it work.

The Petticoat

Using a ready made hoop purchased on Amazon, such as this one, I went to work. As I wanted the hoop separate from the petticoat so I could wear it with other costumes, I did not attach the fabric to it. Instead I used organza to create an overlay.

img_0352

First I measured the hoop, circumference, length, and length between hoops. I divided the circumference into 3 sections that could be pieced together.

img_0349