
Once I had a good idea for how to drape the lace, it was time to attach it.
As I was beginning this process, I decided I wanted all of the yellow layers of the skirt to be connected, and all of the white to be separate, so I could wear the white petticoat with other things.
As a result, my first step was to put the yellow circle skirts, and the yellow gathered petticoat layer together.

I placed the ruffled layer inside the circle skirts, aligned the center front, and pinned all four layers together at the waist.


Evie wanted to help. Thank goodness she is cute, since she isn’t terribly helpful!

Next, I took it to the machine and stitched them together with a 1/2 inch seam allowance around the waist.

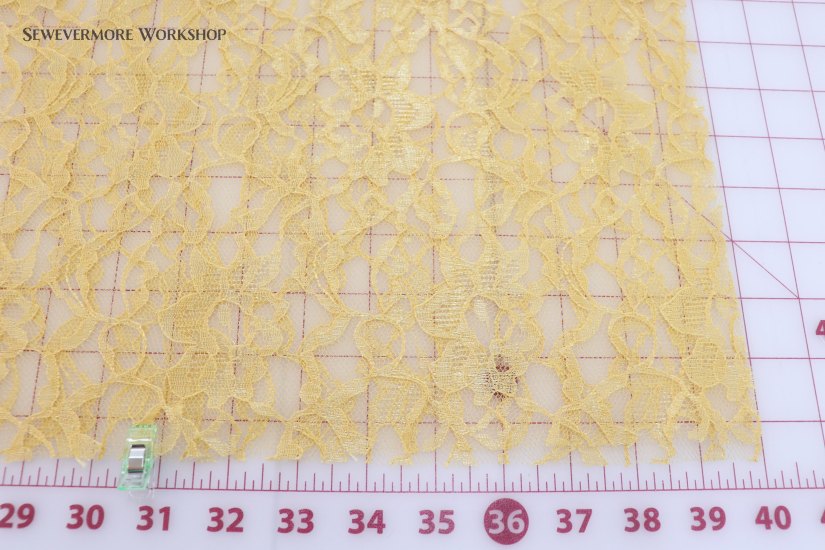
Now, I was ready to work with the lace. I started with 5 yards of JoAnn’s Casa Collection 58″ lace in Ochre. It is a great value, only about $5 per yard with a 50% of coupon. I wish I had purchased a few more yards of lace, 6 – 7 yards probably would have been better for a fuller or longer drape, but as I didn’t want to invest anymore in materials…we will make 5 yards work!
I began by trimming the lace to be 40 inches tall, rather than 58 inches. After cutting I had lace that was 5 yards by 40 inches. (I will use the part that was trimmed off for accents and details later.)
I folded the lace in half with right sides together. I marked 9 inched down from the top edge (the scalloped finished edge of the lace is the bottom), and 6 inches up from the bottom, and pinned in between. I left 9 inches open at the top for the center back opening, and the bottom 6 inches open for the draped swoops of fabric.

I stitched between the two marks. This created a big loop of lace.

Next, I folded the lace fabric into quarters and used clips to mark the quarter sections. (Pins tend to fall out of lace.) Each quarter section was about 45 inches along the top raw edge.


I then marked the waistband section of the skirt into quarters as well.

I placed the skirts inside the lace, making sure the lace was right side out, and aligned the quarter sections. You will notice that the lace is MUCH bigger than the waistband.

To bring in the waist I created pleats, similar to what I did when draping the fabric. When making the pleats I found that my pleats overlapped about 2/3 to 3/4 of the time. For example, if my pleats were 1.5 inches long, they would overlap the previous pleat by about 1 inch or a touch more. I didn’t really measure, so this took a little playing with, but in the end I was happy with the results. I stitched the pleats in place in sections using a 1/2 inch seam allowance.
The pleats go in opposite directions. They fold toward the back of the skirt, so at the center front they meet and then point different ways.

The lace is now attached to the skirt! Hooray.
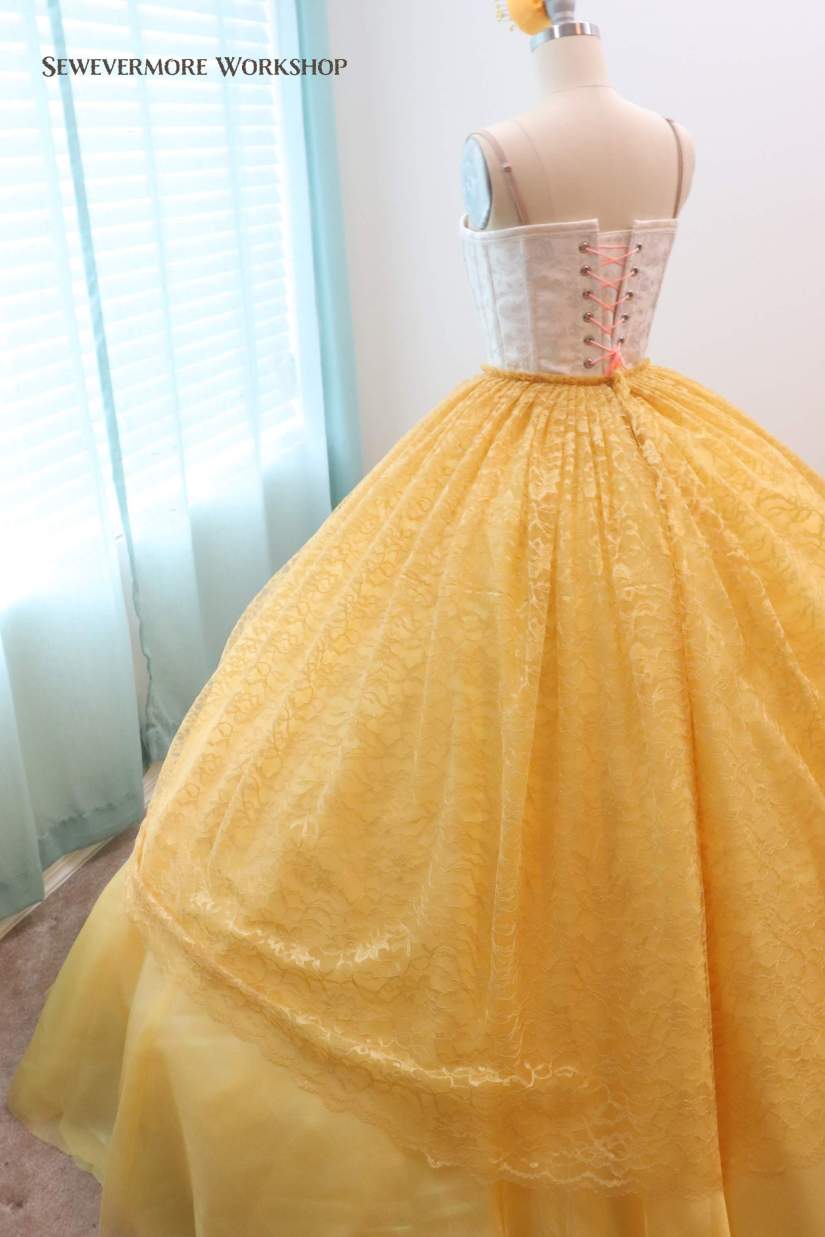
You will notice that the lace is a bit snug around the skirt. Raising it up higher will help eliminate this. If you had an extra yard or two you also would have that problem. Not to worry though, 5 yards will work!
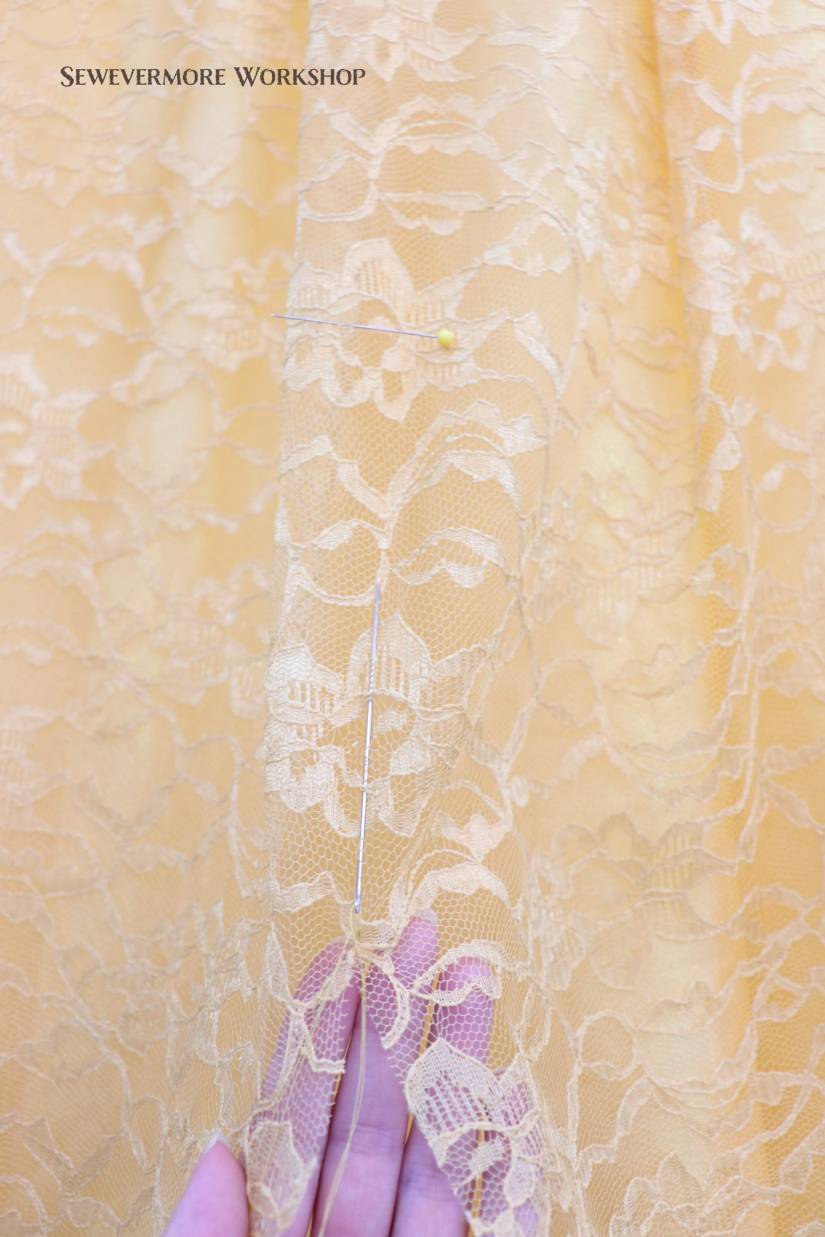
Next, let’s begin with the swoops of lace. I started by marking off 18 inch sections along the bottom edge. At each 18 inch mark I cut a 6 inch vertical slit…and marked 6 inches straight above that. If I had to do this again, I would do so when the material was flat, perhaps with an air erase marker or something, so that I could ensure my markings were accurate and forming right angles.

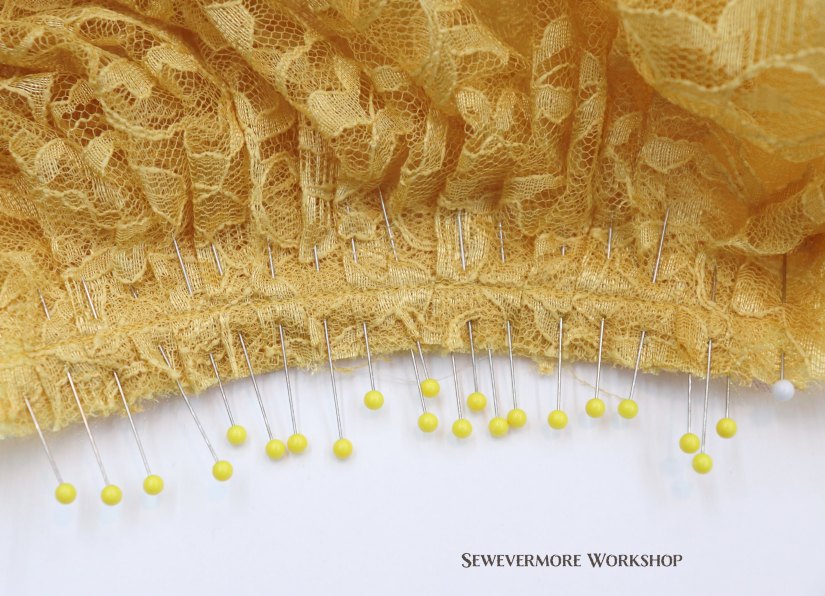
At the top of each slit I did 6 inches of vertical gather stitches by hand. I used a long doll needle to make the work faster.
I pulled the gather stitches tight and made a knot.

This created nice little bunches in the lace which will be the top of the swoops of fabric.

I was pretty pleased with how they turned out.

I still plan to go back and work with the slit sections to add to the look of the drape, and I might increase the length of the gathered sections. We will see!


