Belle Dress

Beginning the Underskirt

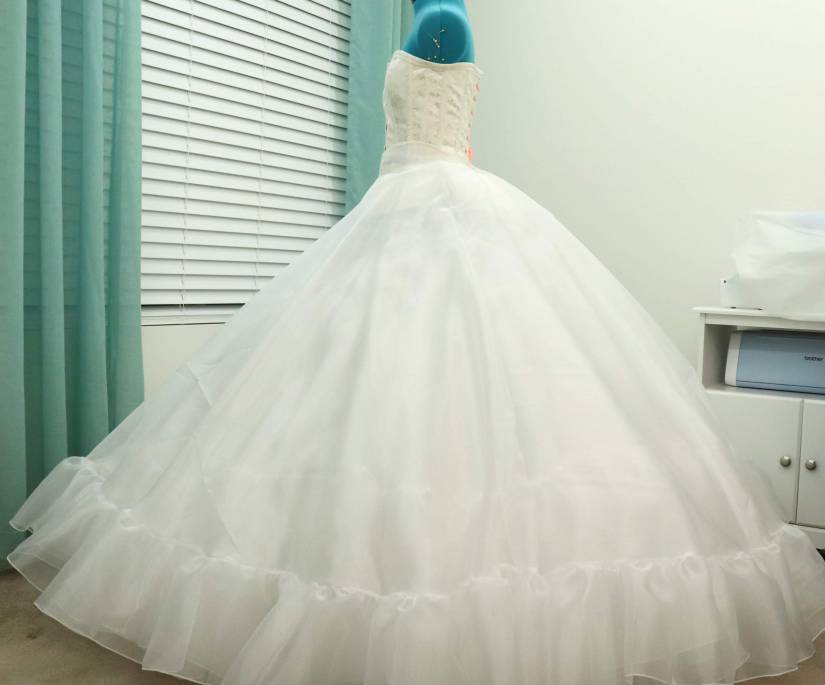
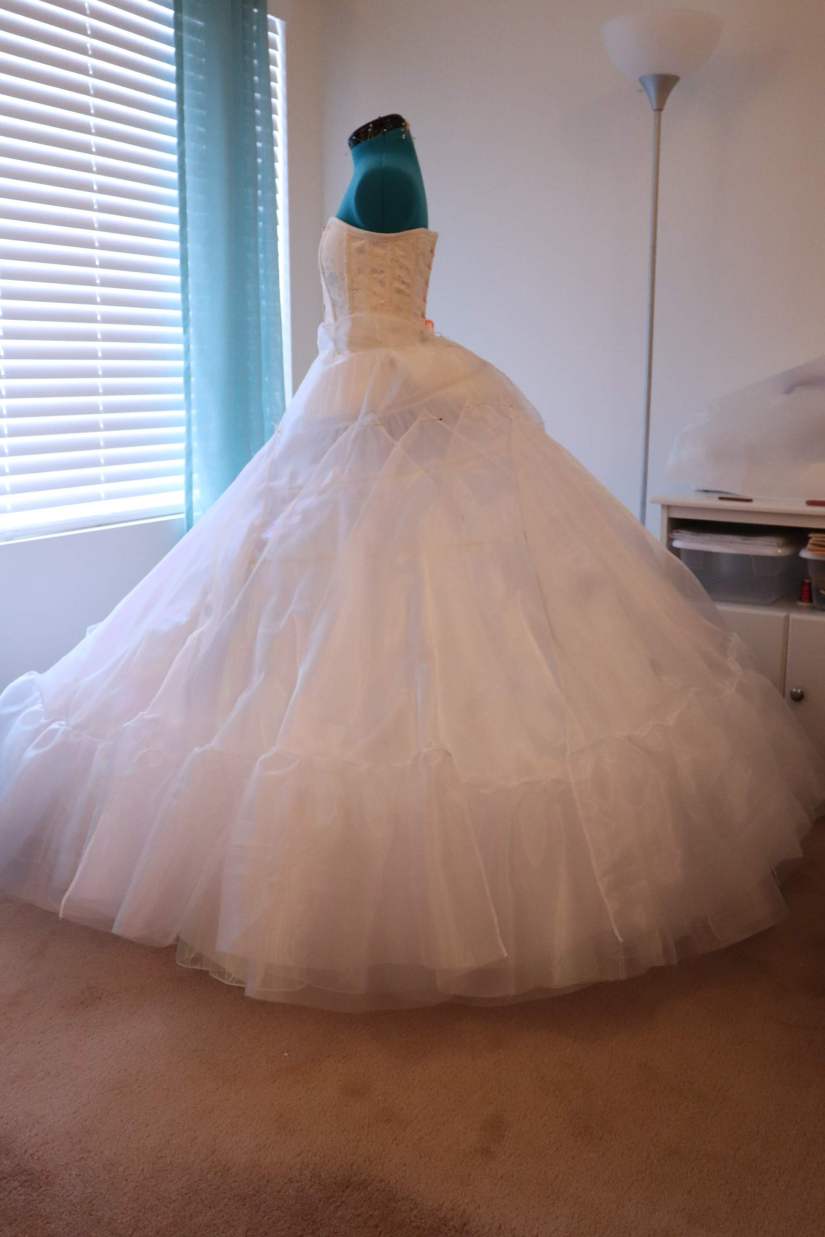
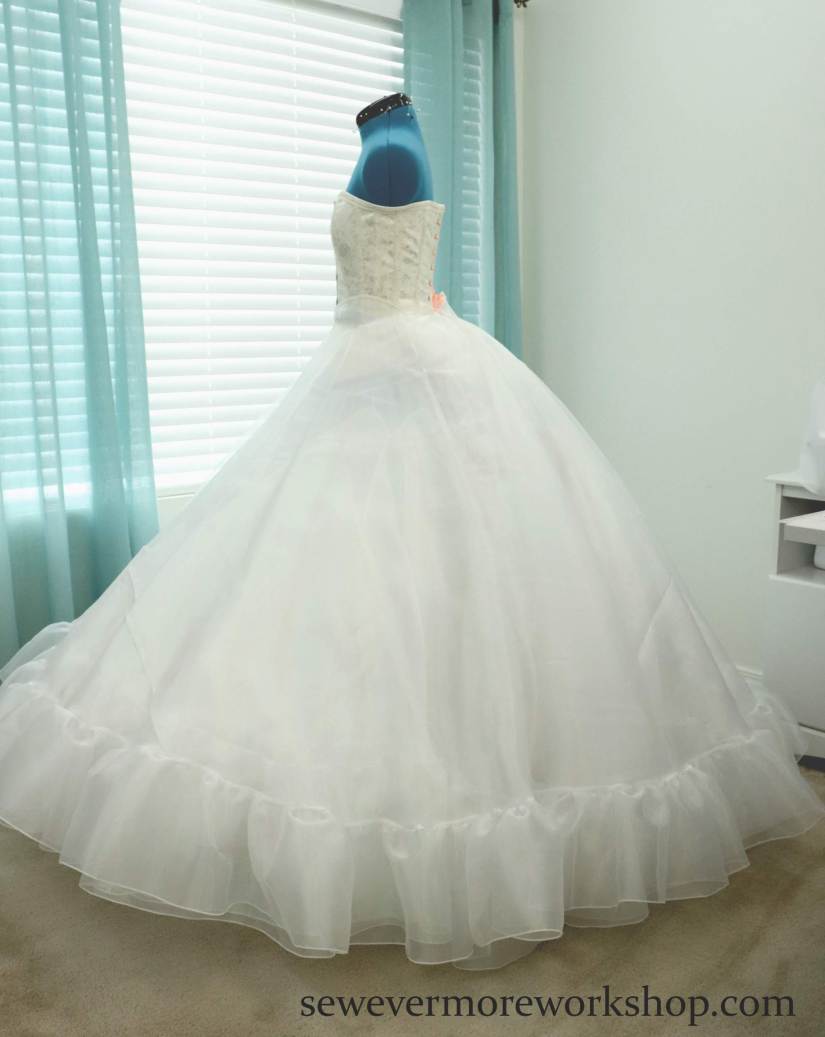
With the petticoat done it is time to start thinking of the dress itself. If you are making a Cinderella dress up next are circle skirts! Since I am mimicking that style for my Belle dress, I will be doing the same.

The first thing I did was decide what colors to do the circle skirts. If you are using sheers, it helps to layer the fabrics before hand to see what they will look like.

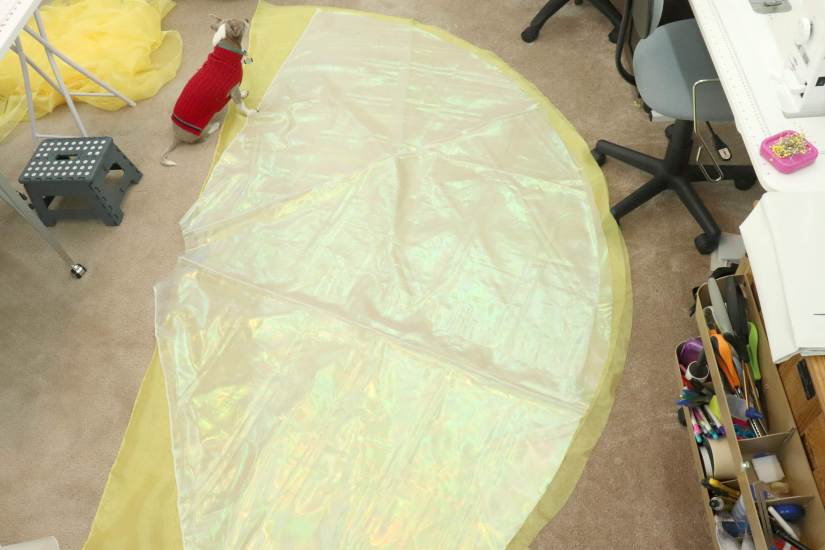
For my skirt I chose to layer circle skirts in yellow, white pearl, and gold. The yellow fabric I purchased was brighter than I expected. Adding the white and gold on top of it tones down the intensity of the color.

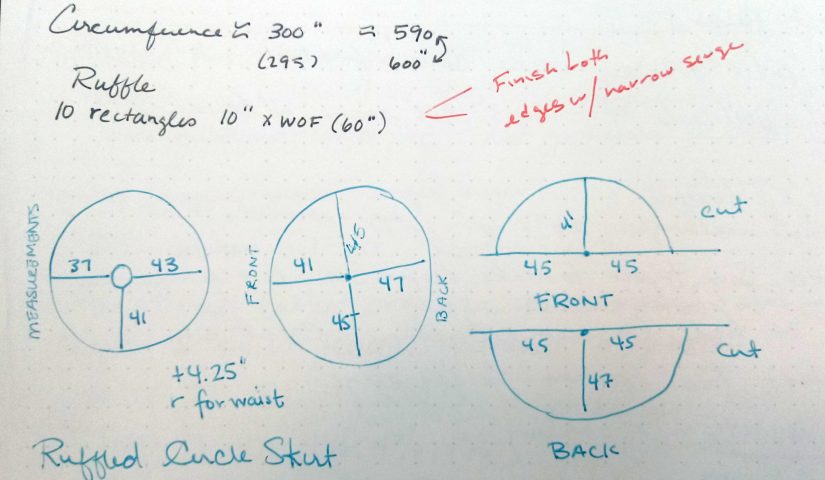
Using the same method I did when cutting the circle skirt for Layer 5 of the petticoat I cut circle skirts with a 56 inch radius. (4.25 inches for the waist and 52 inches for the length of the skirt.)

This is a few inches longer than I actually need, but since this part of the skirt will be visible on the outside of the final dress, I didn’t want to chance accidentally cutting it too short.

Depending on the circumference of your petticoat, and the fullness you want in your skirt, a circle skirt may or may not be large enough for you. You can always add godets at the sides to make the skirt fuller. This was not necessary for me.

A 56″ circle skirt in Sunshine Yellow.

3img_4369

This was cut in two pieces, each using about 120 inches of 60 inch wide Casa Organza fabric from Joann+ in Sunshine Yellow. Each piece is a semi-circle and they were serged together at the sides to create a full circle. Approximately 7 yards used.

56 inch “almost” circle skirt in Glitterbug White Pearlized Sheer.

3img_4374

I ran out of the white pearl fabric, so I was not able to create a full circle skirt, but it was plenty big for what I needed. This skirt was cut using 6 sections. Each section has a radius of 56 inches and was cut so that the arc at the bottom of the skirt extended all of the way across the 44 inch fabric. It probably would have been better if I had 7 or 8 sections, but I don’t think it made a big enough difference for me to go out and purchase more fabric. If I was making the Cinderella dress I may have had a different opinion, but since I am making Belle, and the top portion of the skirt will be covered with an overlay I didn’t find in necessary. All 6 sections were serged together to create a wide skirt. Approximately 8 yards used.

I really liked using the pearl for this layer. The shimmer of the fabric is visible underneath the next organza layer, but is subdued. It gives a nice iridescent effect without looking cheap or over the top.

A 56″ Gold circle skirt.

3img_4382

This layer was also made using Casa Organza. I don’t recall the exact color. It was purchased in store during a 70% off sale. Approximately 7 yards used.

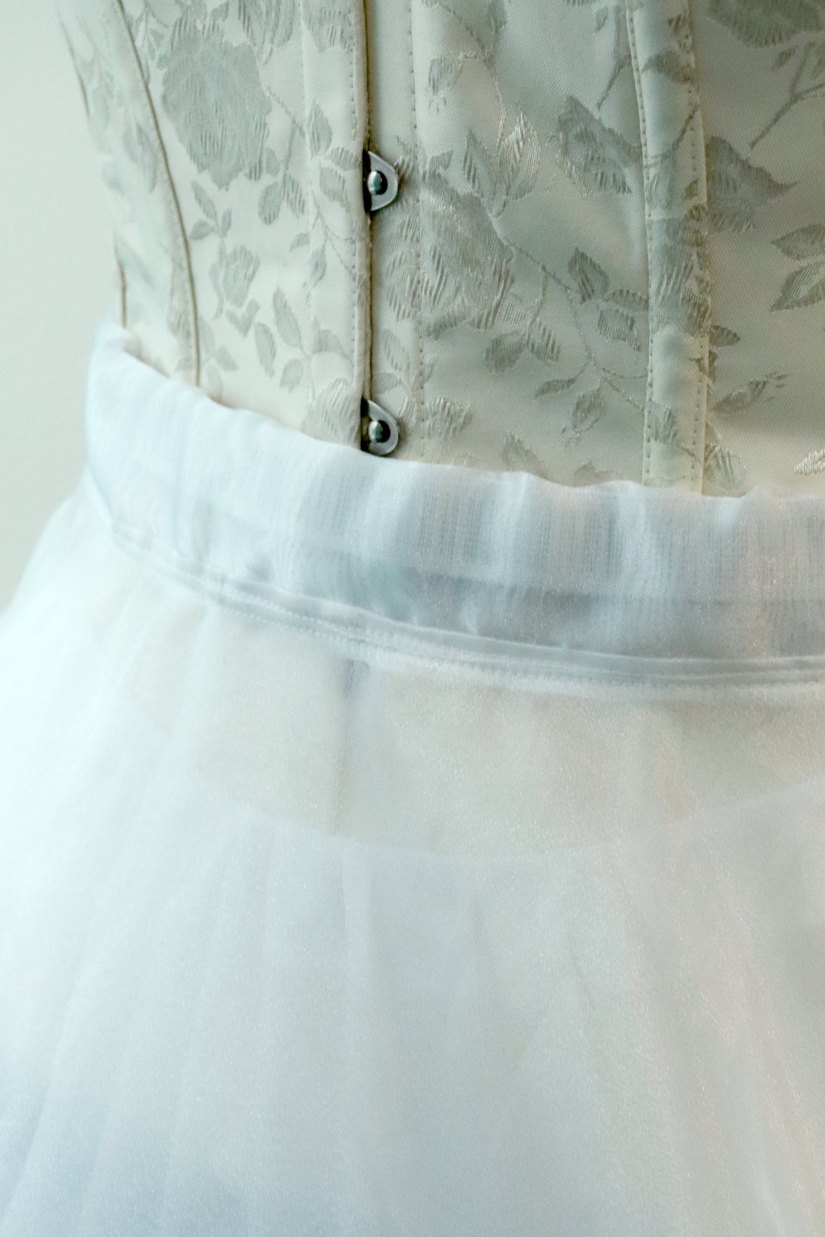
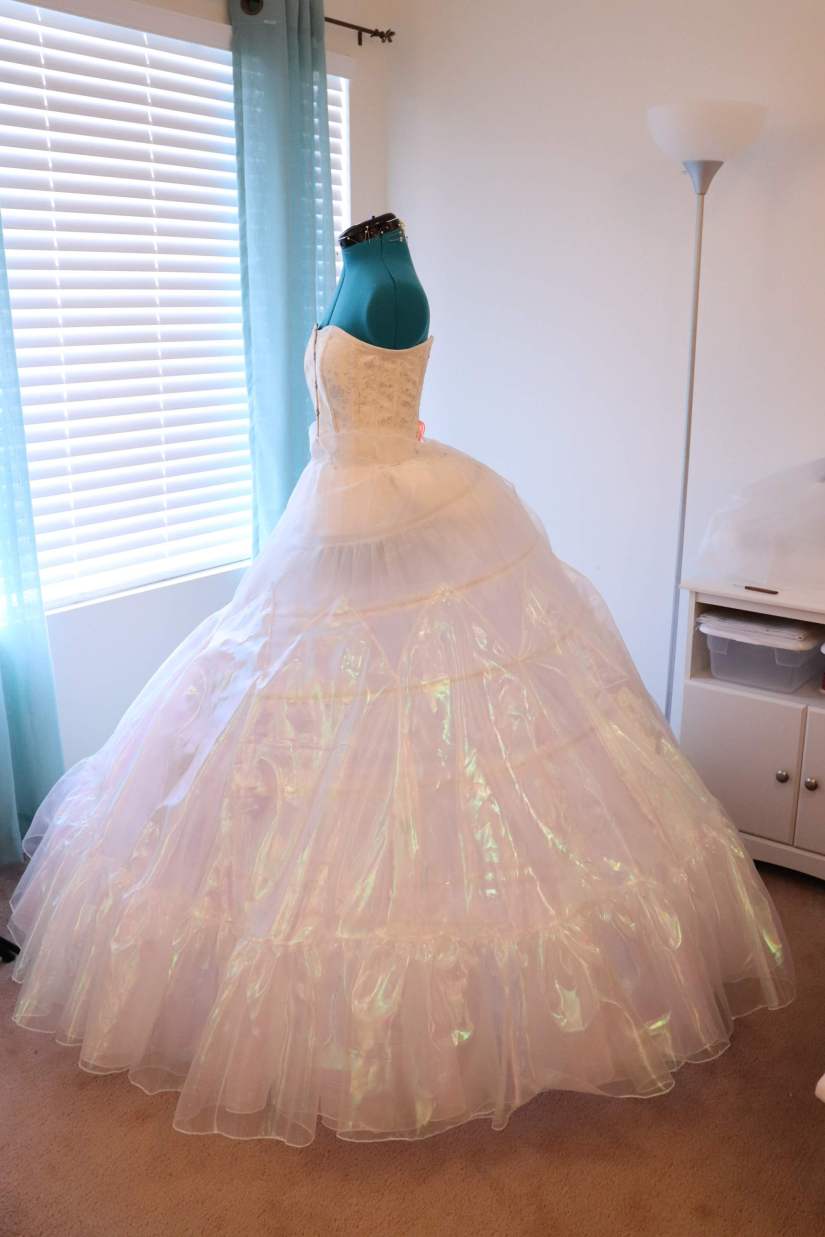
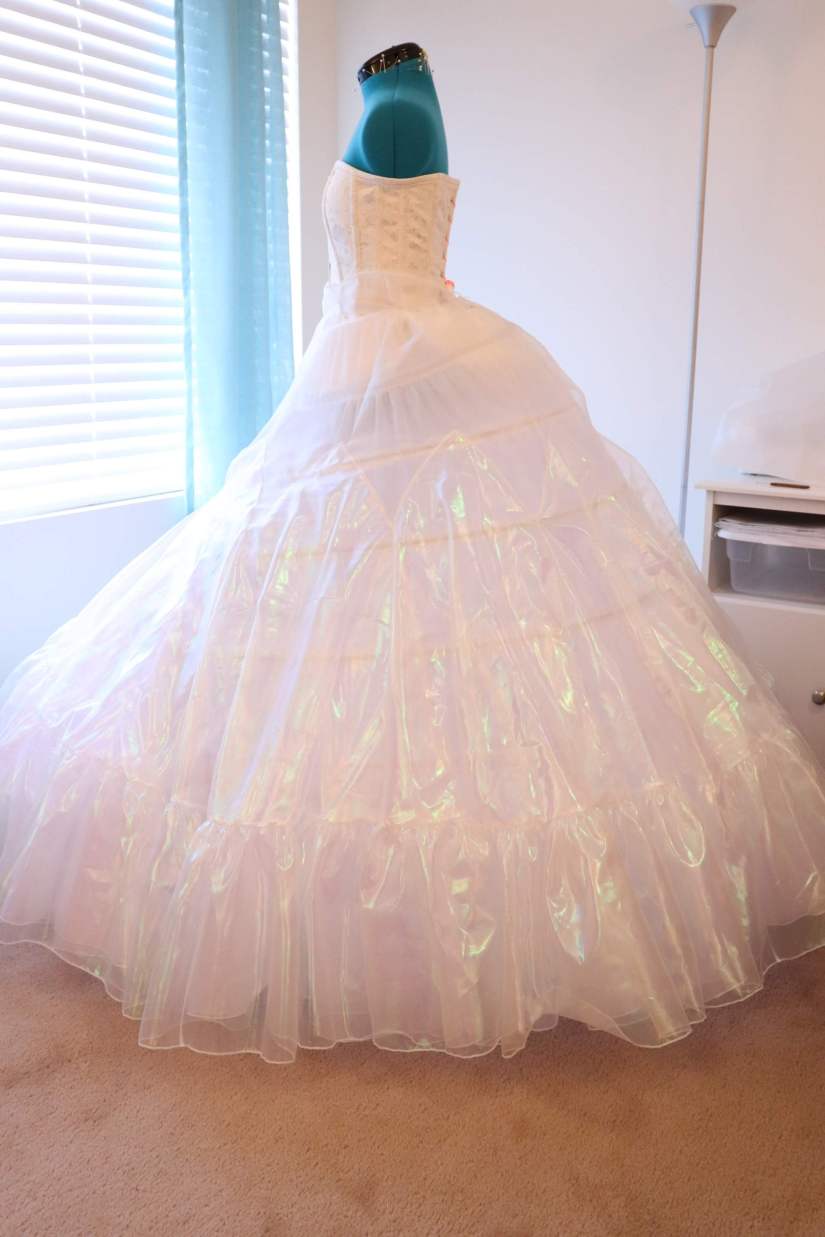
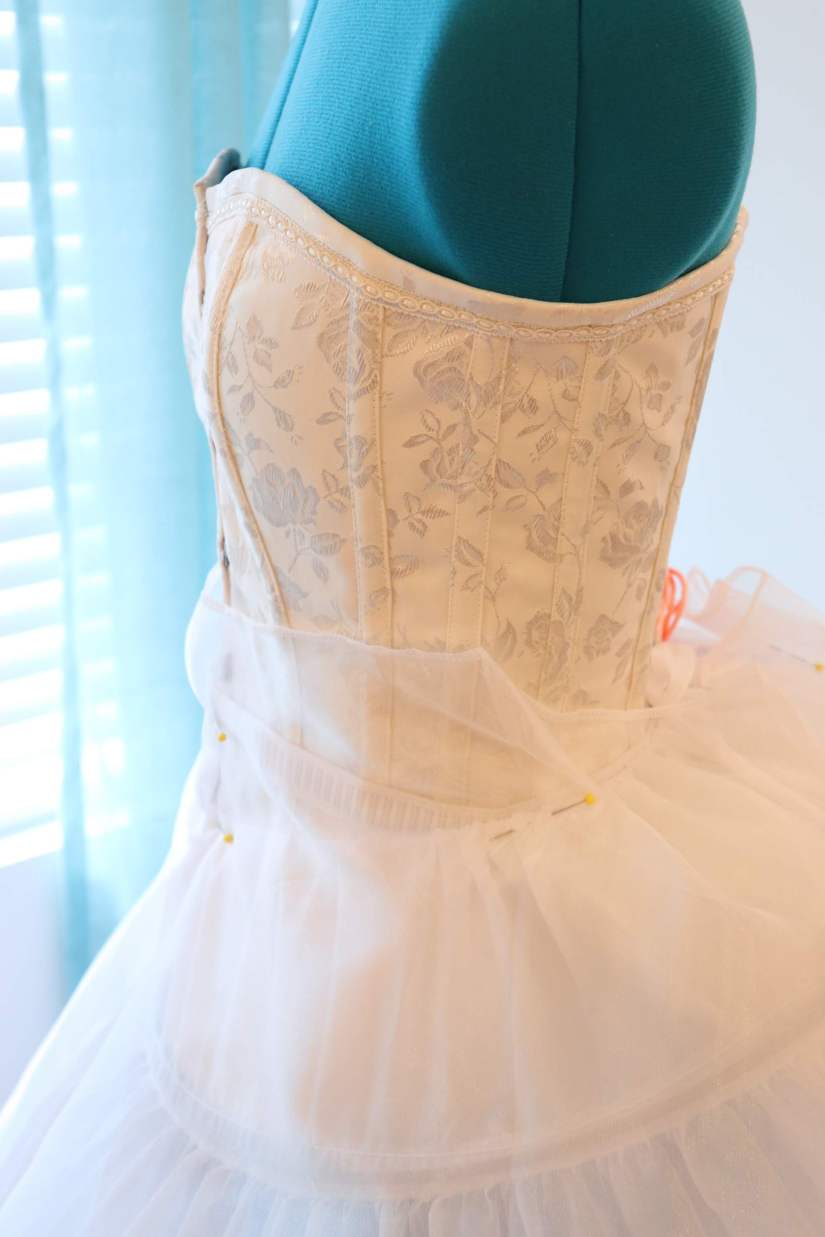
I placed the pearl skirt inside the gold, and the yellow inside the pearl, to create a 3 layer skirt.

3img_4392

I pinned all three layers together at the waist and basted them together at the top.

3img_4399

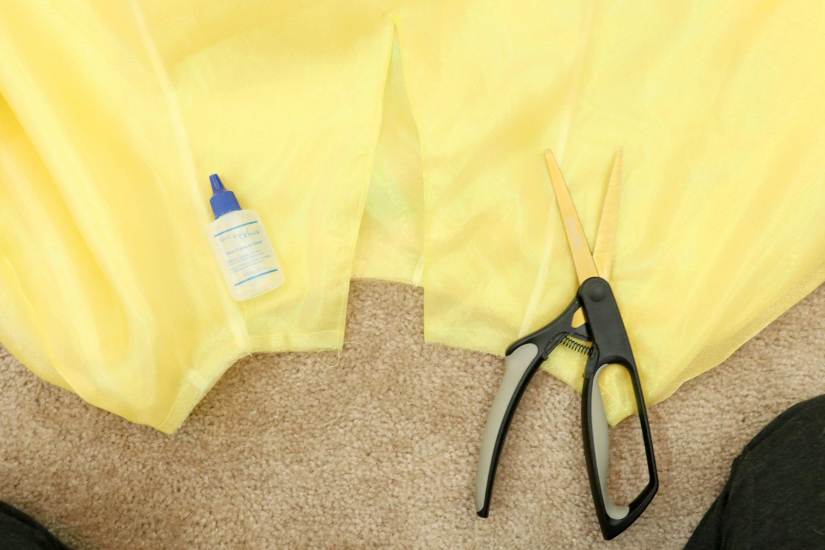
I measured 9 inches down the center back and stitched 2 rows of stitching about 3/16 inches apart along that center line. I then cut between the stitches to create a back opening. I used fray check to seal the raw edges. I plan on binding this in the future.

3img_4415

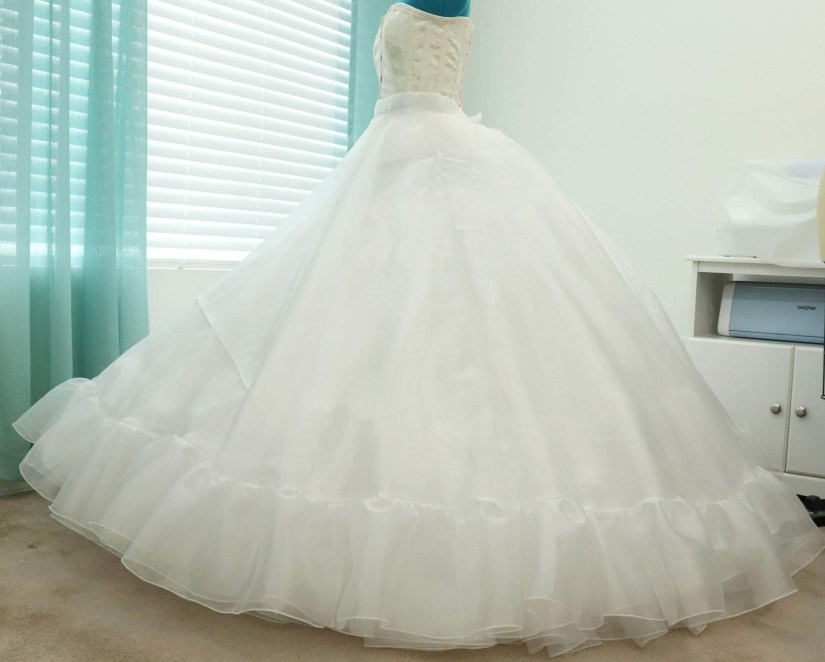
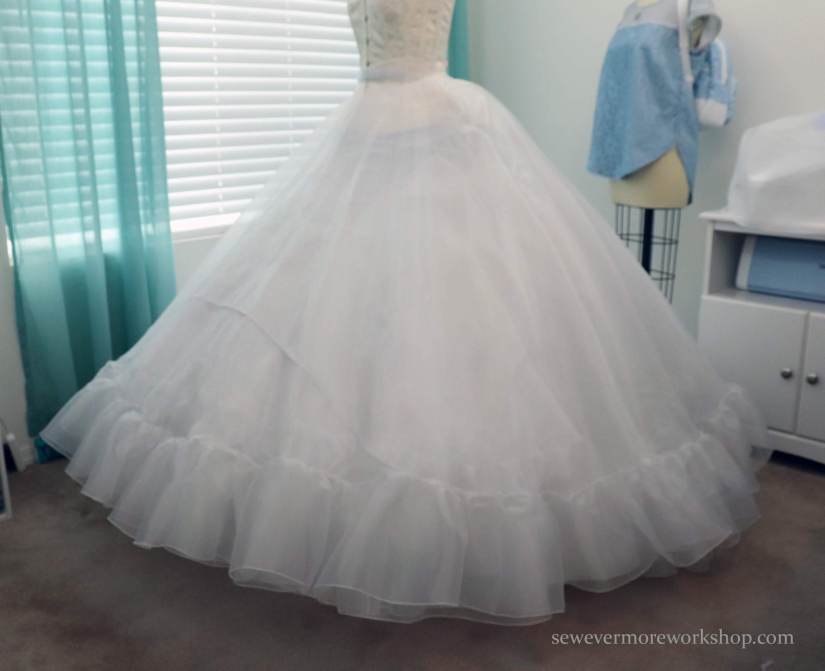
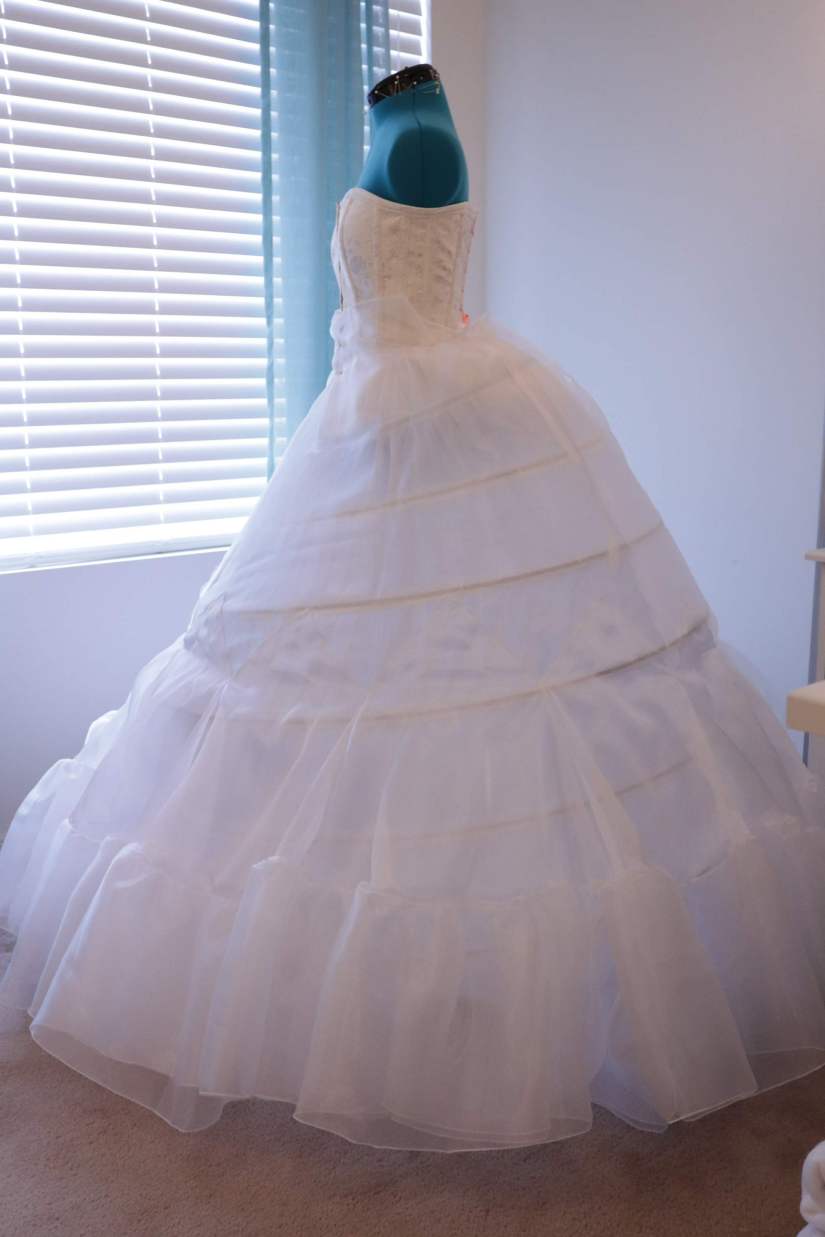
The circle skirts are done! If you were creating a Cinderella dress, you would now be ready to add a waistband and/or move on to the overskirt.

As for me, I am not yet finished with my underskirt. Since my dress will be Belle I wanted to have a bit more of a “bell” shape to the skirt. I decided to add another layer to the understirt that was a traditional tiered petticoat. I’m not sure how it will look, if the final dress will be better with or without it, but I wanted to give it a try.

3img_4356

The top tier of the petticoat is a circle skirt with radius 12 and 14 inches. (14 in the back). The second tier is composed of three 16 inch by width of fabric (60″) rectangles. The third tier is composed of six 16 inch by width of fabric rectangles. The final tier is a ruffle composed of twelve 8 inch by width of fabric rectangles.

I serged each tier together and then serged along one long edge of each tier to help prevent fraying when gathering.

3img_4359

Up next? A lot of gathering! It’s a good think I have Neflix!


Belle Dress, Uncategorized

Petticoat Measurement & Yardage Summary

To review making the petticoat I thought it might be helpful to summarize the dimensions and amount of fabric used. The yardage used is approximate.

The Casa Organza fabric was purchased online at Joann+ for $1.27 per yard. (40 yards had to be purchased to get this price.)

Layer 1 –  Skirt with Ruffle

Fabric used: Casa Organza White. 58 inch width.

Amount of fabric used: about 7 yards

3 A-line skirt sections about 48 inches long.

Ruffle: Cut 5 Rectangles, 26in  x Width of Fabric.

Layer 2 – 18″ Godets

Fabric used: Casa Organza White. 58 inch width.

Amount of fabric used: 7.5 yards

Number of Godets: 12

Godet Radius: 18 inches

Length of Bottom Curve: ≈ 30 inches

Ruffle: Cut 12 Rectangles, 13in  x Width of Fabric. One rectangle used per ruffle.

Layer 3 – 24.5″ Godets

Fabric used: Glitterbug White Pearlized Sheer. 44 inch width.

Purchased: $3 per yard. Joann+ (Had to purchase 20 + yards for this price)

Amount of fabric used: 13 yards

Number of Godets: 10

Godet Radius: 24.5 inches

Length of Bottom Curve: ≈ 40 inches

Ruffle: Cut 20 Rectangles, 13in  x Width of Fabric. Two rectangles used per ruffle.

Layer 4 (Without Bustle) – 29″ Godets

Fabric used: Casa Organza White. 58 inch width.

Amount of fabric used: 8 yards

Number of Godets: 8

Godet Radius: 29 inches

Length of Bottom Curve: ≈ 47 inches

Ruffle: Cut 12 Rectangles, 13in  x Width of Fabric. One and a half rectangles used per ruffle

Layer 4 (WITH Bustle) – 29 ” Godets

Fabric used: Casa Organza White. 58 inch width.

Amount of fabric used: 12 yards

Number of Godets: 12

Godet Radius: 29 inches

Length of Bottom Curve: ≈ 47 inches

Ruffle: Cut 18 Rectangles, 13in  x Width of Fabric. One and a half rectangles used per ruffle.

Layer 4.5 (WITH Bustle) – 29″ Godets

Fabric used: Casa Organza White. 58 inch width.

Amount of fabric used: 7 yards

Number of Godets: 6

Godet Radius: 29 inches

Length of Bottom Curve: ≈ 47 inches

Ruffle: Cut 9 Rectangles, 16 in  x Width of Fabric. One and a half rectangles used per ruffle.

Godets placed on back and sides only.

Layer 5 – Circle Skirt with Ruffle

Fabric used: Casa Organza White. 58 inch width.

Amount of fabric used: 8.5 yards

Circle Skirt Radius: Approximately 47 inches

Length of Bottom Curve: ≈ 300 inches

Ruffle: Cut 10 Rectangles, 10 in  x Width of Fabric.

Totals yards used: Approximately 55 yards


Belle Dress

Finishing the Petticoat

The petticoat layers are finished! Hooray! Now to finish off the petticoat, it needs a waistband.

I pinned the top of the ruffled circle skirt to the top of the godet layer  at the waist and stitched the two layers together. (Other than the ruffled circle skirt, only the first petticoat layer reaches the waist.) I trimmed off the excess in the back and serged the waist and the edges of the back slit.

I then cut a 4 inch by width of fabric rectangle from the organza.

Next I folded it in half creating a 4 x 30 inch rectangle and serged the edges. Since I needed a 29 inch waistband, this worked perfectly for me.

2img_4304

Next, I folded the rectangle in half lengthwise (skinny like a hot dog) so that the serged edges were touching. I then aligned those serged edges with the serged edges of the petticoat waist and pinned them together.

2img_4306

2img_4307

I stitched the waistband to the petticoat using a 1/2 inch seam allowance. Then folding the waistband up, I top-stitched the seam allowance in place. I used two rows of stitching for added strength. This may not have been necessary, but it made me feel better 🙂

2img_4317

Using the same method I used for the bustle, I created an elastic waistband and slid it through the channel. I probably could have made the waistband channel a bit narrower, but overall I was happy with it. The elastic slid in easily, and it lays well.

2img_4325

Having the waistband attached finally finishes the petticoat! Huzzah!

2img_4336

I definitely like the shape after adding Layer 4.5 with the back godets.

2img_4340

The petticoat is done! I love it!!!

2img_4349-1.jpg

Belle Dress

Additional Godets – Layer 4.5

After staring at my petticoat for quite some time I felt like it was still a bit unbalanced. This probably could have been avoided if I had made the hoop myself, but since I chose not to, I felt like this was something I needed to correct.

I wanted the back side of the petticoat to be fuller. So, I decided to add some additional godets. I am calling this layer 4.5. I removed the ruffled circle skirt and went back to the drawing board.

Since I wanted to add fullness to the back and sides, but not the front, I decided not to have the godets go all of the way around.

I cut 6 more godets. The triangular sections had a radius of 29 inches. For the ruffles I cut 9 rectangles that were 16 inches by the width of the fabric. One and a half rectangles were sewn together to create a 90 inch ruffle for the bottom of each godet. This required an additional 7 yards of fabric.

Instead of creating a loop with the godets, I left one of the seam open creating a long chain rather than a ring. Centering the godets on the back of the petticoat, 3 on the left, 3 on the right. I attached them above layer 4. I then hand stitched the sides in place connecting this new layer to layer 4 so they would stay in place.

2img_4293

2img_4292

Once the new set of godets were in place I put the ruffled circle skirt layer back on. The result was not perfect, but I was much happier with the overall shape.

2img_4298

Yes! This is what I was going for!

The lesson I learned…don’t be afraid to change your mind along the way, or to go back and fix your mistakes. You will be a lot happier with the result if you do!

Belle Dress

Petticoat Layer 5

Here it is! The next step to the Belle/Cinderella cosplay tutorial. We are on layer 5 of the petticoat. This layer is constructed differently than the previous layers.

Here was the petticoat after Layer 4.

IMG_2966

Layer 5 is a simple circle skirt with a ruffled bottom. Based on the shape of the petticoat to this point I decided I didn’t want the ruffle to be the same length as the previous as it was starting to develop a “ledge” where the line of the skirt would angle down when it reached the ruffle. To compensate for that I decided to make the Layer 5 ruffle 9″ tall instead of 12″.

Reader beware! The next section is riddled with math! I actually love this. I teach math, so I think it is just fabulous when I can incorporate math into my projects. Don’t worry, I will keep it as simple as possible and try to make the calculations clear. If you are working on your own project, you may want a calculator handy as you do these steps.

First, I measured the length of the petticoat. Since the length is not consistent, due to the bustle, I measured the length from the front, sides, and back. In hindsight, if I made it again, I would probably now measure halfway between those points as well, for increased accuracy.

2019-02-18-20.11.09

To create the circle skirt I used the measurements I collected. I then needed to determine my waist measurement, for me, approximately 30 inches. Using the formula Radius = Circumference ÷ 6.28, I was able to determine that the radius for my waist was 4.75 inches. However, I need a seam allowance, so the measurement I will cut for my waist is actually 4.25 inches.

I added this length to the measurements needed for the skirt to create my cut pattern.

The largest radius used in my pattern was 47 inches. I used this radius to determine the length of ruffles needed. Circumference = 6.28 x Radius. Plugging in 47 inches for the radius I was able to determine that the circumference of the circle is approximately 300 inches. I doubled this for my ruffle. So, I needed 600 inches of ruffles for this layer of the petticoat. This actually worked out perfectly as the organza I used is 60 inches wide.

I cut ten 10″ strips that were the length of the fabric (60 inches) and sewed them together along the short edge. I finished both edges of the ruffle (hem and opposite side) using a narrow hem on my serger. I finished the non-hem edge to help prevent fraying as I worked with the gathers. I am very glad I did!

I made a gather stitch along the top edge of the ruffles. Don’t you just love all the fluff!

3IMG_3828

The organza was not wide enough to cut the whole circle skirt, so I cut it in two sections, front and back.

Using 100 inches of organza fabric, I folded it width wise so I had a double layer of fabric that was 60 inches by approximately 50 inches. Laying the fabric flat, and pinning the edges to hold it together, I drew out the circular shapes from my sketches in the same manner that I drew out the curved sections of the godets. I also drew out the circle for the waist and cut them out.

2IMG_3785

My yard stick wasn’t long enough to get the job done, so I taped two together. It worked great! I repeated this process for both the front and the back of the skirt.

Once both pieces had been cut I serged the sides together.

I cut an approximately 10 inch slit in the back and serged that edge as well.

2IMG_3806

I draped the circle over my dress form to make sure it was the right length. It did require a few adjustments. As you can see, the edge closest to the camera is a little long. I trimmed that before adding the ruffle. I think this could have been prevented if I had taken more measurements at the beginning.

3IMG_3804

I attached the ruffled edge with a straight stitch and then serged the seam to eliminate bulk.

Here is the Layer 5 petticoat complete!3IMG_3831

I think I may want to add a bit more volume to the back to create a smoother shape. The next two layers of the petticoat are simple circle skirts, so they won’t add much to the overall appearance. I do really like the shorter ruffle on this layer. I think it prevented the drop off problem I was having previously.

Overall, I think Layer 5 was a success. We will have to see if I decide to add more godets to  make it even bigger!

3IMG_3843

Belle Dress

Assembling Petticoat Layers 3 & 4

The Layer 3 godets were added in the same manner as the Layer 2, except, due to the bustle, the back godets are lower on the petticoat than those on the front.

IMG_2953-1

It’s so shiny!

One thing that I noticed occurred on this layer, was that the front end of the petticoat began to poke out. You can kind of see the dramatic angle of the front of the petticoat, while it slopes more gradually in the back.

IMG_2963

I decided to compensate for this by adjusting the number of godets on the next layer. I had originally planned for 8 godets in Layer 4. This would be very sufficient if you did not have the bustle altering the shape of the gown. However, given my hoop and the shape created by my bustle, alteration to the next layer was necessary for my petticoat.

I pinned my godets in place to see where they would look best.

IMG_2966

IT”S SO FLUFFY!!!! I LOVE IT! The positioning I preferred placed 3 godets on the front of the petticoat and 9 on the back. This required making 4 more godets than planned.

My dogs did make adding the panels a bit of a challenge. Evie here realized the Layer 4 godets were great fun, and decided to take a swim in them.

IMG_2916

Not to be left out, Gracie then wanted to take a nap right in the middle of the action. Which meant, my lap. Needless to say, creating the new godets was slow going, but I liked the result.

IMG_2918

The godets in the front were sewn together 12 inches from the tips (two seams). All other godets were sewn together 3.5 inches from the tips.

Belle Dress

Adding a Bustle

When I began this project I wasn’t planning to add a bustle. I thought I would be satisfied without one, but after consideration I determined that I wanted one after all. So, before applying the 3rd and 4th layers of the petticoat, I decided to make a bustle. Or…as my students and I call it…a butt pillow 🙂

(This did cause me to have to make adjustments to my previous petticoat, so if you plan on using a bustle I would definitely make it before the petticoat.)

To make the bustle I used some scrap crepeback satin that I had, and non-roll waistband elastic. Then, I drafted the pattern. The largest width was my hip measurement ÷ 2. The top width was my waist measurement ÷ 2. The height, was the same measurement. I sewed around the edges with a 1/2 inch seam allowance leaving an opening.

IMG_2898

Flipped it right side out and stuffed.

IMG_2899-1

Next, I edge stitched the opening closed. I also pinched this top edge together and stitched again about 3/4 inch away from the edge. This is was to create an area for the waistband.

IMG_2900

The waistband was made from 1 inch waistband elastic. There is a lingerie hook at one end. At the other I added a few inches so I could fold it over and sew vertical divisions along the folded area. This creates slots for the hook, so the waistband becomes adjustable.

IMG_2902

Next, I pinned the elastic in place underneath the waistband section on the pillow. The center of the elastic (mid sized) was placed at the center of the bustle pillow. I stitched this in place with two rows of stitching.

IMG_2906

Here it is over the corset, as it will be worn with the dress.

IMG_2930

Next, comes the hoop!

IMG_2933

As you can see, this changed the positioning of my hoop SIGNIFICANTLY! You could always use a smaller bustle if this is not the look you prefer, but I kind of liked the drama of the shape.

Next, I added the first two layers of my petticoat. It’s so big!

IMG_2938

Since I added the bustle, this brought up the back edge of the hoop. To compensate, I had to unpick and drop down the godets along the back side of the skirt a few inches. This made it a bit of a tight fit, but since it will be covered by other layers it wasn’t that big of a deal.

So now, because of the bustle, when I add additional godets, they will not be able to be aligned with the hoop, instead they will have to be placed based on the desired hem length.


Belle Dress

Finishing the Corset

I was able to finish the corset last weekend!

IMG_2927

This was the first time I had ever used a busk in a corset, and it was a lot of fun to use. It was a challenge, but I was quite pleased with it in the end. I think I will have to practice my technique in order to help remove wrinkles, but overall I enjoyed the pattern and the process. Alison Smith’s Zara Pattern really was a nice place to start. The curves were gentle and easy to align.

IMG_2939

I particularly enjoyed adding the trim. I thought it really added a lot of character to the corset.

The primary reason that I made the corset was to offer support for the Belle/Cinderella dress. The skirt will be quite heavy. I wanted to have a corset to wear under the dress so that the waistband would not dig into your stomach when the dress was worn.

IMG_2947

The corset will be worn under the petticoat.

Belle Dress, Uncategorized

Corset: Boning

I wanted to make a standard corset that could be worn under the Belle Dress to help support the weight of the petticoat when it is worn.

I decided to go with the Zara Corset Pattern. It is available on Etsy and is the pattern that Alison Smith uses in her Craftsy Class on Sewing Corsets. I highly recommend the class if you would like to learn how to make corsets. It was very informative and easy to follow. The pattern is a bit pricey, but it is a great simple shape and is easy to start with.

I used coutil with an overlay of Ivory Rose Jacquard for the corset. The jacquard was reinforced with Pellon SF101 fusible interfacing.  I hope the end result will be simple yet elegant.

2018-12-02-11-59-36.jpg

I pieced the bodice together, inserted a busk, added grommets, and bound the top. Next, it was time to add the boning.

I like to cut my own boning, you can refer to my Corset Tools Page for more info regarding the tools I use to do this. I decided to try something new and tip the ends in Plasti Dip.

2018-12-02-12-05-28

I like the look of the Plasti Dip. And it seems more secure than the PTFE tape. That said, it was a bit more work, took more time, and required more tools. In order to use the Platidip, because the fumes are so strong, it required a respirator.

I think it is something I will continue to do. Even if the tape is sufficient, the Plasti Dip makes me feel like the bones are more securely tipped.

I have heard from other corset makers that the Plasti Dip tipped bones are fine to dry clean, but I have never done so, and I would definitely check with the dry cleaner to make sure it is okay.

After dipping each bone, I even did the spiral bones to help secure the tips, I inserted them into the channels. The Plasti Dip made the bones a bit hard to slide so I covered the end with just a small bit of PTFE tape.

Something else I did this time…I can’t remember where I saw it but it is such a great idea! Why didn’t I think of it years ago? I used a sharpie to label the boning placement. You can see the markings that indicate if the boning goes on the left (L) or right (R) and the channel it should be placed in. Thank goodness there are wise people in the world who share their ideas online!

2018-12-02-12-11-491

My boning was now ready to place in the channels. The boning went in very smoothly.

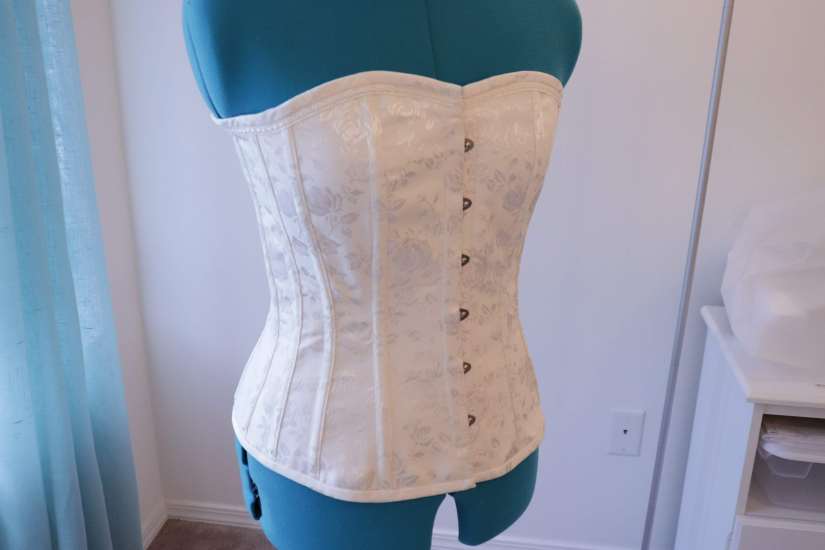
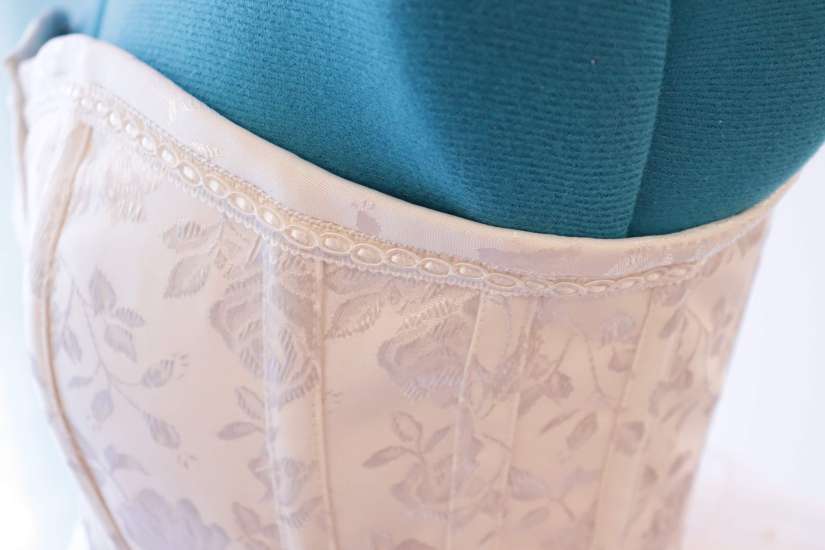
I used a skewer to make sure the boning was all of the way inserted. (I trimmed off the pointed tip and sanded the ends first.)

What to do next? Next, I need to bind the lower edge, add trims and my corset will be done. I will add it to my Belle Dress once it is finished.


Belle Dress

Petticoat: Cutting Layers 3 & 4

Now that the 2nd layer is complete and attached it is time to move on to Layers 3 and 4. Layers 3 and 4 are constructed in the same manner as Layer 2, using godets. These layers will be placed higher up on the petticoat. The godets are larger in size but fewer in number for Layers 3 and 4. (Alterations were later made due to adding a bustle.)

Here are the details. I will also provide the information for Layer 2 so it can be easily viewed for comparison.

Layer 2

Fabric used: Casa Organza White. 58 inch width.

Purchased: $1.27 per yard. Joann+ (Had to purchase 40+ yards for this price)

Amount of fabric used: 7.5 yards

Number of Godets: 12

Godet Radius: 18 inches

Length of Bottom Curve: ≈ 30 inches

Ruffle: Cut 12 Rectangles, 13in  x Width of Fabric. One rectangle used per ruffle.

Layer 3

Fabric used: Glitterbug White Pearlized Sheer. 44 inch width. (I might choose the crinkle sheer if I had to choose again.)

Purchased: $3 per yard. Joann+ (Had to purchase 20 + yards for this price)

Amount of fabric used: 13 yards

Number of Godets: 10

Godet Radius: 24.5 inches

Length of Bottom Curve: ≈ 40 inches

Ruffle: Cut 20 Rectangles, 13in  x Width of Fabric. Two rectangles used per ruffle.


Layer 4 (Without Bustle)

Fabric used: Casa Organza White. 58 inch width.

Purchased: $1.27 per yard. Joann+ (Had to purchase 40+ yards for this price)

Amount of fabric used: 8 yards

Number of Godets: 8

Godet Radius: 29 inches

Length of Bottom Curve: ≈ 47 inches

Ruffle: Cut 12 Rectangles, 13in  x Width of Fabric. One and a half rectangles used per ruffle

Layer 4 (WITH Bustle)

Fabric used: Casa Organza White. 58 inch width.

Purchased: $1.27 per yard. Joann+ (Had to purchase 40+ yards for this price)

Amount of fabric used: 12 yards

Number of Godets: 12

Godet Radius: 29 inches

Length of Bottom Curve: ≈ 47 inches

Ruffle: Cut 18 Rectangles, 13in  x Width of Fabric. One and a half rectangles used per ruffle.

Progress

So far all of the godets and ruffles have been cut out. The ruffles have been pieced together and the godets have been stay stitched.

2018-12-02-05-32-39

The image shows the Layer 4 organza on the left and the Layer 3 pearlized sheer on the right.

The pearlized sheer is so clear it almost looks like plastic wrap! We will have to wait to see what it looks like on the petticoat. The crinkle pearlized sheer by Glitterbug at JoAnn is not quiet so sheer and also adds a nice look. It was used on the Cinderella version of this dress. It is harder to work with, but I think it adds a nice effect if you want something a little more noticeable.