

- Making a Princess Dress
I teach a sewing class, and this year one of my students wanted to make a princess dress. Not just any dress, the Cinderella dress from the live action film! Yes, quite the project.
To ensure that I would be able to help her with the project, I knew I would need to make one as well. However, I had already made a Cinderella dress some years ago, and as I prefer the original Cinderella design, I didn’t really need another. So, my solution…making a Belle dress! While I made a Belle dress for a friend in the past, I don’t have one of my own, so this was the perfect opportunity. Since the designs of the two dresses are so similar, the difference between the two construction wise will be slight.
So, for the next few months I will be working along with my student to make a massive ball gown!
We are following the Youtube tutorial for the Cinderella Petticoat put together by Traybuff who did an excellent job of explaining how her Cinderella dress was constructed and showing the process.
The Fabric
A word on fabric. This project requires massive amounts of fabric! More than 100 yard for the Cinderella version of the dress! I anticipate to use 40+ yards just for the petticoat.

As a result, cost is a huge consideration. If you are able check out Joann+, the bulk purchasing site through JoAnn Fabric. I was able to purchase the fabric for the petticoat for less than $2 a yard. I chose to use their Casa Organza fabric. You have to be on their Joann+ site to view the value pricing, and they do not have all of the colors available for bulk ordering. Also, they DO NOT ACCEPT RETURNS! Be confident in your purchase before ordering. I found this out the hard way. The “Sunshine” yellow displayed online looked much different than what I received. I got “sunshine” when I was expecting a very pale yellow based on the photos. But…after purchasing 40 yards…we will make it work.
The Petticoat
Using a ready made hoop purchased on Amazon, such as this one, I went to work. As I wanted the hoop separate from the petticoat so I could wear it with other costumes, I did not attach the fabric to it. Instead I used organza to create an overlay.

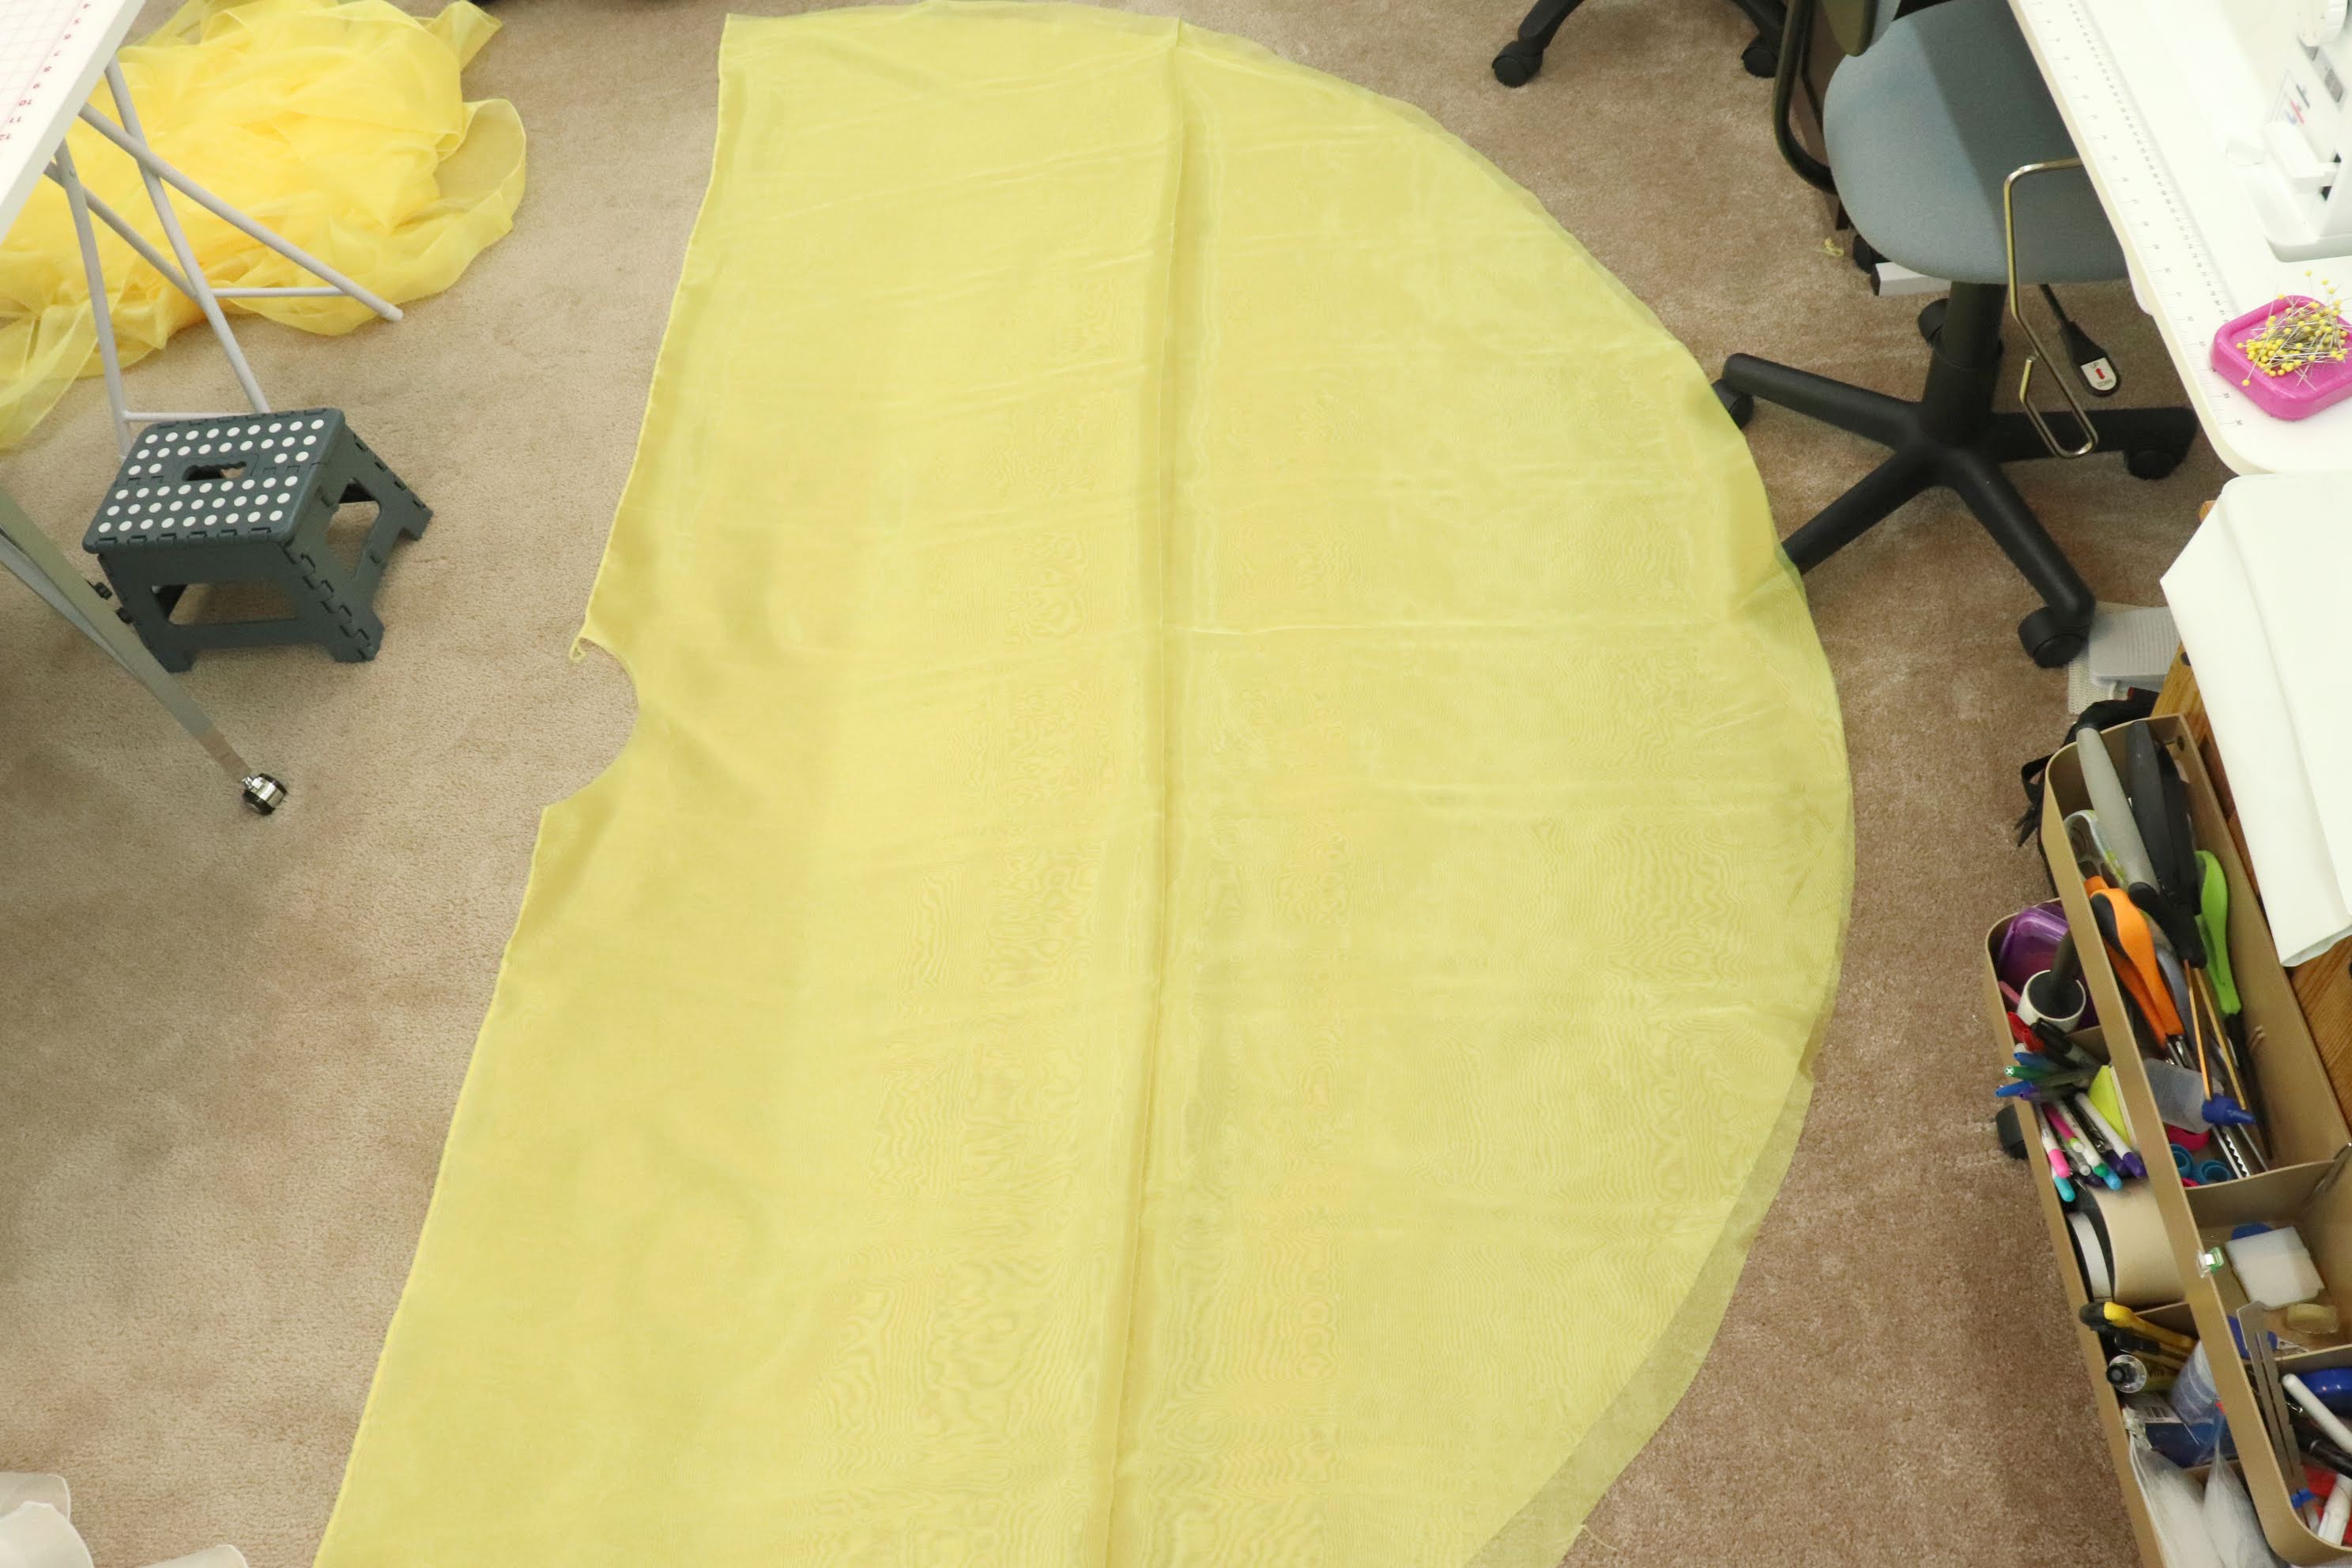
First I measured the hoop, circumference, length, and length between hoops. I divided the circumference into 3 sections that could be pieced together.

- Continuing the Petticoat
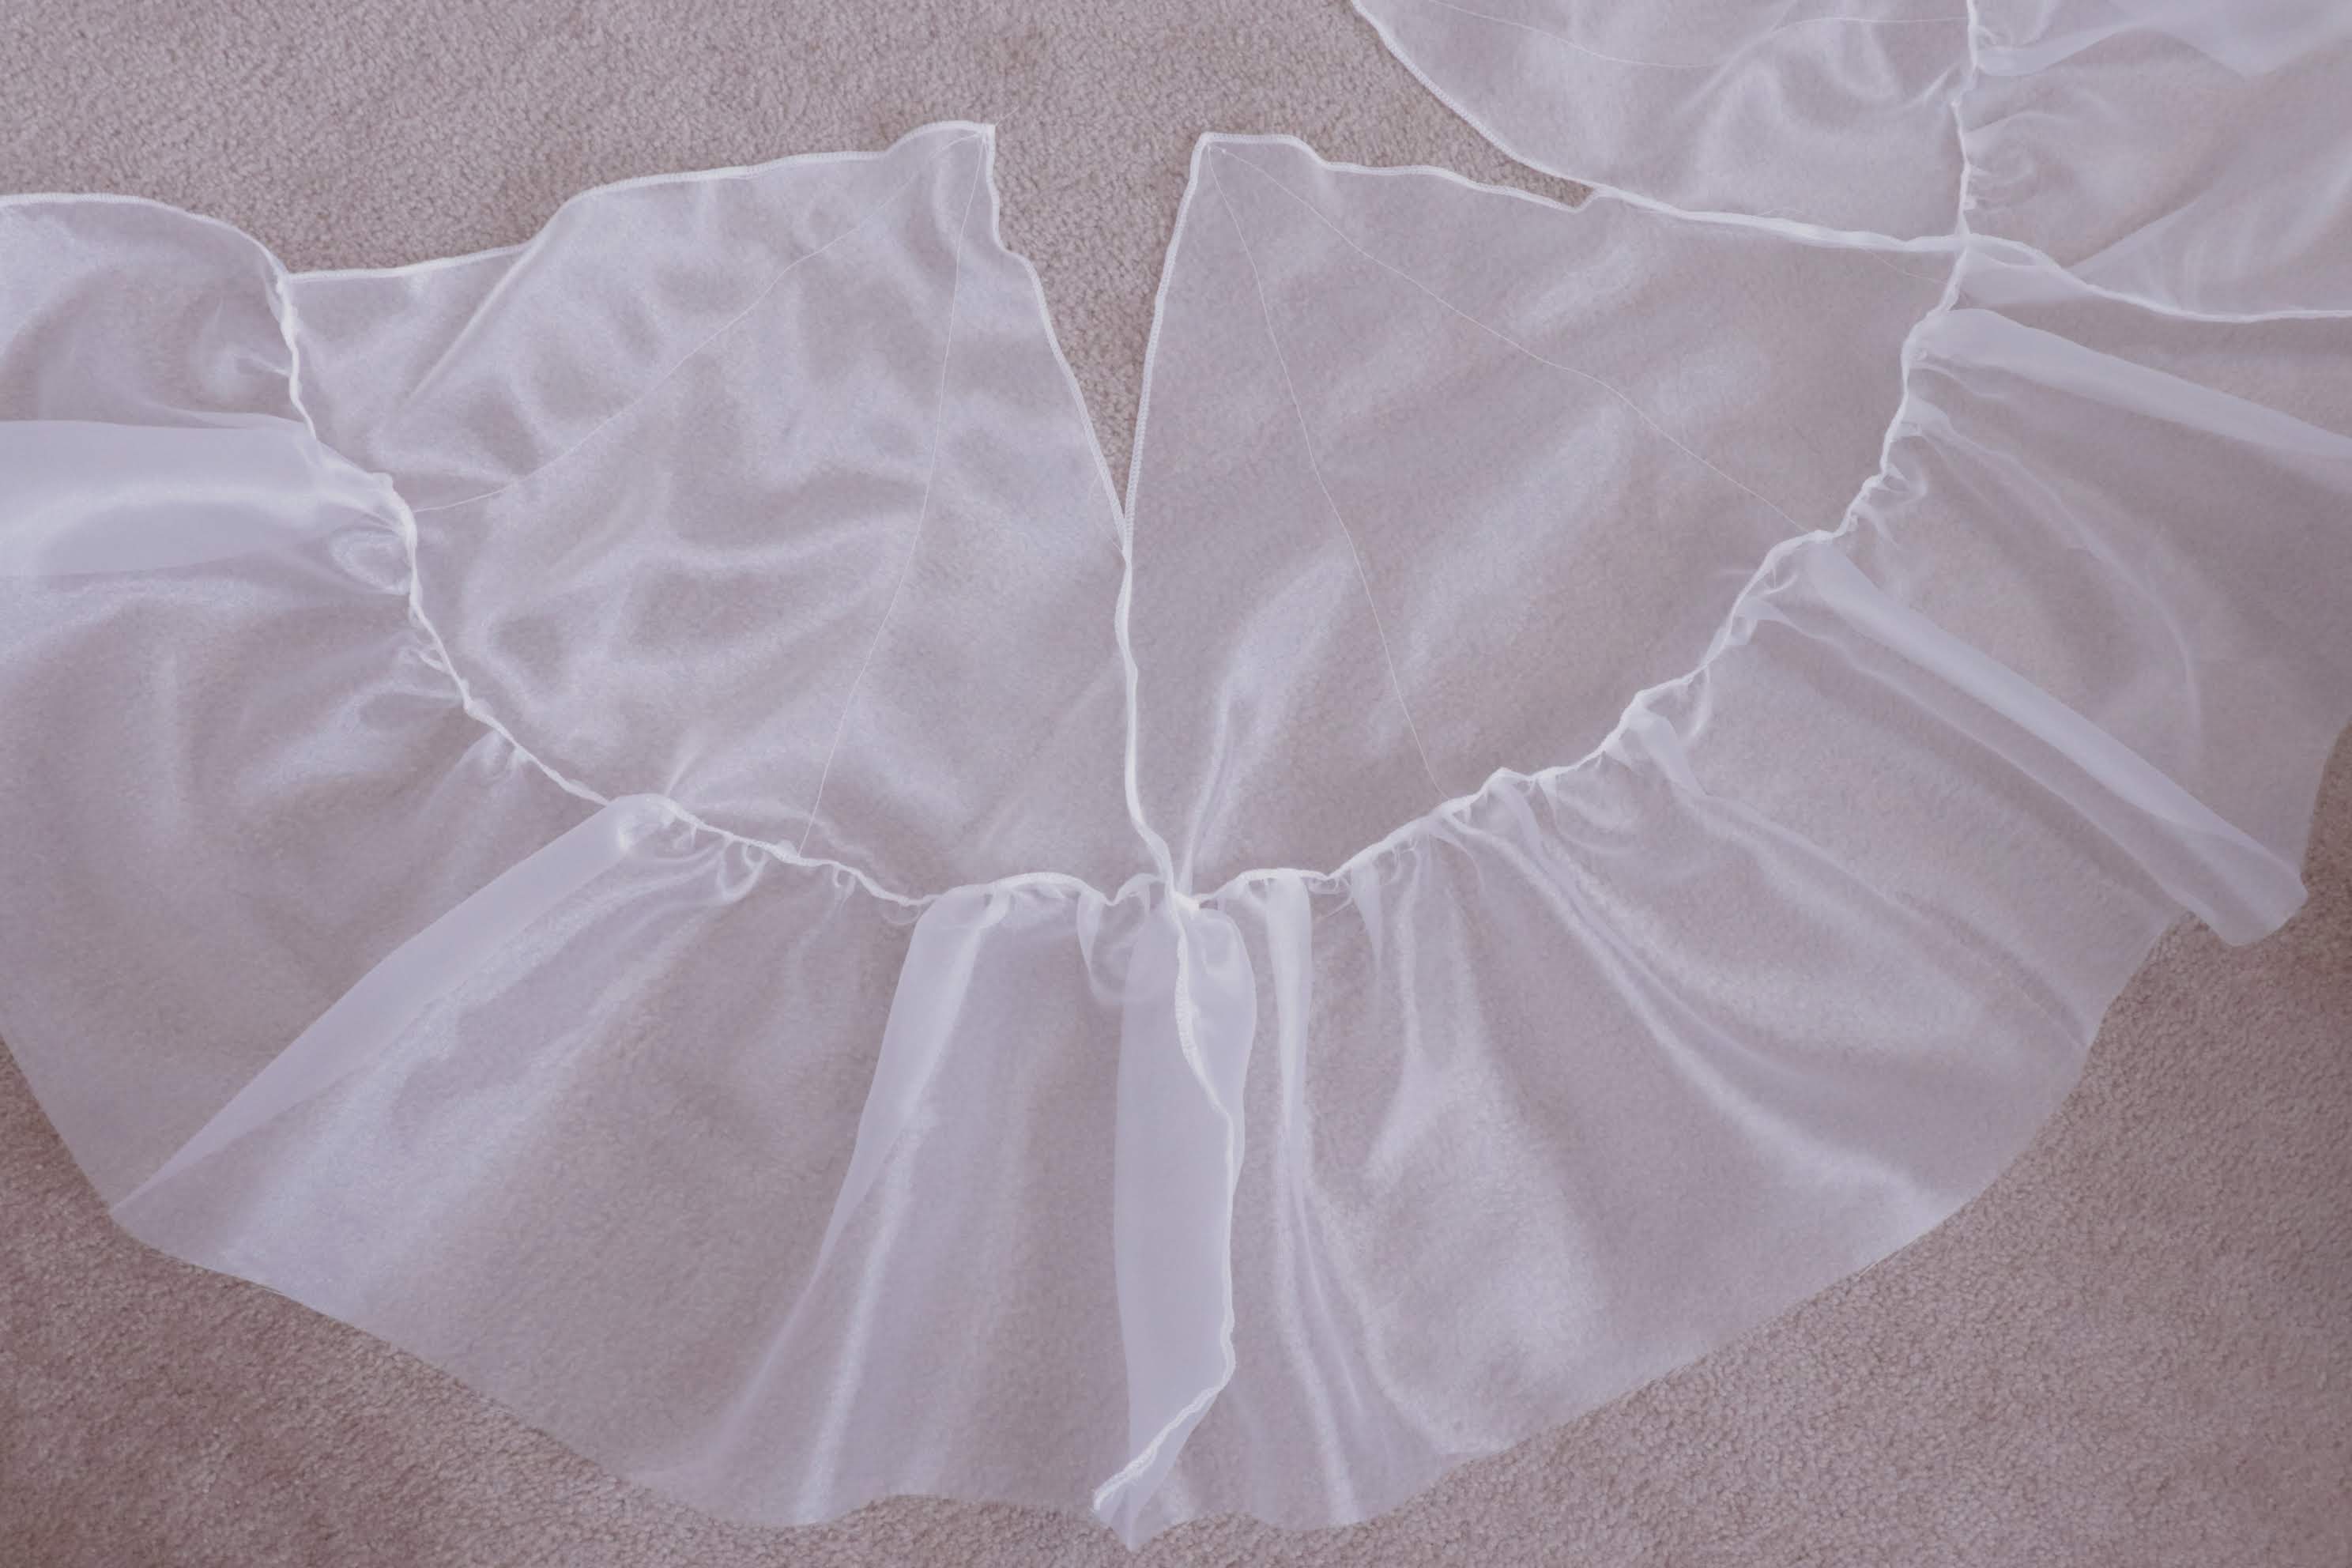
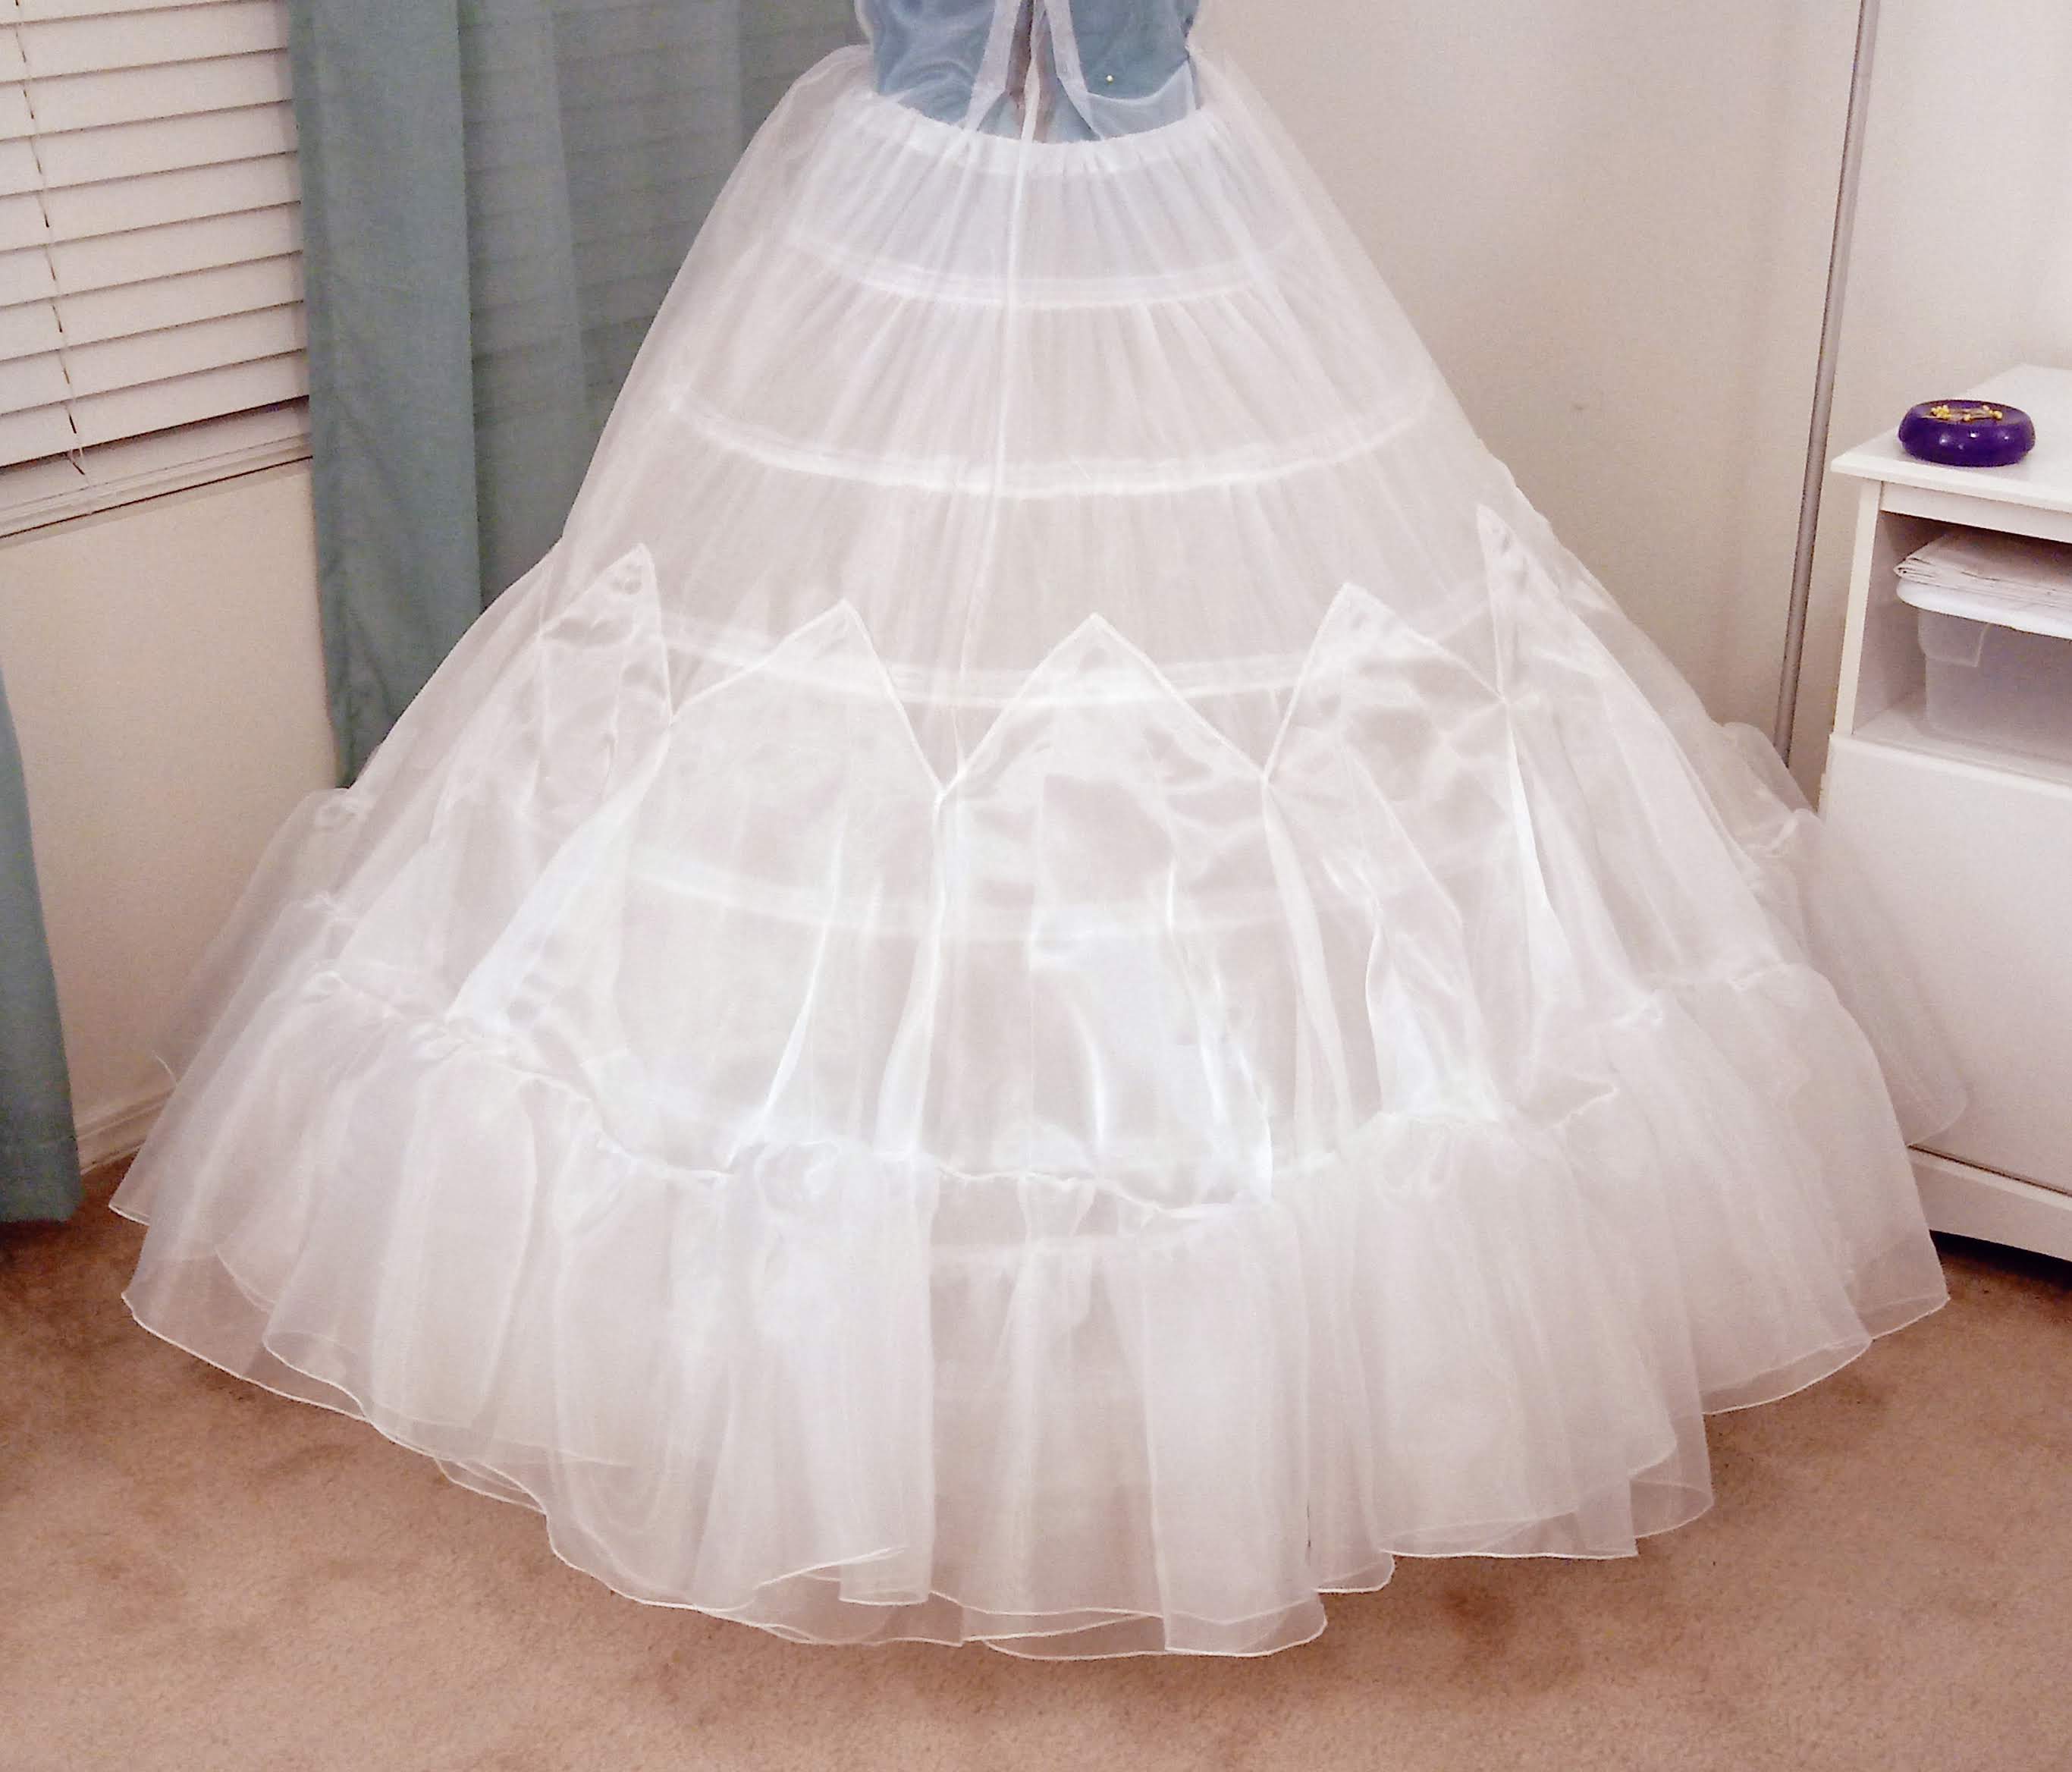
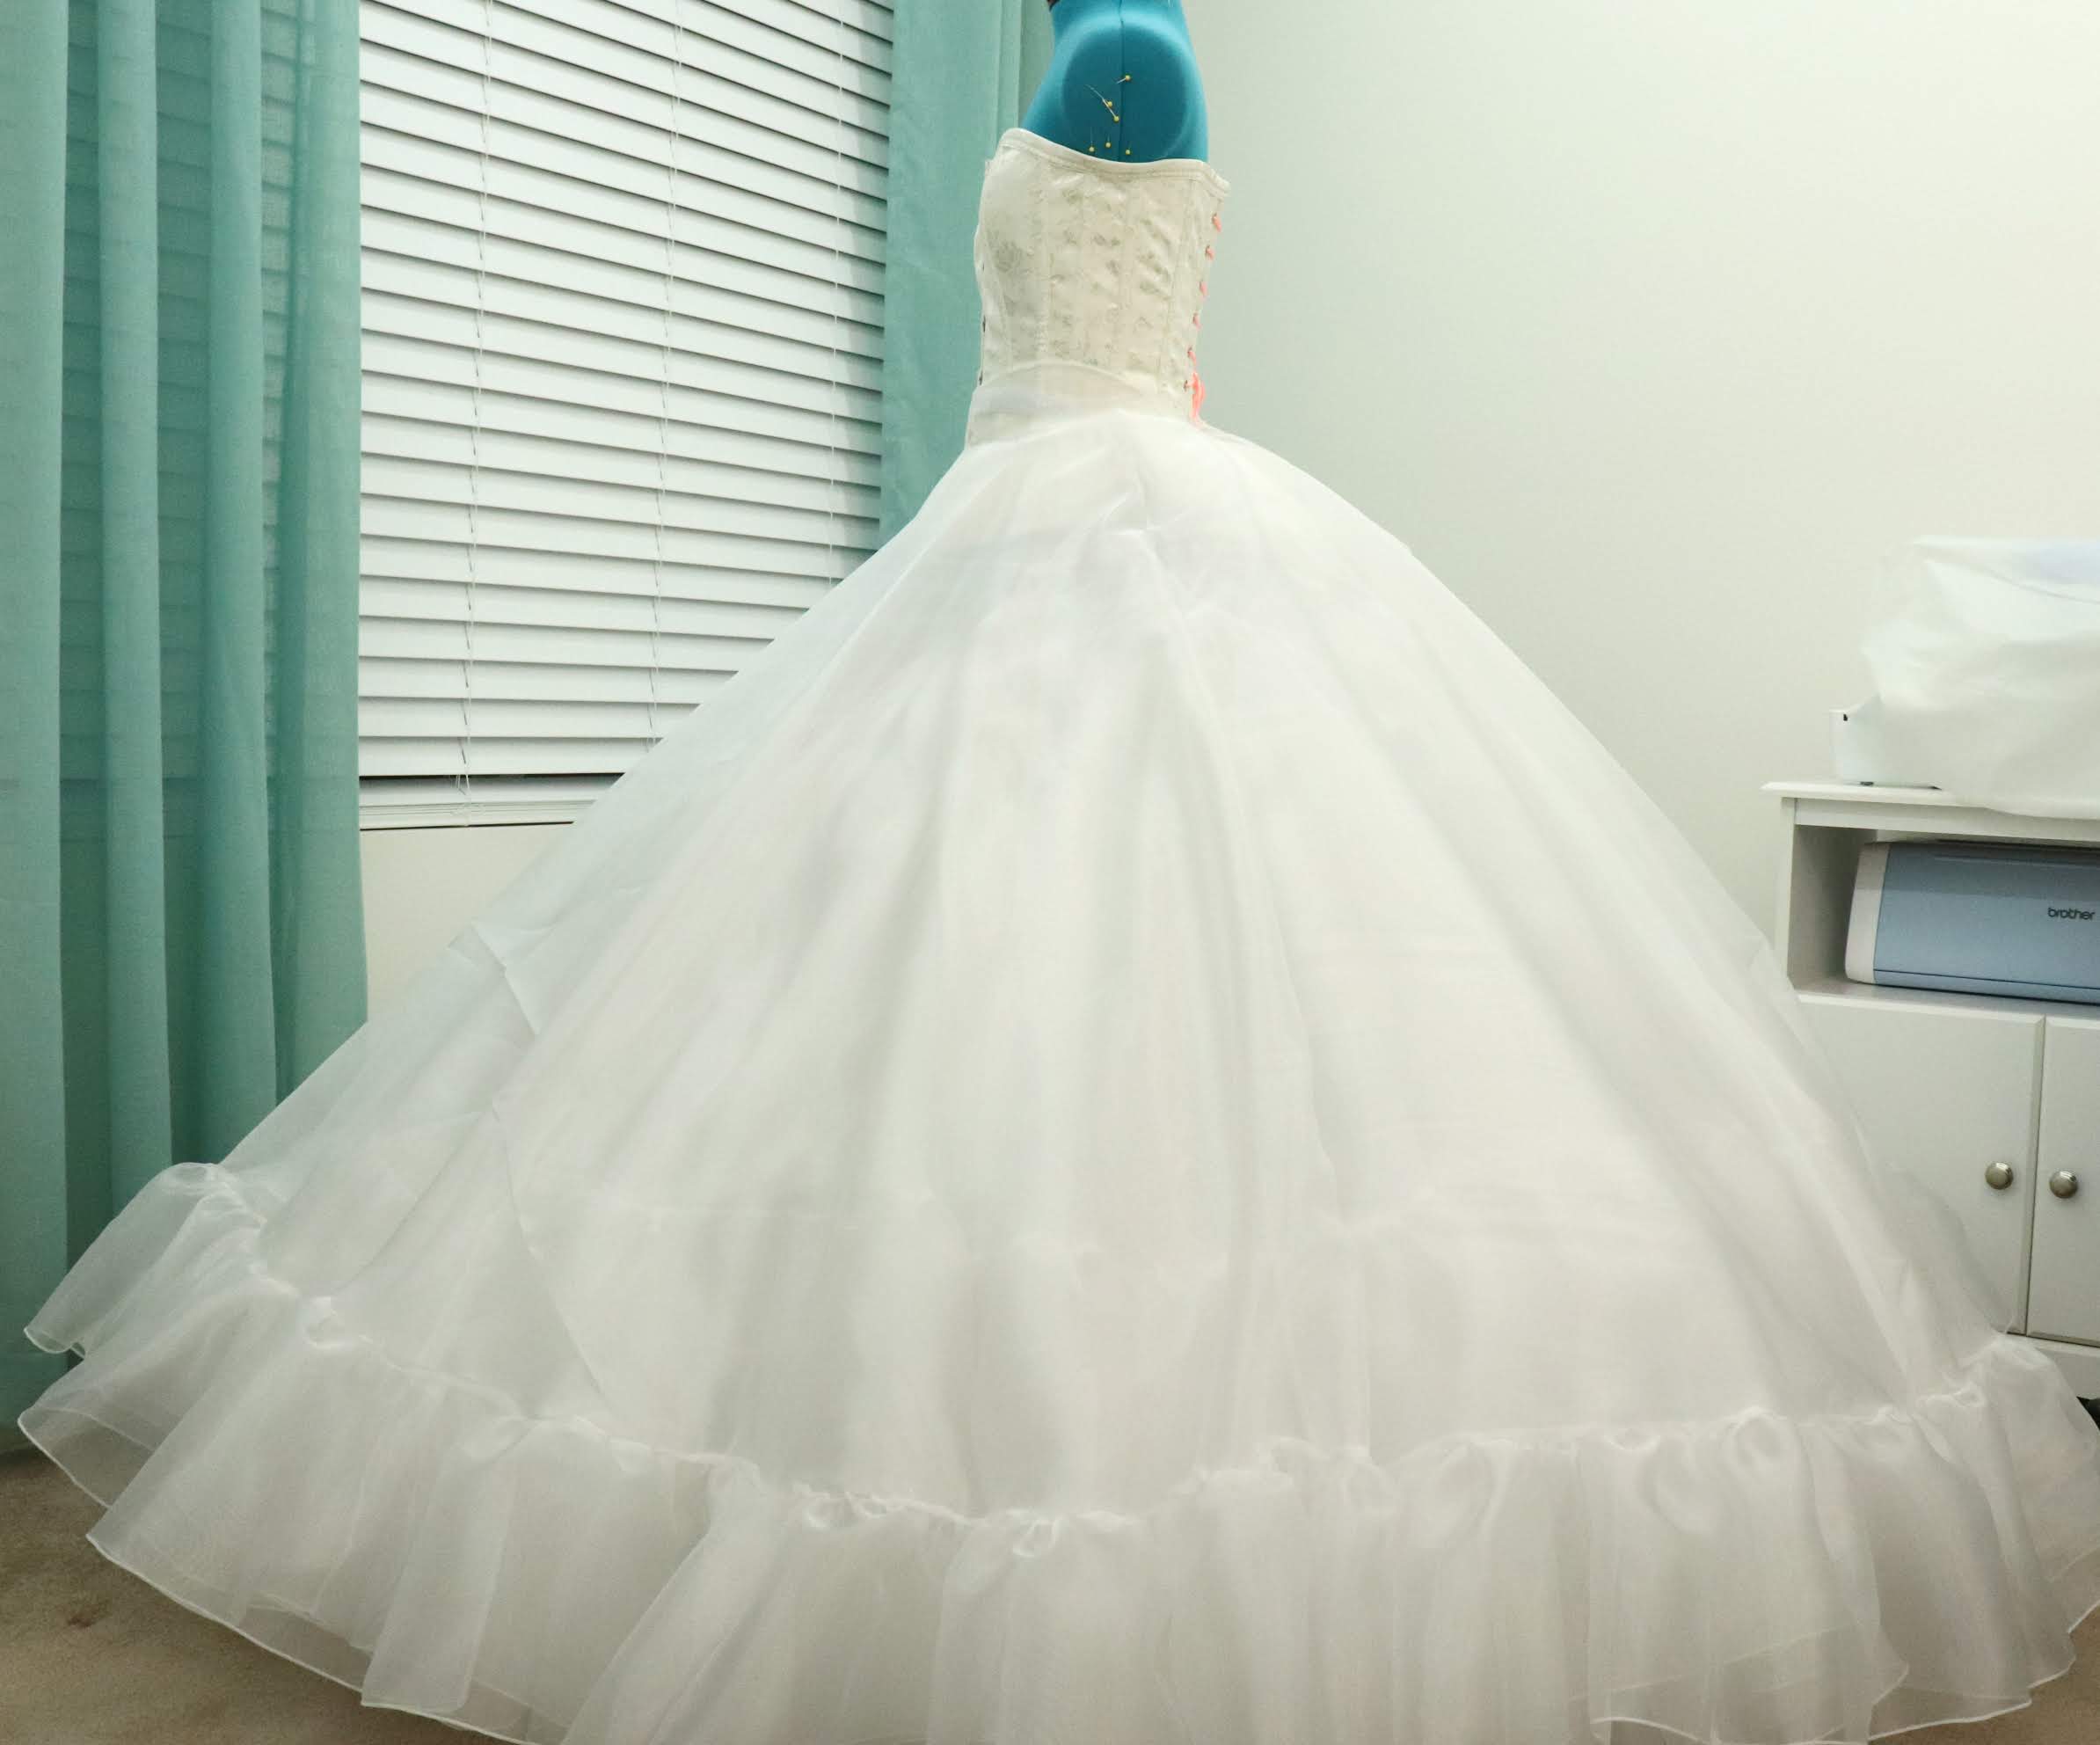
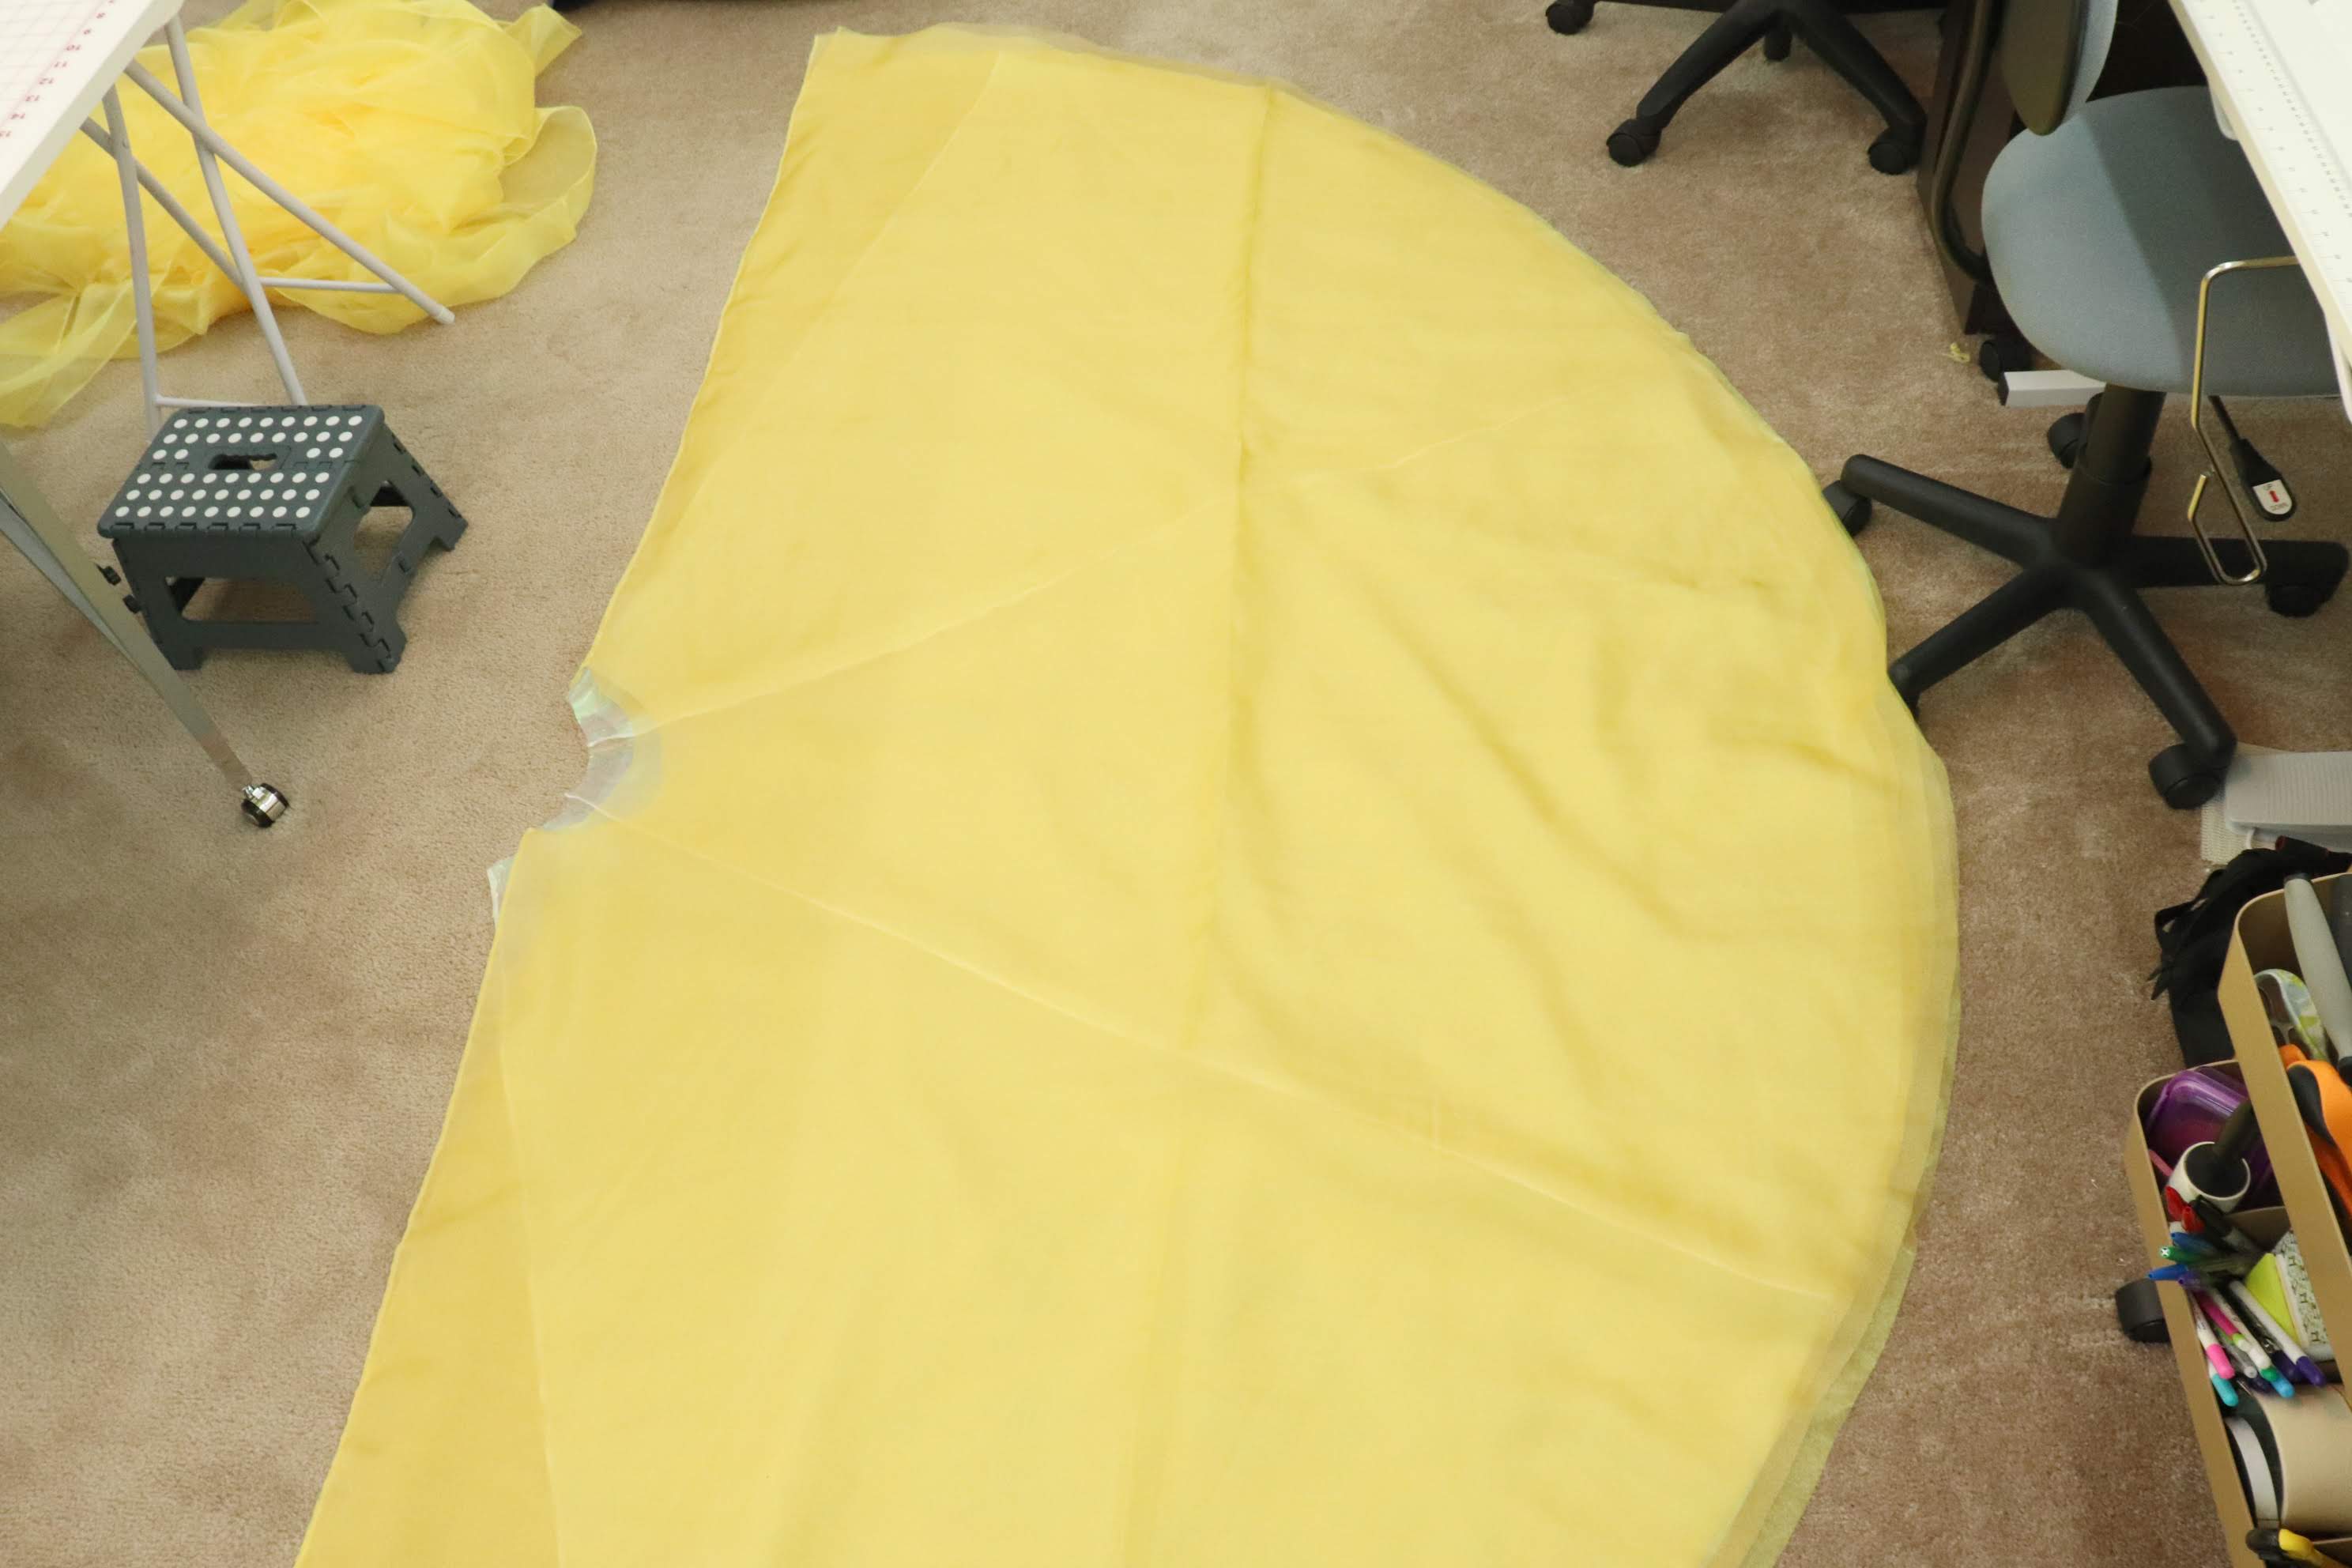
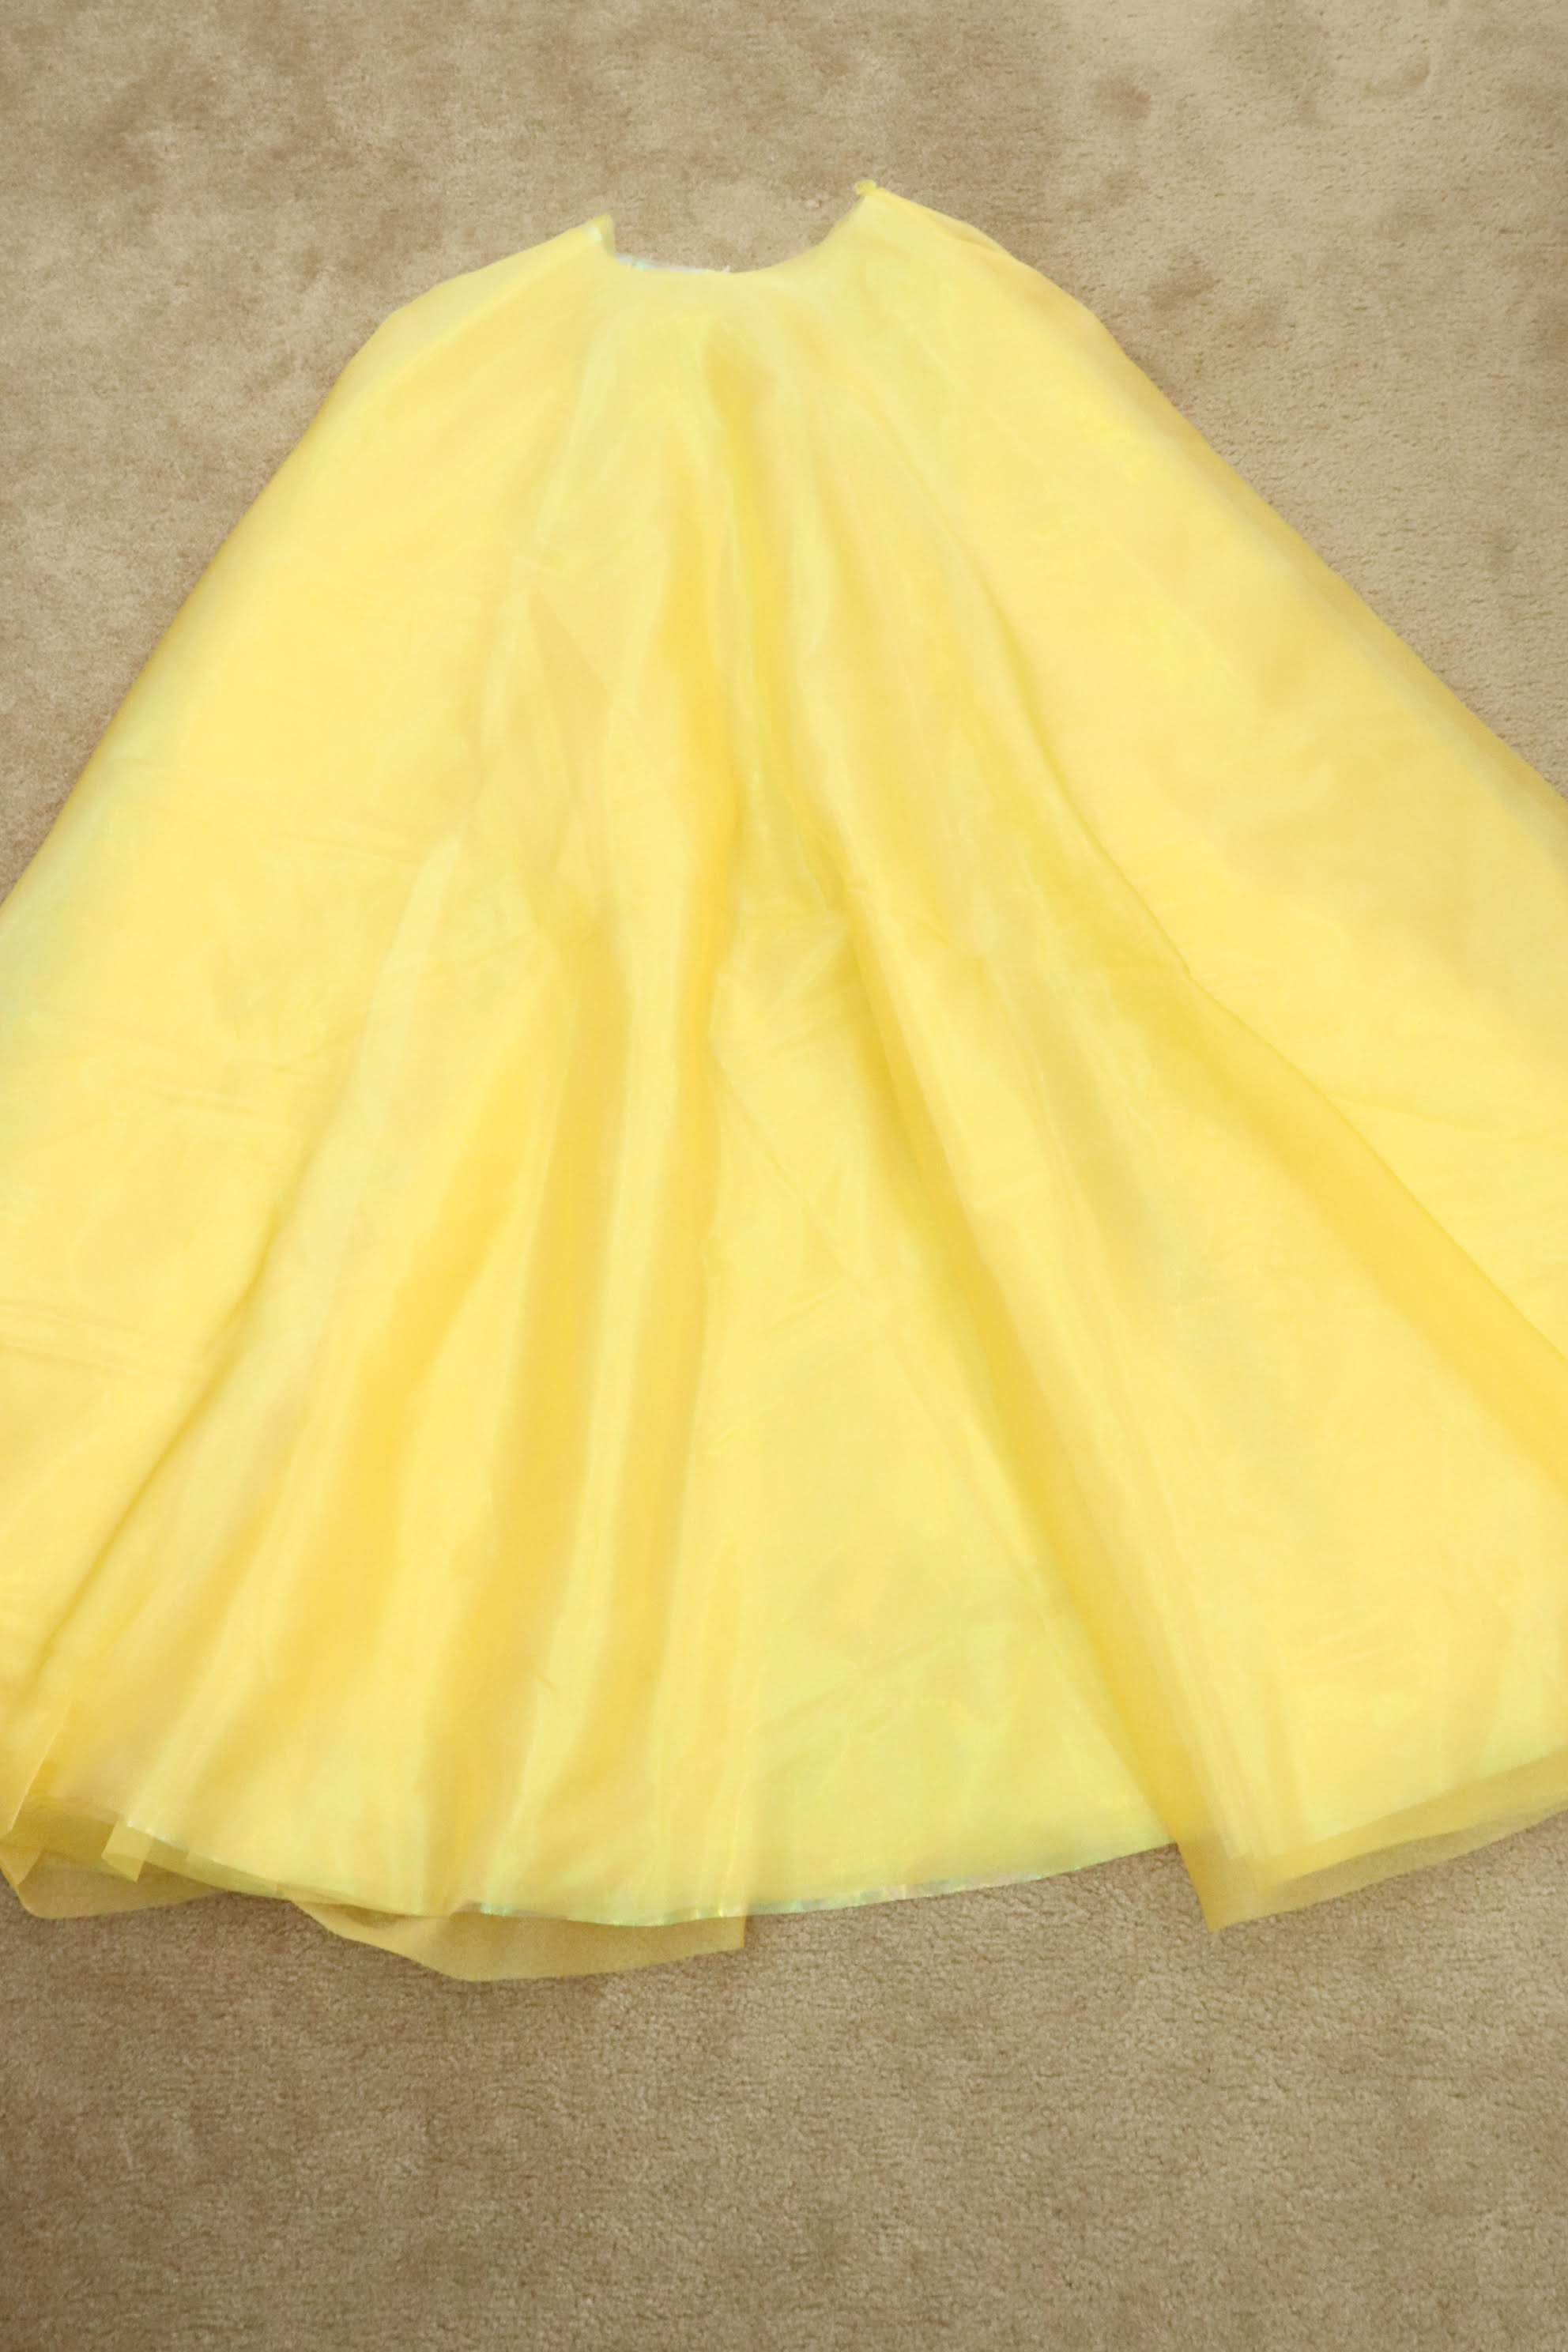
I cut three panels to create the overlay. If I had to do so again, I would give myself a few more inches of leeway in the seam allowances. To save fabric, two of the panels were cut on the fold, but the third wasn’t. I used the split panel for the center back. I sewed the panels together and draped it over my dress form. The result is the image from the previous post.
The waist was a little big, but I plan to gather the top edge when inserting the waistband later.
Adding the Ruffle
To complete the first layer of the petticoat I wanted to add two ruffles to the bottom of the overlay.
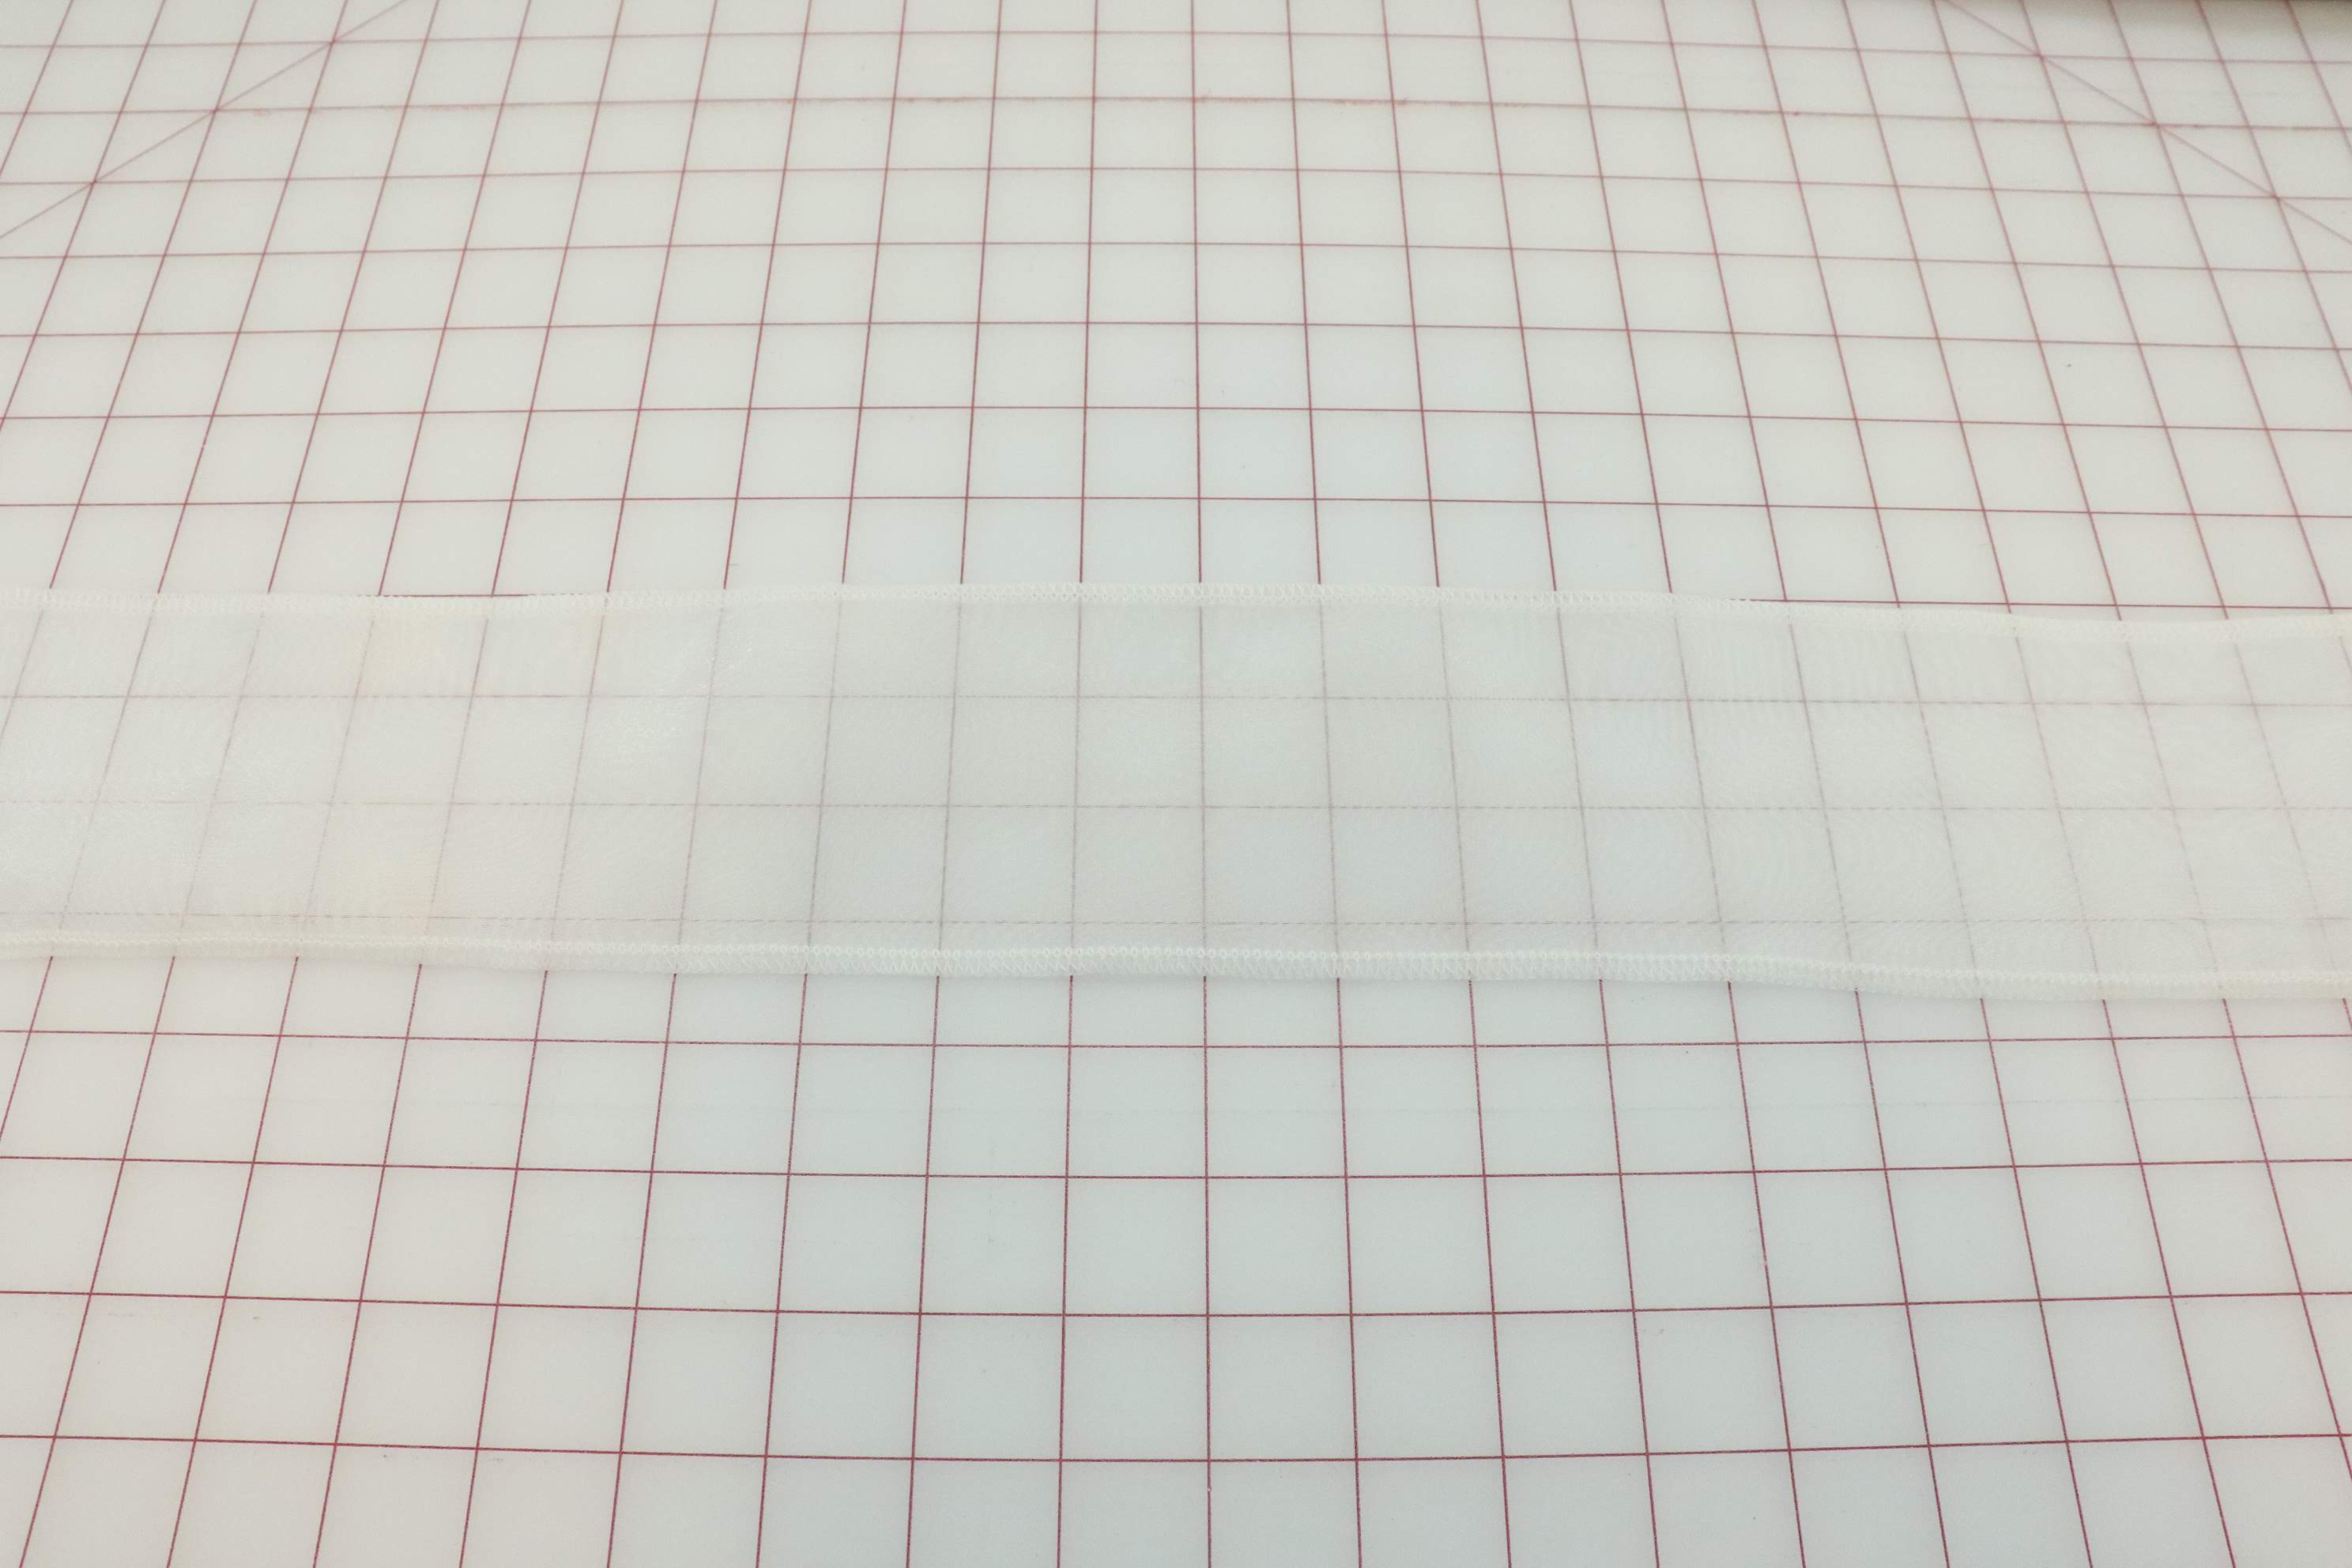
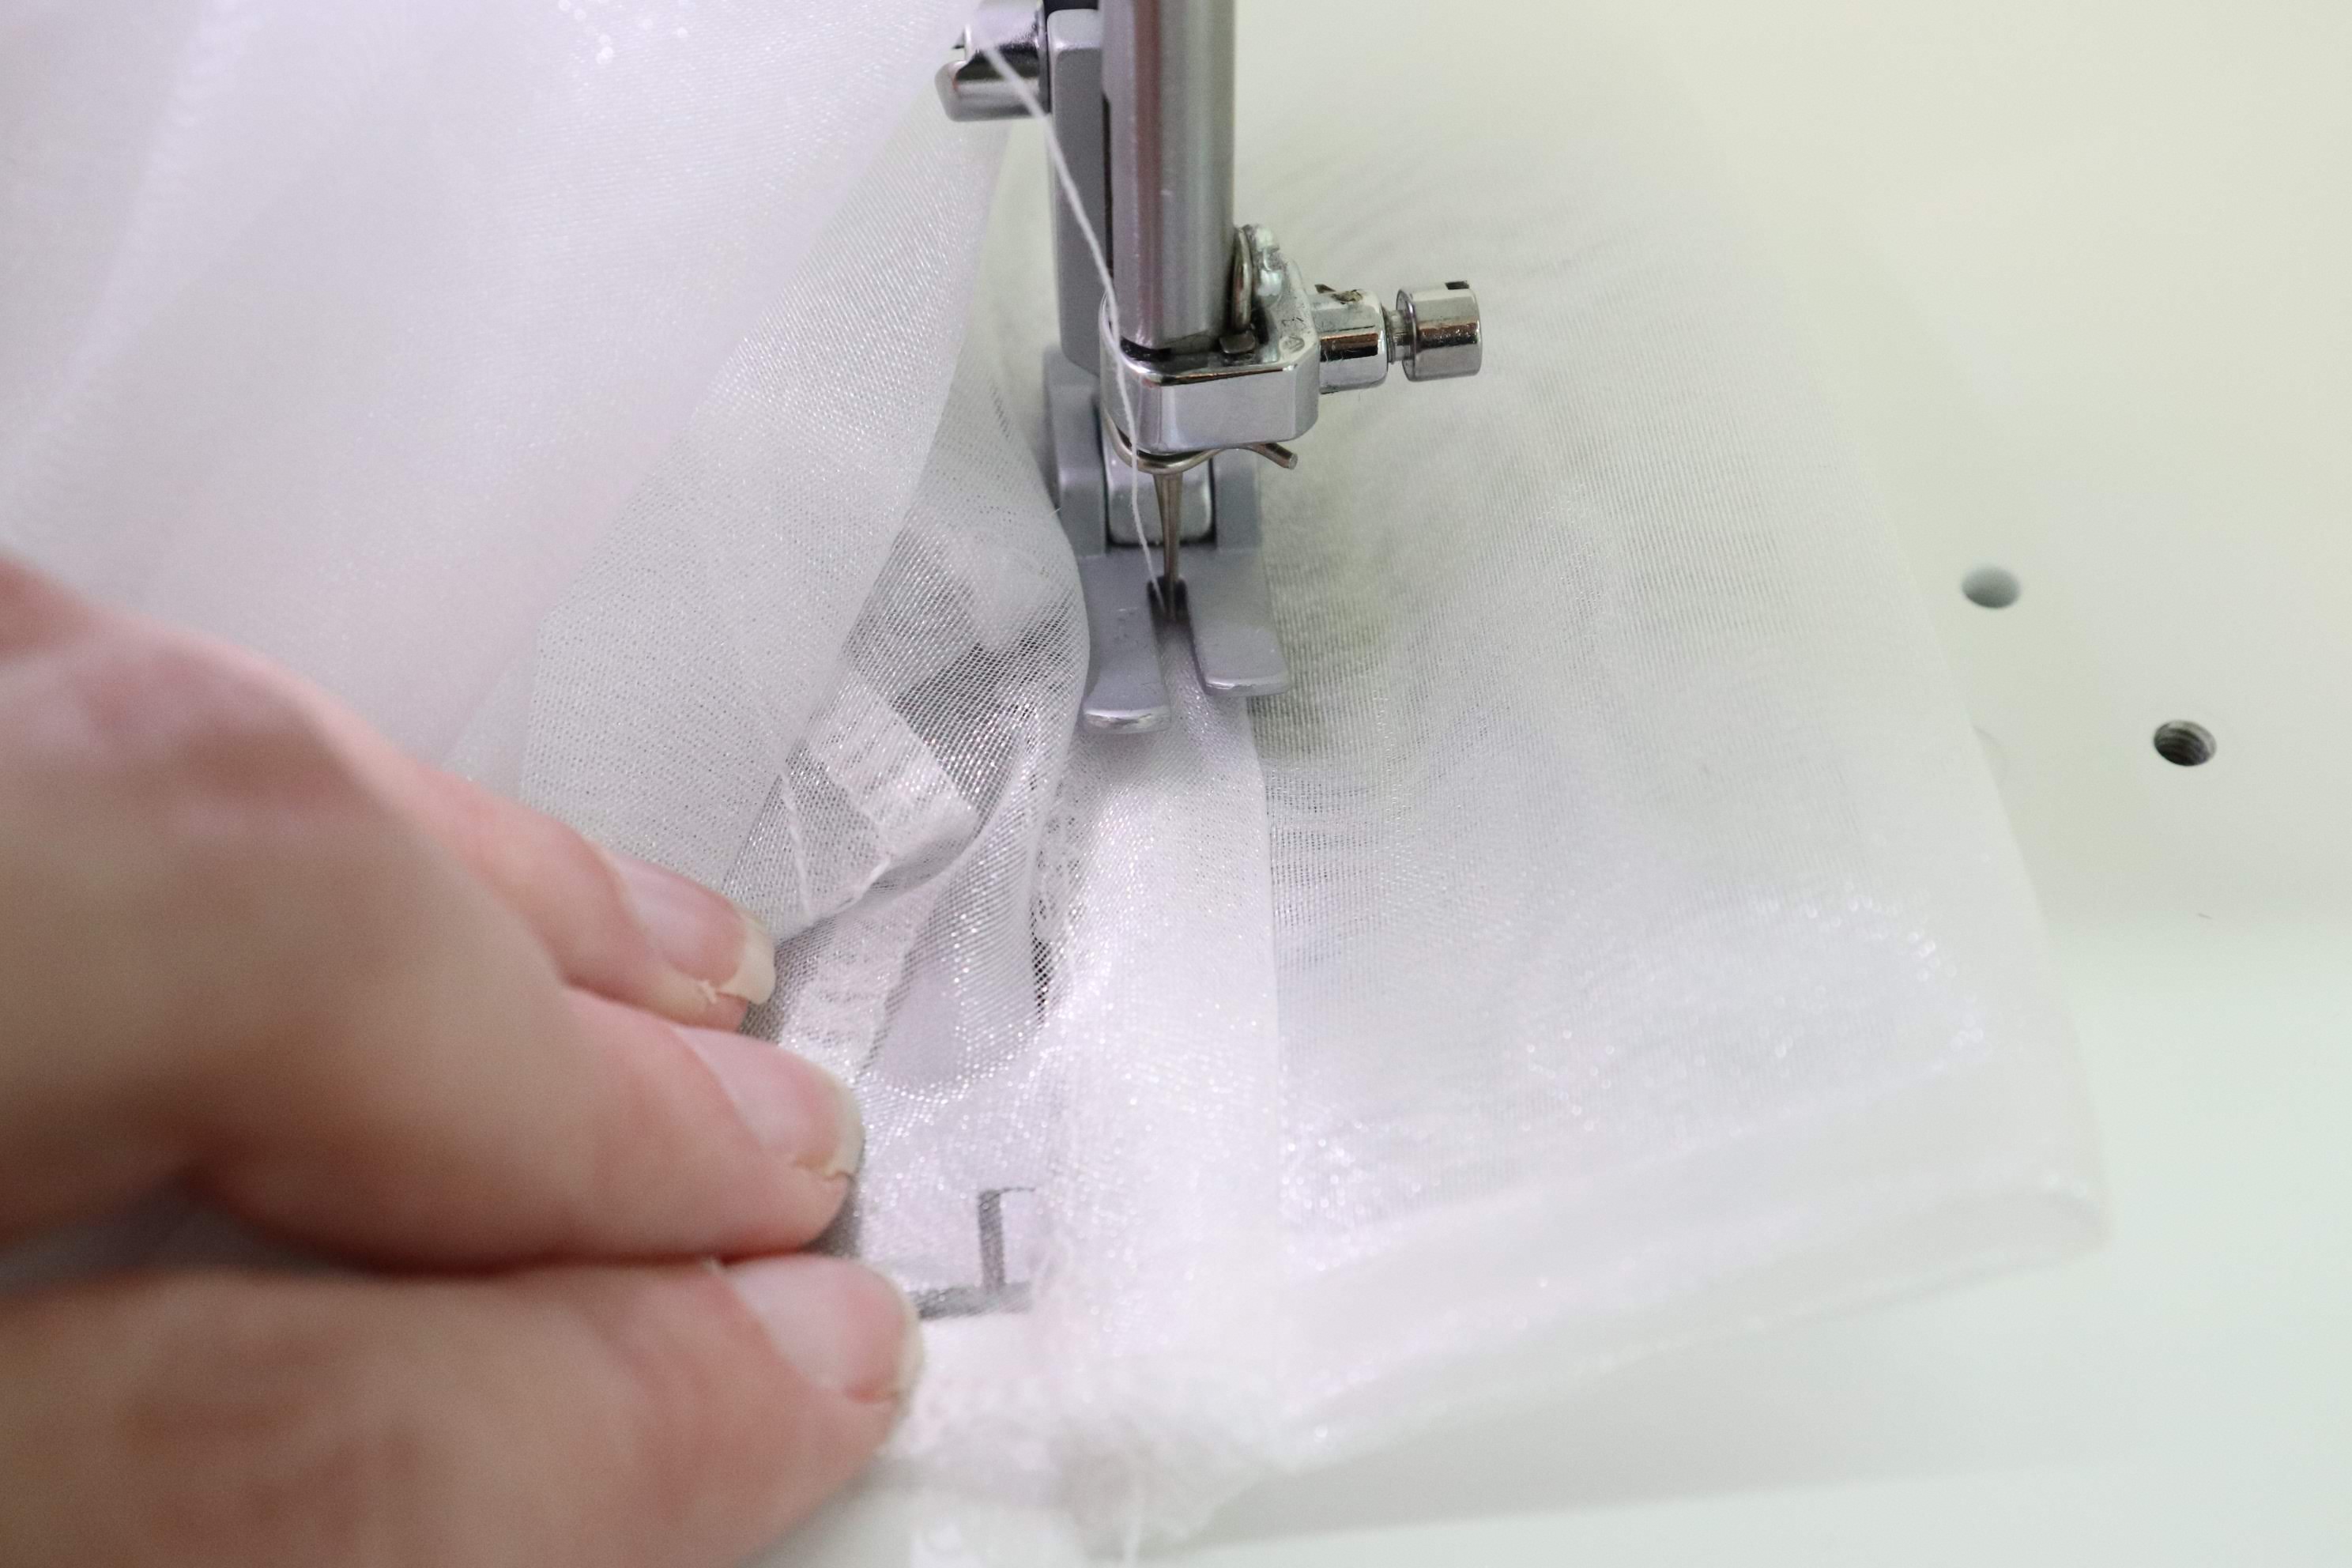
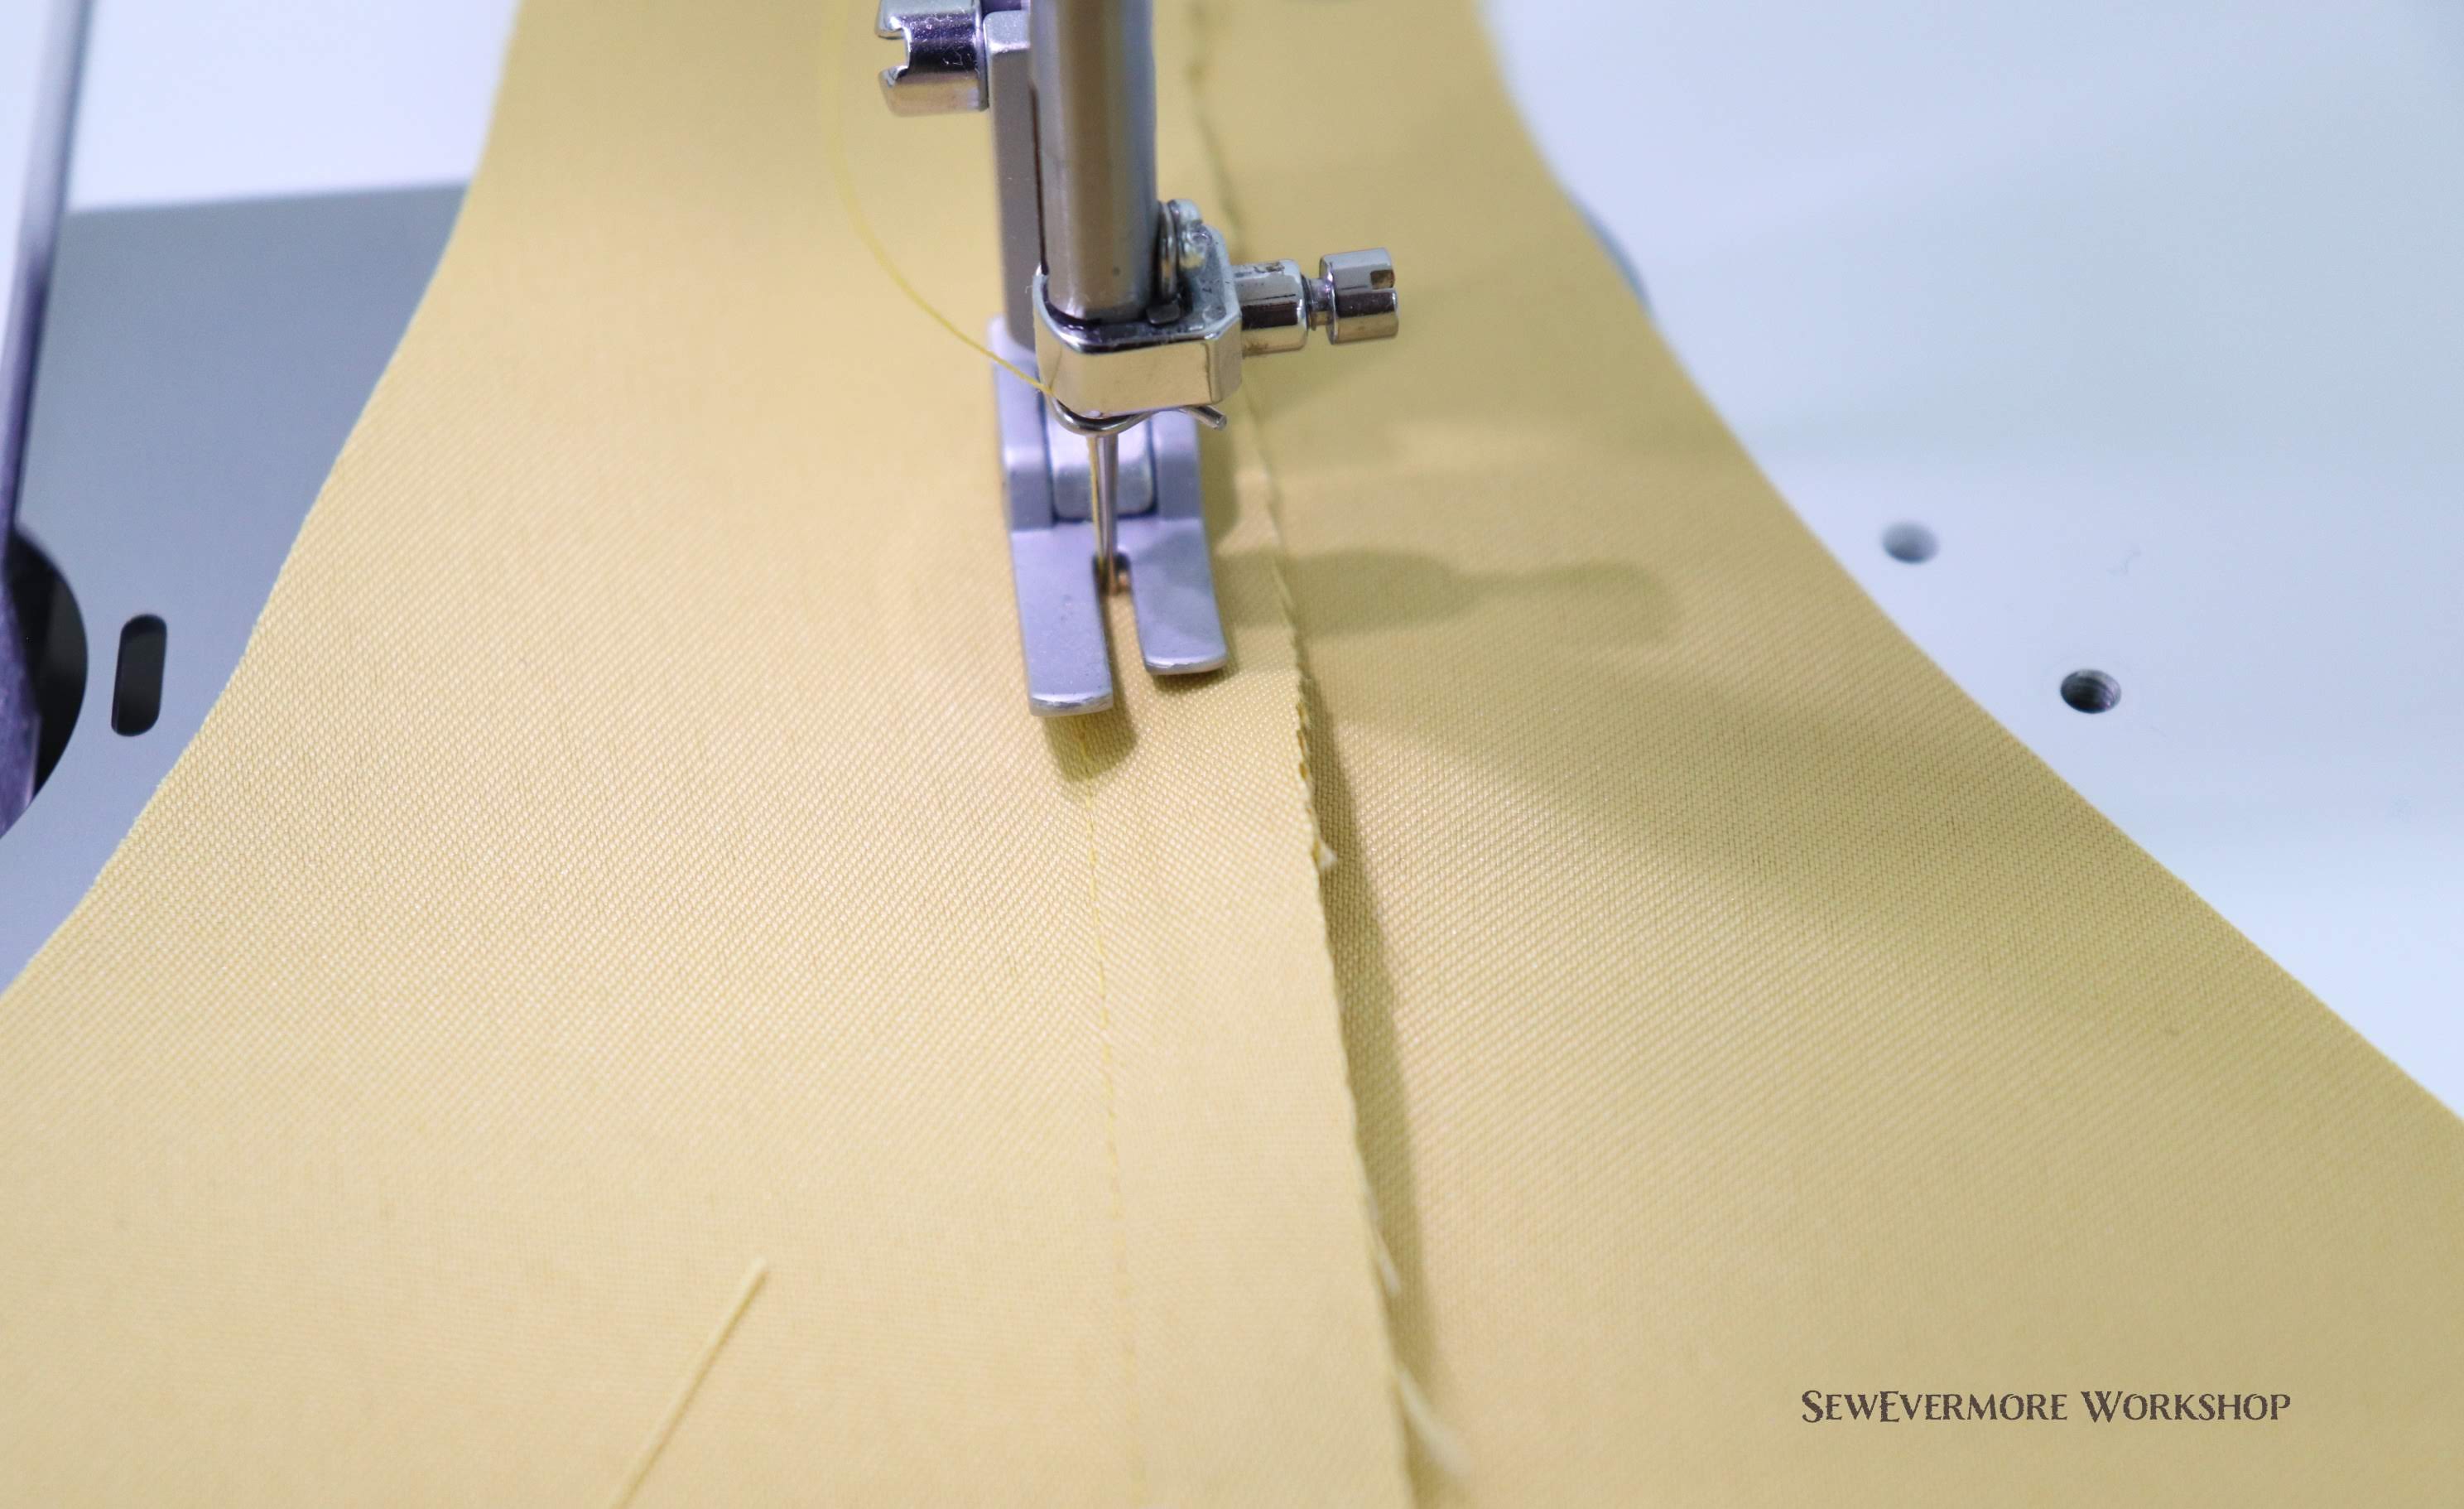
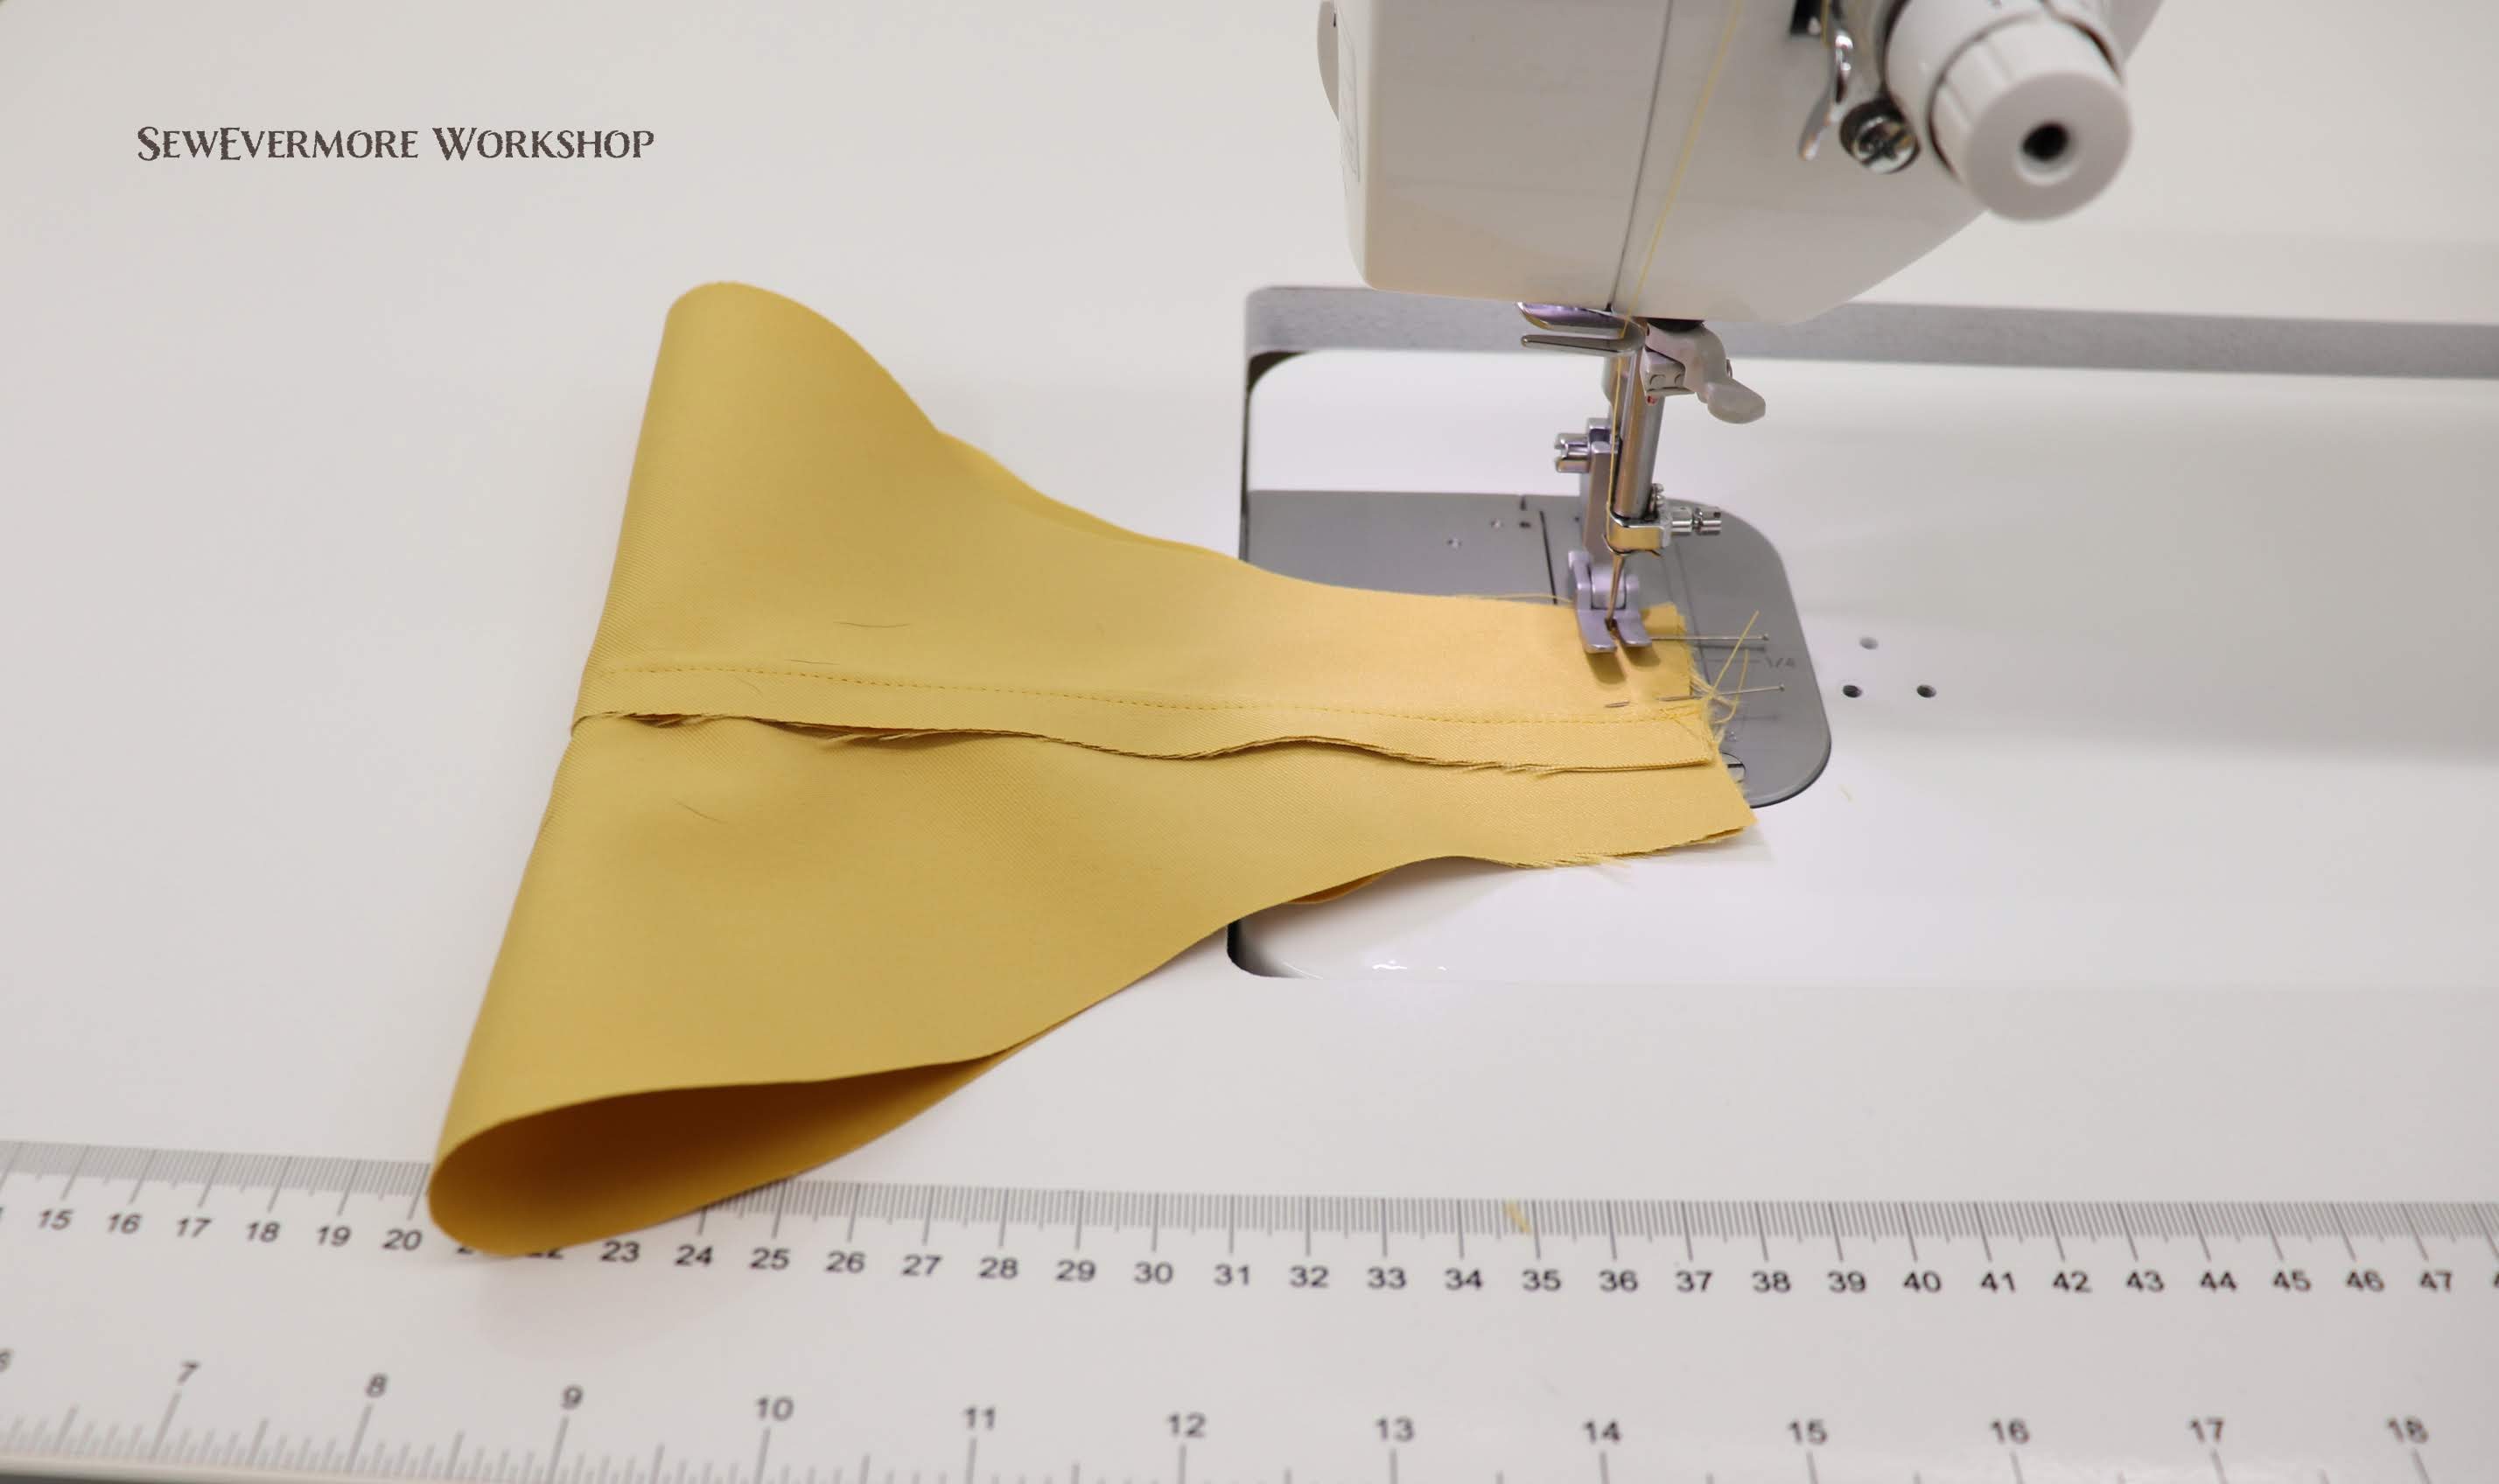
Cut five 26″ by Width of Fabric (≈ 60″) rectangles. Next I sewed them together along the short edges with my serger creating a very long chain ≈ 300″ long. Then I finish the both long edges on the serger using a rolled him.
Folding the rectangle in half (creating a double layer 13″ x 300″ rectangle, I gathered the folded edge. I wanted my ruffles to be 12 inches wide on the finished petticoat. This worked out well.

A note on serging. I serged using woolly nylon thread in the looper. This seemed to work well and gave the hem a nice finished look.
After gathering I attached it to the bottom of the overlay and joined the ends.
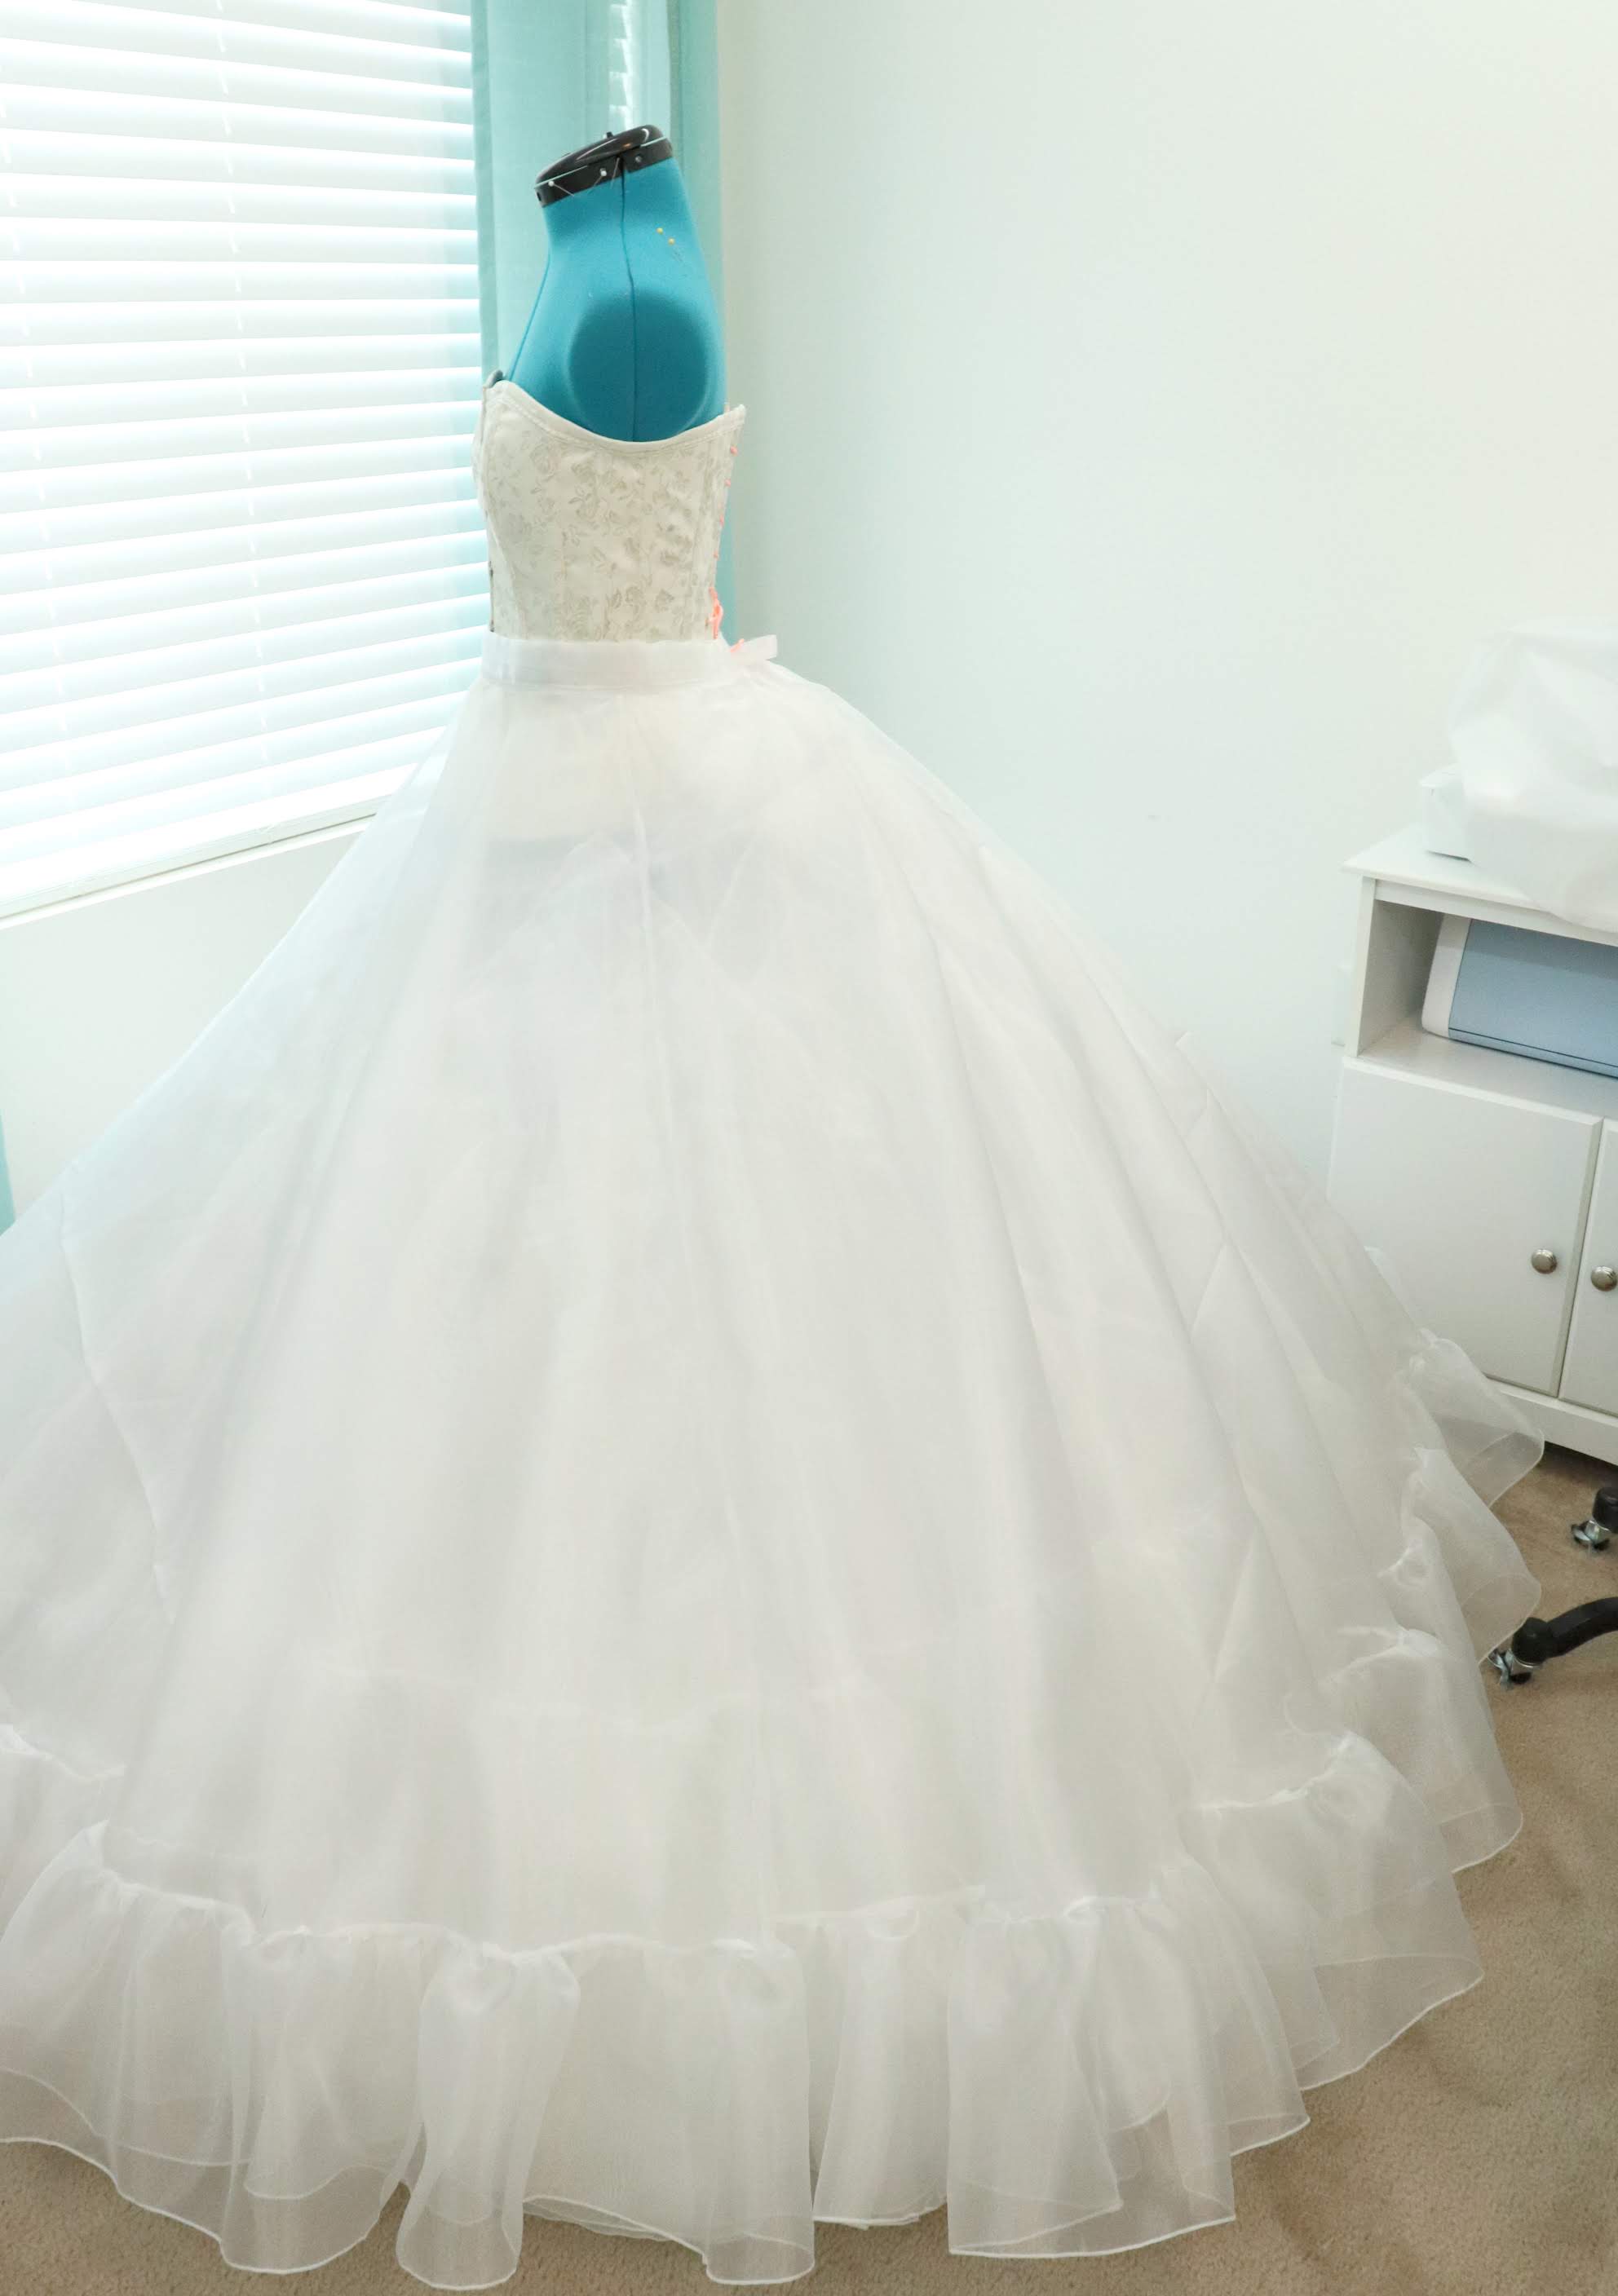
Here was the result.

And the first layer of the petticoat is finished!
- Petticoat Layer 2 – Godets
Now that the first layer of the petticoat is complete it is time to work on the second layer!
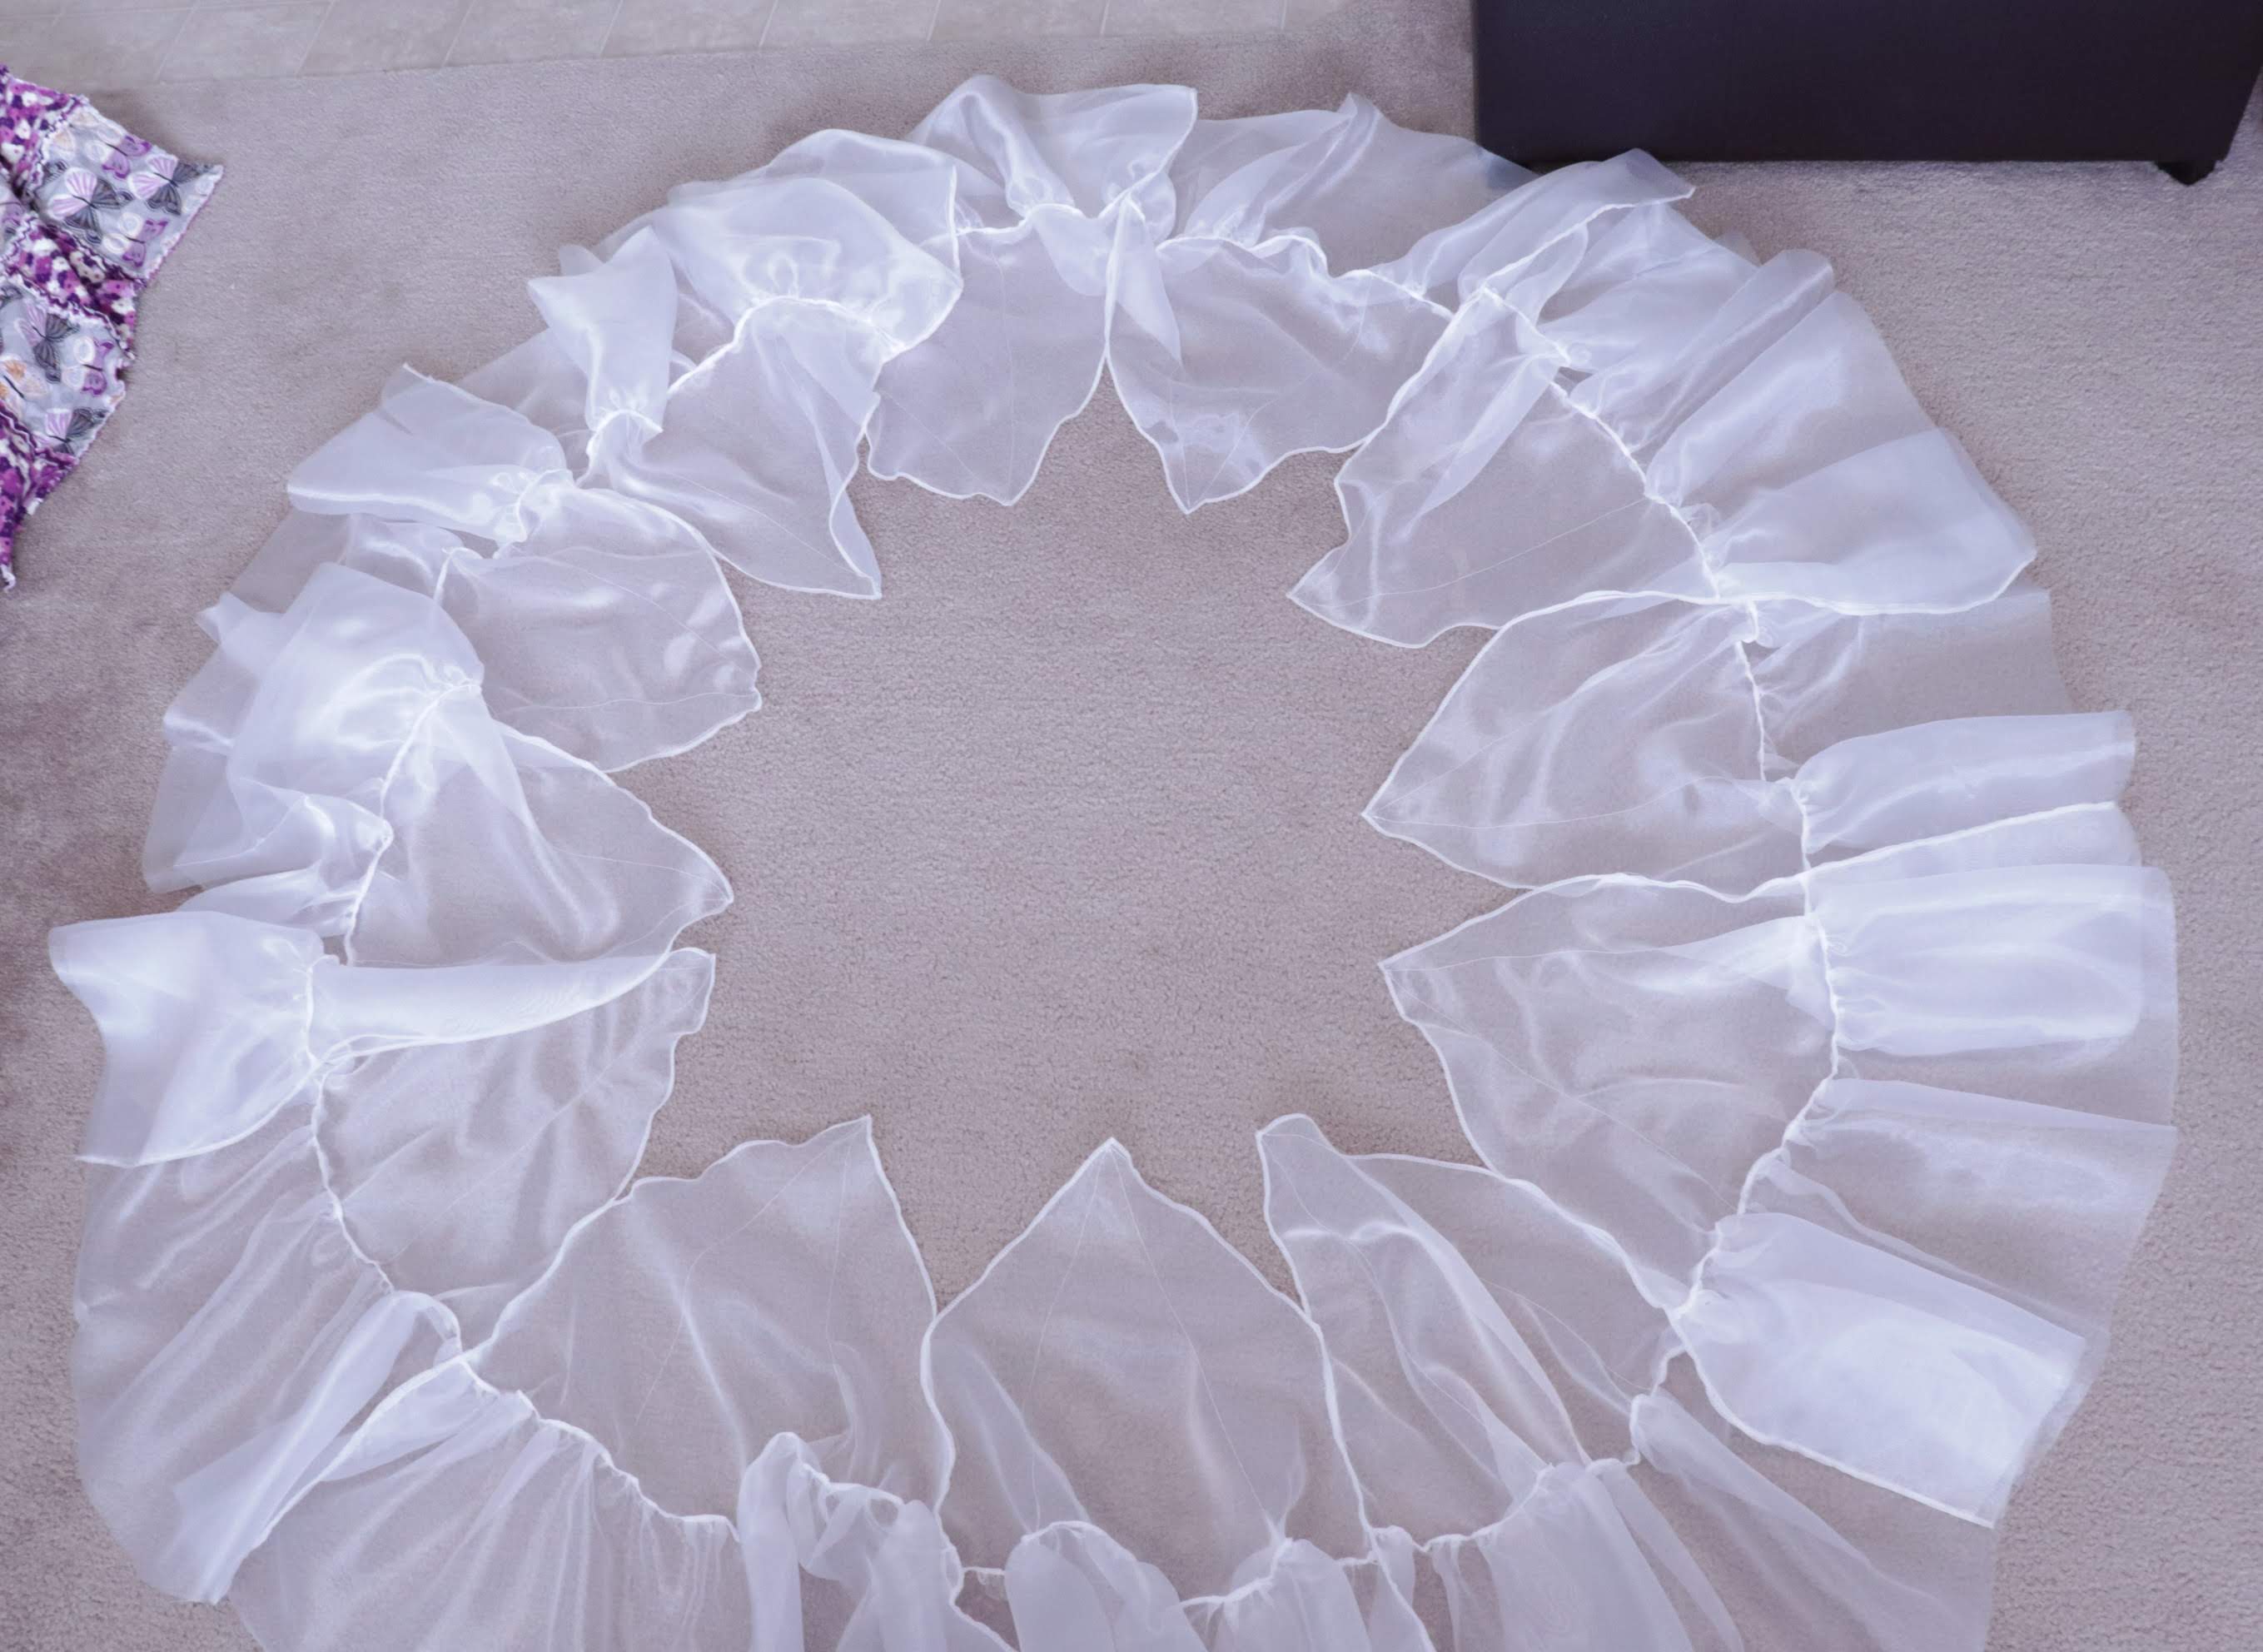
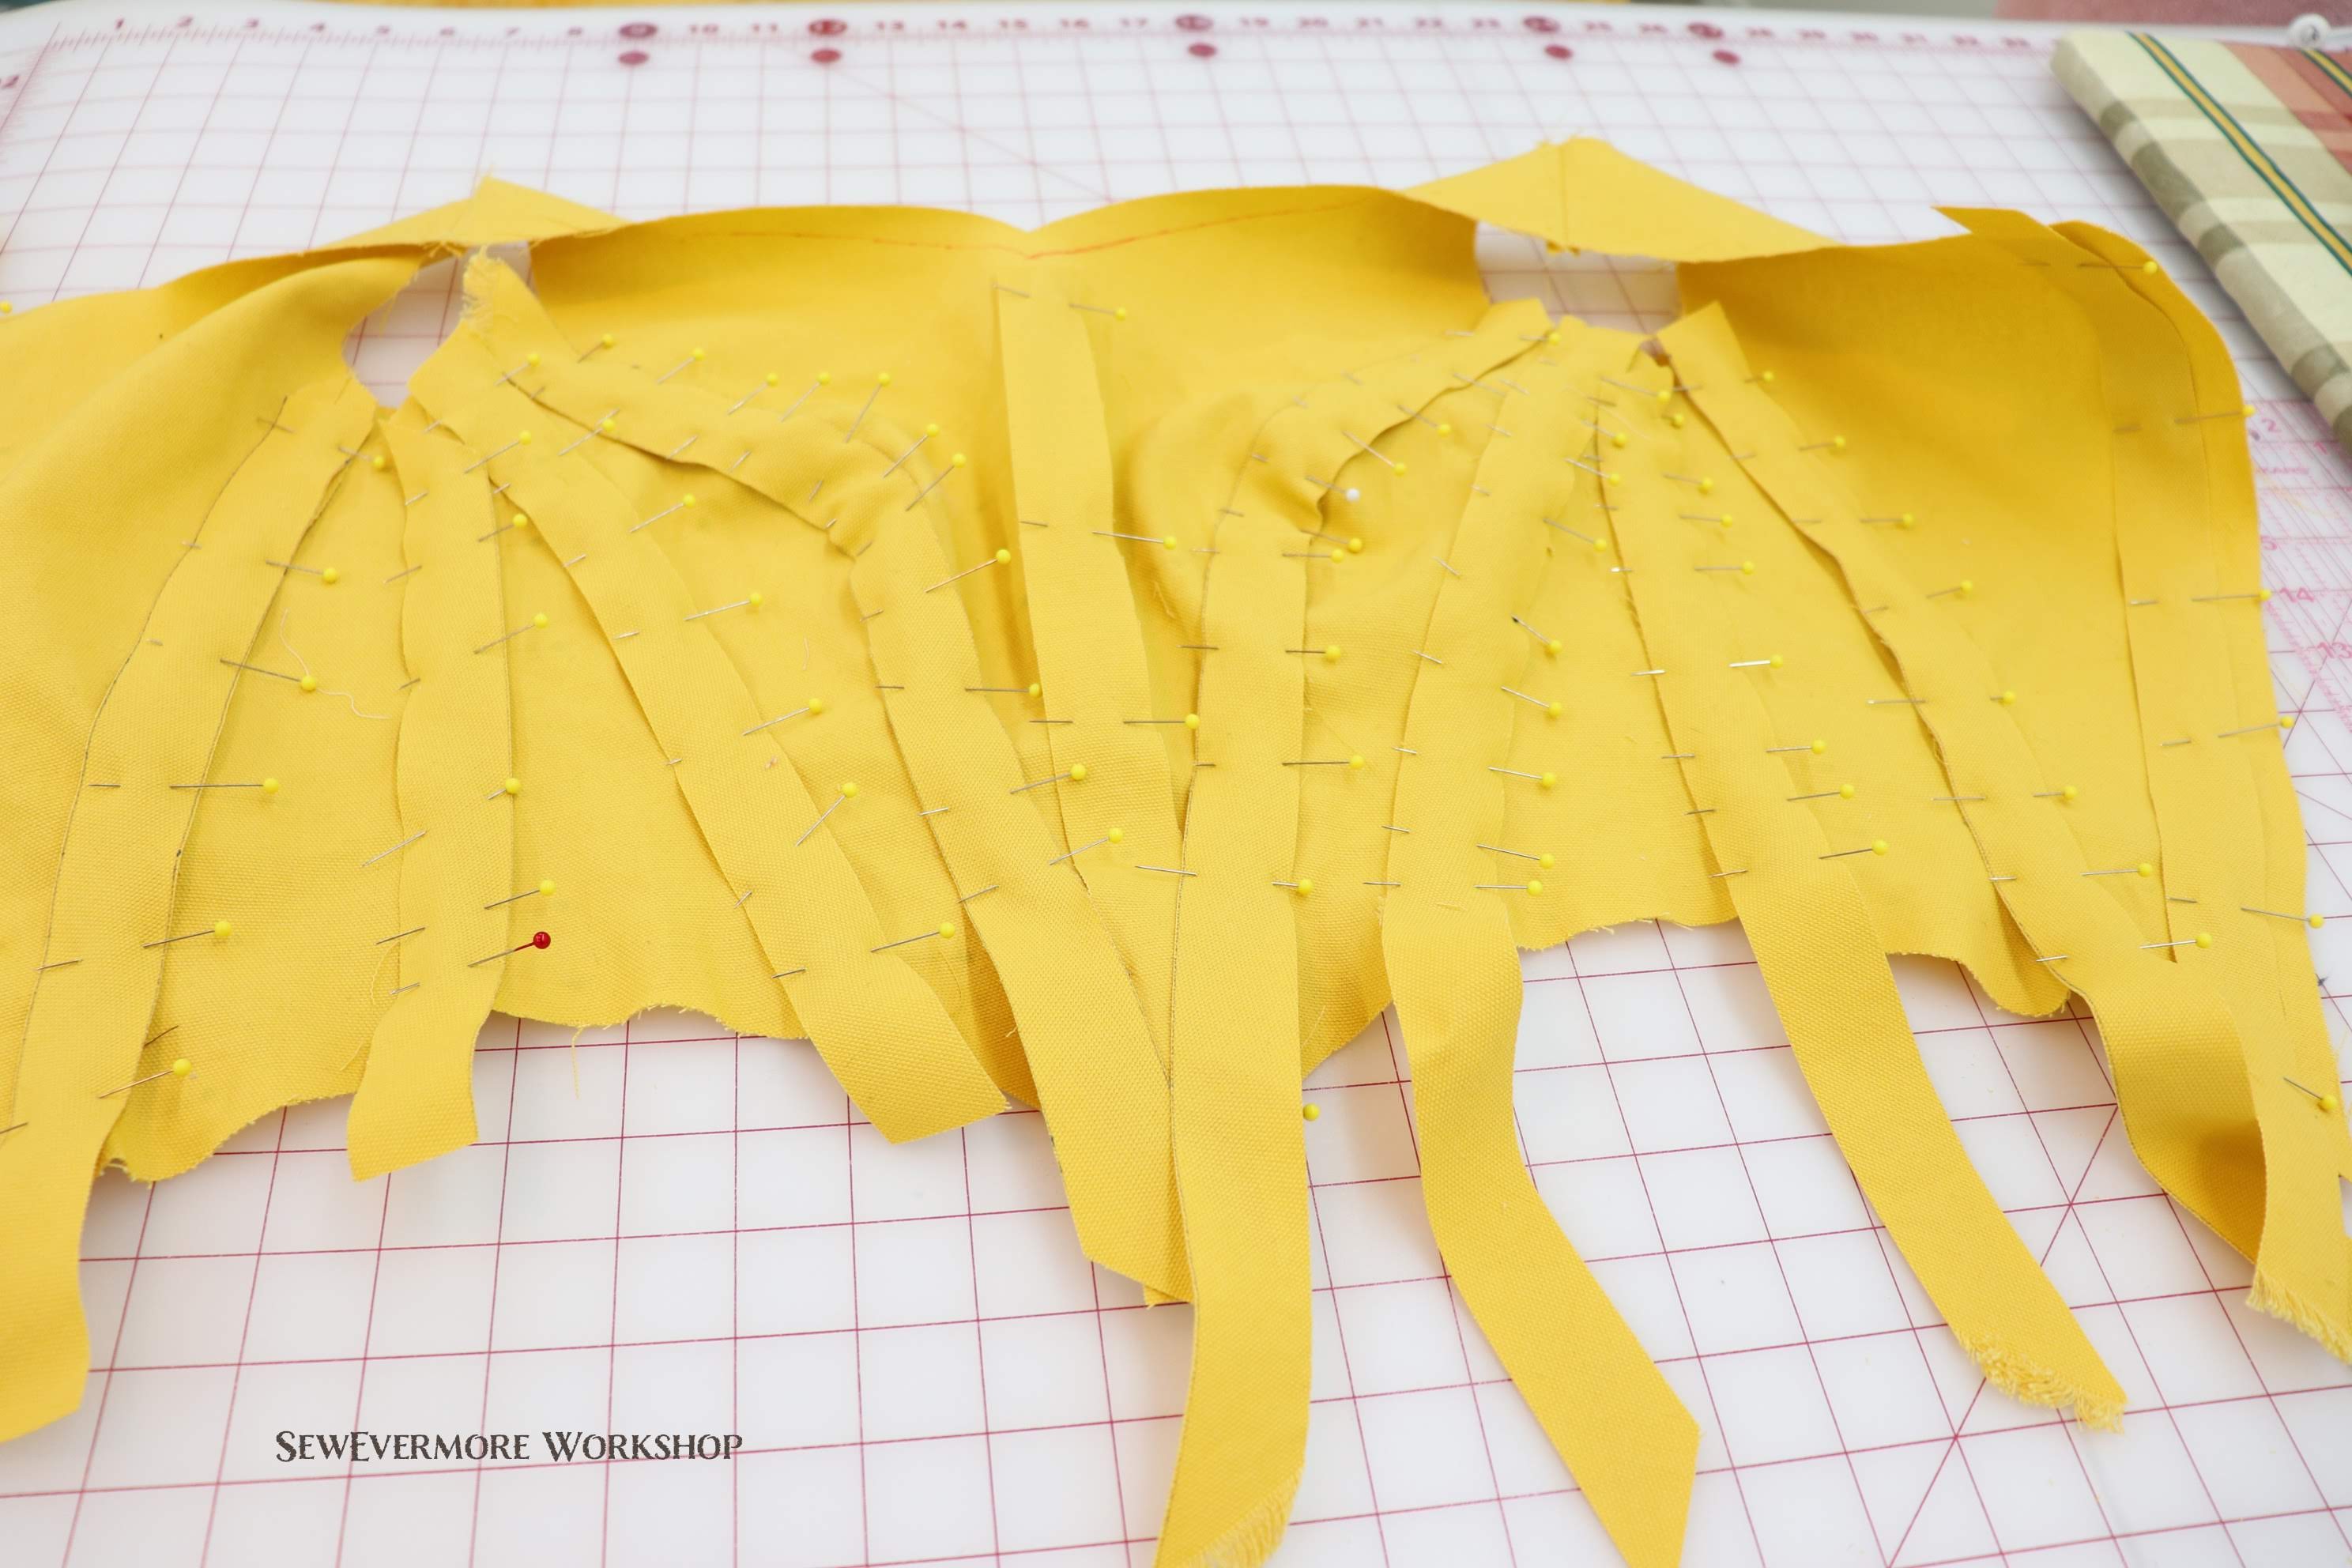
The second layer is constructed much differently from the first. Rather than adding a full length skirt for this layer, it is formed using a series of godets, triangular sections of fabric, each with a ruffle attached to the bottom.
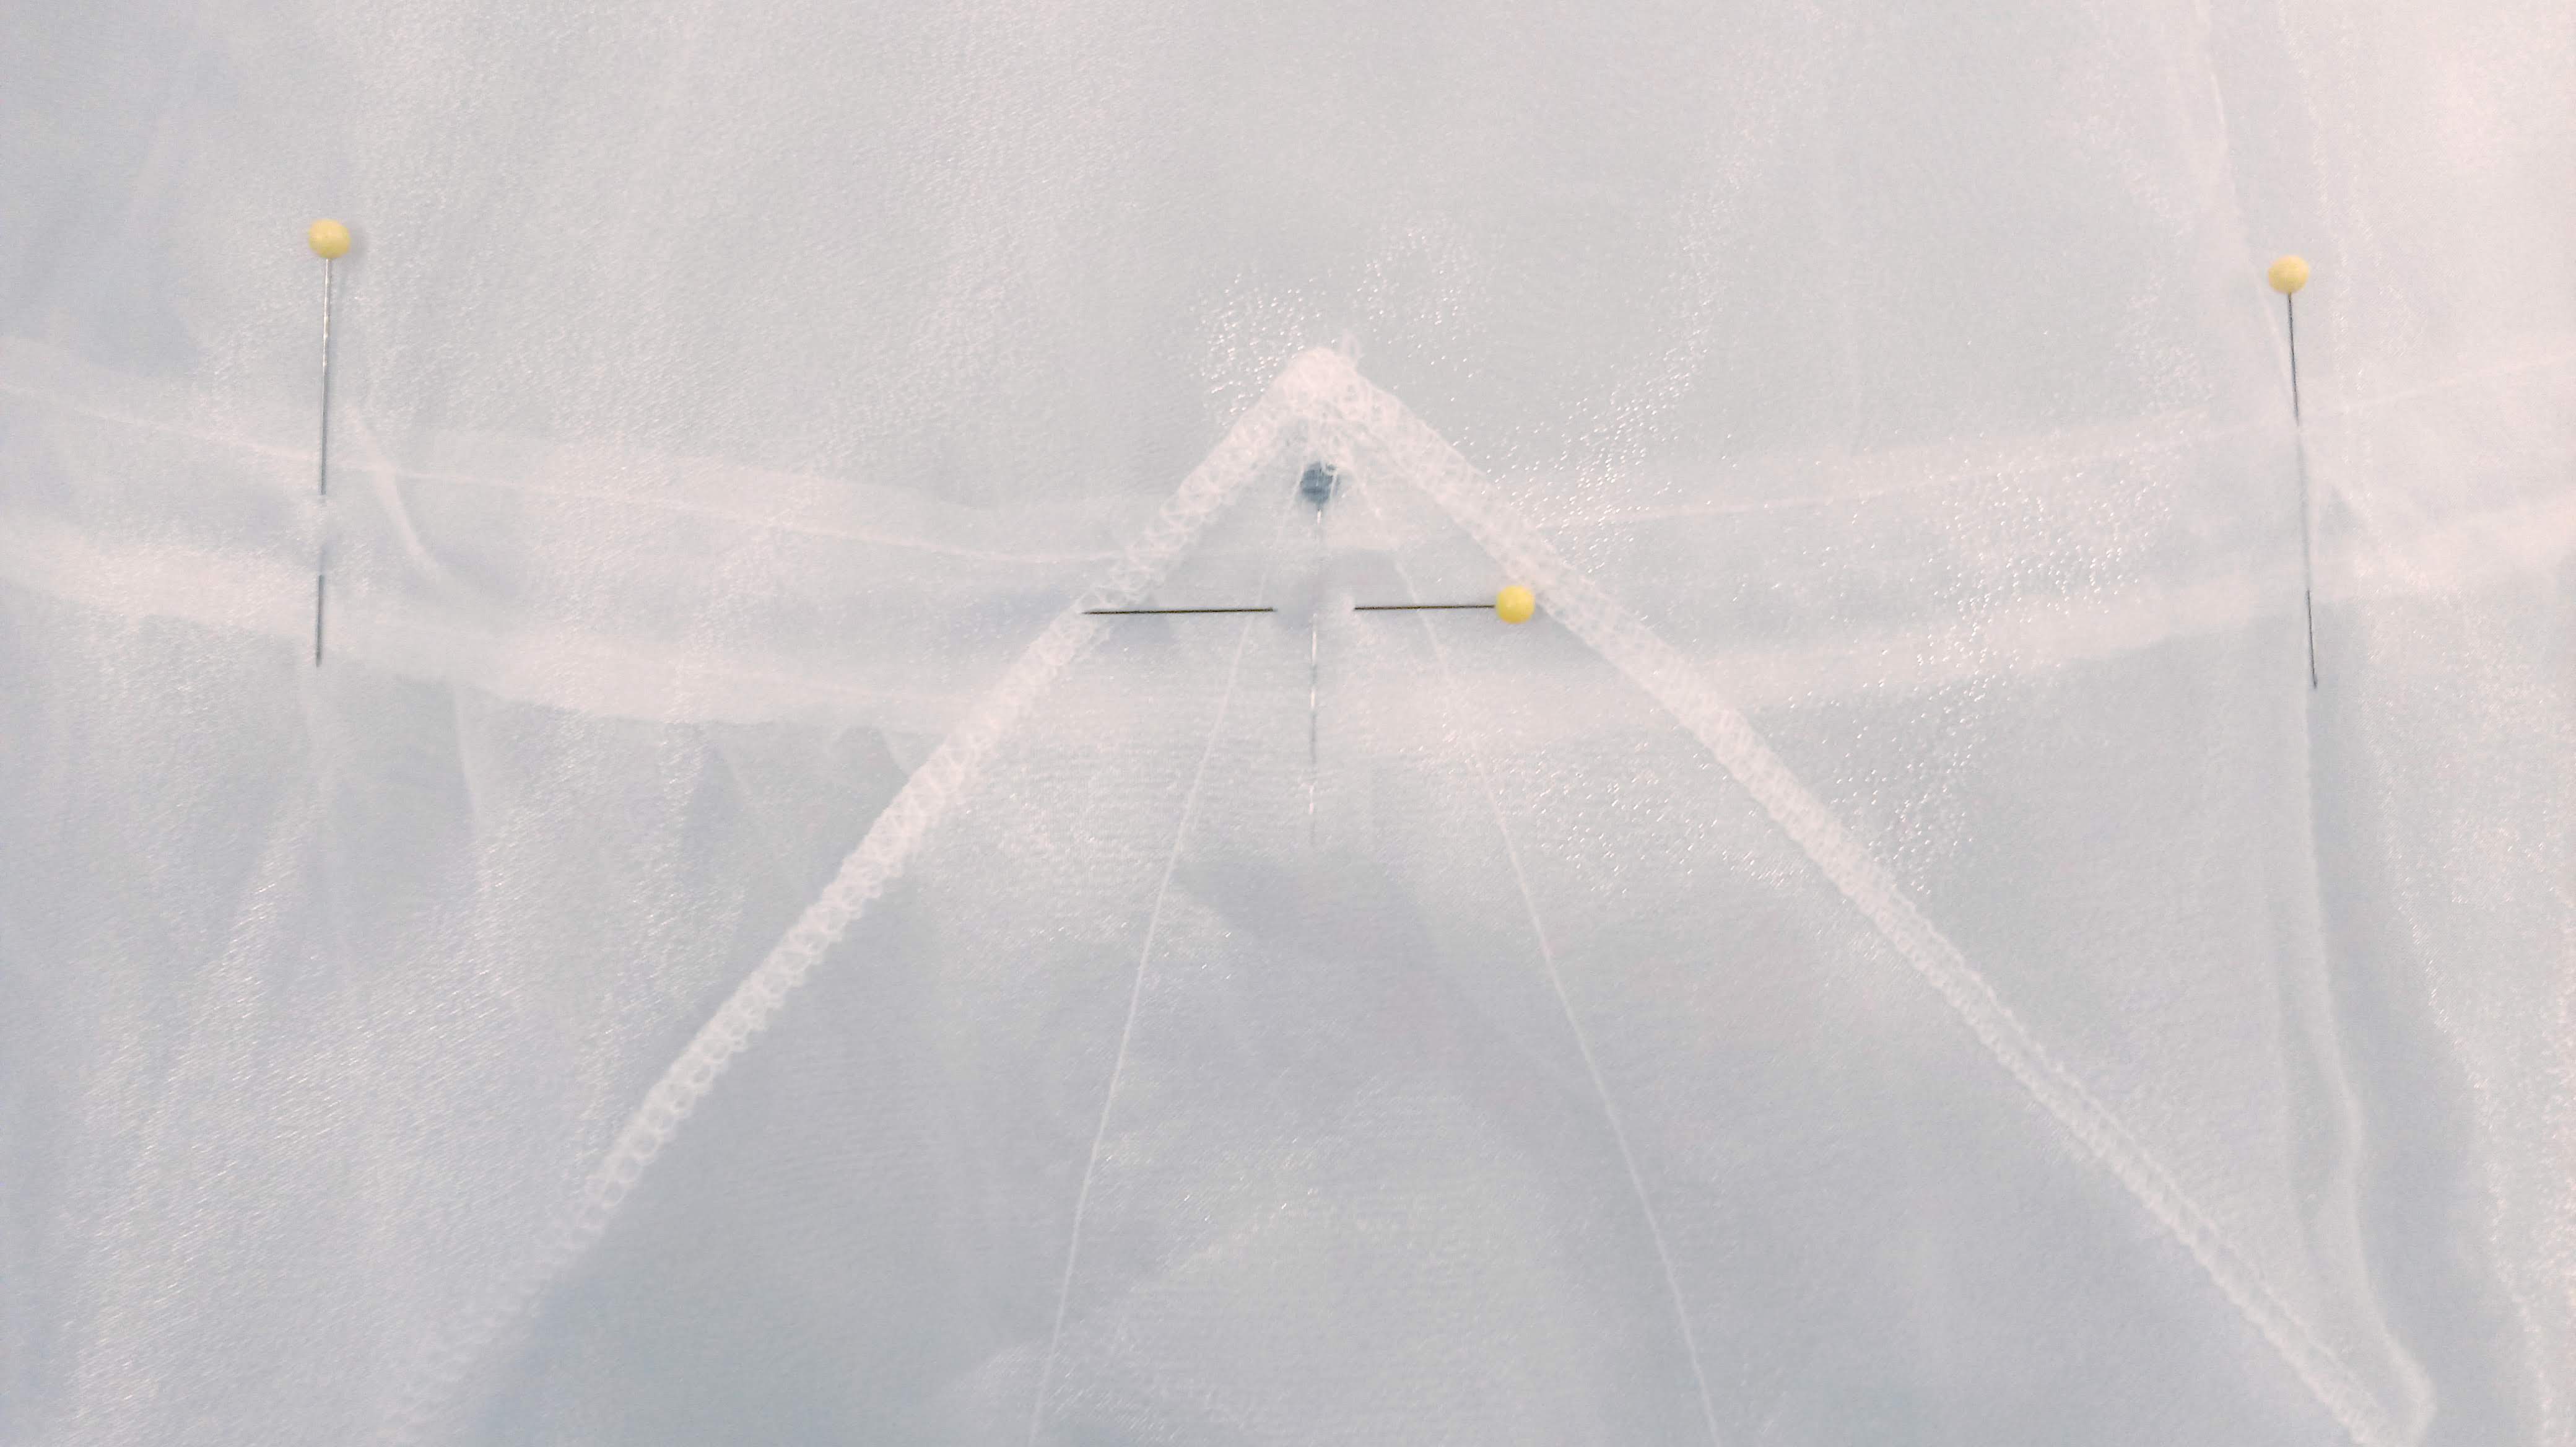
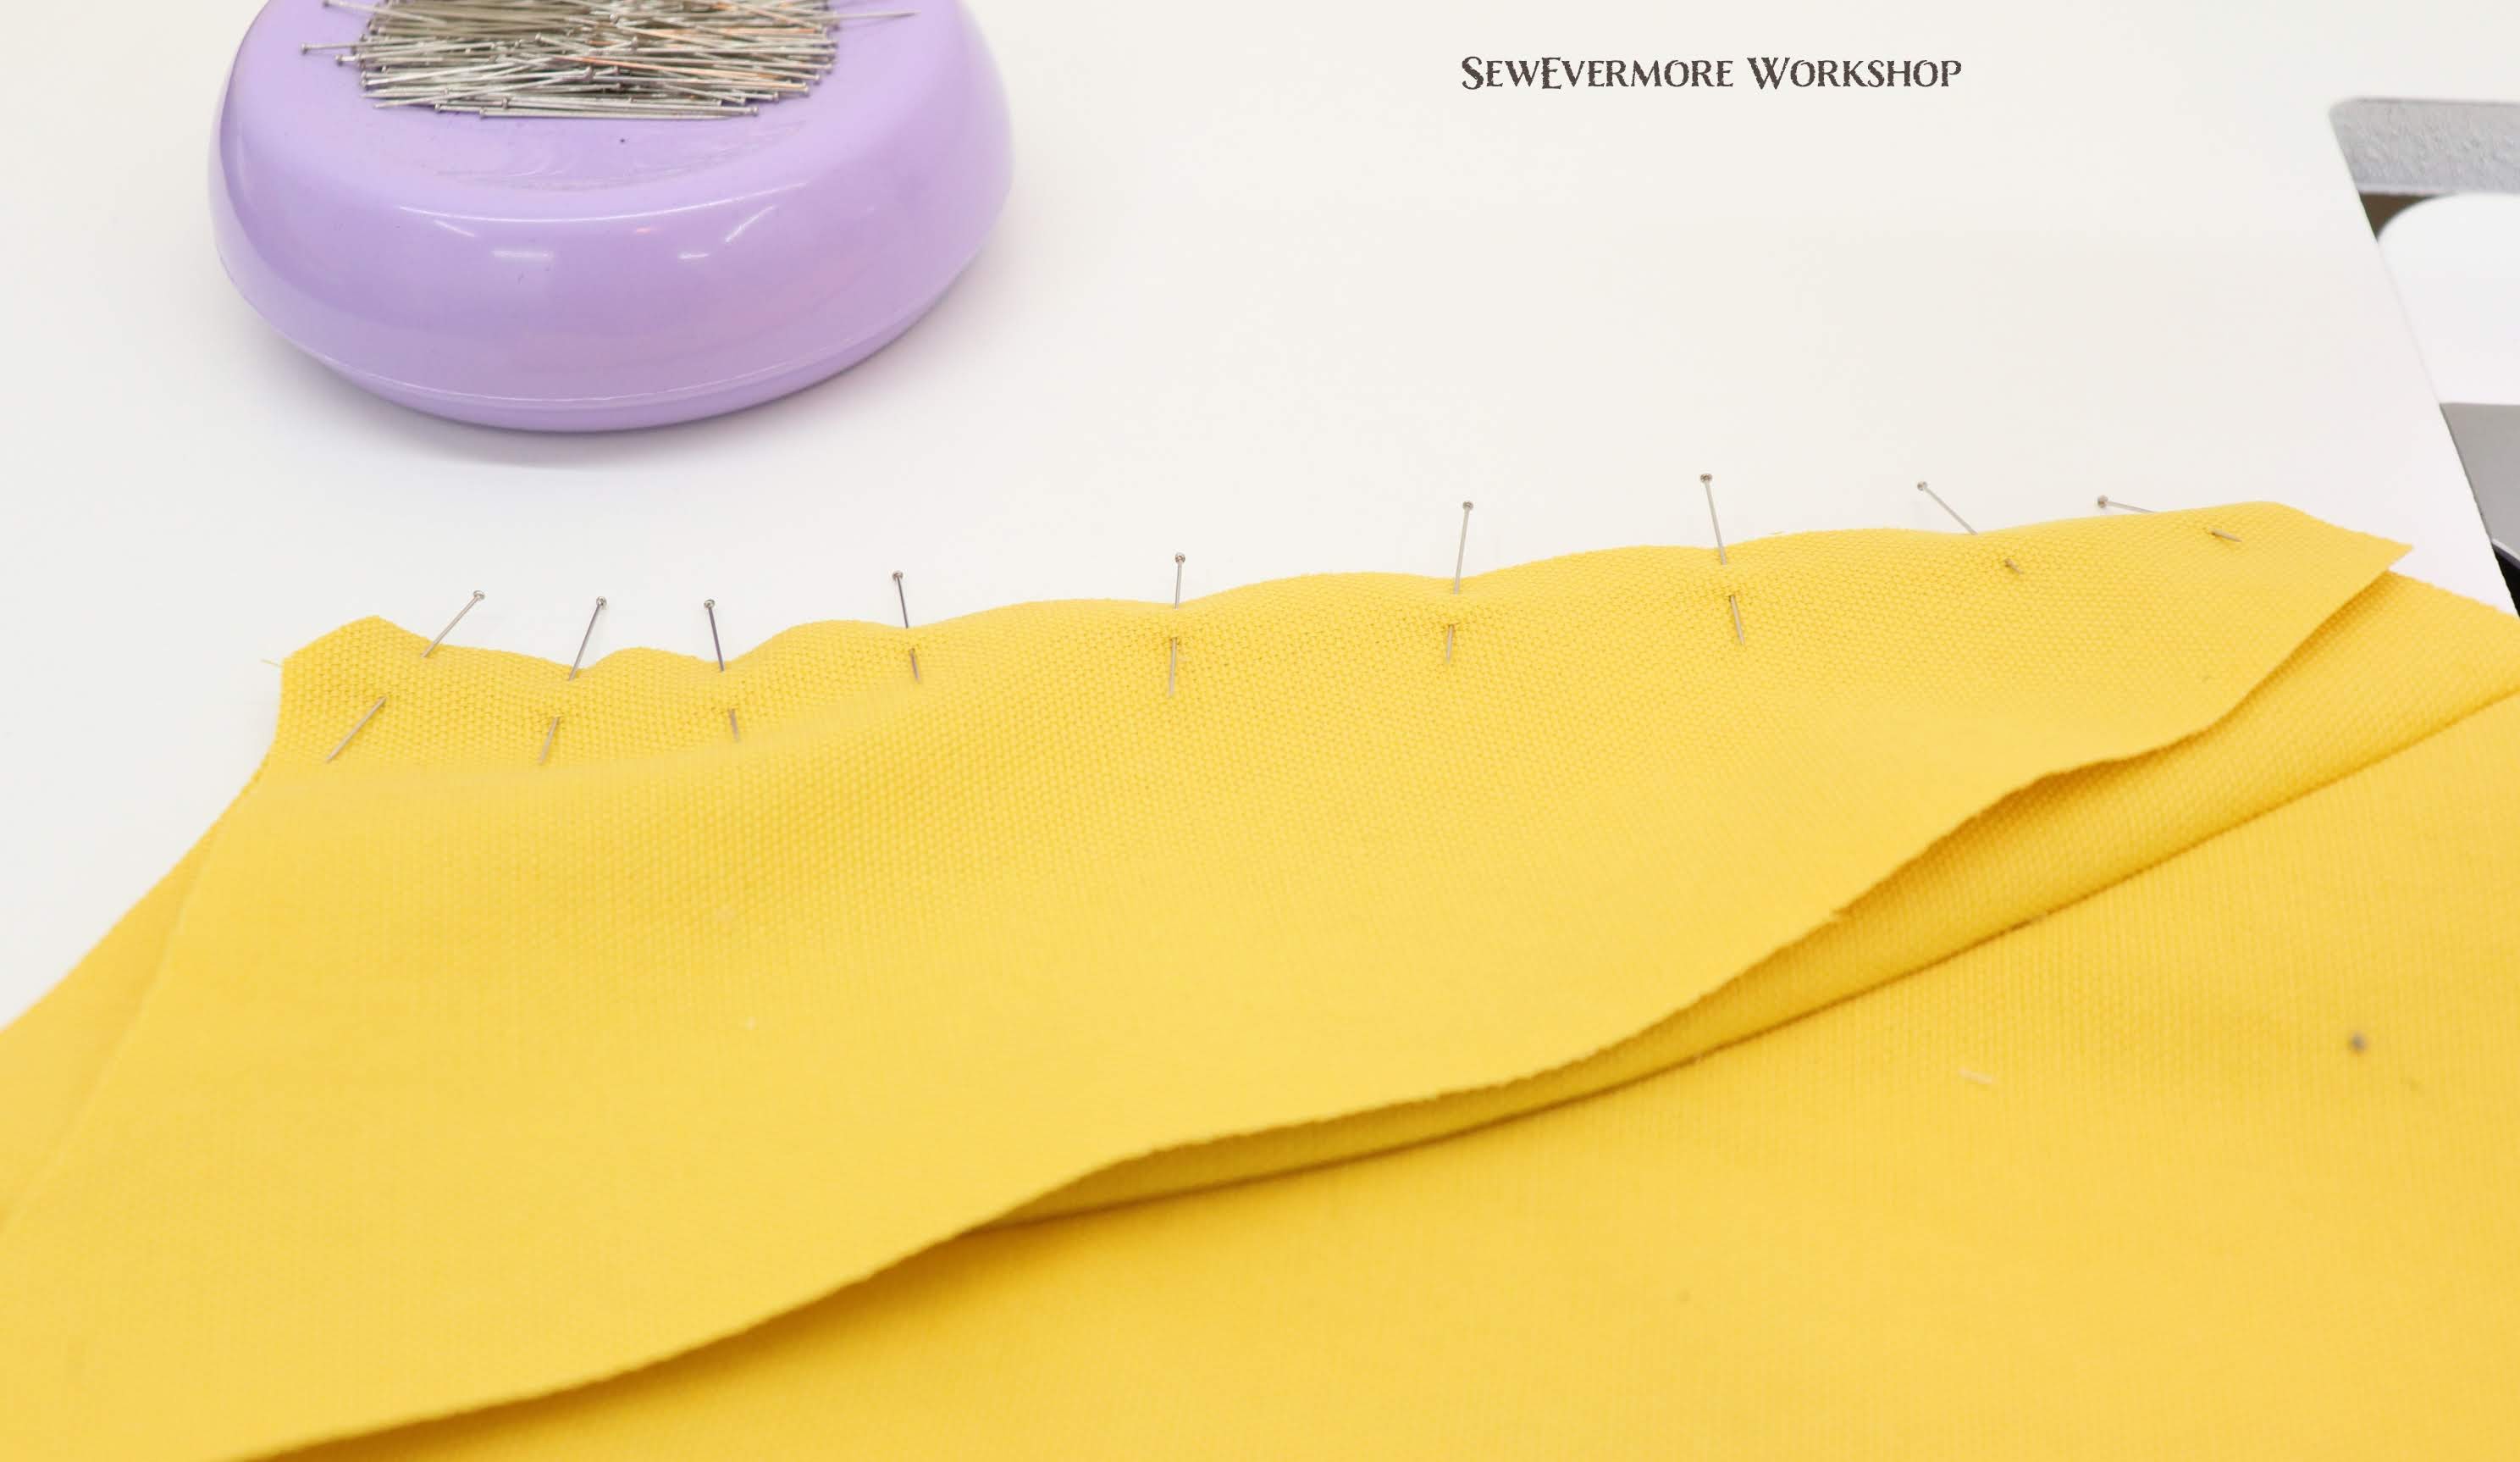
Here is a quick peak to give you an idea.

The image only shows a few of the triangles pinned in place. Eventually, all of these sections will be sewn together and then attached to the bottom overlay section from the first layer of the petticoat.
A quick note on design. I am using this petticoat to create a Belle dress inspired by the animated Beauty and the Beast film. As a result, my petticoat is constructed mainly from white organza. If you are making a replica of the Cinderella dress from the live action film, you may want to consider changing your fabric within the petticoat. To achieve that beautiful look with a wide range of blues you will want to use more than just a single color of fabric for the petticoat. Maybe change with each layer, or even within the layer. You could use different shades of blues, purples, and shimmer fabrics to create an amazing assortment of layers within your petticoat.
Godets
The size of the godets can vary based on the size of your petticoat. I decided to make my triangular sections 18 inches tall with 12 inch ruffles. I plan to use 12 godets sections in layer 2. Here was my plan.
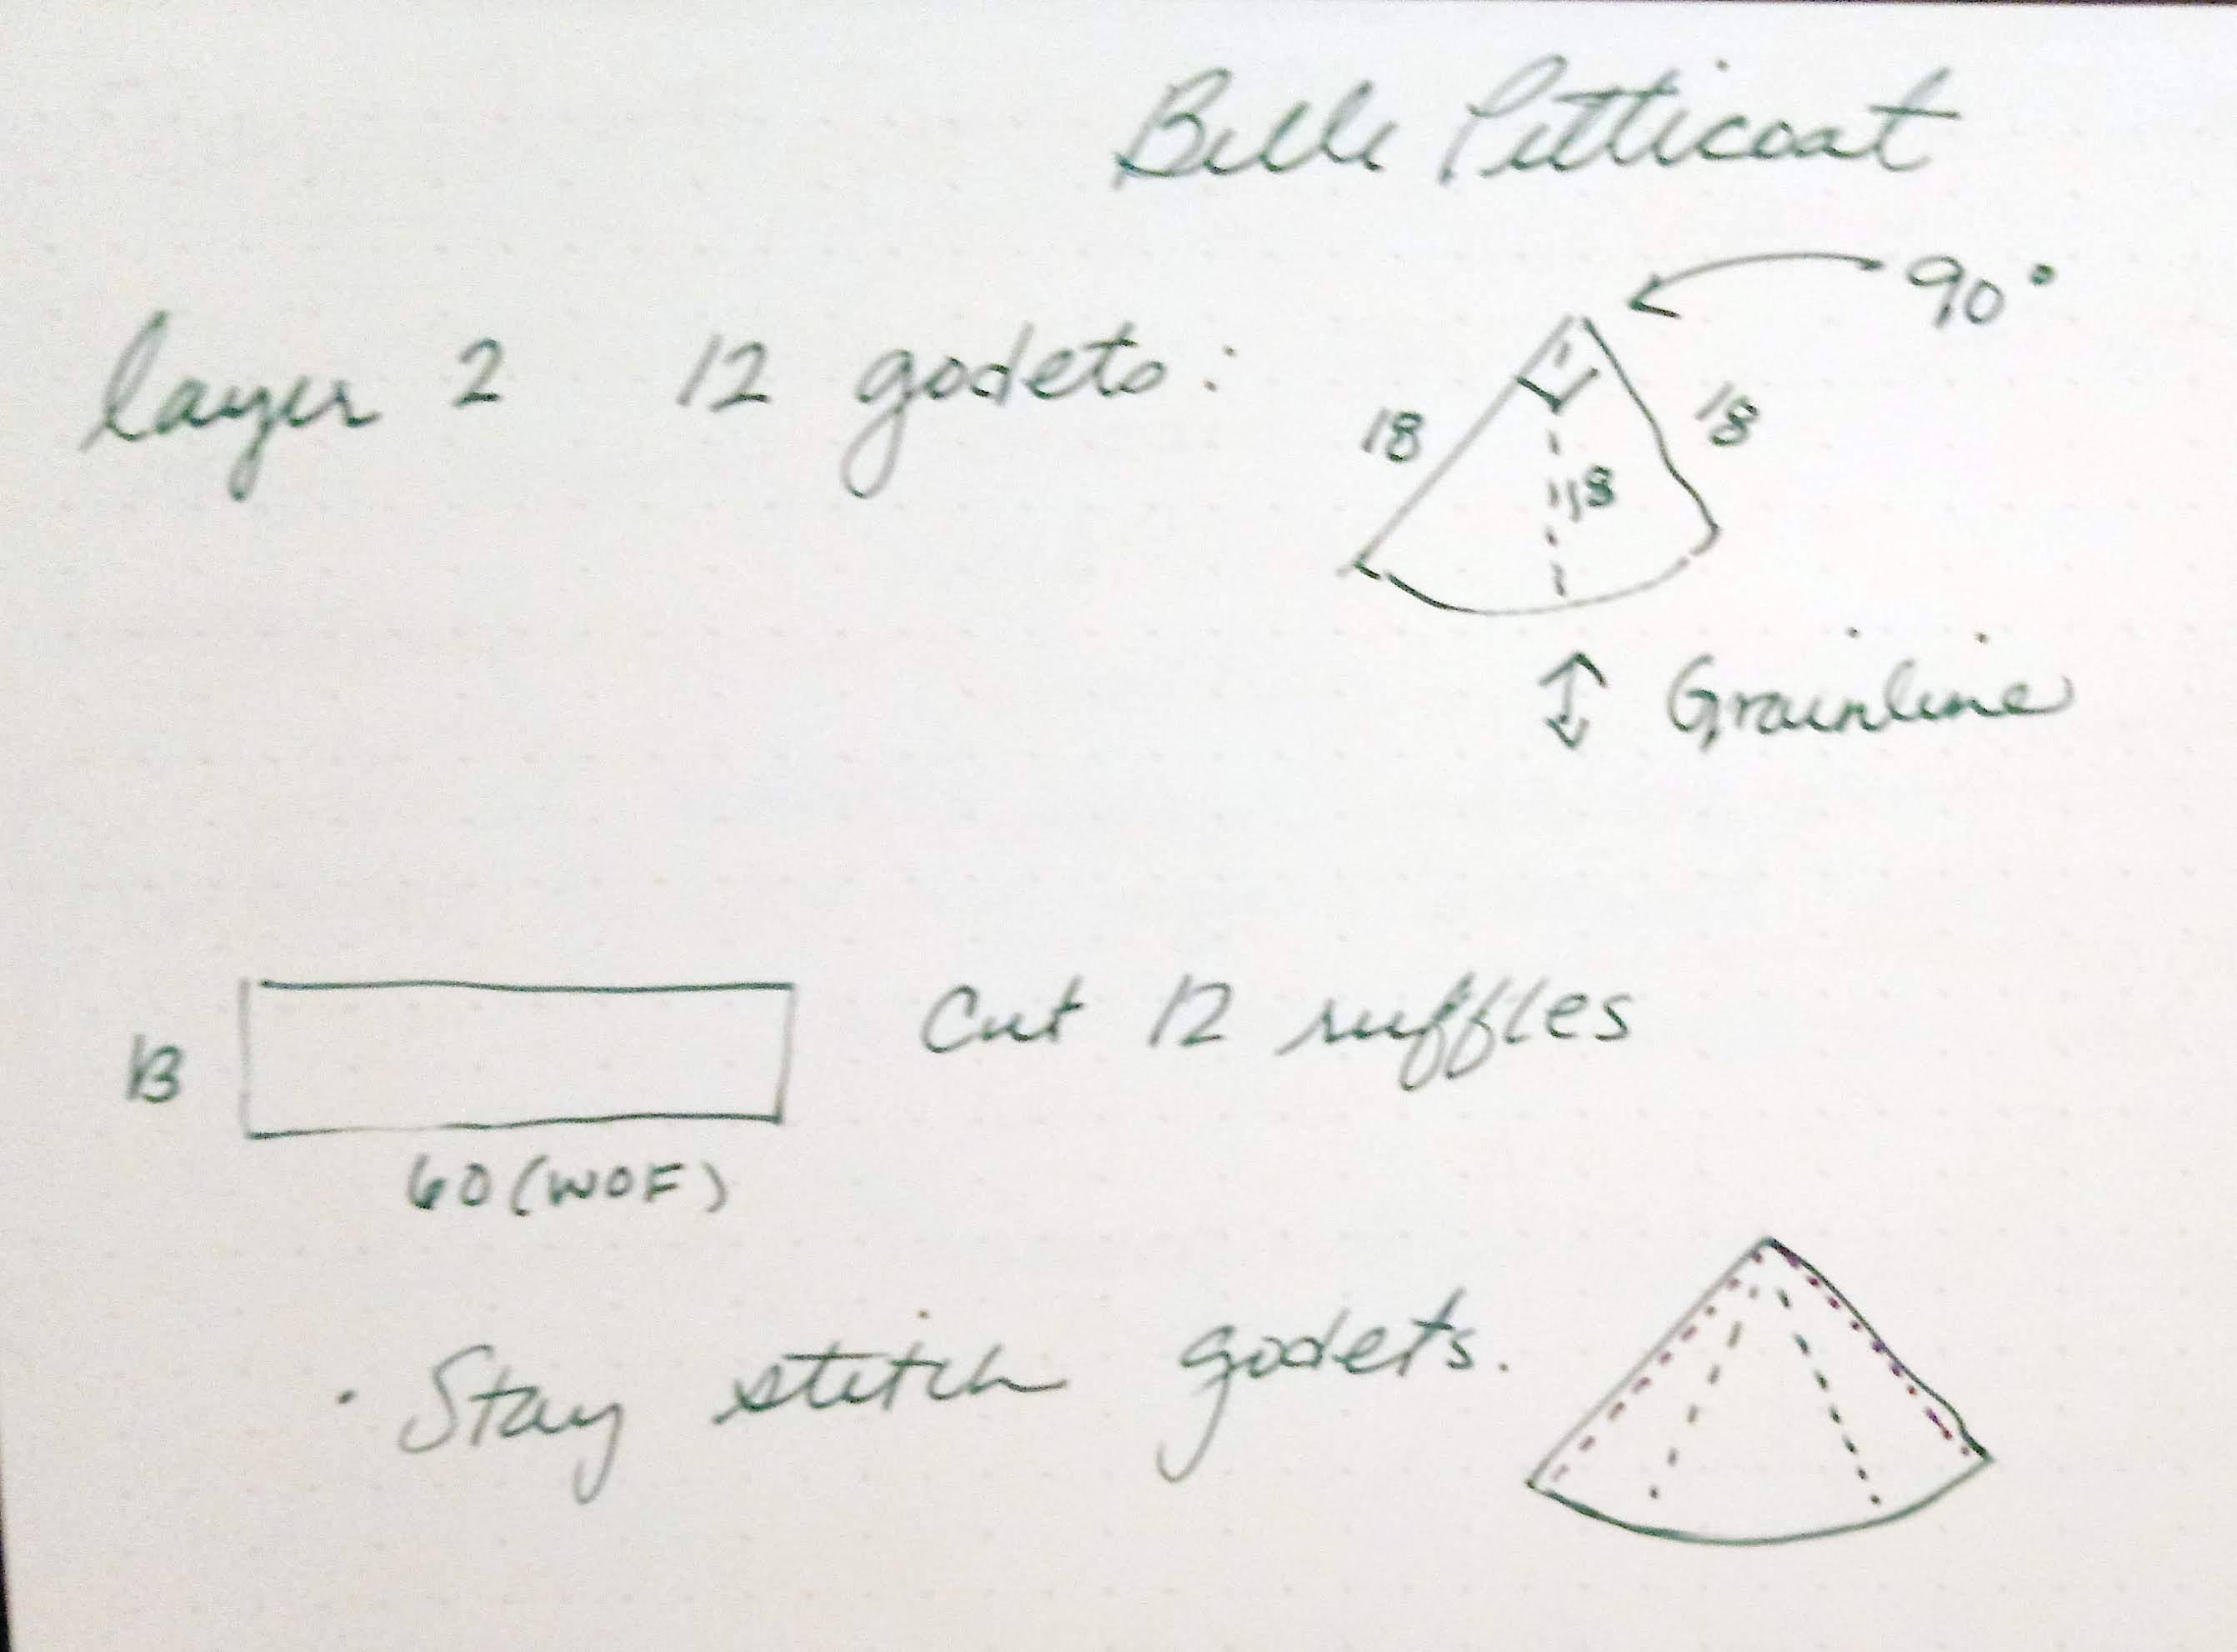
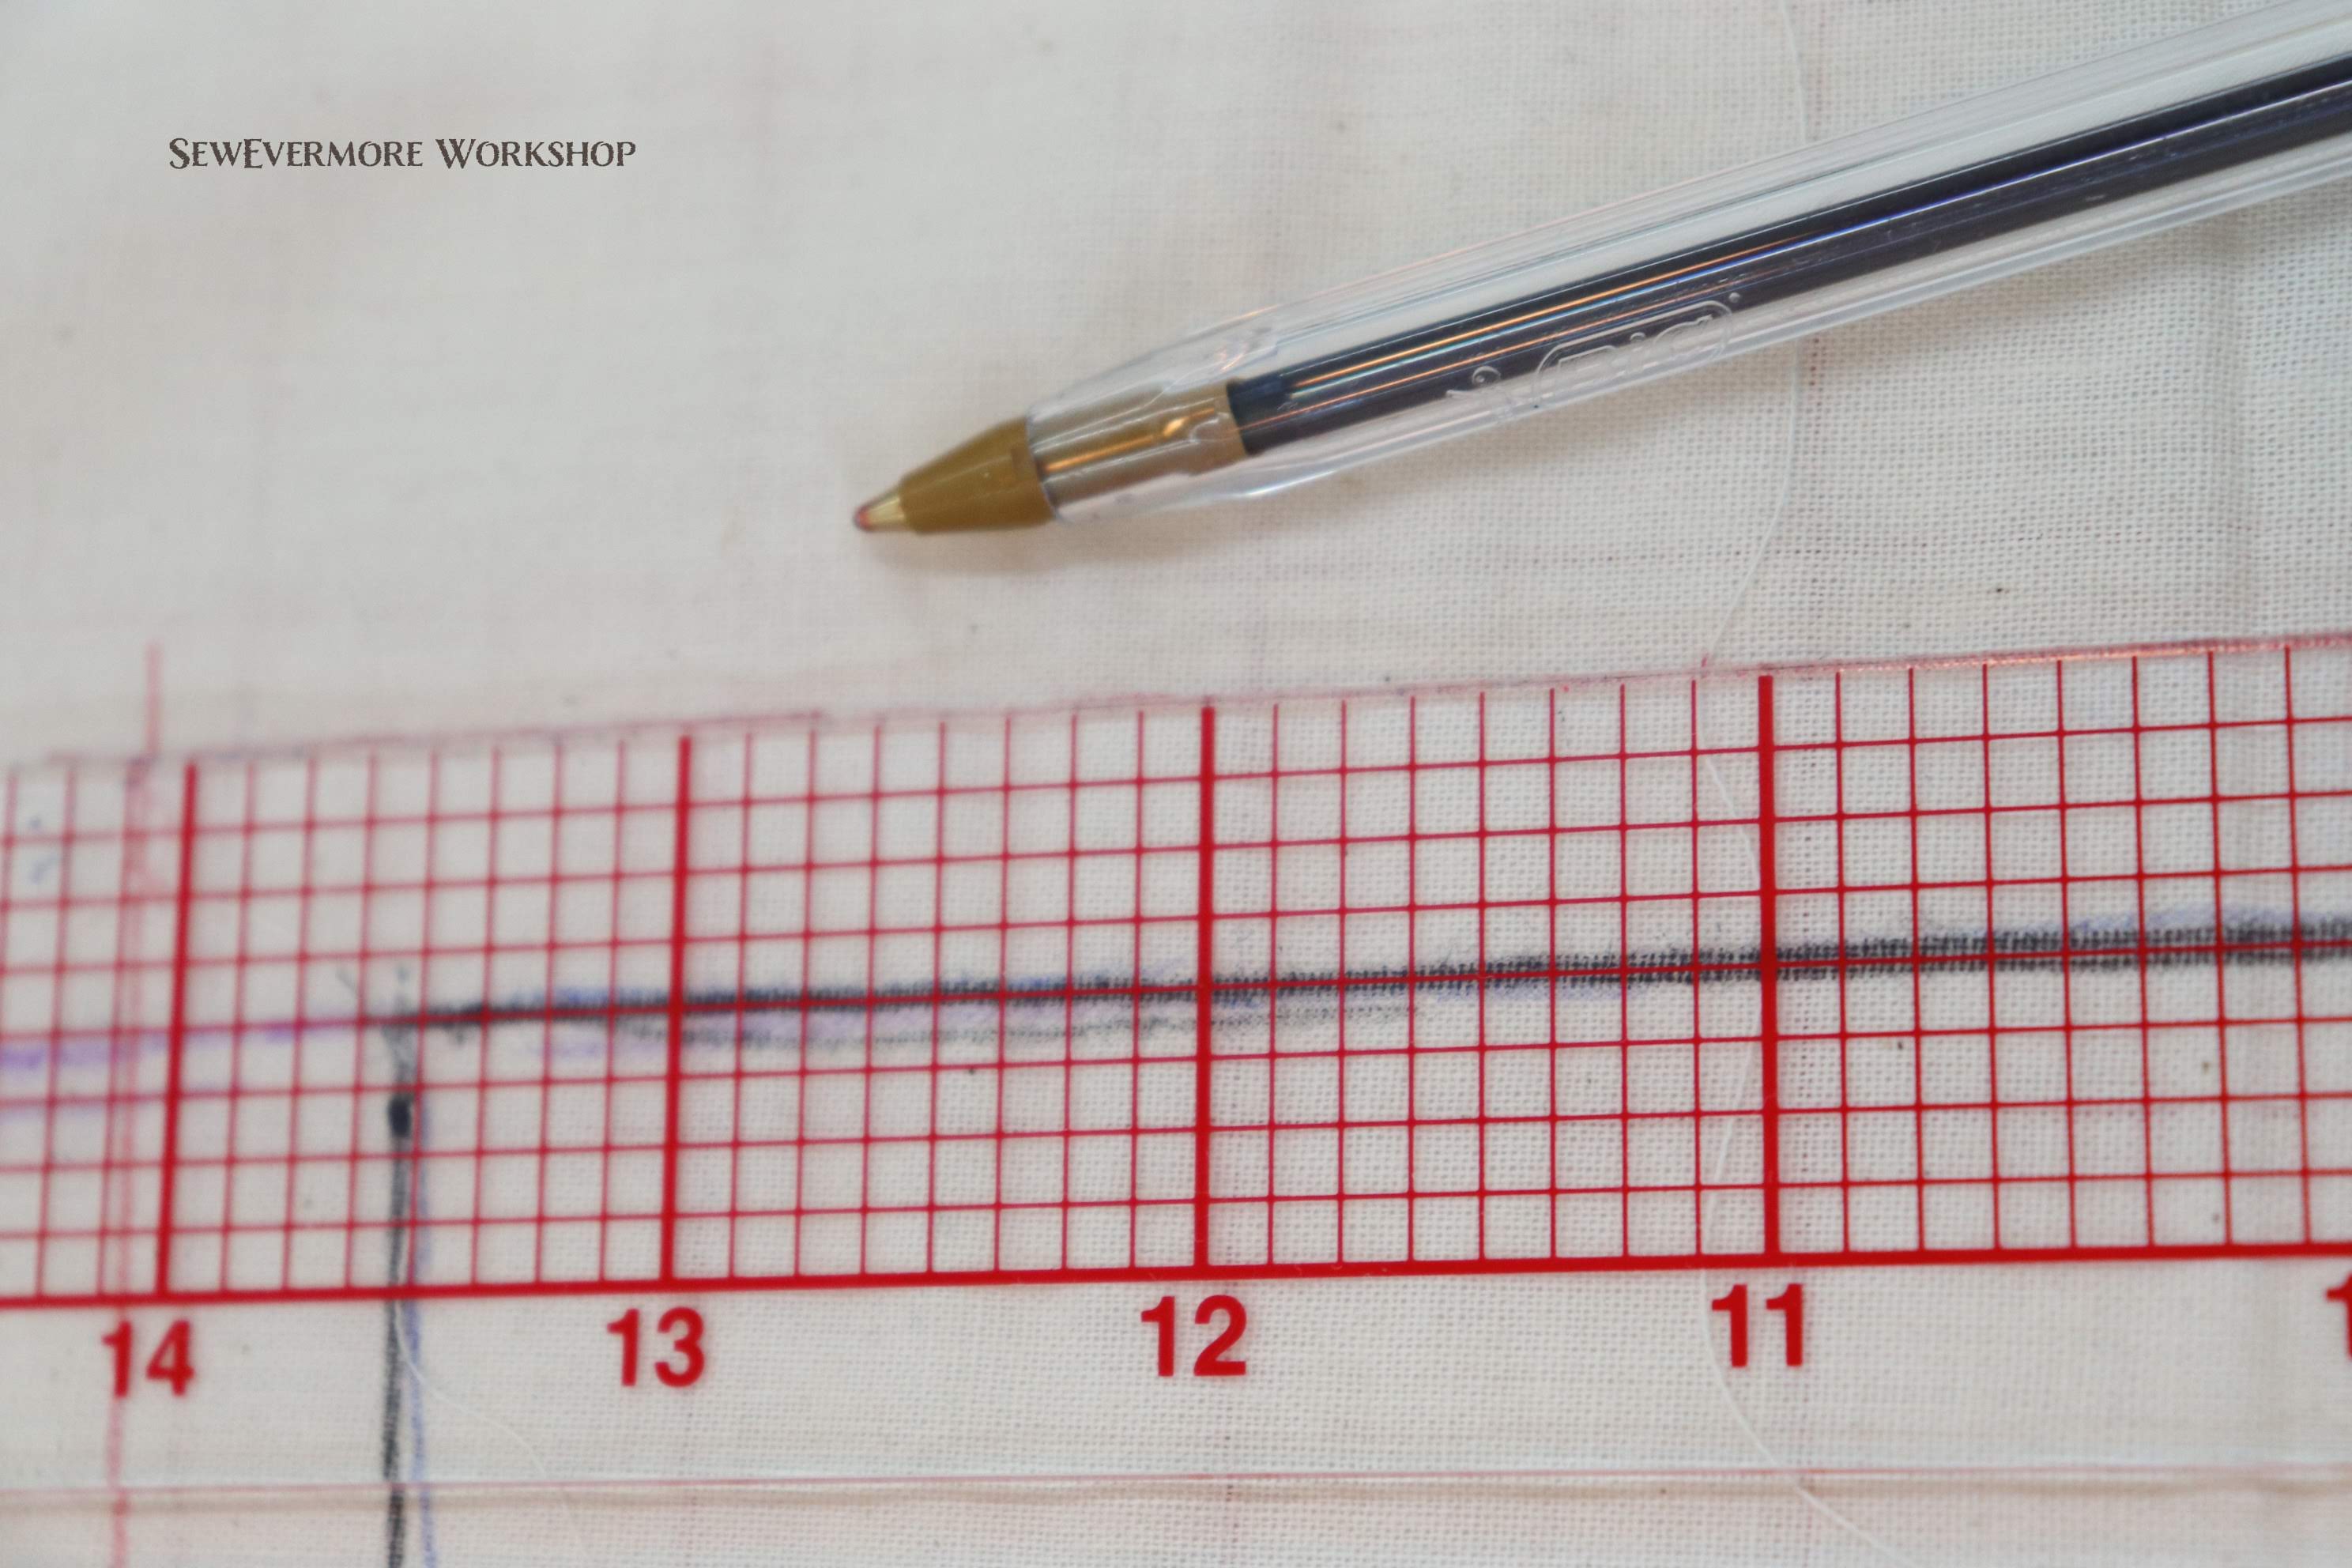
Next, I went to work making the pattern for the godets. Using Swedish Tracing Paper and my handy 6 x 24 acrylic ruler on top of my cutting mat, I created a right angle along the edge and marked 18 inches from that point both horizontally and vertically.
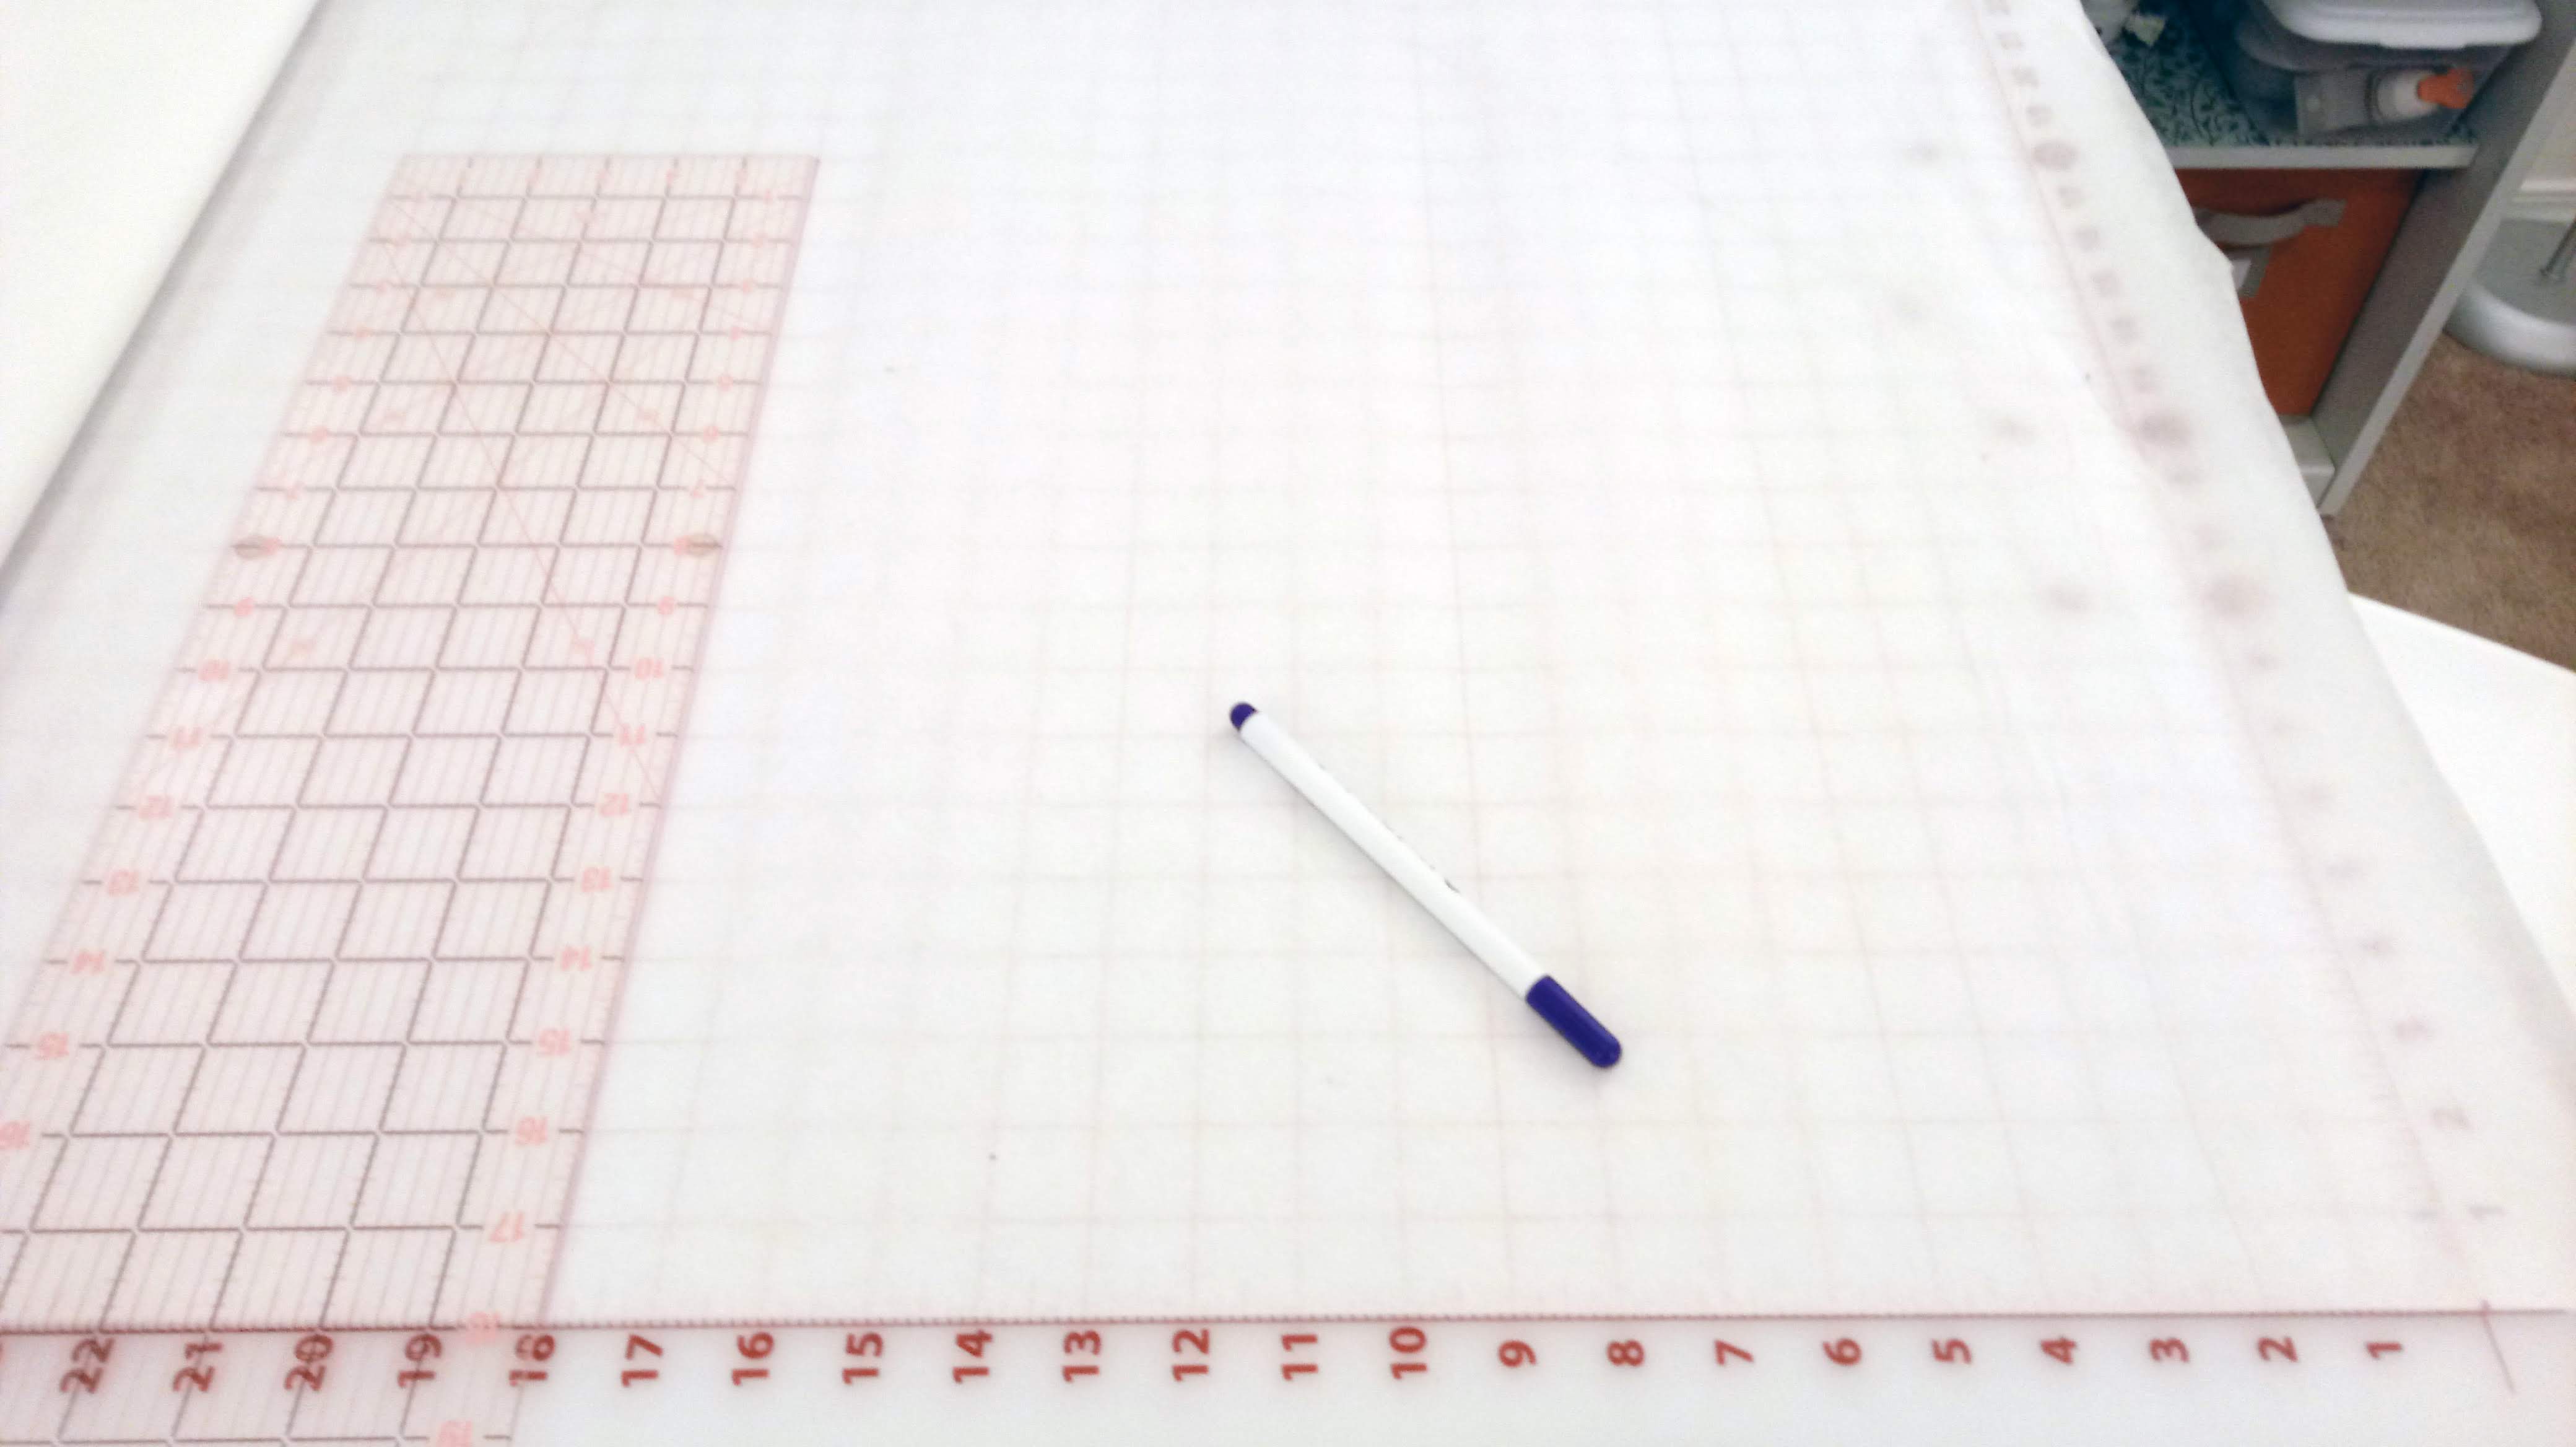
Next I angled the ruler from that corner (the right angle), measuring 18 inches, creating a series of dots from one end point to the other.

You can see my dots a little more clearly here.

I connect the dots to create the curved hem and cut out the pattern.

I used my pattern piece and cut out 12 triangular godets from my fabric.

I also cut out 12 rectangles, 13 inches by the width of fabric (≈ 60 in).

Altogether, the second layer of the petticoat took about 7.5 yards of fabric.
Detail Summary:
Layer 2
Fabric used: Casa Organza White. 58 inch width.
Purchased: $1.27 per yard. Joann+ (Had to purchase 40+ yards for this price)
Amount of fabric used: 7.5 yards
Number of Godets: 12
Godet Radius: 18 inches
Length of Bottom Curve: ≈ 30 inches
Ruffle: Cut 12 Rectangles, 13in x Width of Fabric. One rectangle used per ruffle.
Next time, I will explain how I sewed the godets!
- Petticoat Layer 2: Sewing Godets
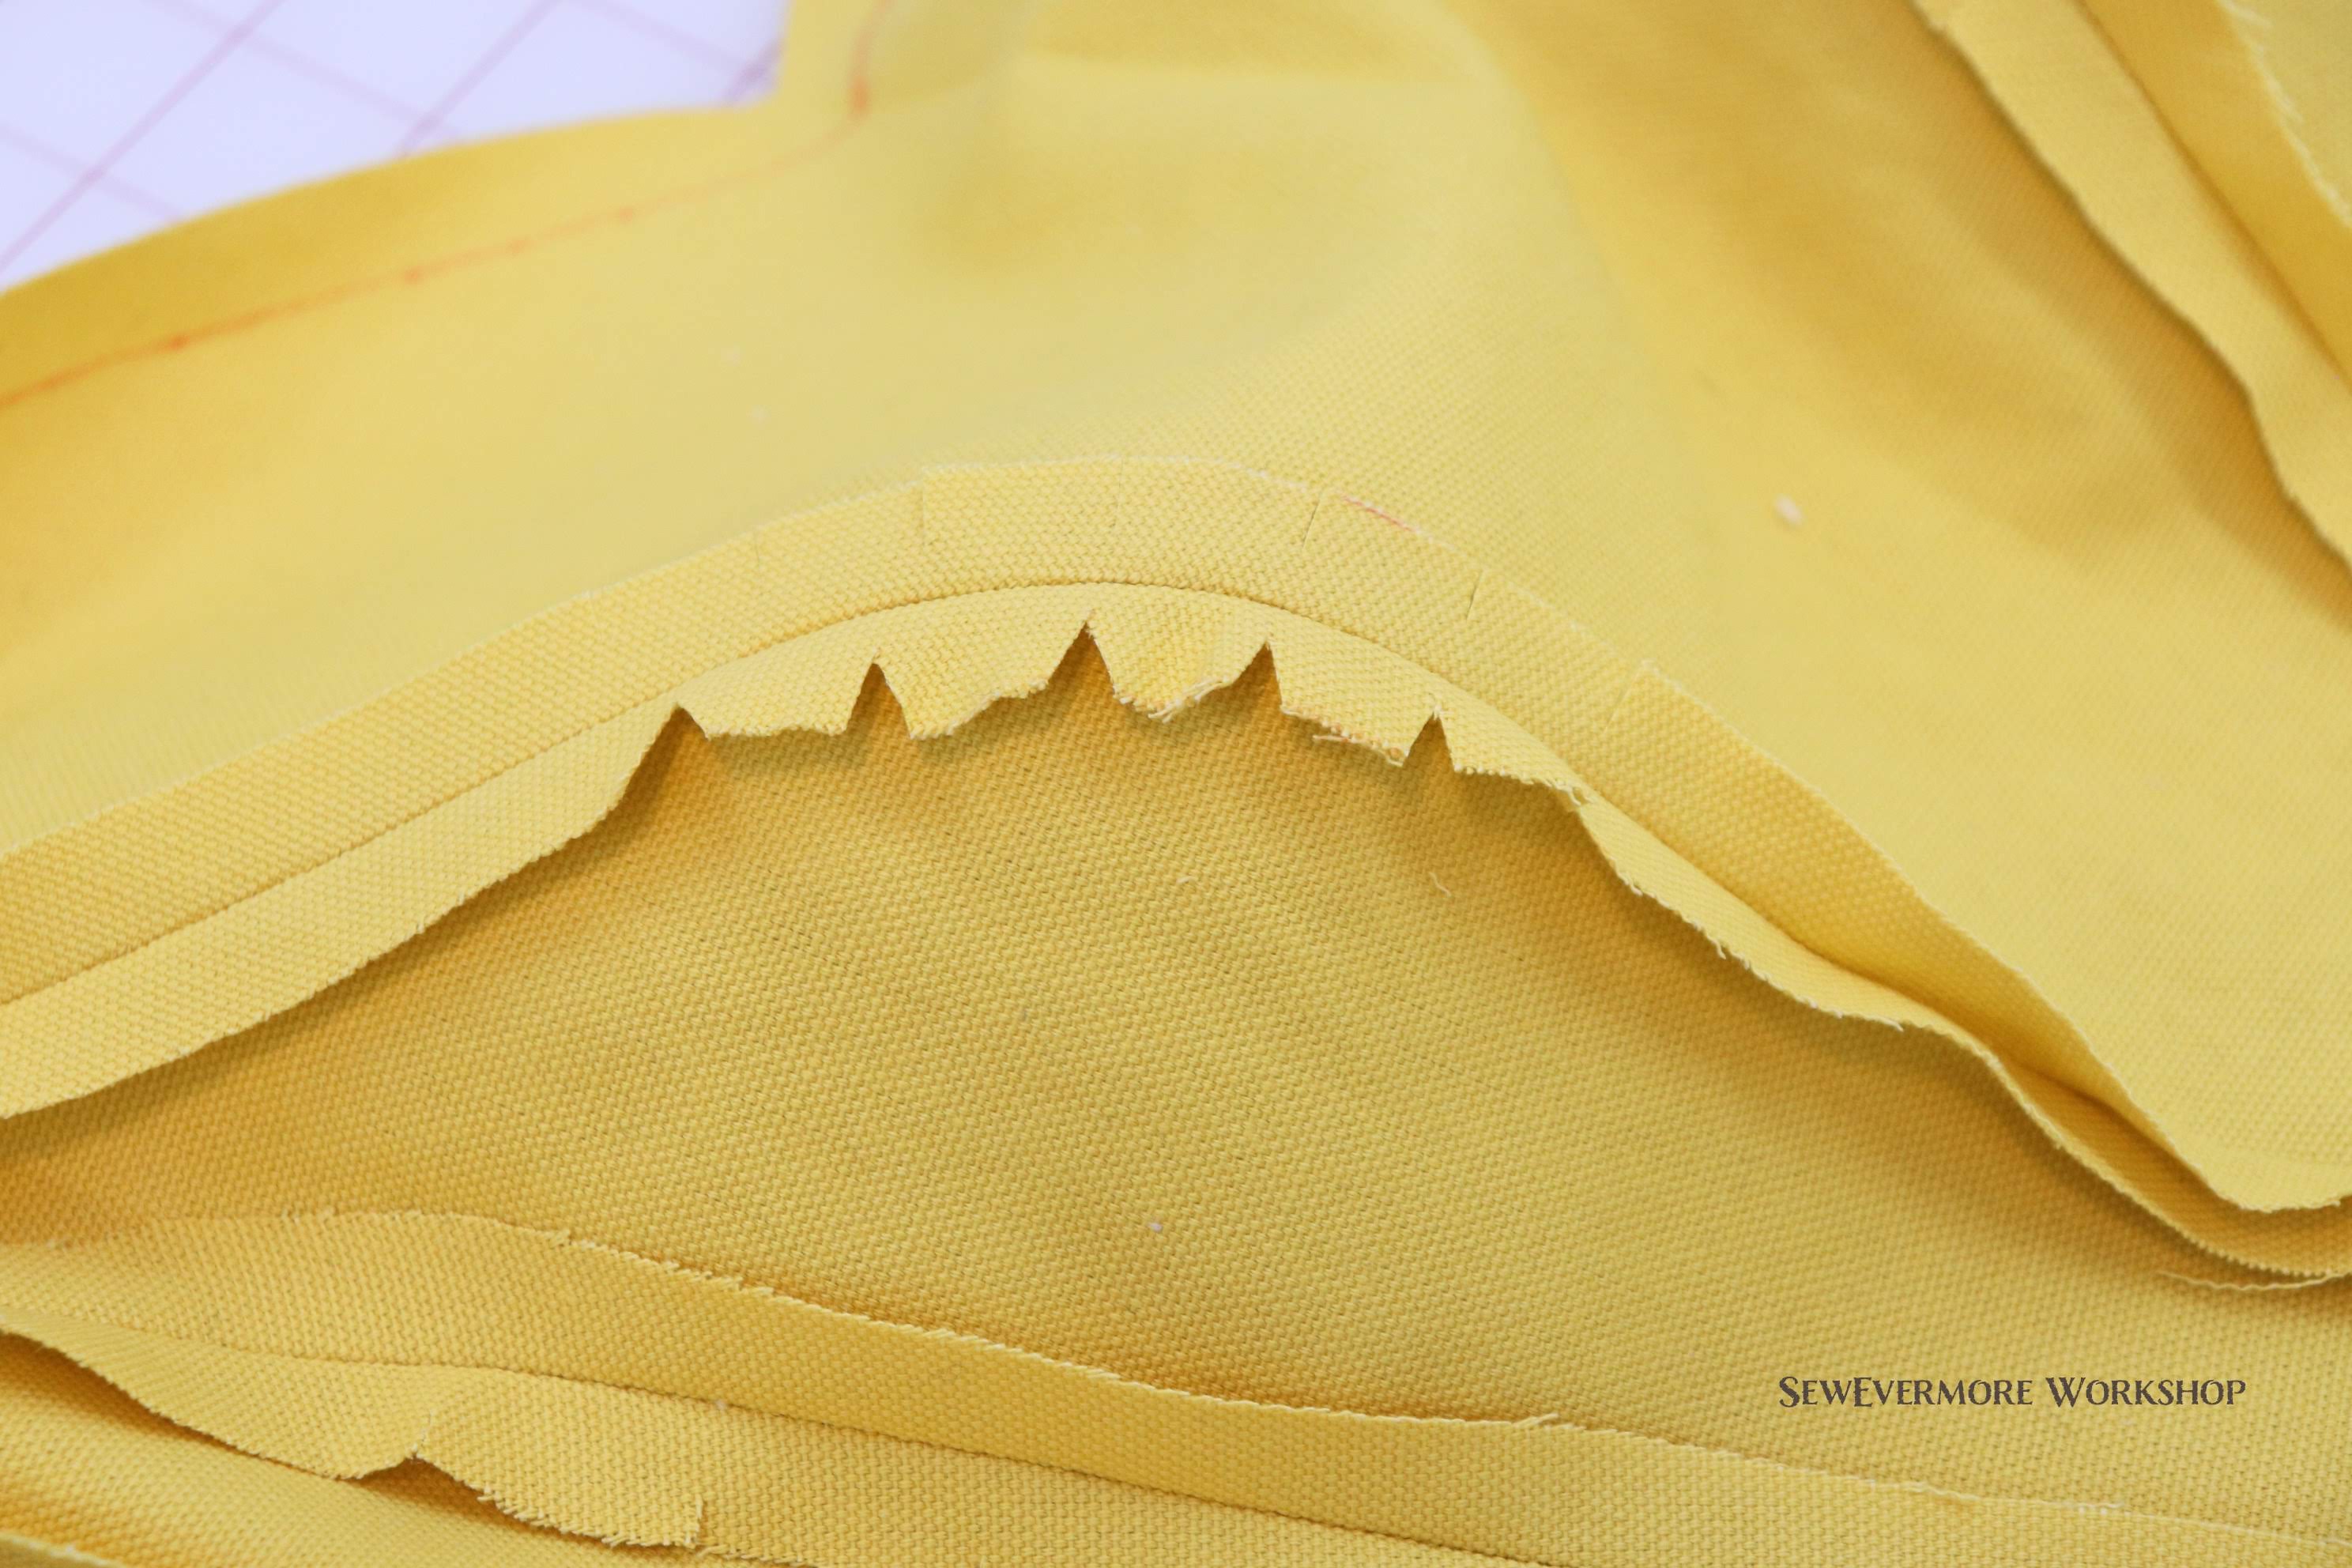
Now that the godets and ruffles have been cut out, it is time to sew them together. The first thing to do was to stay stitch the godets. As Traybuff mentioned in one of her youtube videos, there can be quite a bit of stretch along the bias, and I didn’t want to have to worry about the petticoat falling out of shape. As a result, I decided to stay stitch four lines on the godets.
I stay stitched using a 2.5 stitch length on each straight edge. I also stitched two more lines at approximately 22.5 degrees and 67.5 degrees in relation to the 90 degree corner. My brain works in math terms, but if you don’t speak math, imagine three lines extending from the corner that would separate the panel into quarters. Stitch on the first and third lines, not the halfway point. I didn’t measure this, I just estimate while sewing.

The stay stitching seemed to work well, and when I serged later, it definitely helped the godets hold their shape and prevent excessive ruffling.
Up next was gathering the ruffle. I did the gathering on the serger. I am not terribly experienced with sergers, so it took quite a bit of playing to find settings that worked for my fabric. I have found it very helpful to keep a Serger Setting Log. This catalogs all of the settings I use for different fabrics and functions. Tracking the information is so beneficial. Now, once I have tested and retested fabric to find the perfect feed, tension, and stitch length, I don’t have to do so again. I will be ready to go the next time I face a similar sewing challenge. Here is what my ruffles looked like after gathering.

Next I attached the godets to the ruffles on the serger. (I tried using a gathering foot to simultaneously gather the ruffles and attach them to the godets, but despite numerous attempts I just couldn’t get my serger to gather enough without gathering the godet as well. In the end, doing this process separately worked best for me.)
Finally, after attaching the ruffles I serged along the two straight sides to finish the raw edges.

The godets are now ready to be attached together!
- Petticoat Layer 2: Assembling the Godets
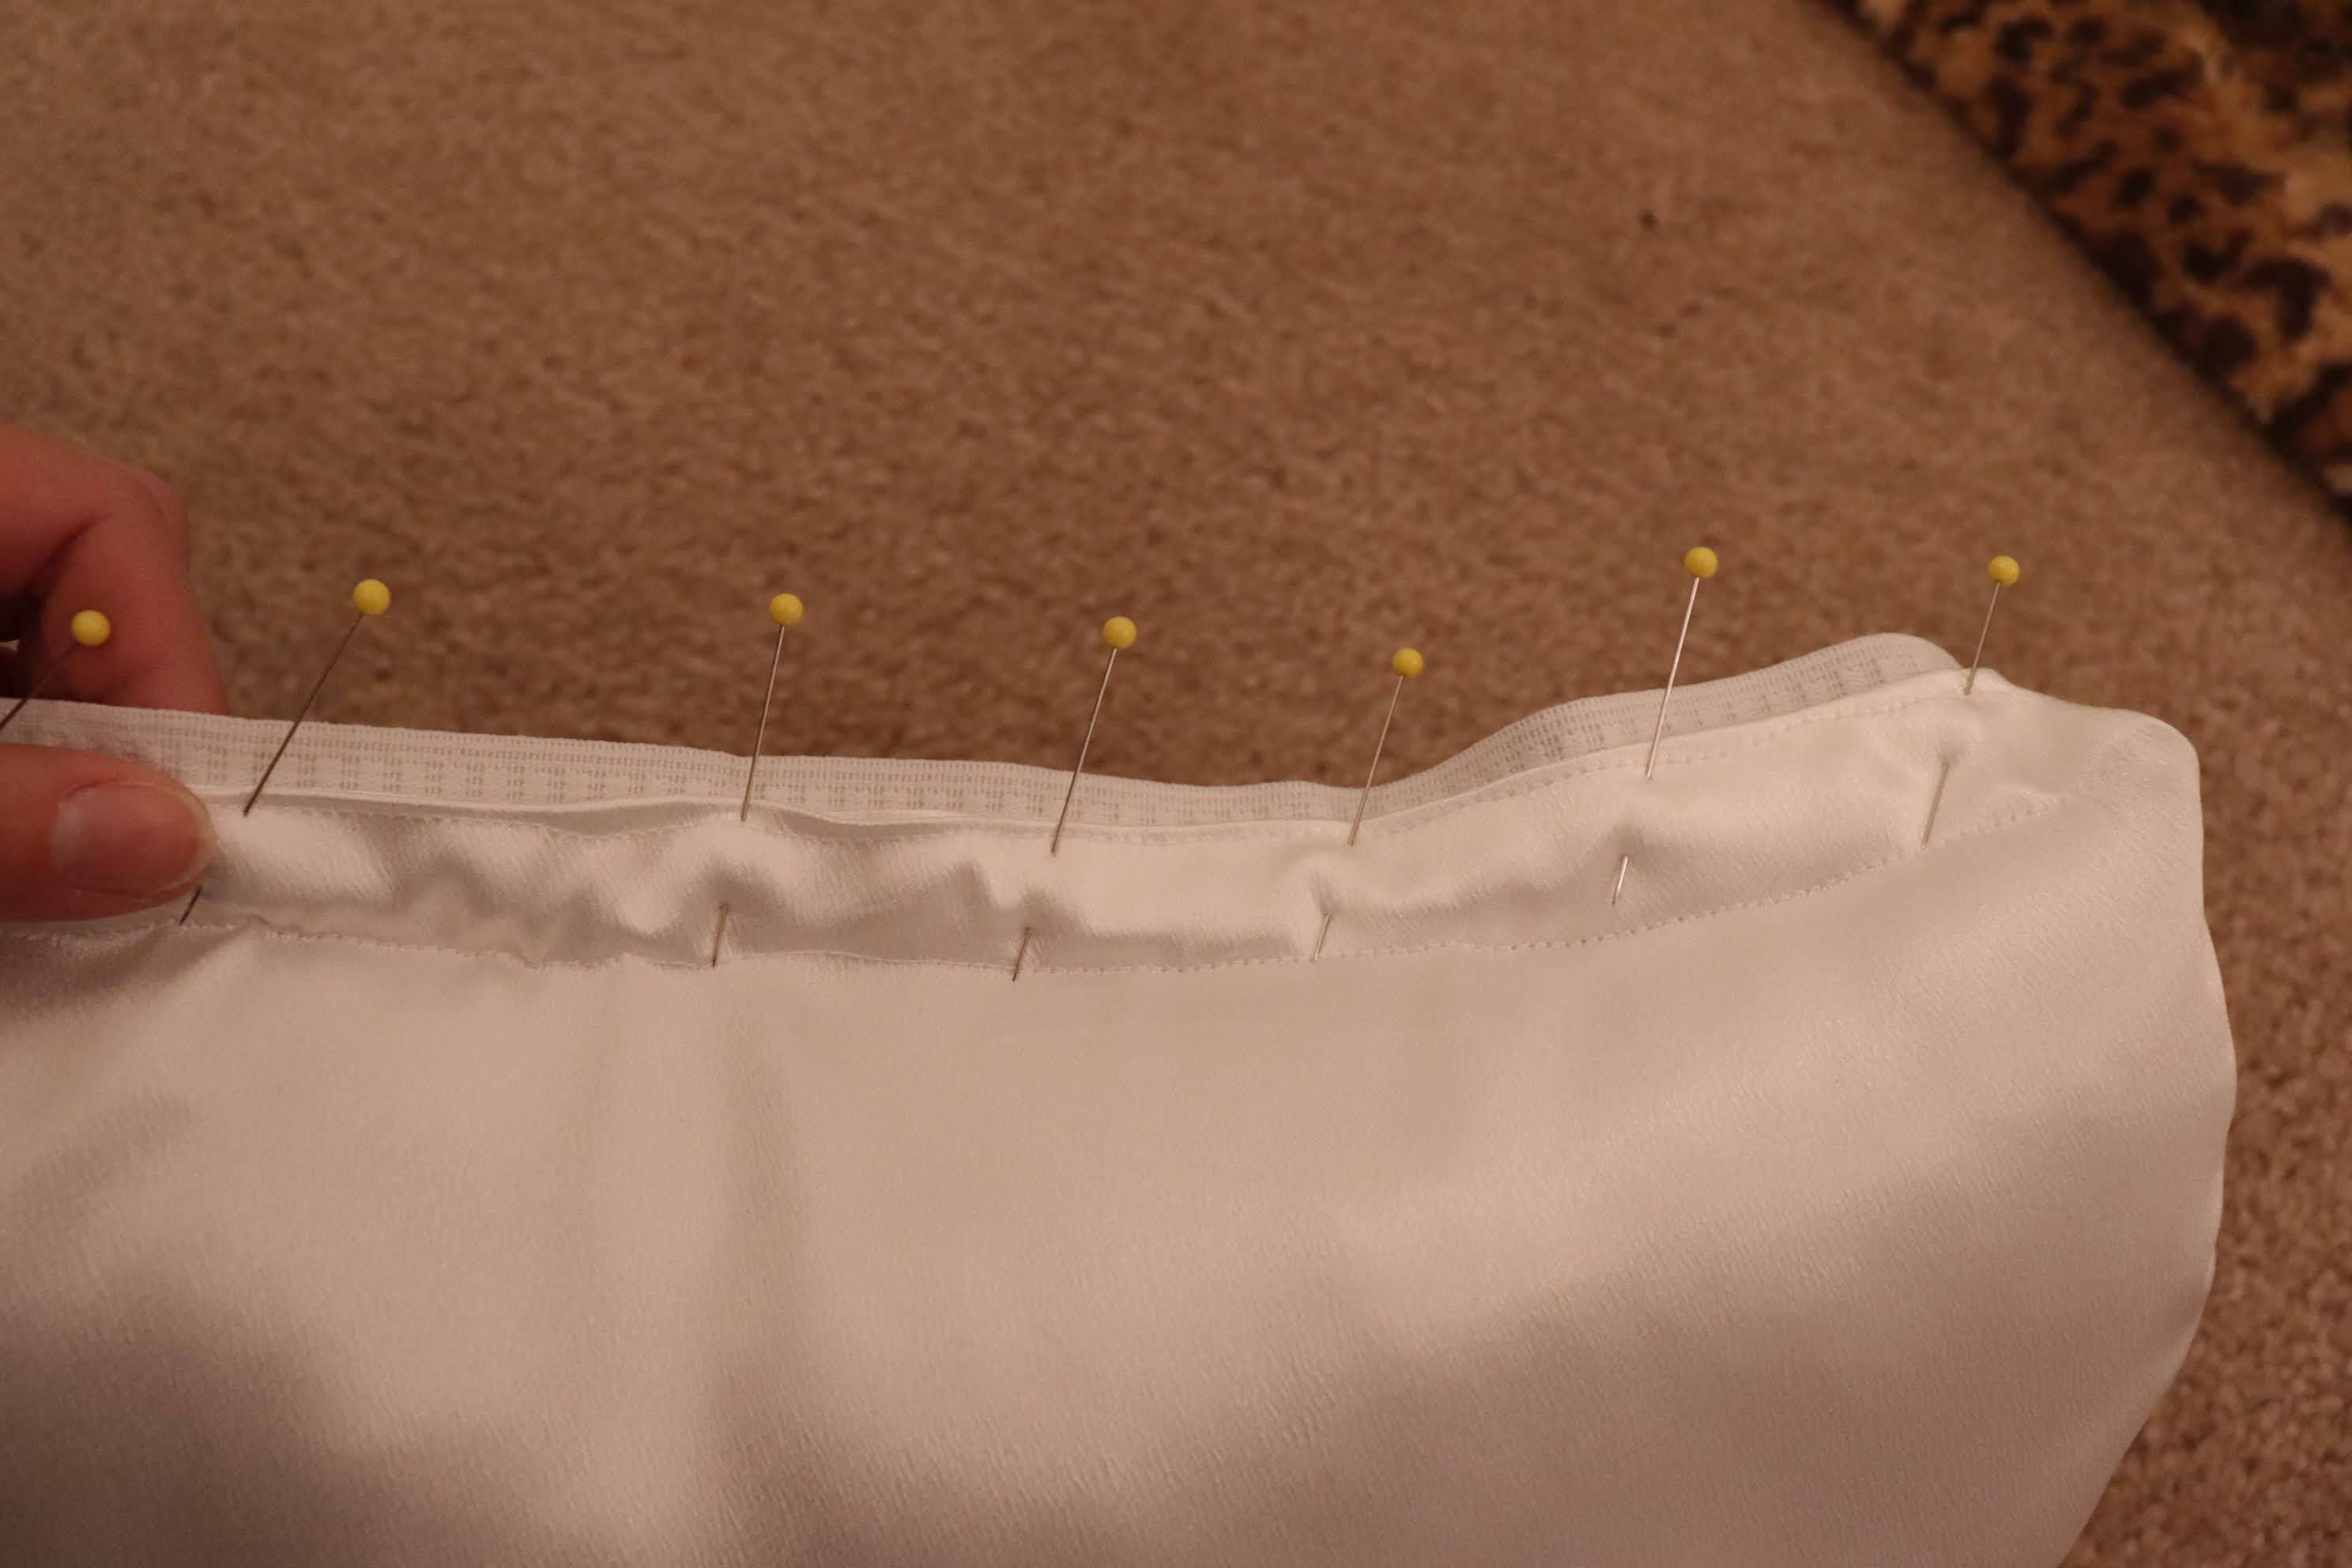
Once the godets were completed it was time to sew them together. This took a bit of planning. To determine where to sew the godets I needed to arrange them on my hoop.
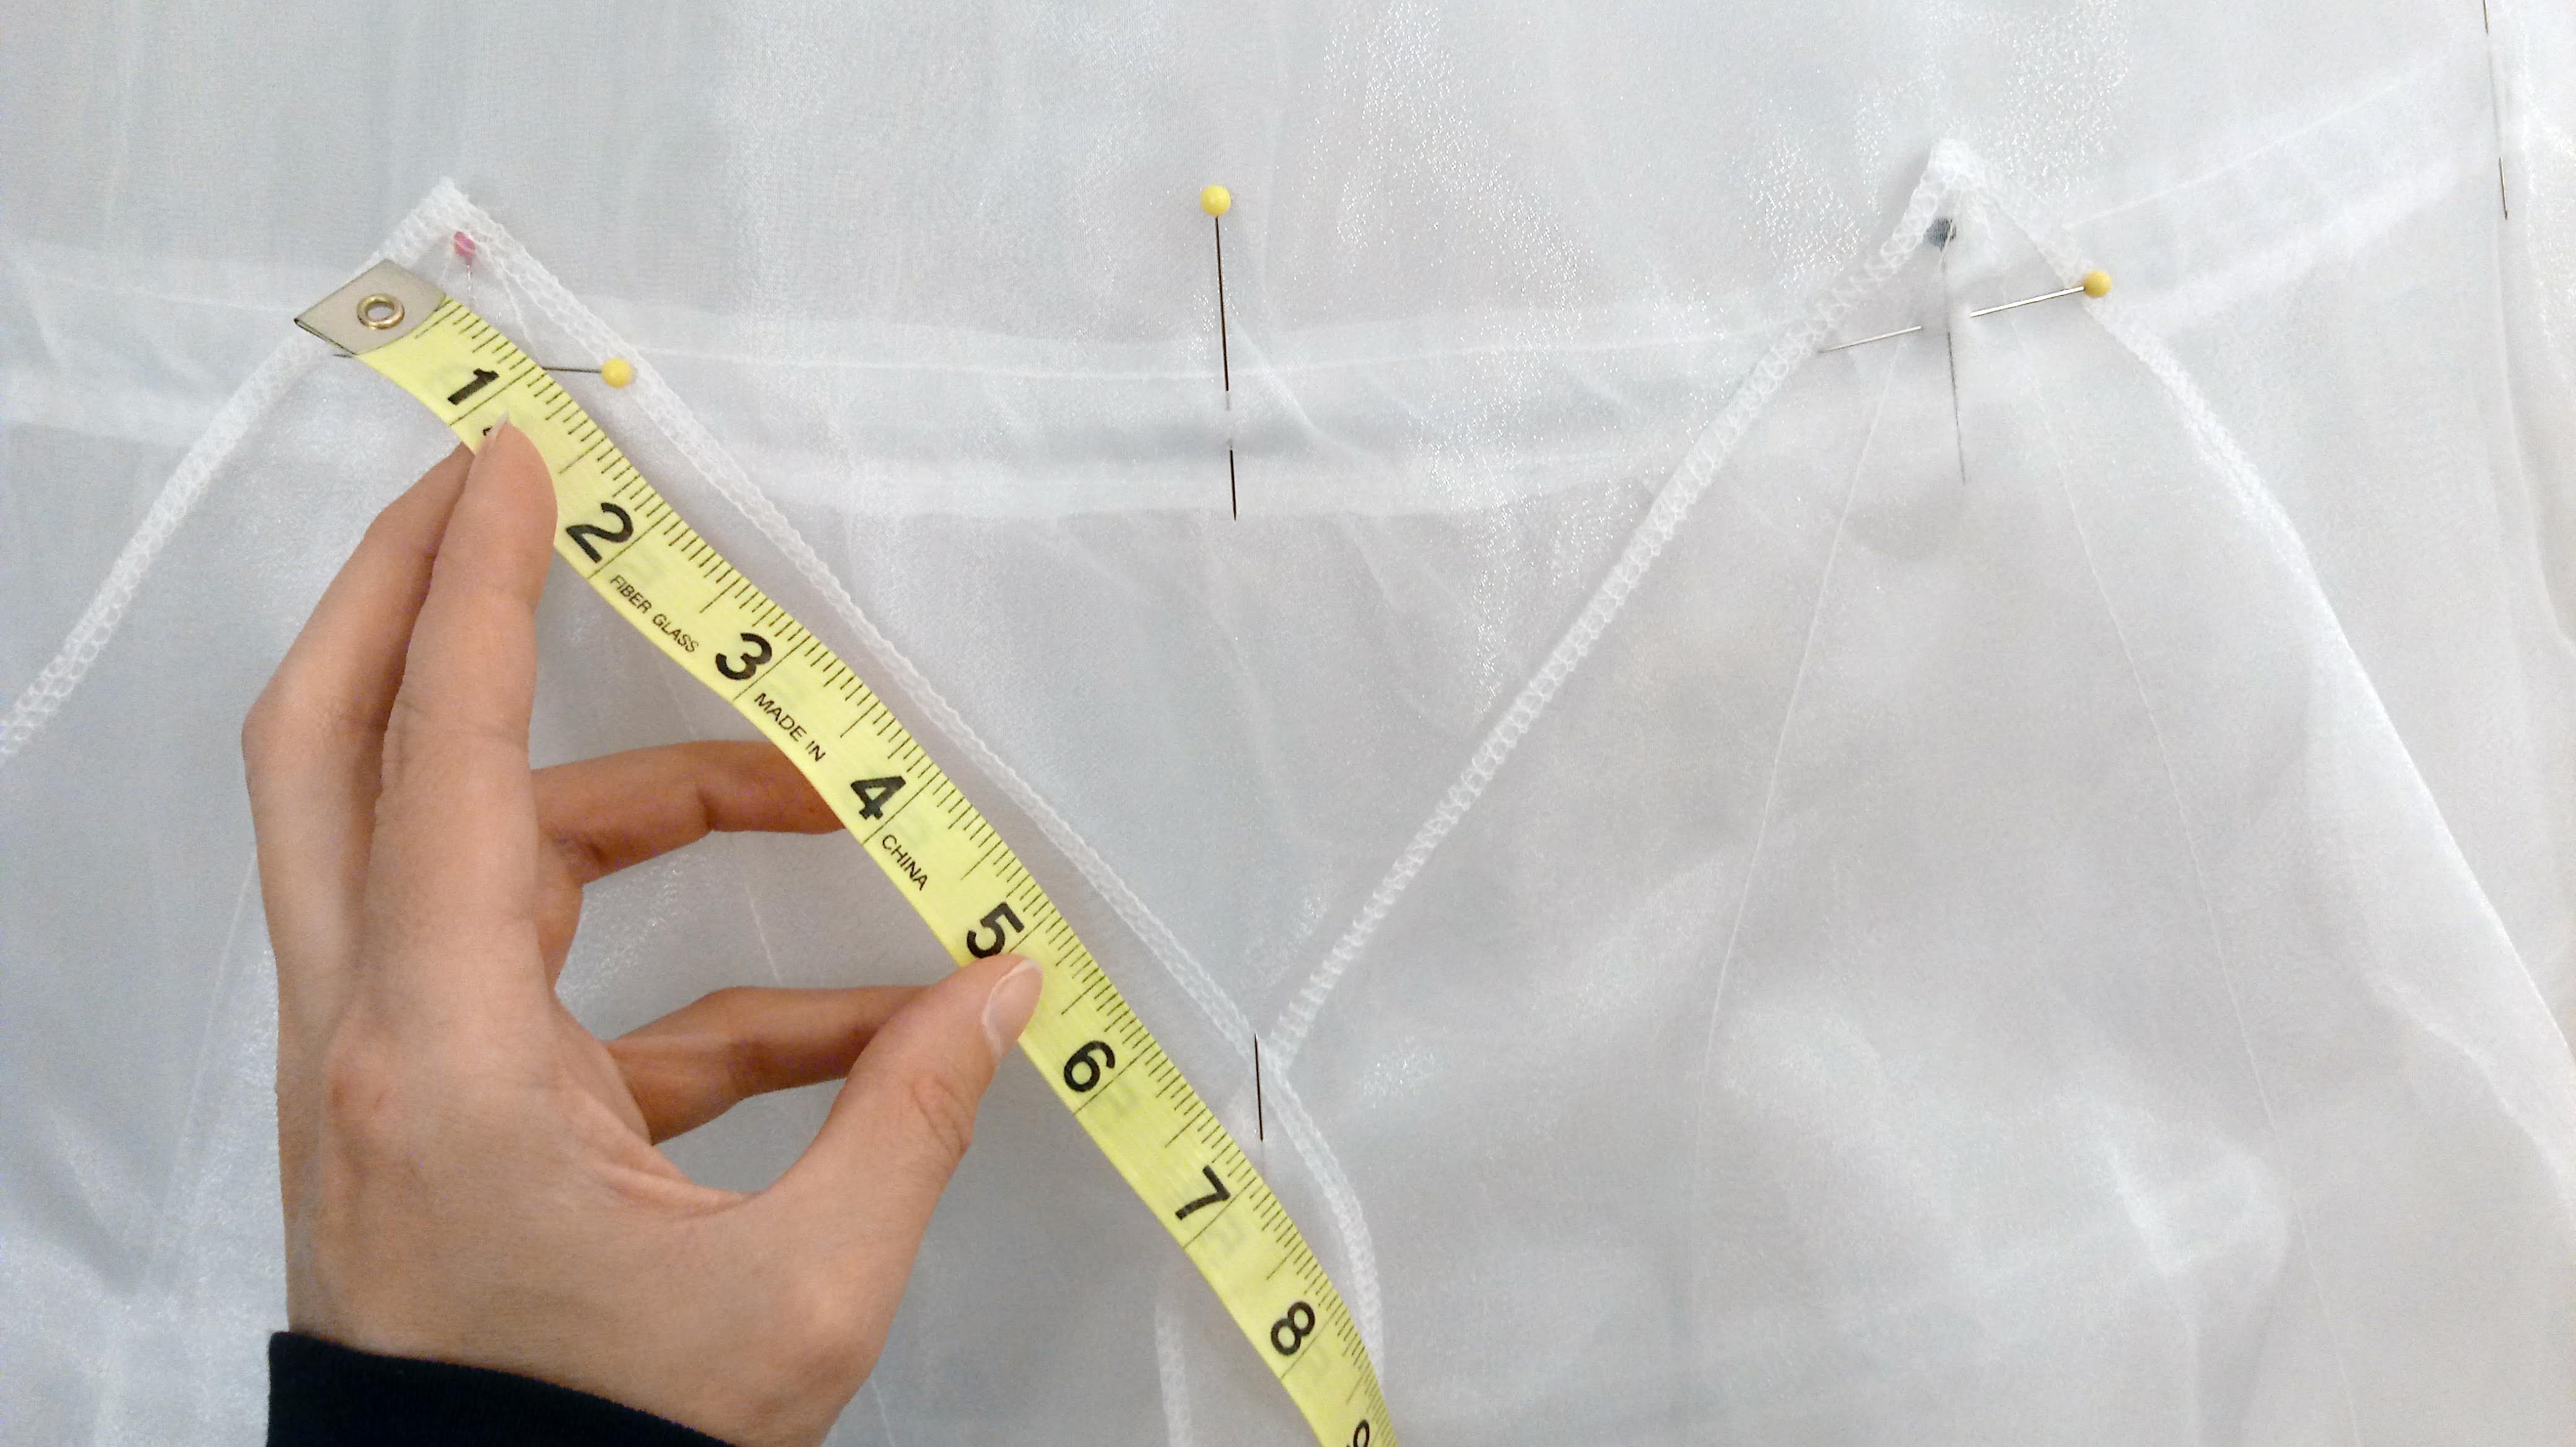
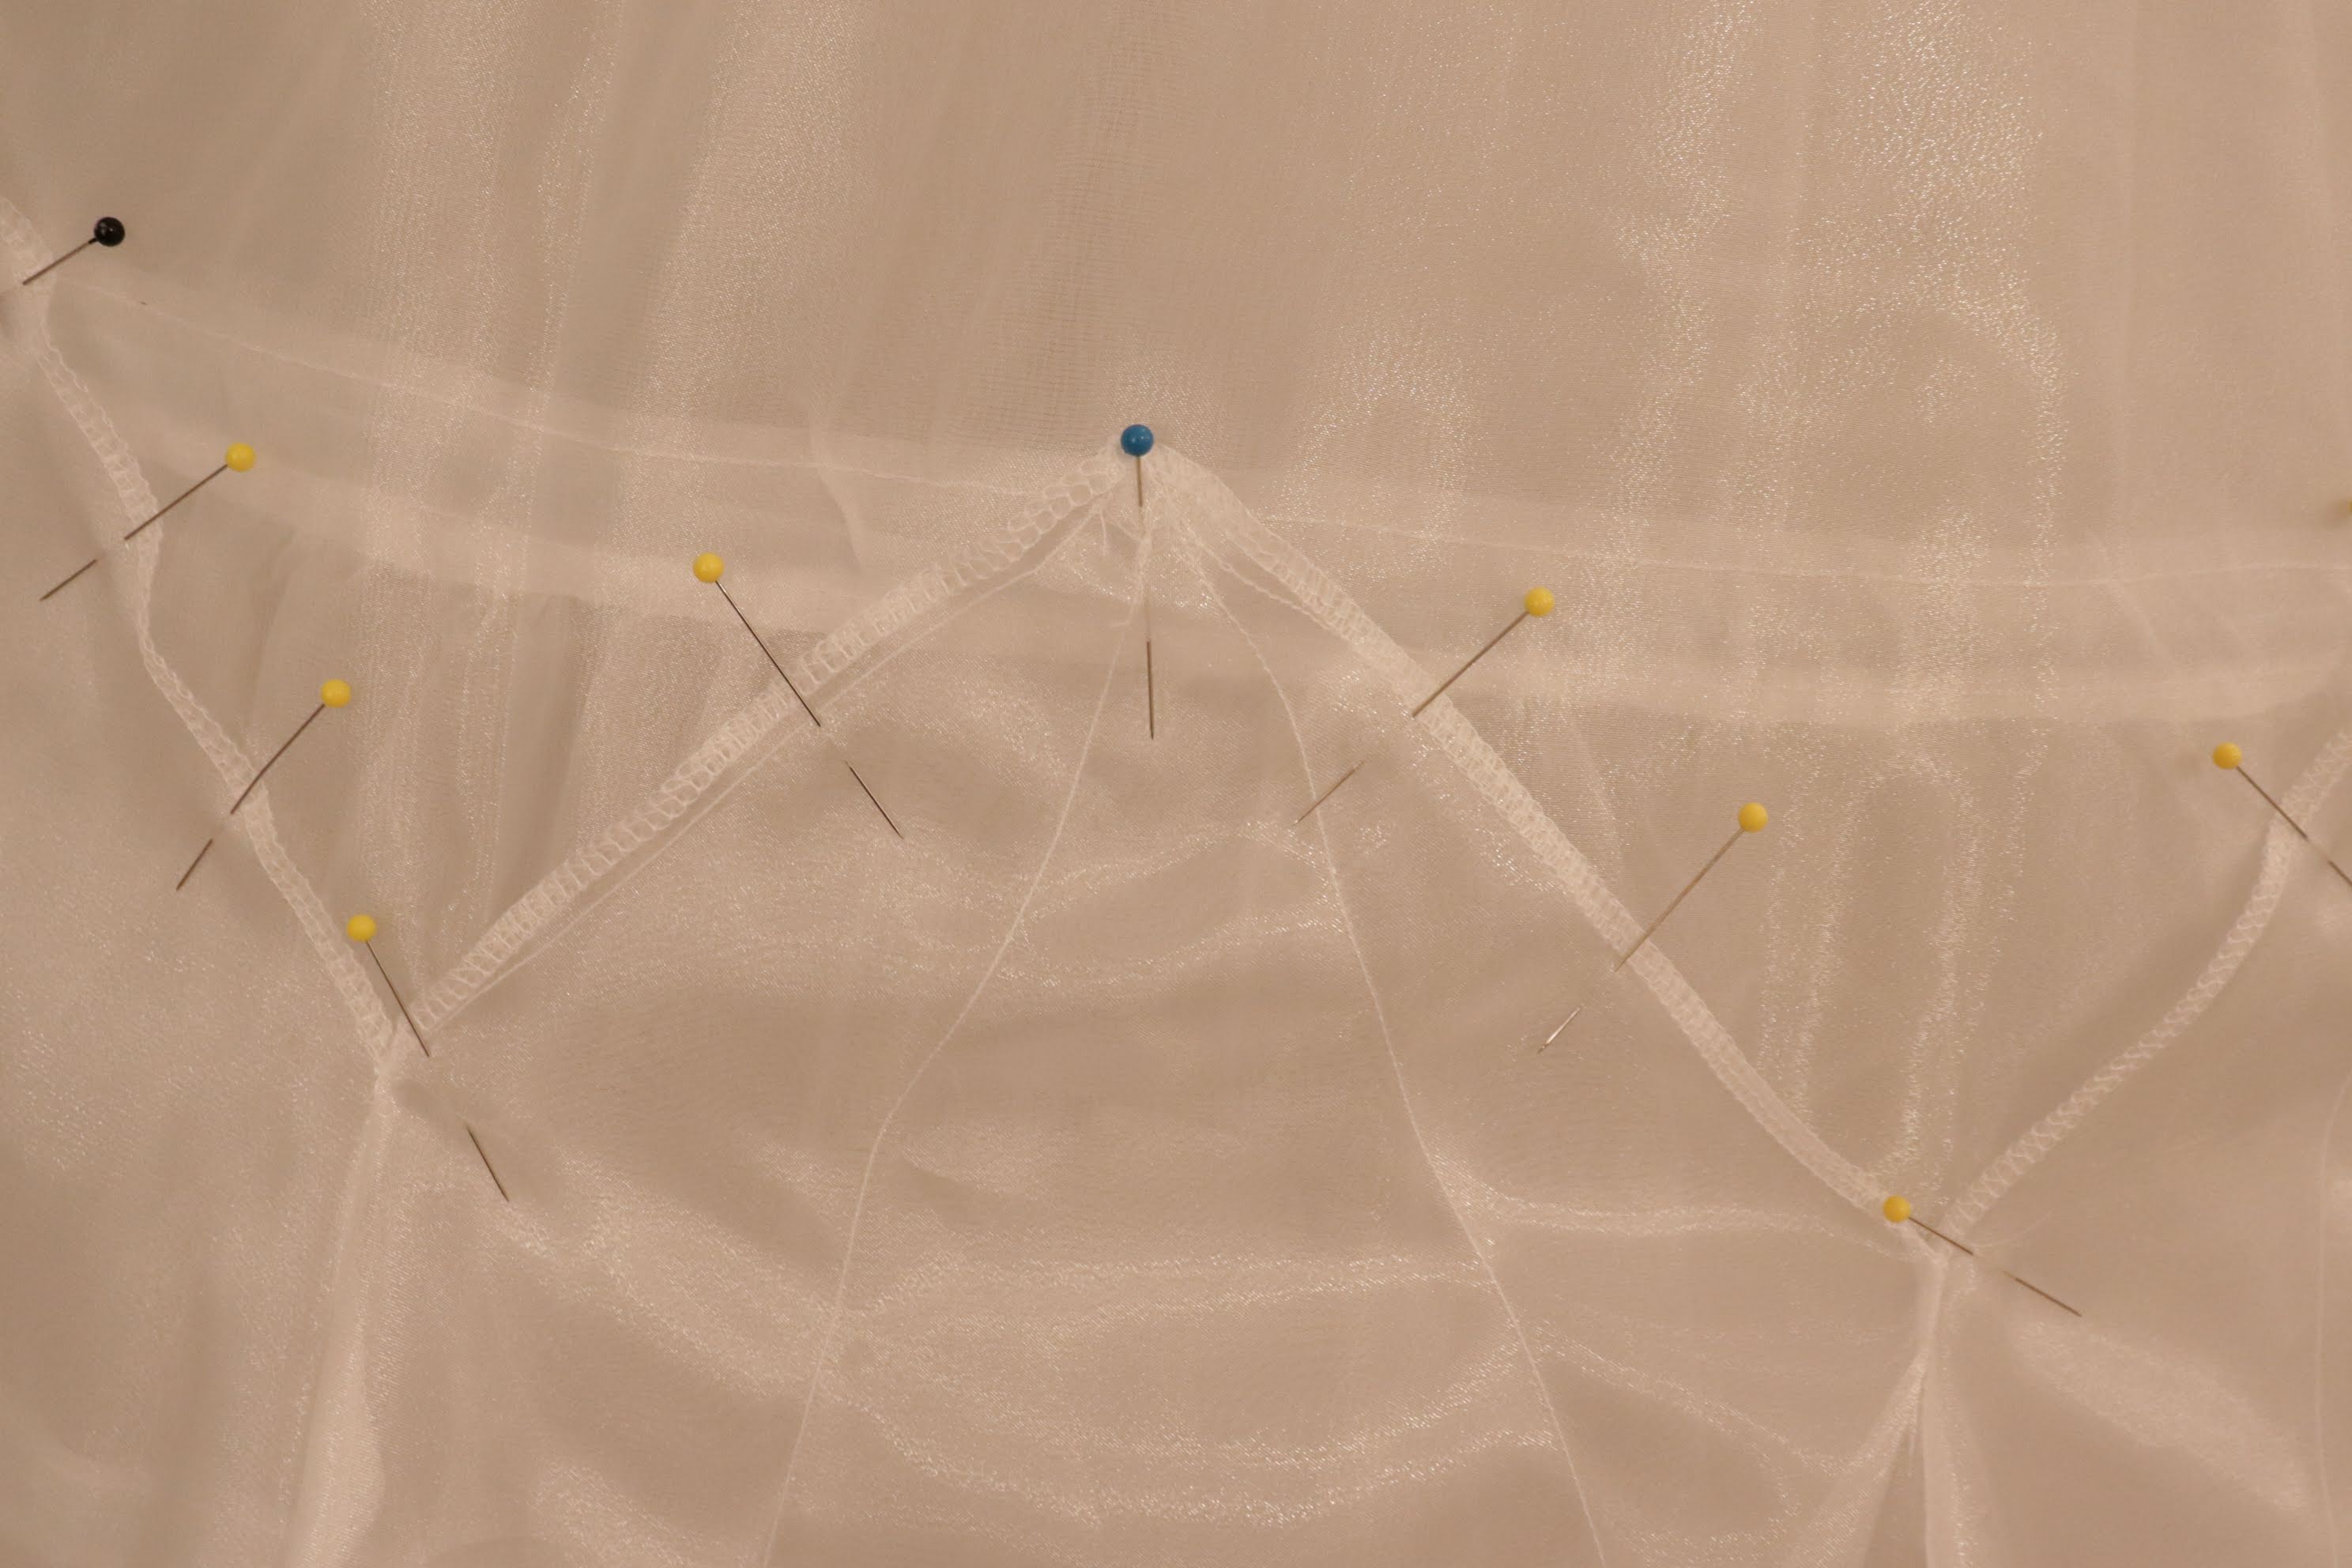
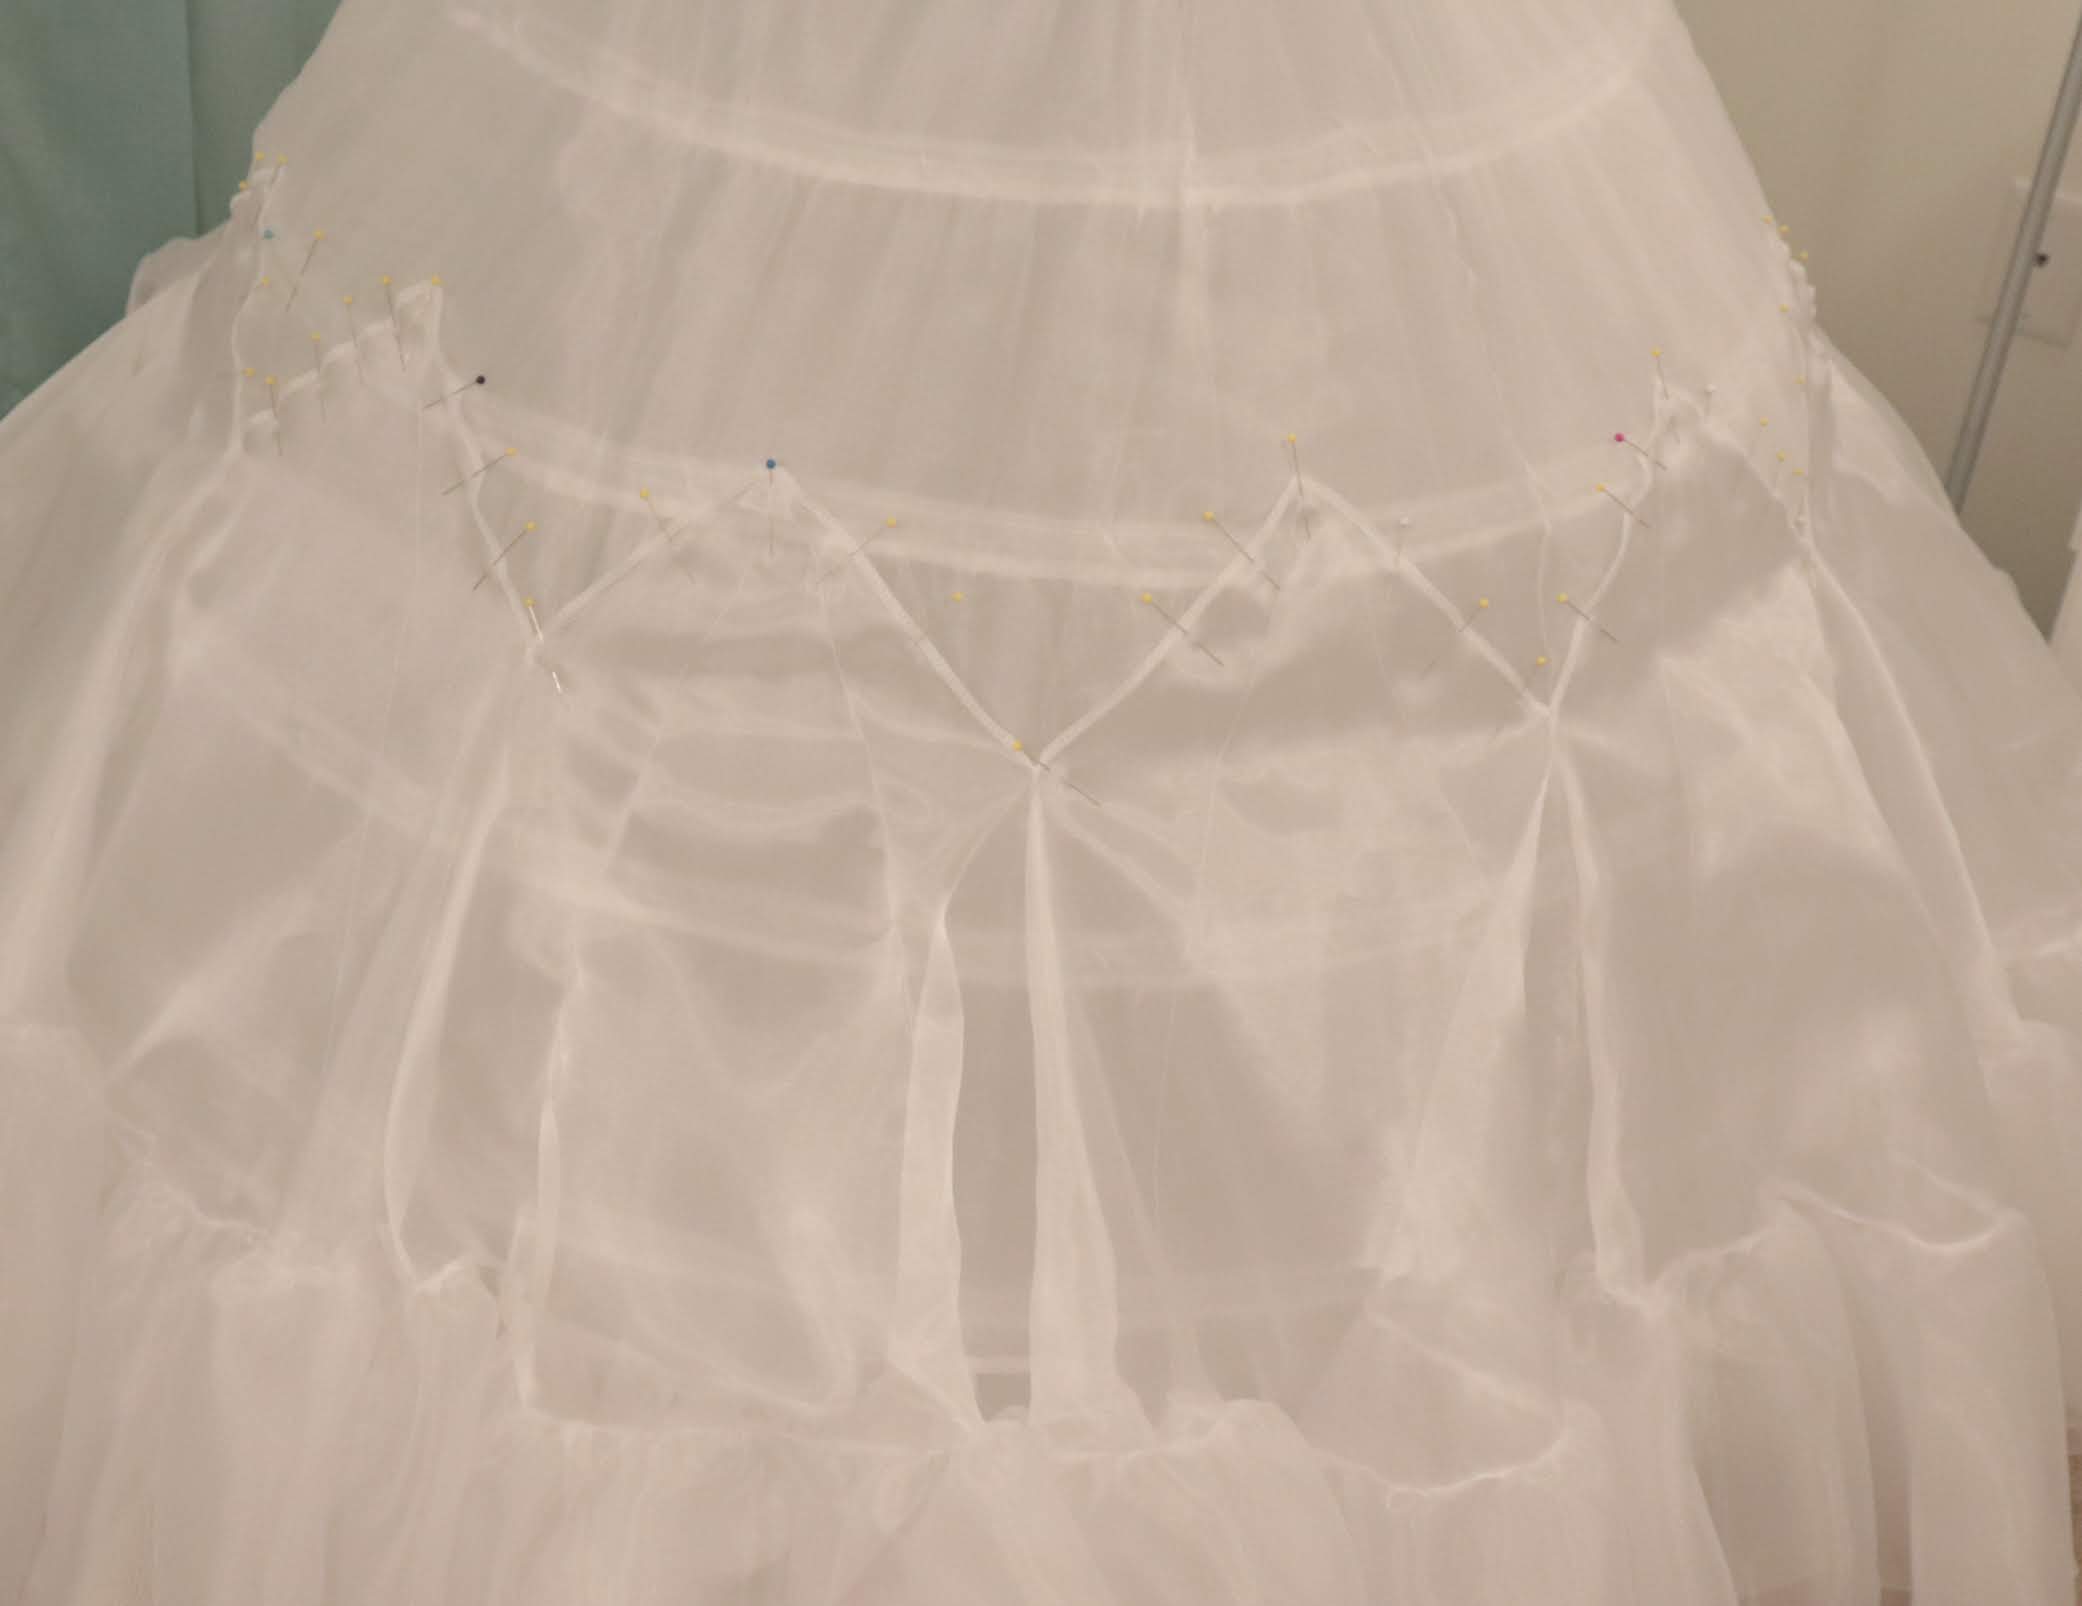
First, I had to decide how high I wanted them to reach. Conveniently for me, they were just tall enough for the tops to be aligned with one of the hoops on the petticoat. I decided to pin the godets on one third of the petticoat to figure out the best placement.
I used Yellow pins to divide the third of the hoop into 4 sections. There will be 4 godets in each third of the hoop for a total of 12. I spit each of these sections in half using a different colored pin. (So, each pin separates an 8th of the hoop section I am working on.)

On my petticoat the third of the hoop measured 32 inches. So each quarter is 8 inches, and each center point (or eighth) 4 inches from there.

The peaks of the godets will align with the multi colored pins (not the yellow). I pinned the godets in place.
The next step was to determine where the godets would need to be attached to each other. Having the godets side by side allowed me to find where they would naturally meet when lying flat against the first layer of the petticoat. On my godets, this point measured 6.5 inches down from the peak of the godet.
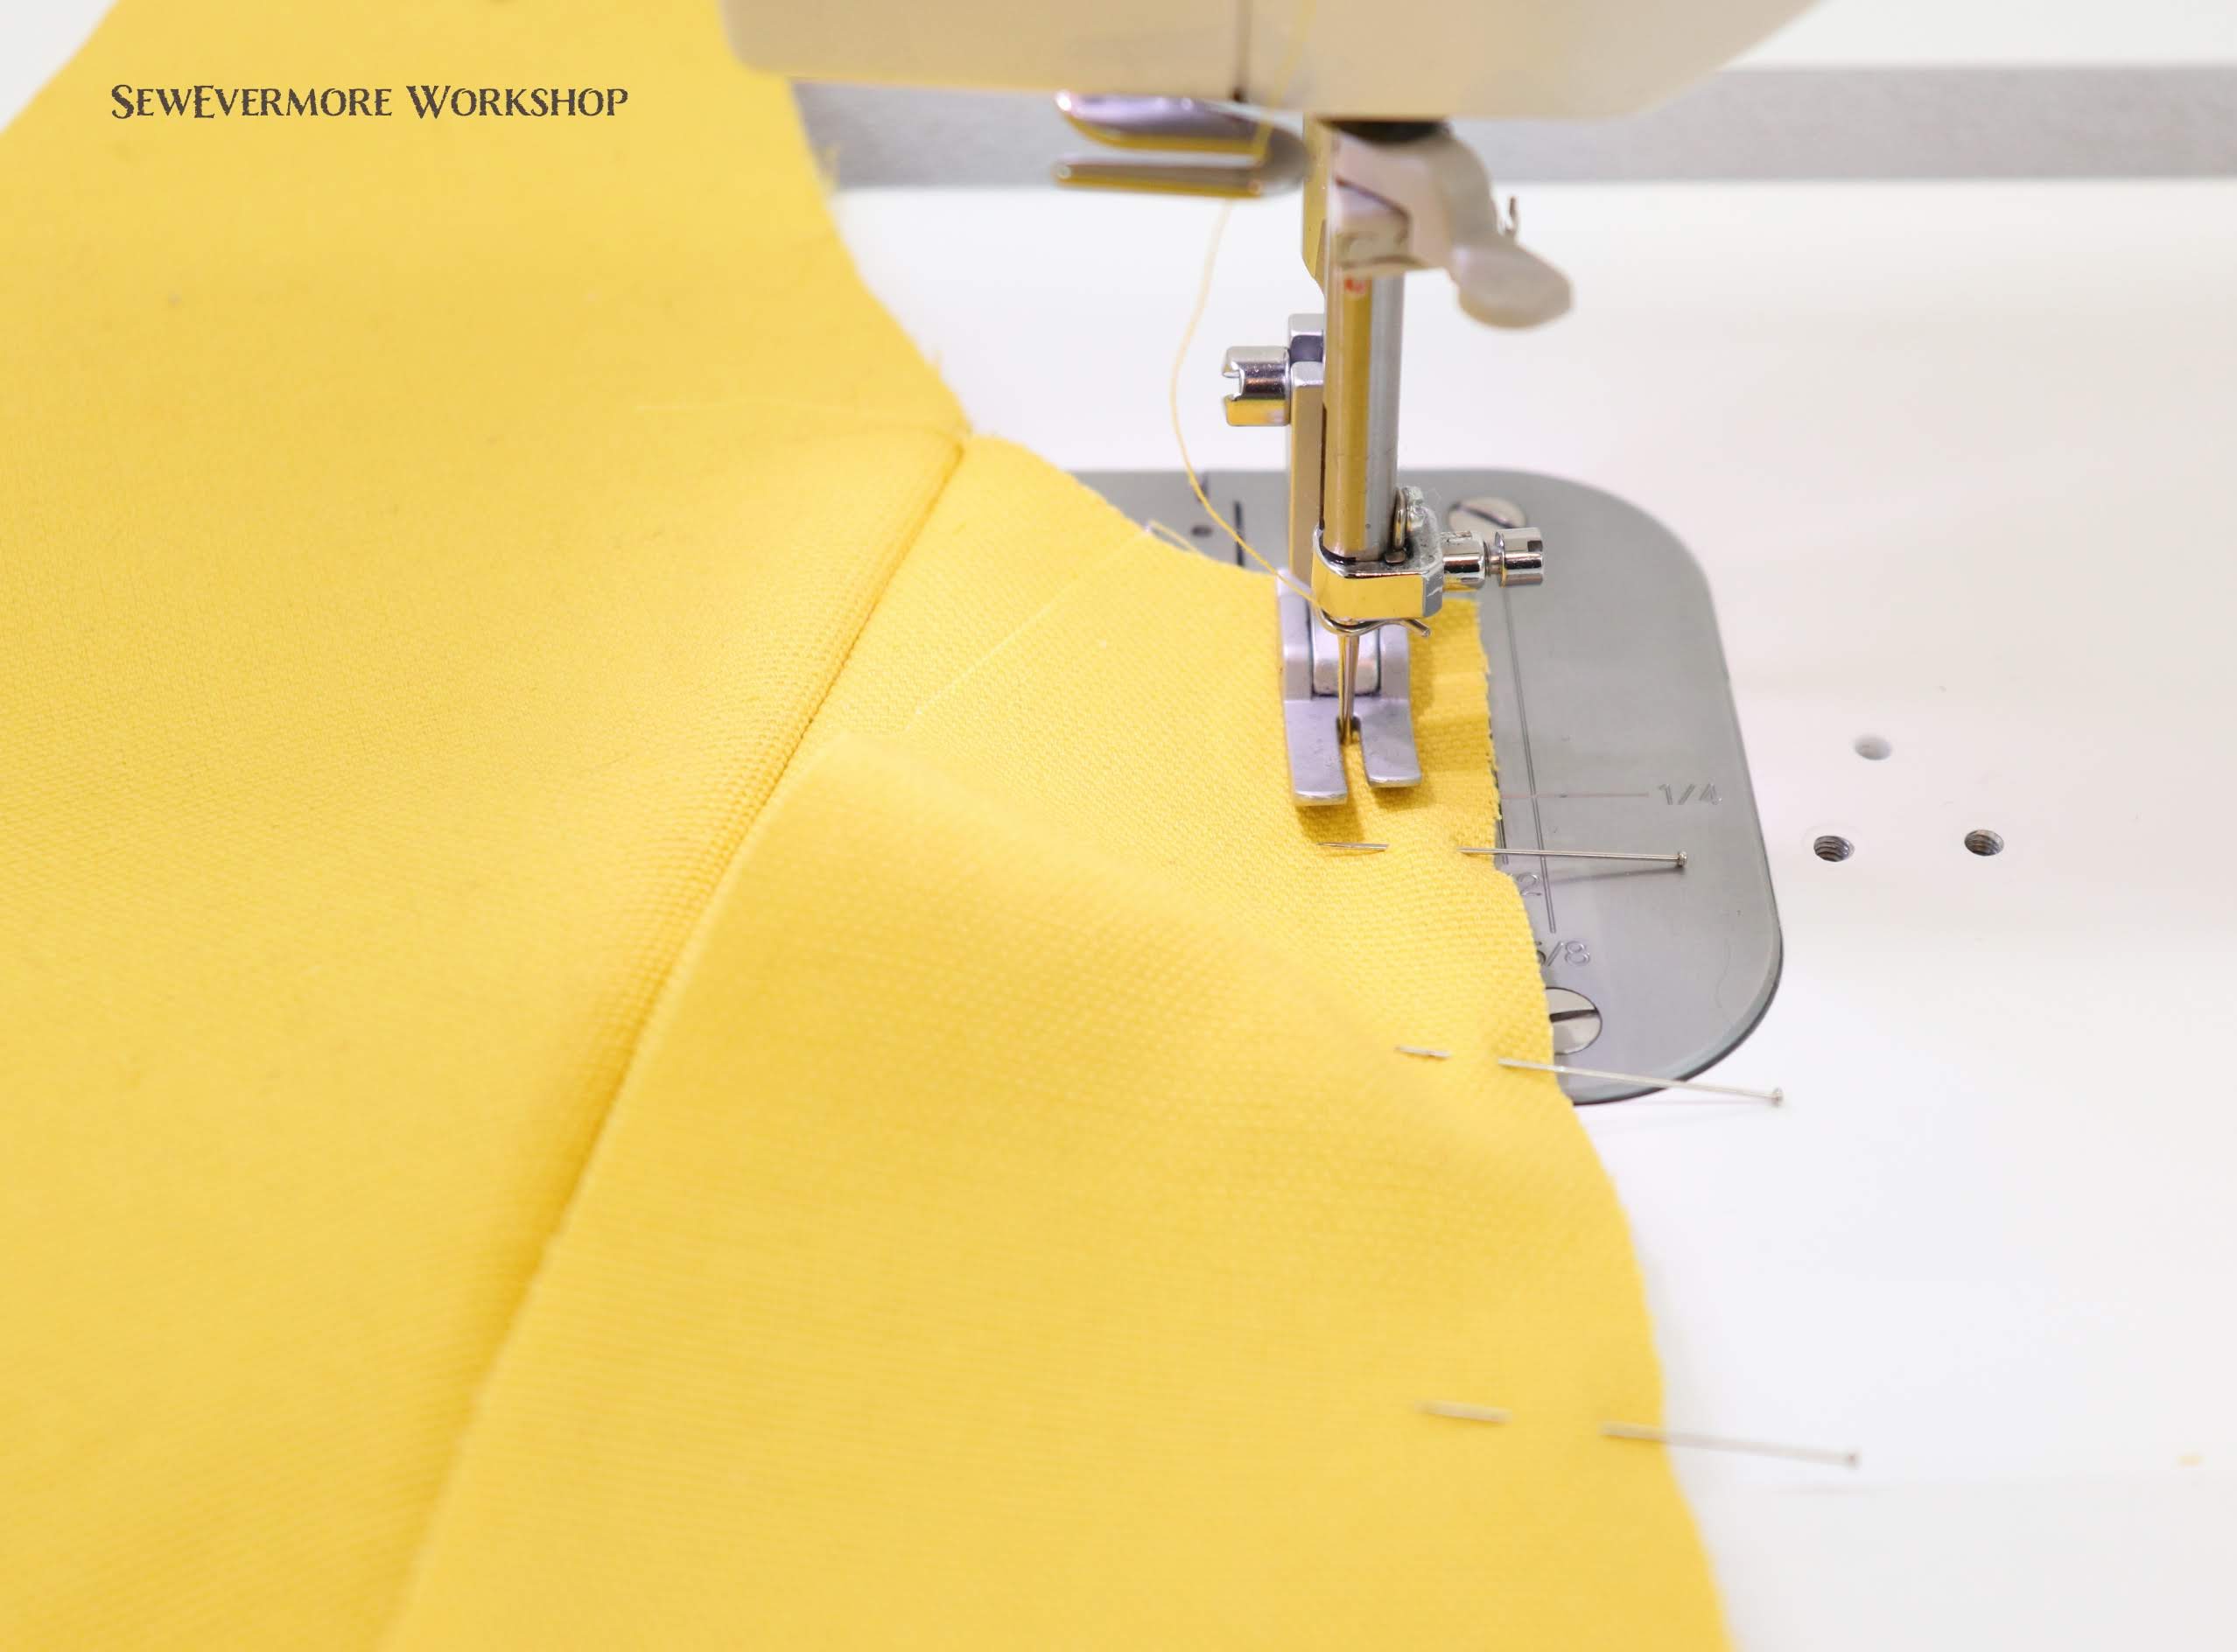
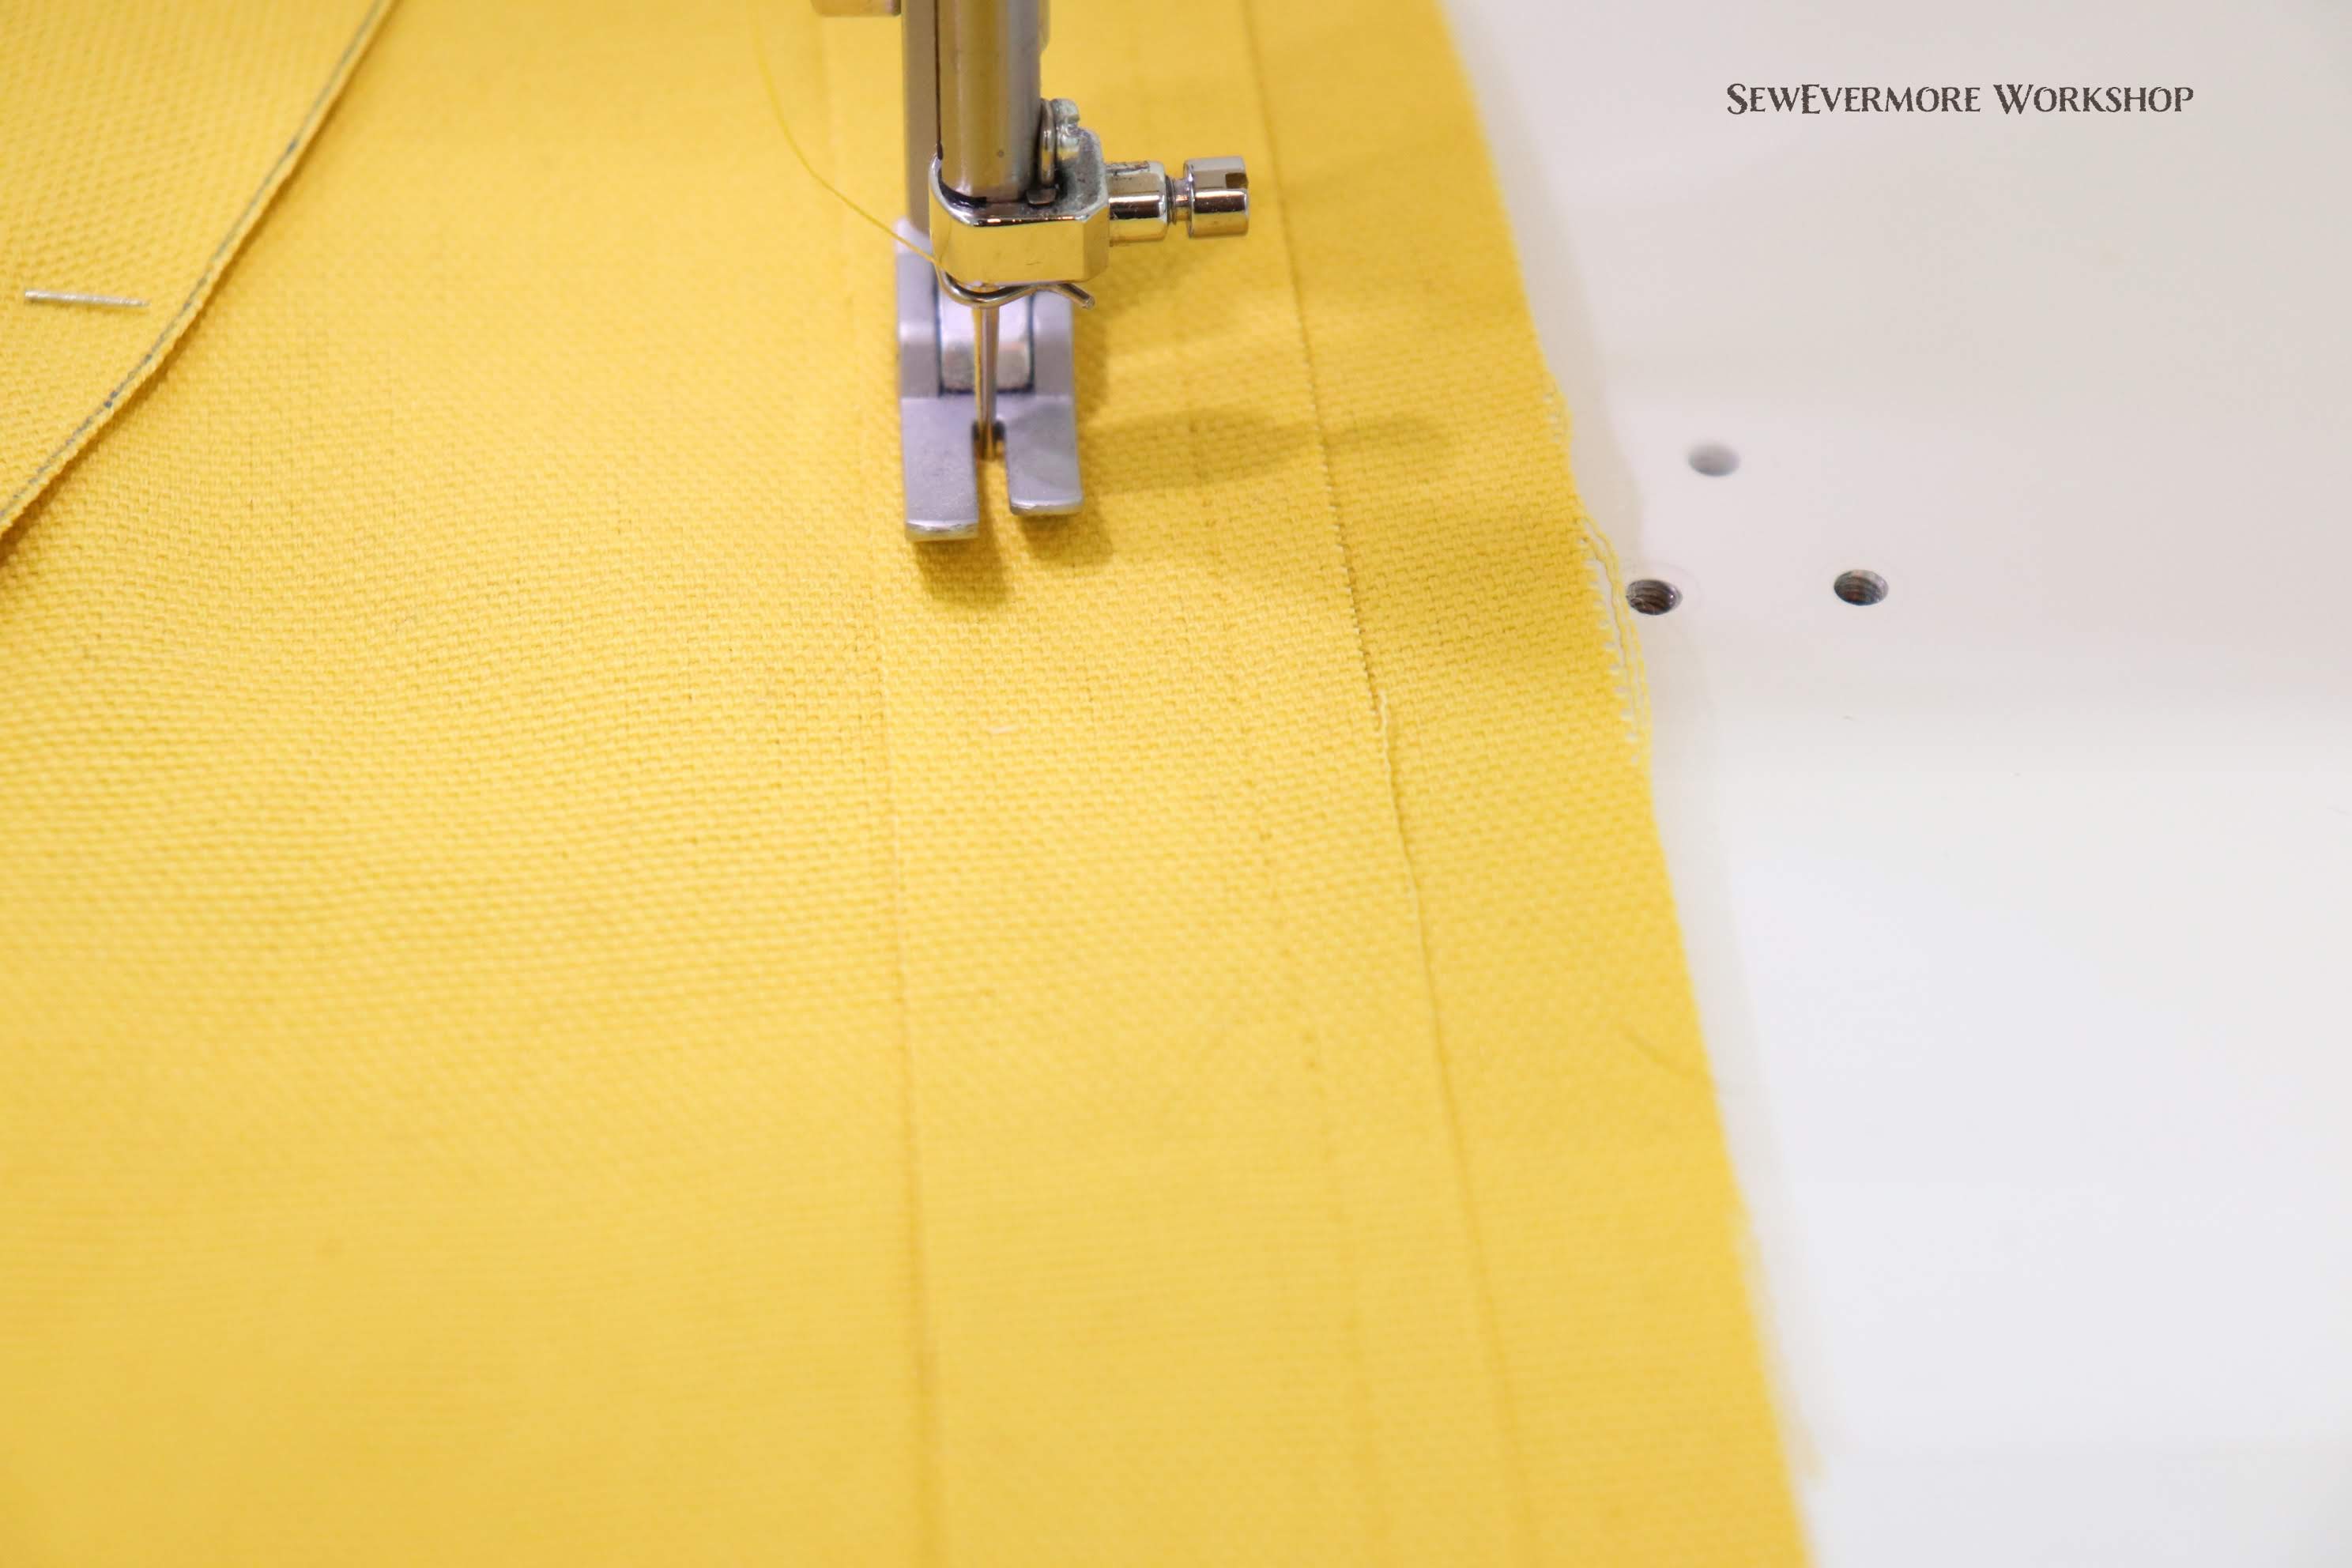
Next, I removed the godets from the hoop so they could be assembled together. With right sides together I aligned two godets along one side, beginning at the peaks. Then I measured 6.5 inches down from that peak and sewed from there to the bottom of the ruffle. I used about a 1/4 inch seam allowance, just to the inside of the serged edges.

Here is what a few godets looked like when sewn together.
And here is all twelve! Can you believe this is only a single layer of the petticoat!
- Petticoat Layer 2: Attaching the Godets
It’s time to attache the godets to the first layer of the petticoat.
First, I positioned the ring of godets around the petticoat and pinned them in place. It took a bit of repositioning to get them to lay the way I wanted them to.

I made sure to pin all the way around the top layer of the godets. I also took care to ensure that when I pinned the godet was attached only to the first layer of the petticoat and not the hoop skirt.
Once the godets were securely pinned in place, I lifted the entire petticoat off the dressform. Using a straight stitch I then sewed the top of the godets to the first layer of the petticoat. I sewed along the zigzag shaped path formed by the tops of the godets, near the serged edge. By sewing just along the top edge, the bottom of the petticoat will be able to flow freely.
Success! The second layer of the petticoat is complete. It is already looking so poofy!
- Petticoat: Cutting Layers 3 & 4
Now that the 2nd layer is complete and attached it is time to move on to Layers 3 and 4. Layers 3 and 4 are constructed in the same manner as Layer 2, using godets. These layers will be placed higher up on the petticoat. The godets are larger in size but fewer in number for Layers 3 and 4. (Alterations were later made due to adding a bustle.)
Here are the details. I will also provide the information for Layer 2 so it can be easily viewed for comparison.
Layer 2
Fabric used: Casa Organza White. 58 inch width.
Purchased: $1.27 per yard. Joann+ (Had to purchase 40+ yards for this price)
Amount of fabric used: 7.5 yards
Number of Godets: 12
Godet Radius: 18 inches
Length of Bottom Curve: ≈ 30 inches
Ruffle: Cut 12 Rectangles, 13in x Width of Fabric. One rectangle used per ruffle.
Layer 3
Fabric used: Glitterbug White Pearlized Sheer. 44 inch width. (I might choose the crinkle sheer if I had to choose again.)
Purchased: $3 per yard. Joann+ (Had to purchase 20 + yards for this price)
Amount of fabric used: 13 yards
Number of Godets: 10
Godet Radius: 24.5 inches
Length of Bottom Curve: ≈ 40 inches
Ruffle: Cut 20 Rectangles, 13in x Width of Fabric. Two rectangles used per ruffle.
Layer 4 (Without Bustle)
Fabric used: Casa Organza White. 58 inch width.
Purchased: $1.27 per yard. Joann+ (Had to purchase 40+ yards for this price)
Amount of fabric used: 8 yards
Number of Godets: 8
Godet Radius: 29 inches
Length of Bottom Curve: ≈ 47 inches
Ruffle: Cut 12 Rectangles, 13in x Width of Fabric. One and a half rectangles used per ruffle
Layer 4 (WITH Bustle)
Fabric used: Casa Organza White. 58 inch width.
Purchased: $1.27 per yard. Joann+ (Had to purchase 40+ yards for this price)
Amount of fabric used: 12 yards
Number of Godets: 12
Godet Radius: 29 inches
Length of Bottom Curve: ≈ 47 inches
Ruffle: Cut 18 Rectangles, 13in x Width of Fabric. One and a half rectangles used per ruffle.
Progress
So far all of the godets and ruffles have been cut out. The ruffles have been pieced together and the godets have been stay stitched.
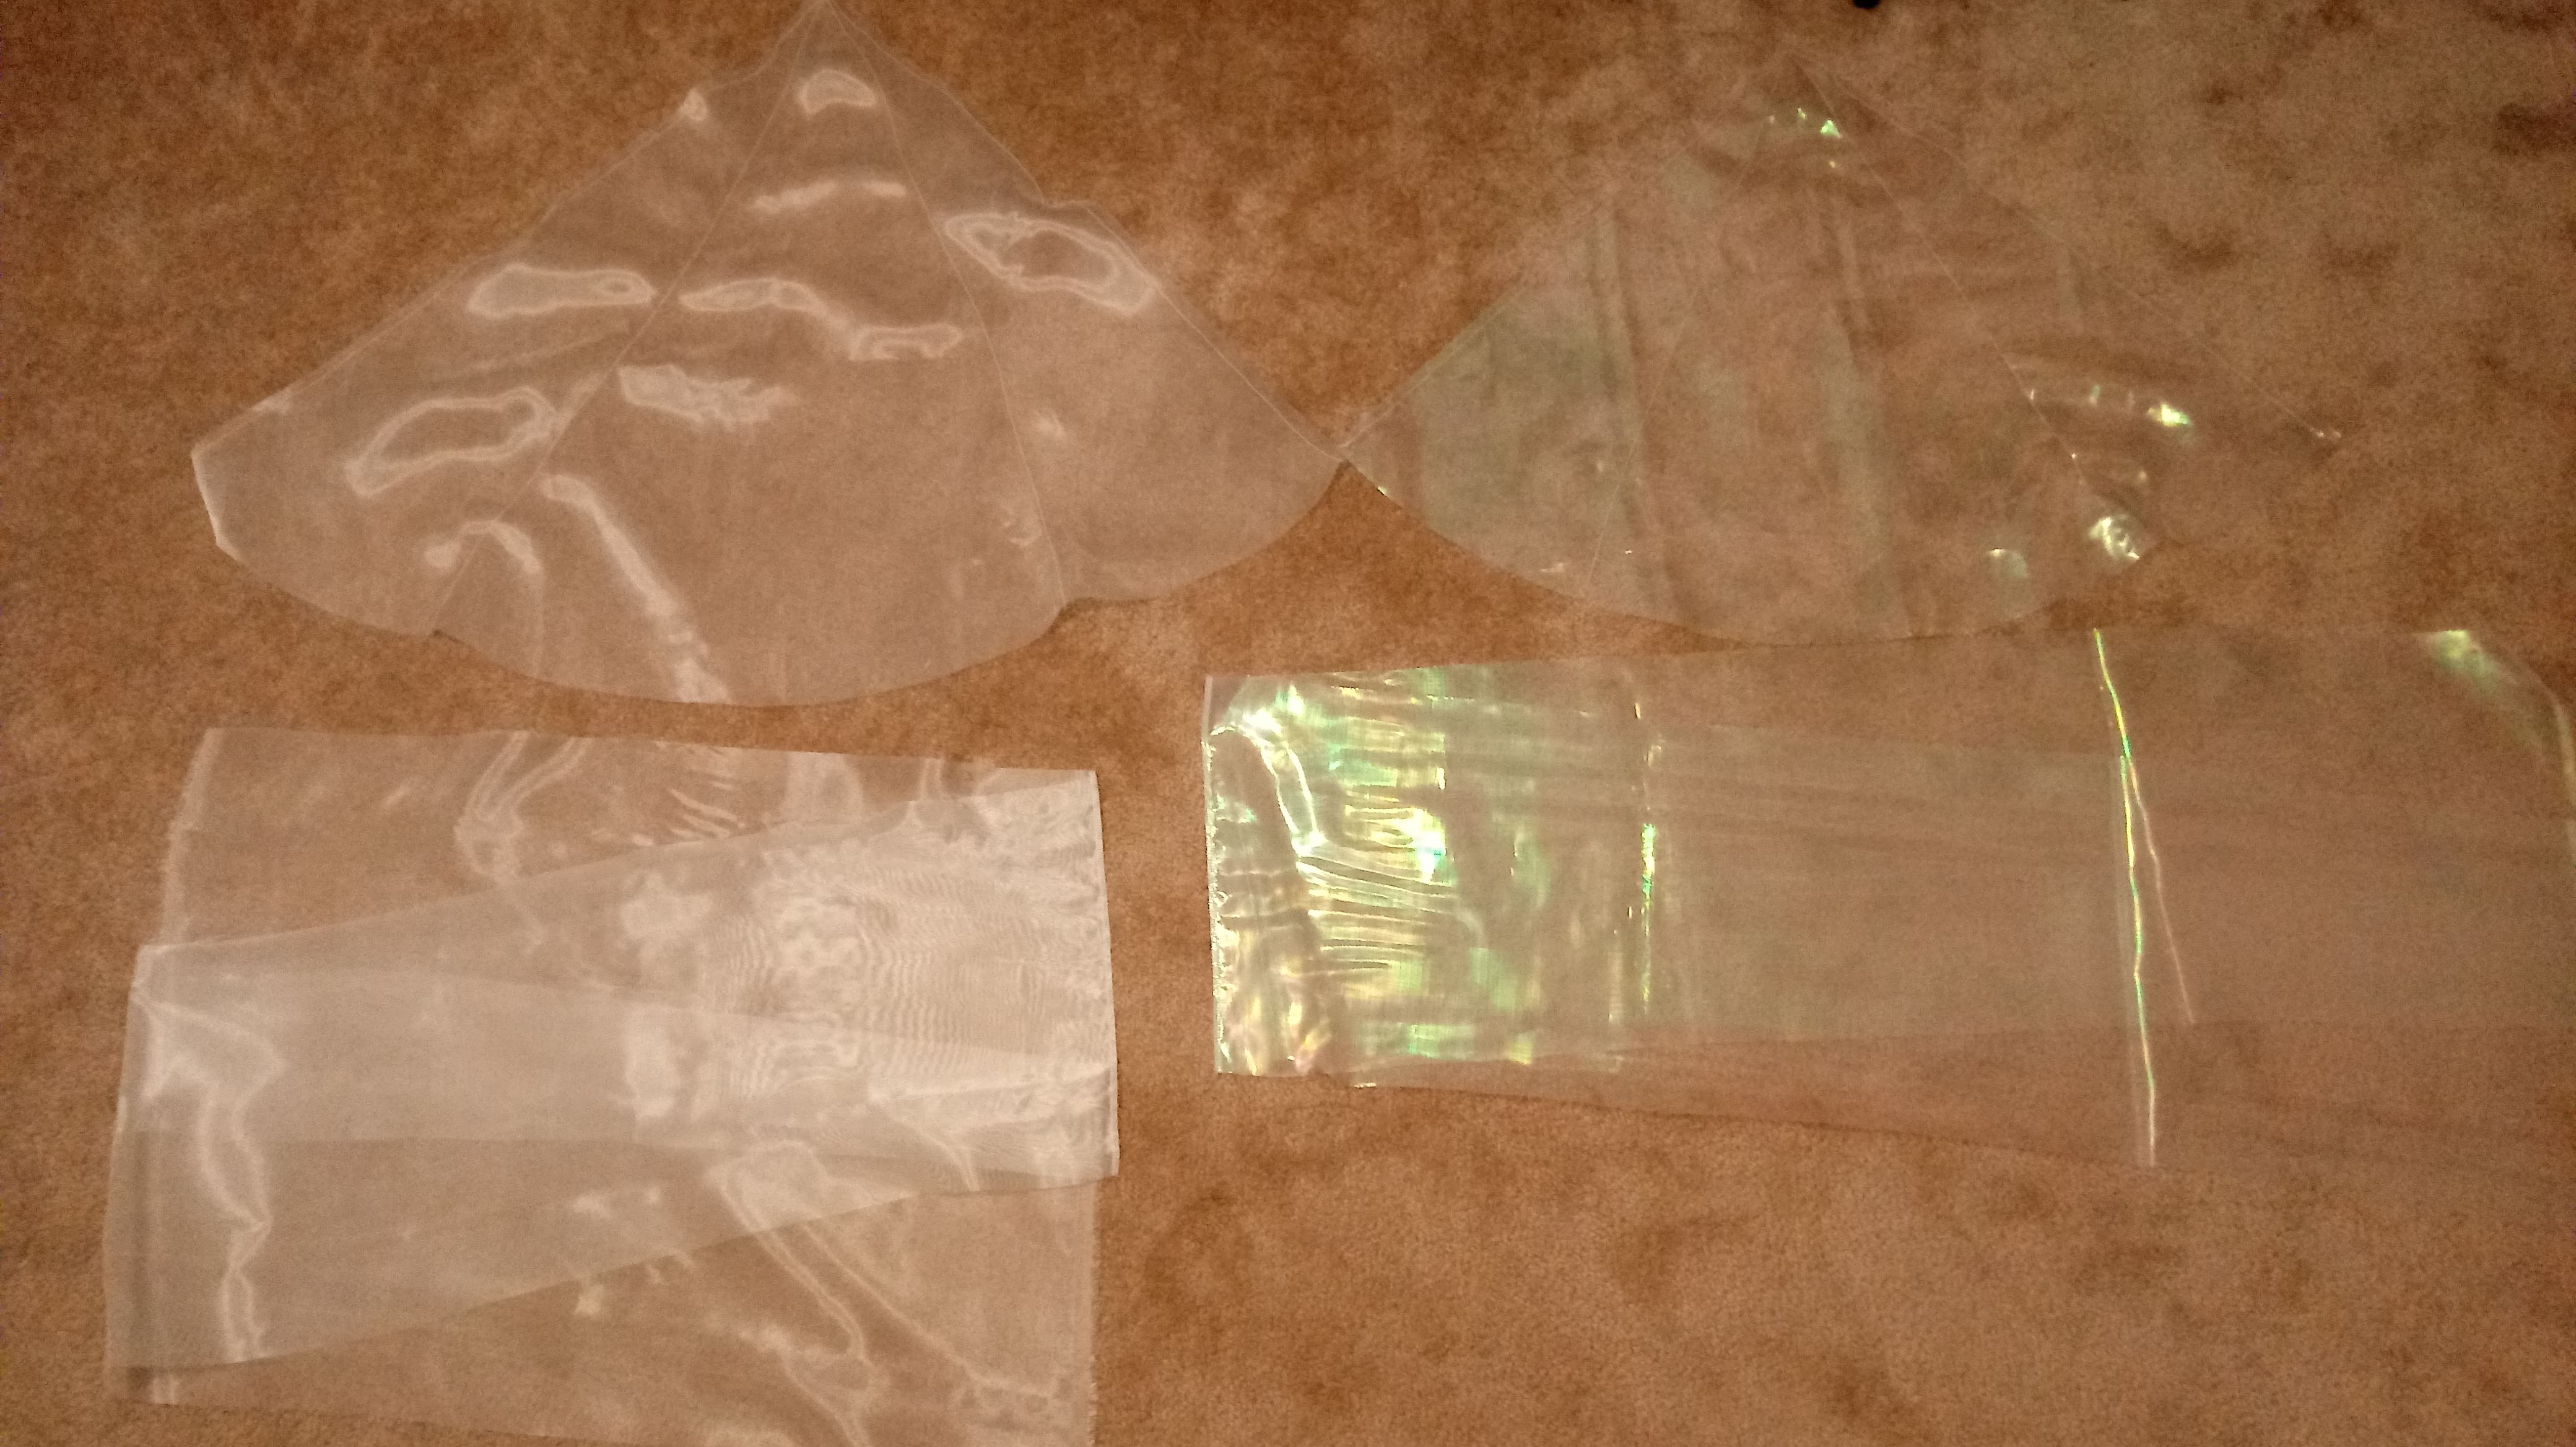
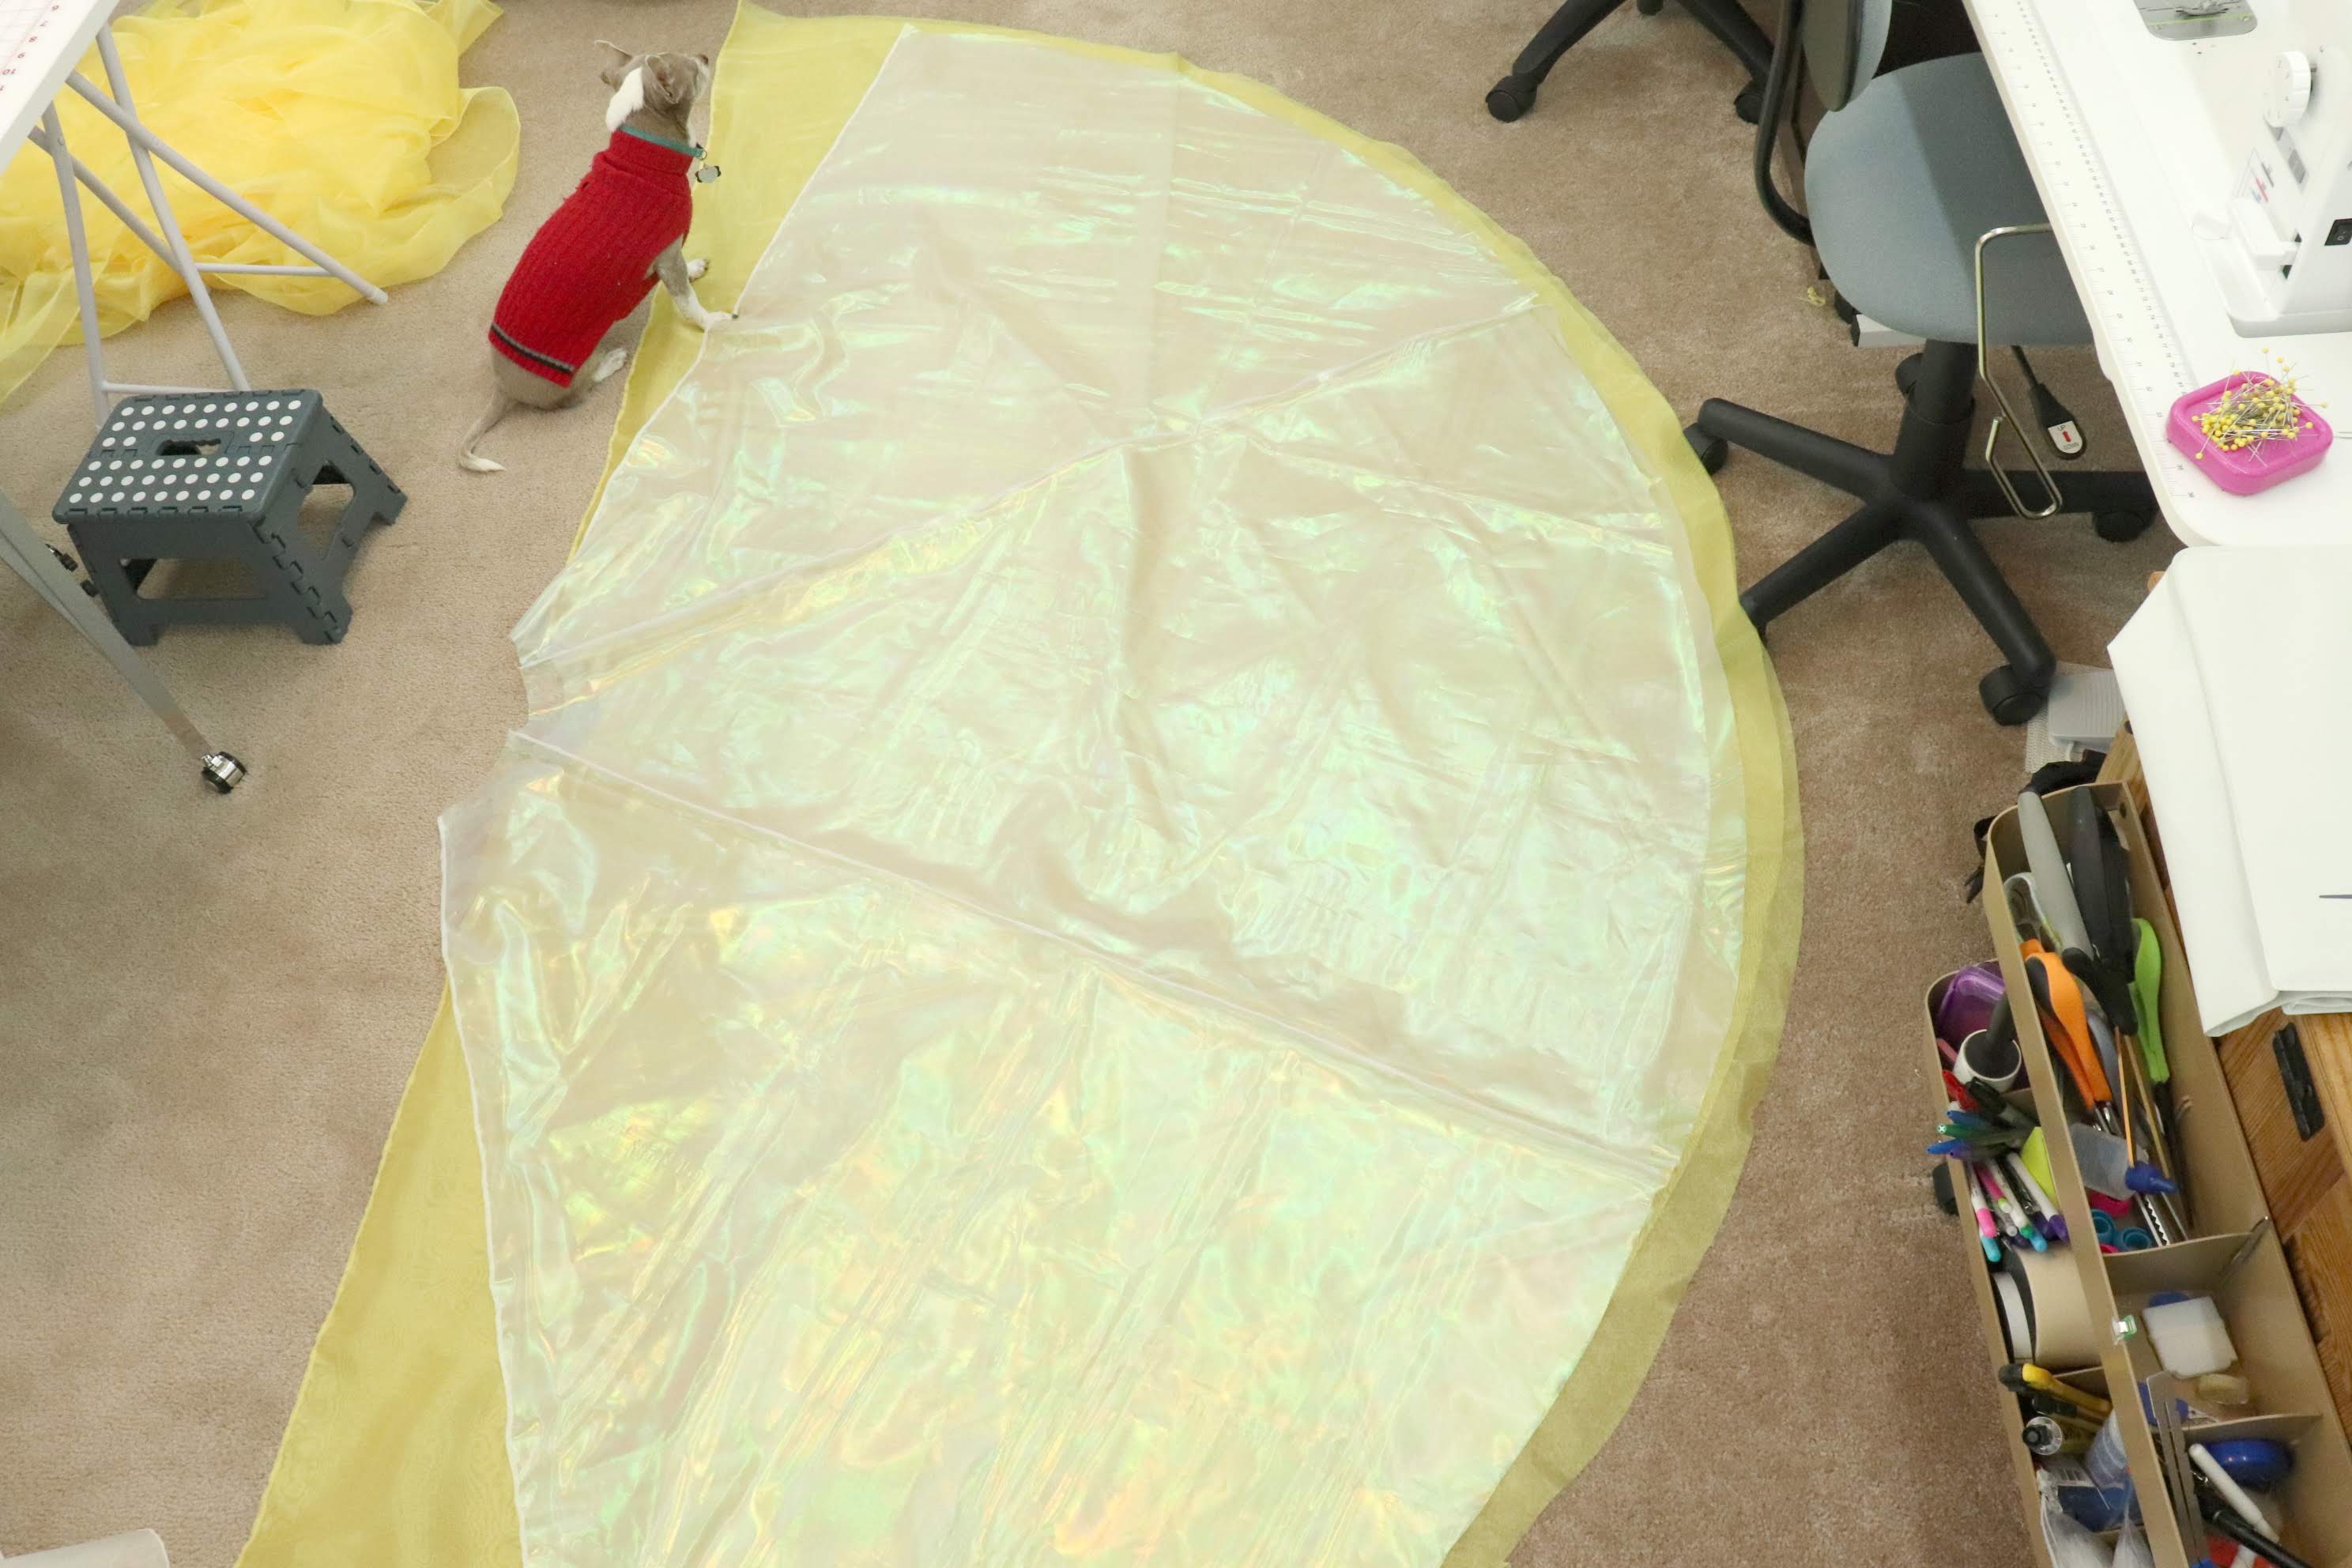
The image shows the Layer 4 organza on the left and the Layer 3 pearlized sheer on the right.
The pearlized sheer is so clear it almost looks like plastic wrap! We will have to wait to see what it looks like on the petticoat. The crinkle pearlized sheer by Glitterbug at JoAnn is not quiet so sheer and also adds a nice look. It was used on the Cinderella version of this dress. It is harder to work with, but I think it adds a nice effect if you want something a little more noticeable.
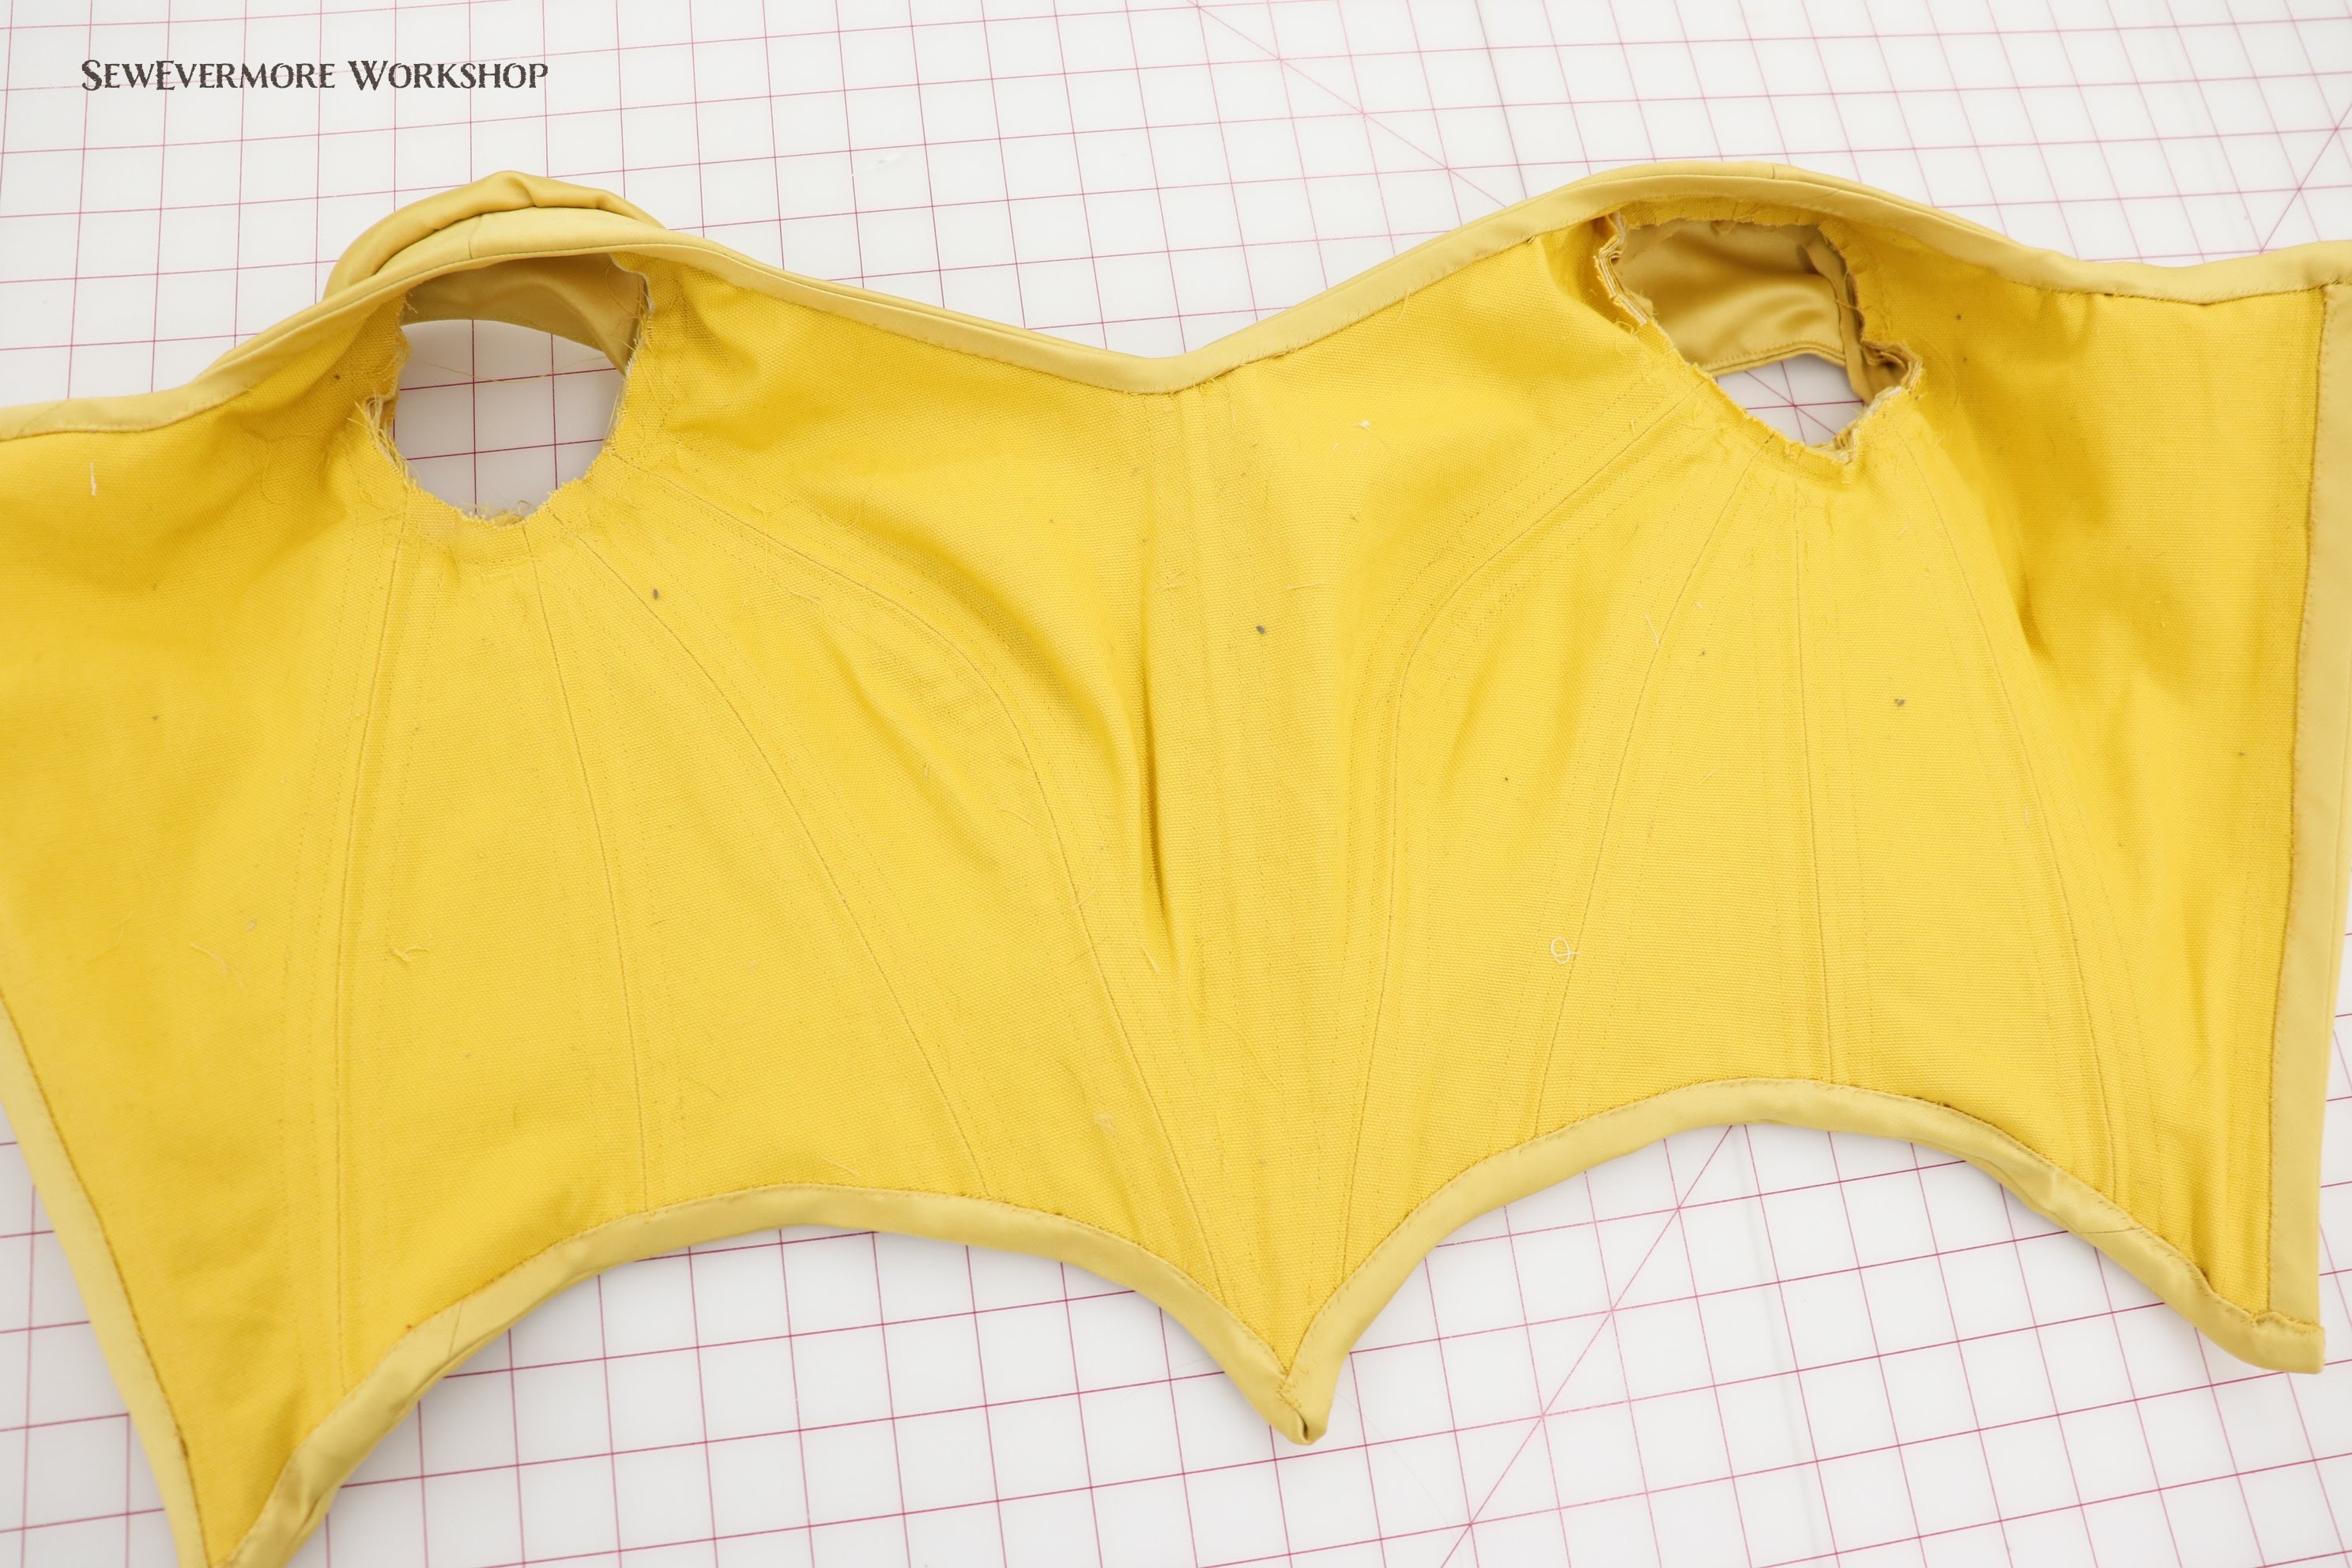
- Corset: Boning
I wanted to make a standard corset that could be worn under the Belle Dress to help support the weight of the petticoat when it is worn.
I decided to go with the Zara Corset Pattern. It is available on Etsy and is the pattern that Alison Smith uses in her Craftsy Class on Sewing Corsets. I highly recommend the class if you would like to learn how to make corsets. It was very informative and easy to follow. The pattern is a bit pricey, but it is a great simple shape and is easy to start with.
I used coutil with an overlay of Ivory Rose Jacquard for the corset. The jacquard was reinforced with Pellon SF101 fusible interfacing. I hope the end result will be simple yet elegant.

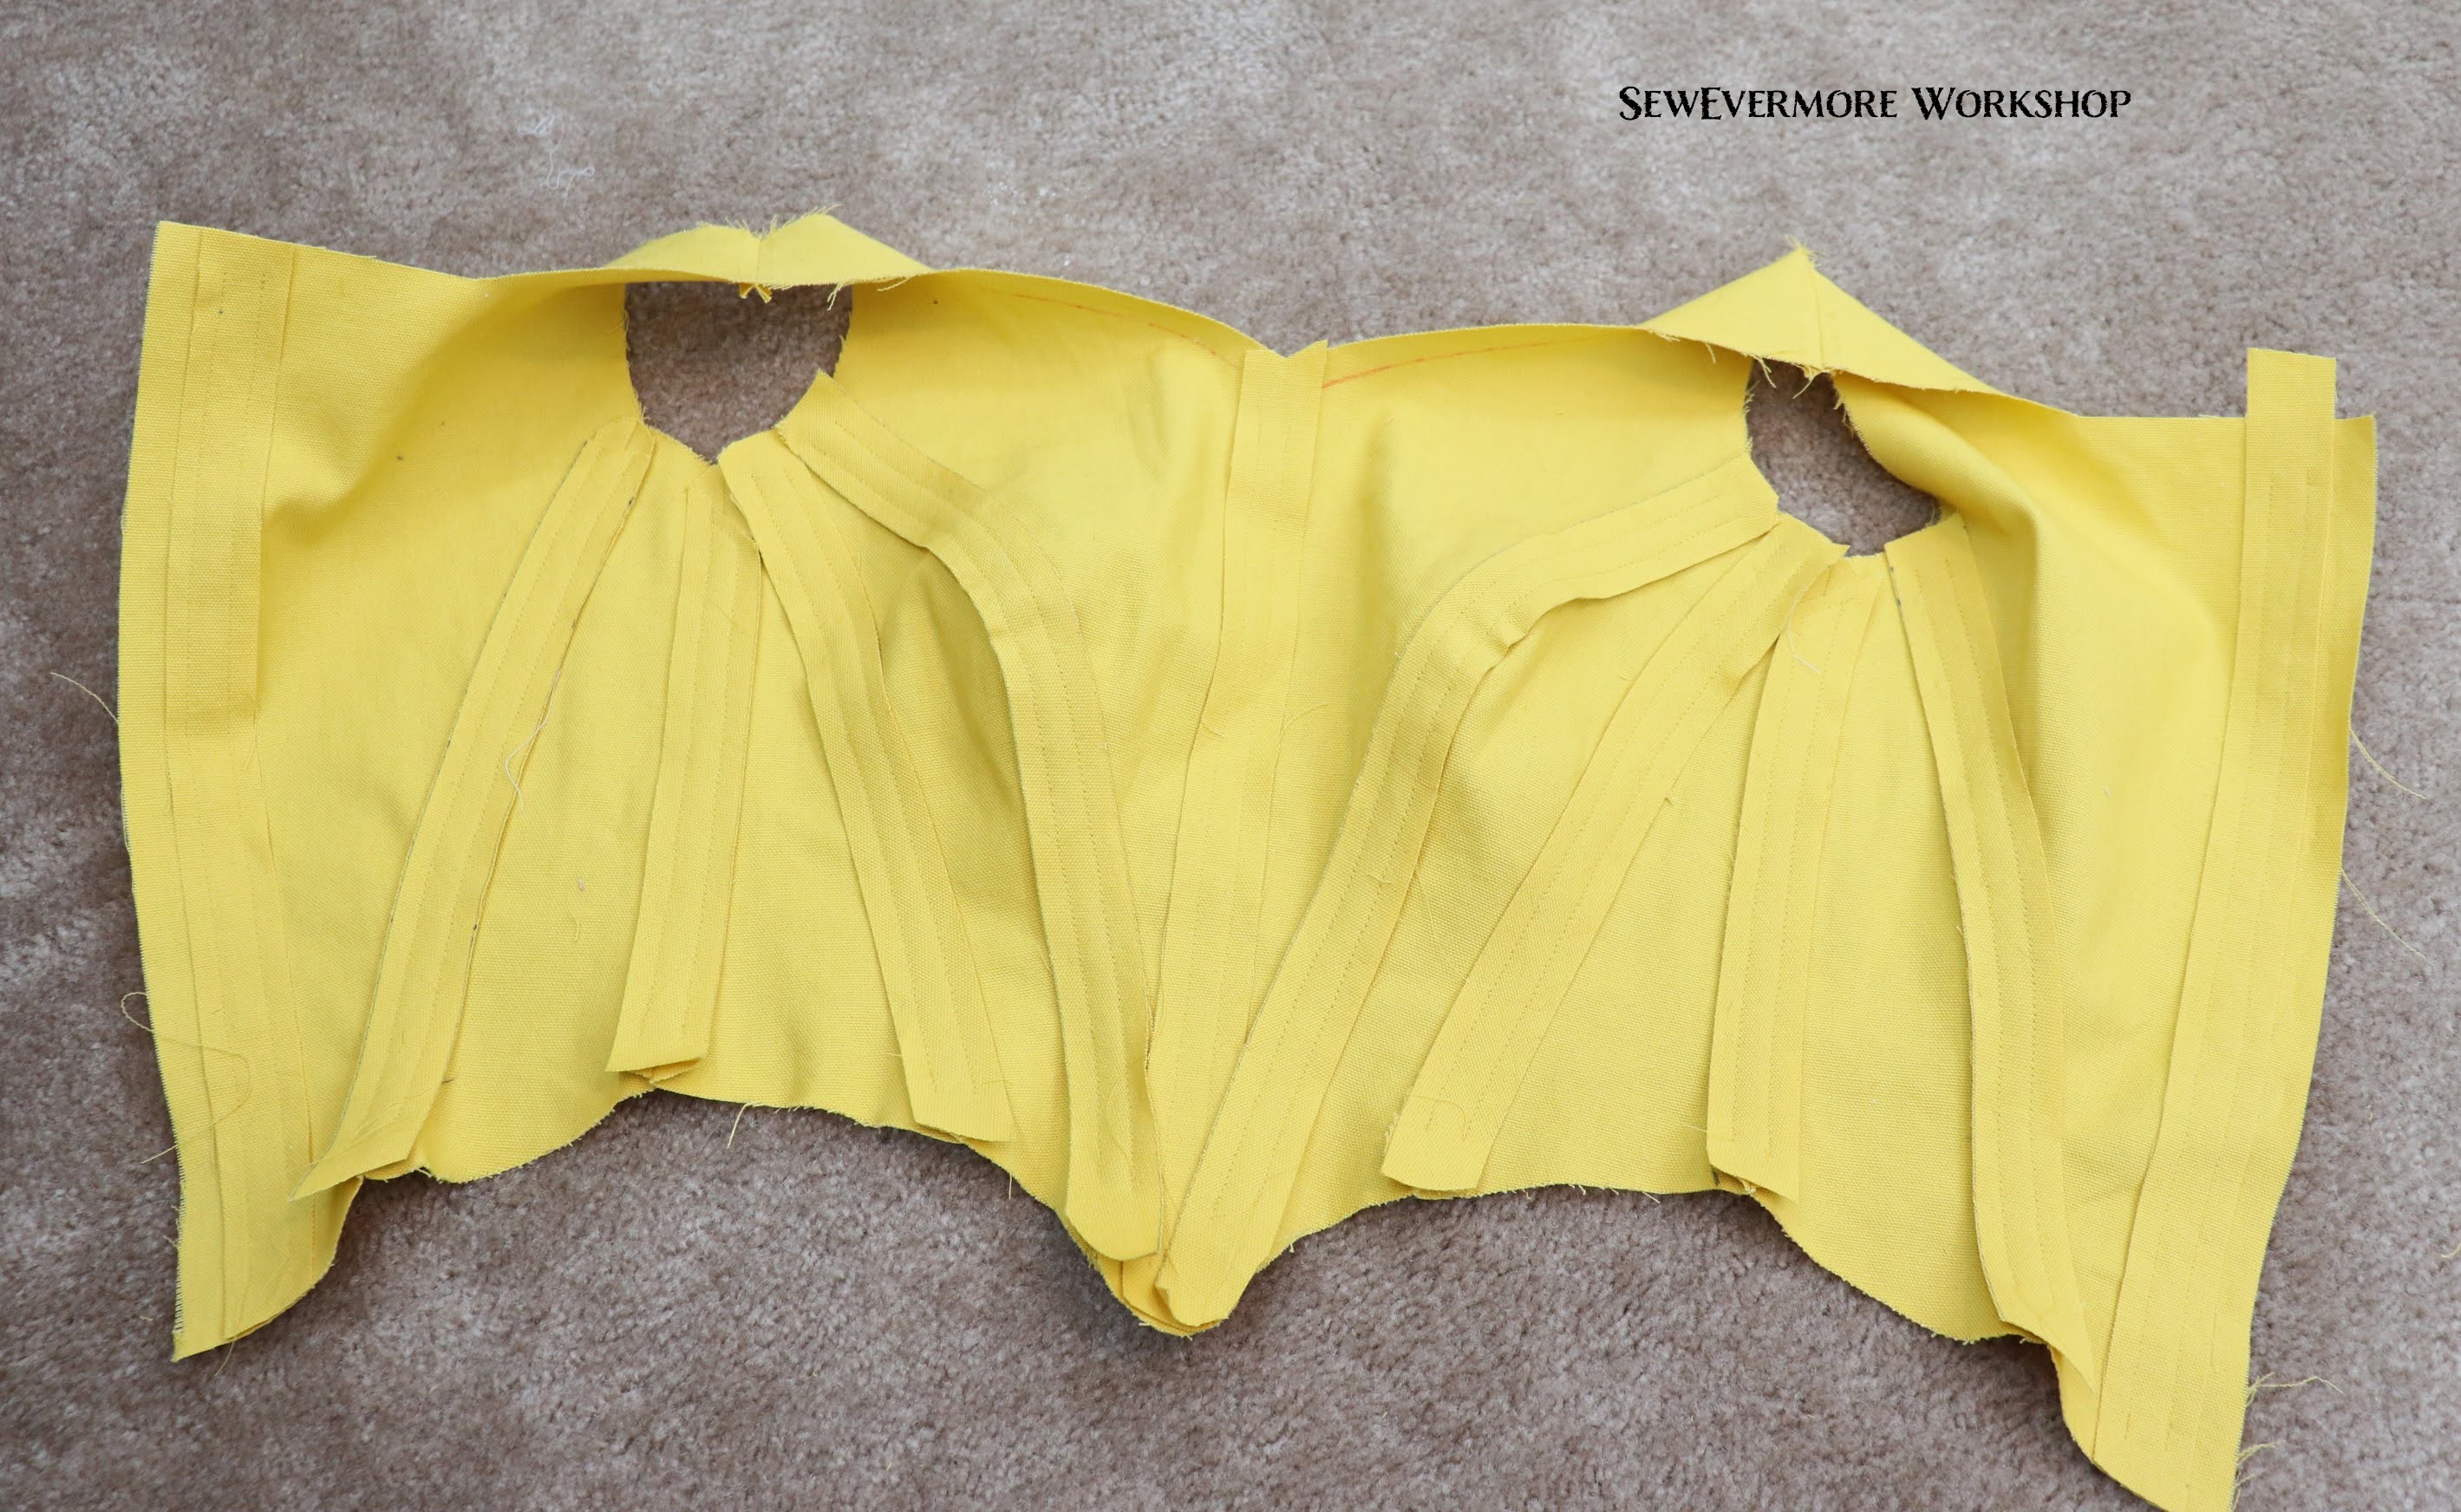
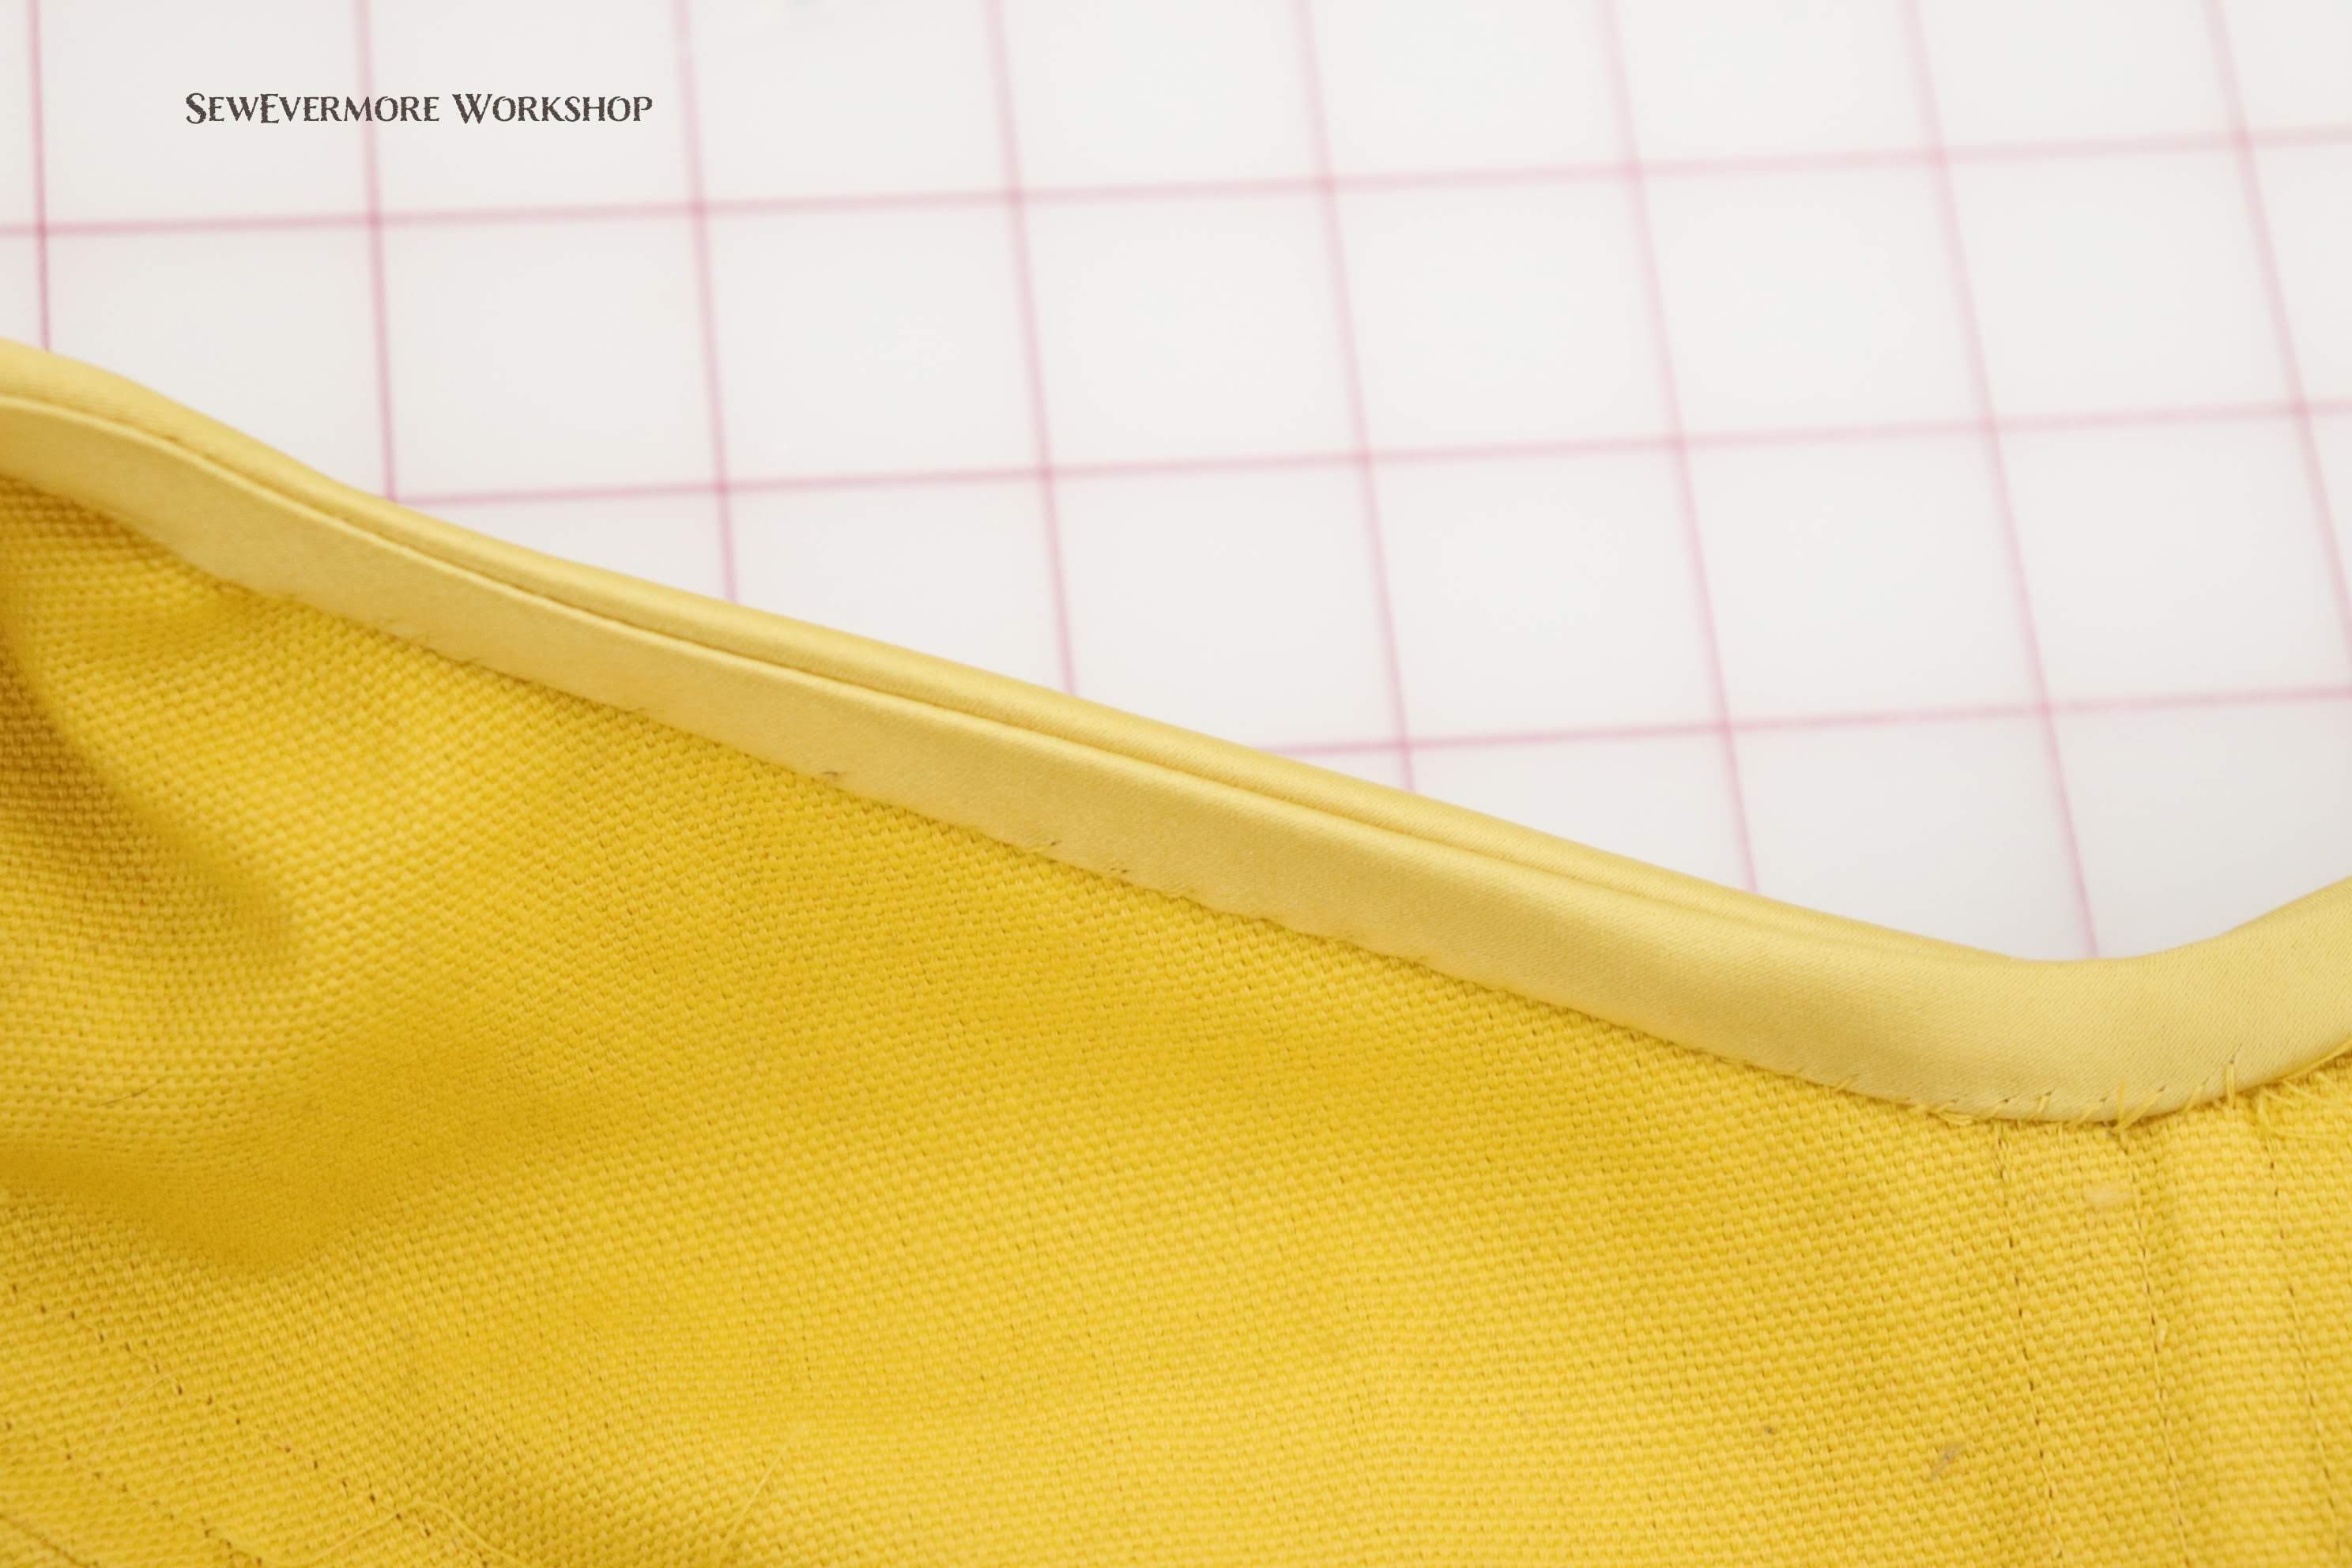
I pieced the bodice together, inserted a busk, added grommets, and bound the top. Next, it was time to add the boning.
I like to cut my own boning, you can refer to my Corset Tools Page for more info regarding the tools I use to do this. I decided to try something new and tip the ends in Plasti Dip.

I like the look of the Plasti Dip. And it seems more secure than the PTFE tape. That said, it was a bit more work, took more time, and required more tools. In order to use the Platidip, because the fumes are so strong, it required a respirator.
I think it is something I will continue to do. Even if the tape is sufficient, the Plasti Dip makes me feel like the bones are more securely tipped.
I have heard from other corset makers that the Plasti Dip tipped bones are fine to dry clean, but I have never done so, and I would definitely check with the dry cleaner to make sure it is okay.
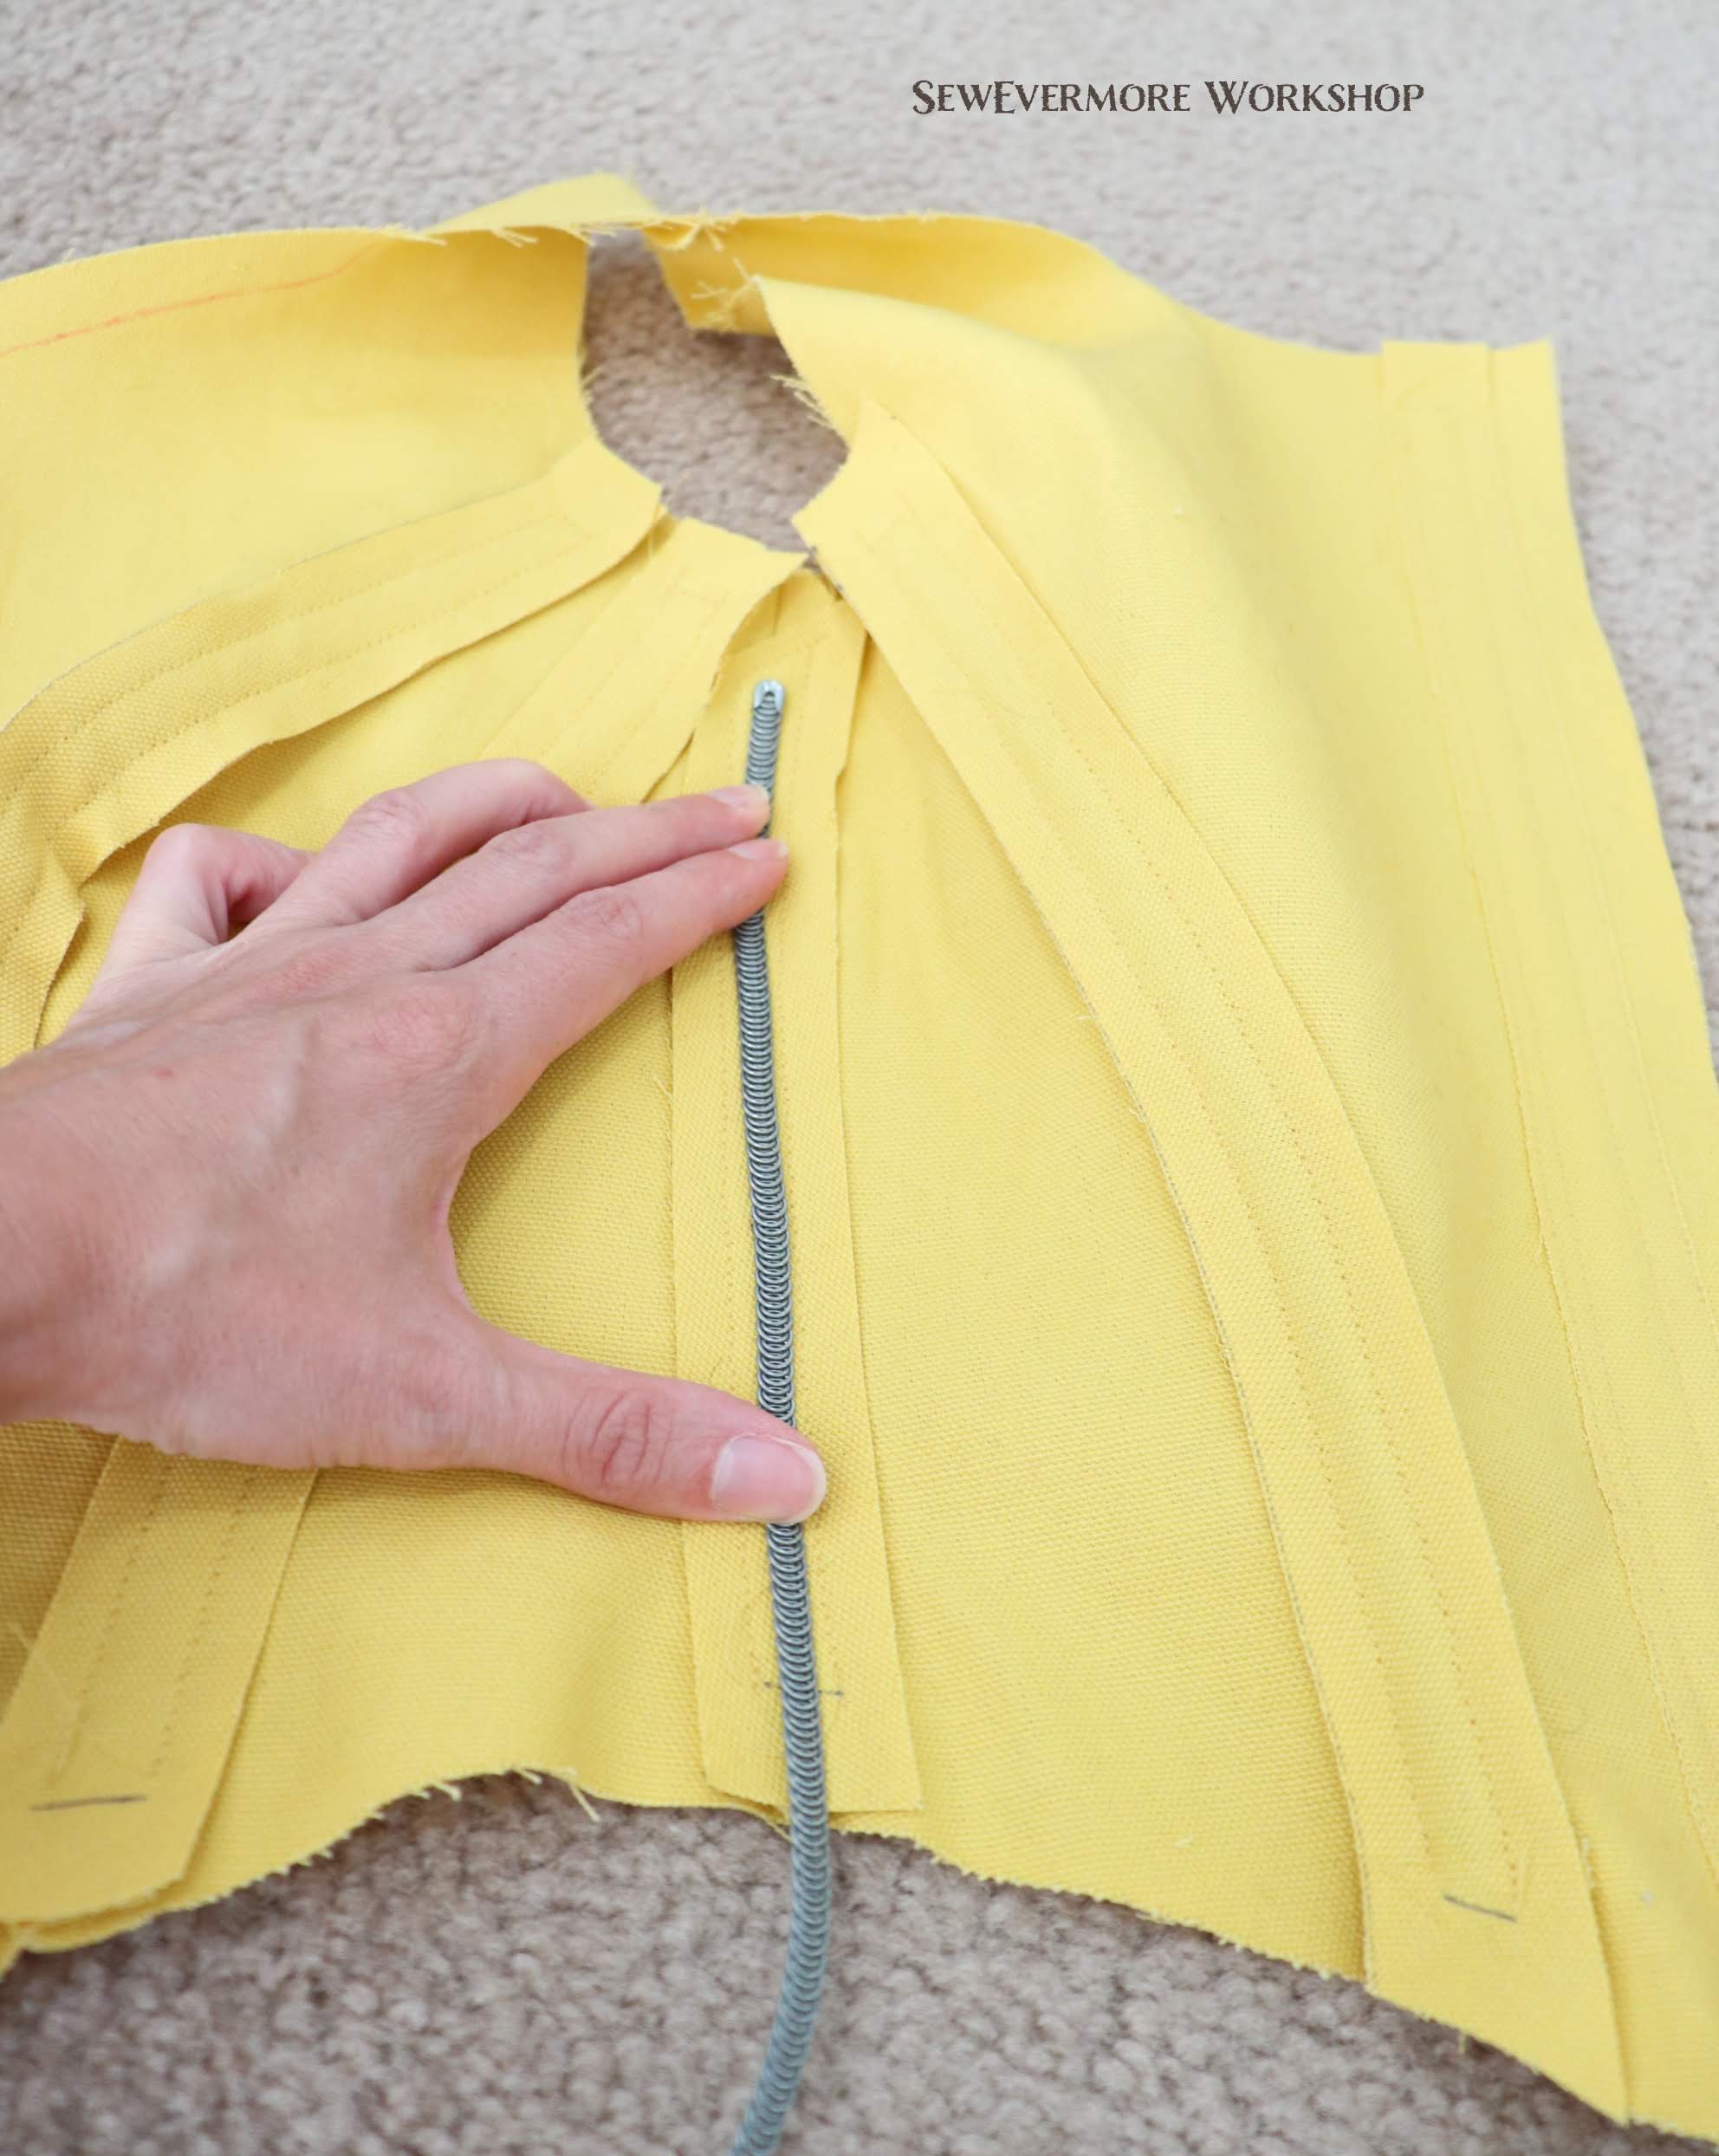
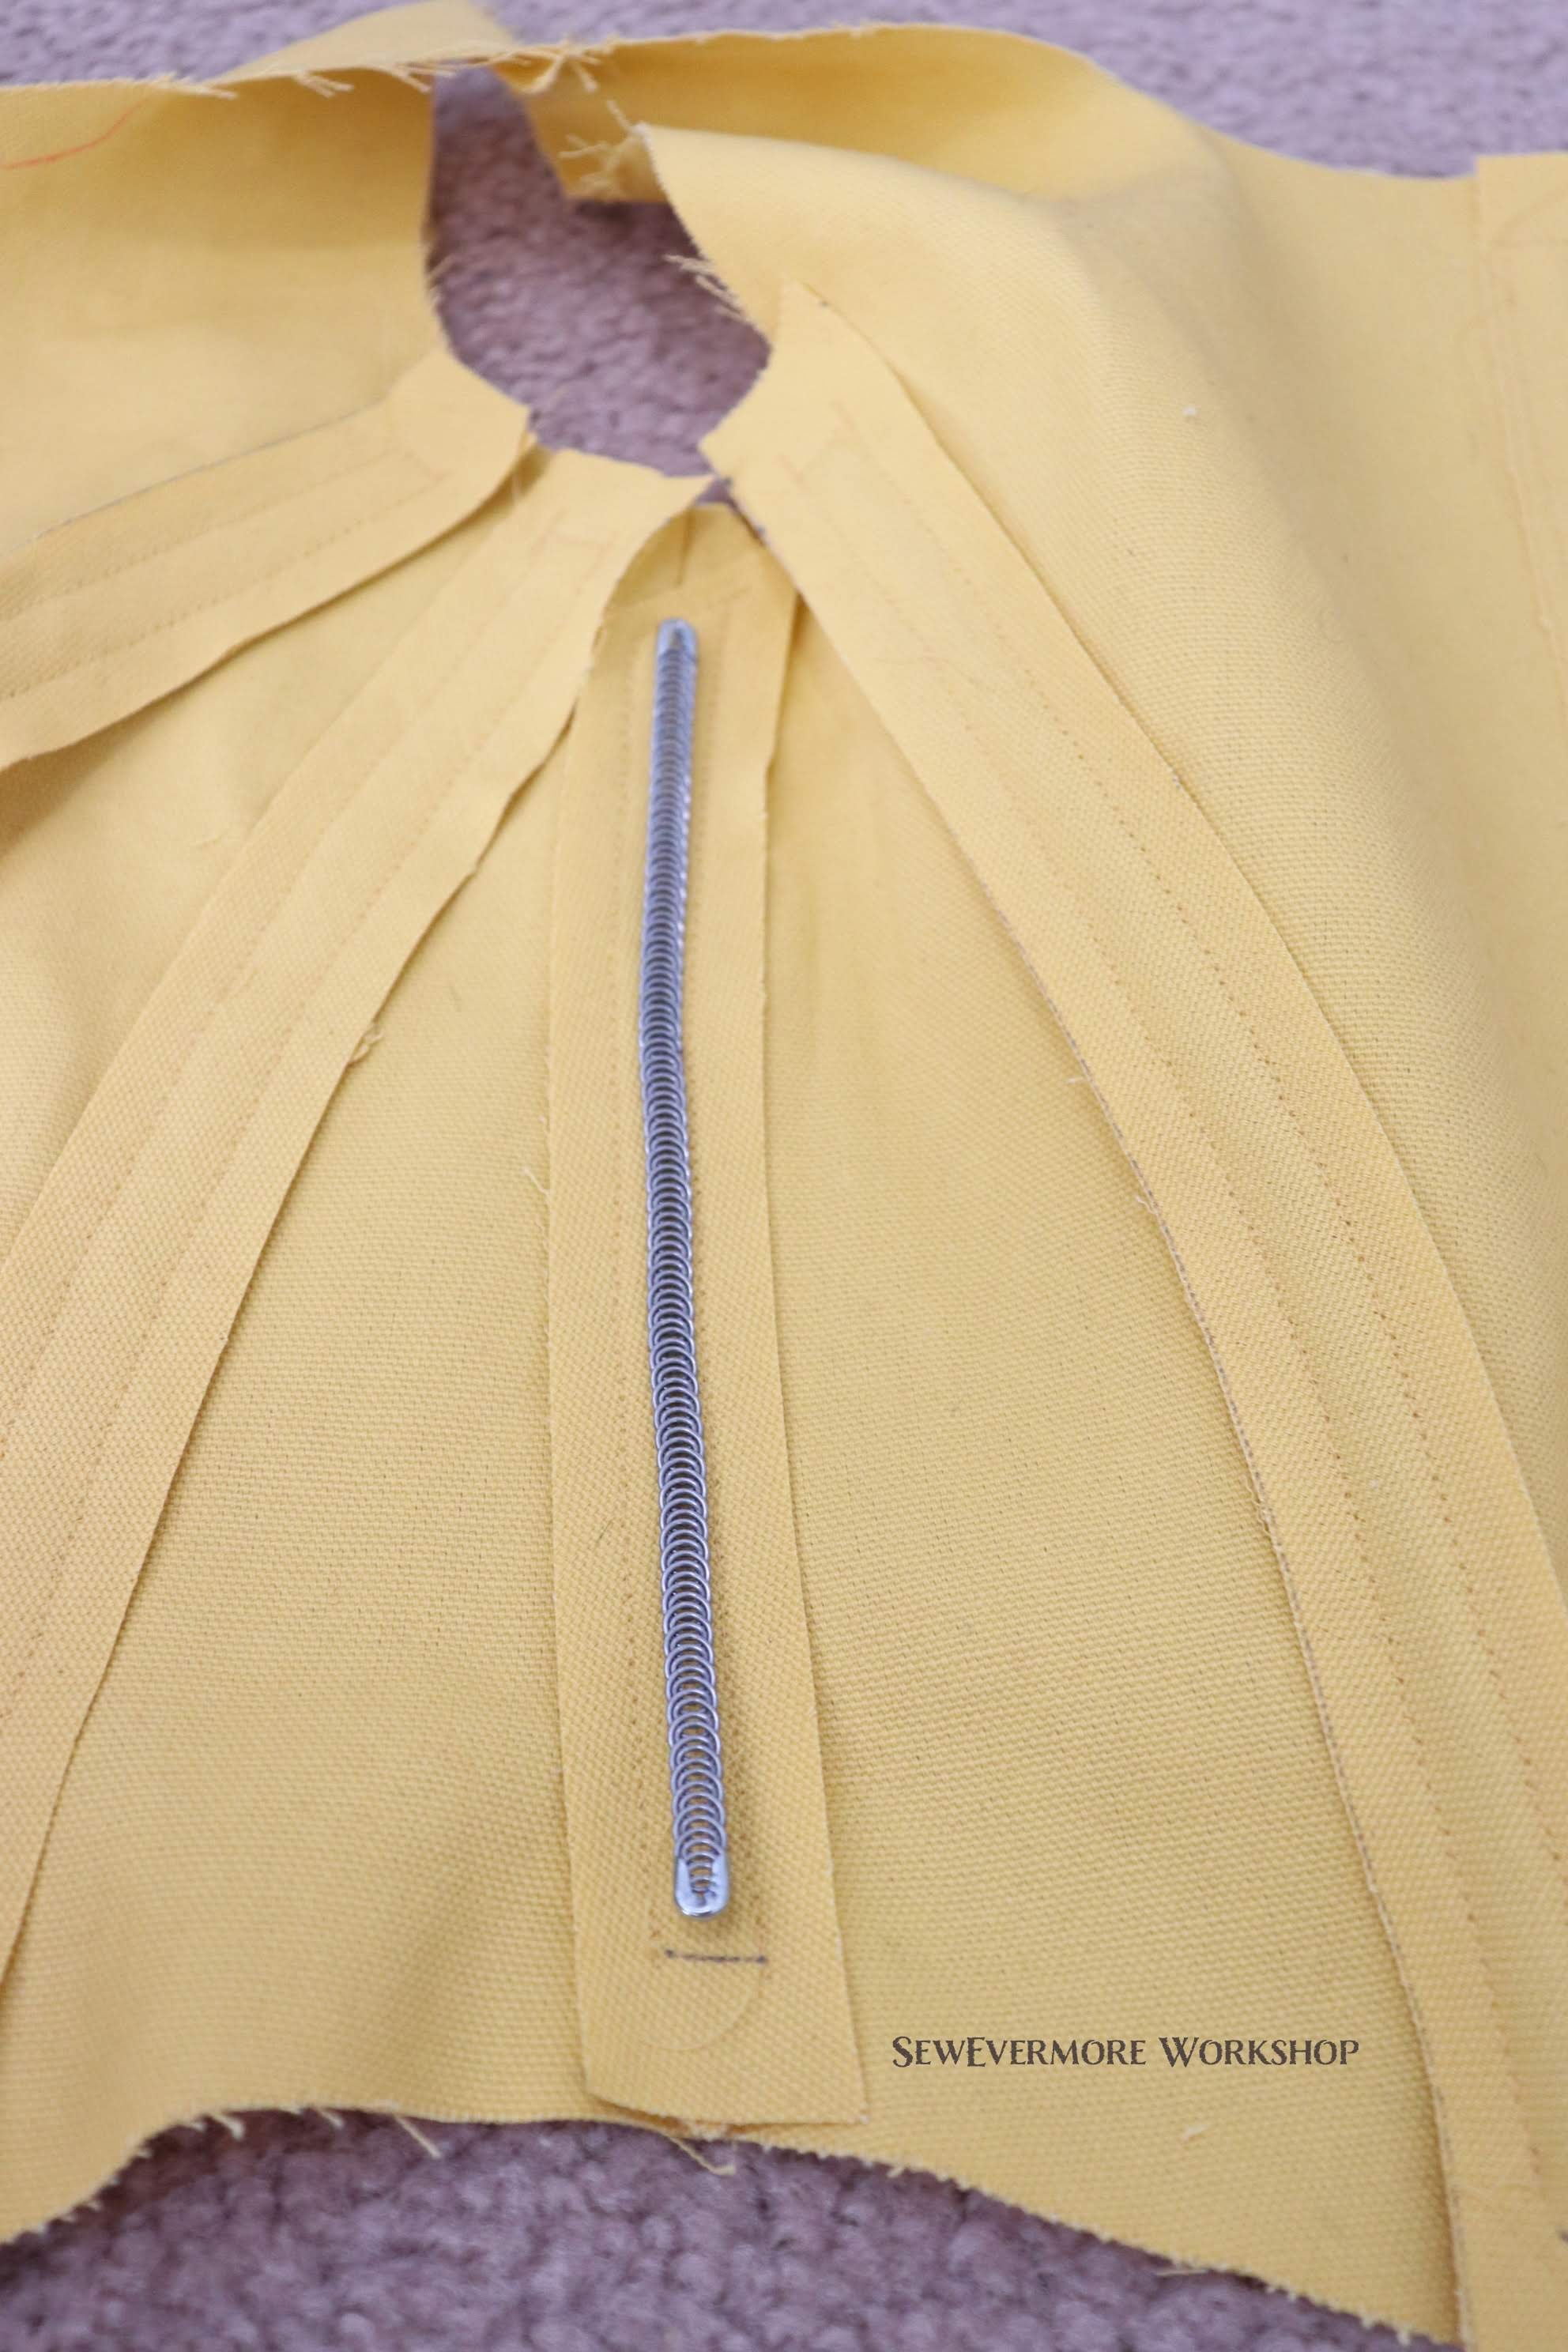
After dipping each bone, I even did the spiral bones to help secure the tips, I inserted them into the channels. The Plasti Dip made the bones a bit hard to slide so I covered the end with just a small bit of PTFE tape.

Something else I did this time…I can’t remember where I saw it but it is such a great idea! Why didn’t I think of it years ago? I used a sharpie to label the boning placement. You can see the markings that indicate if the boning goes on the left (L) or right (R) and the channel it should be placed in. Thank goodness there are wise people in the world who share their ideas online!

My boning was now ready to place in the channels. The boning went in very smoothly.
 I used a skewer to make sure the boning was all of the way inserted. (I trimmed off the pointed tip and sanded the ends first.)
What to do next? Next, I need to bind the lower edge, add trims and my corset will be done. I will add it to my Belle Dress once it is finished.
- Finishing the Corset
I was able to finish the corset last weekend!
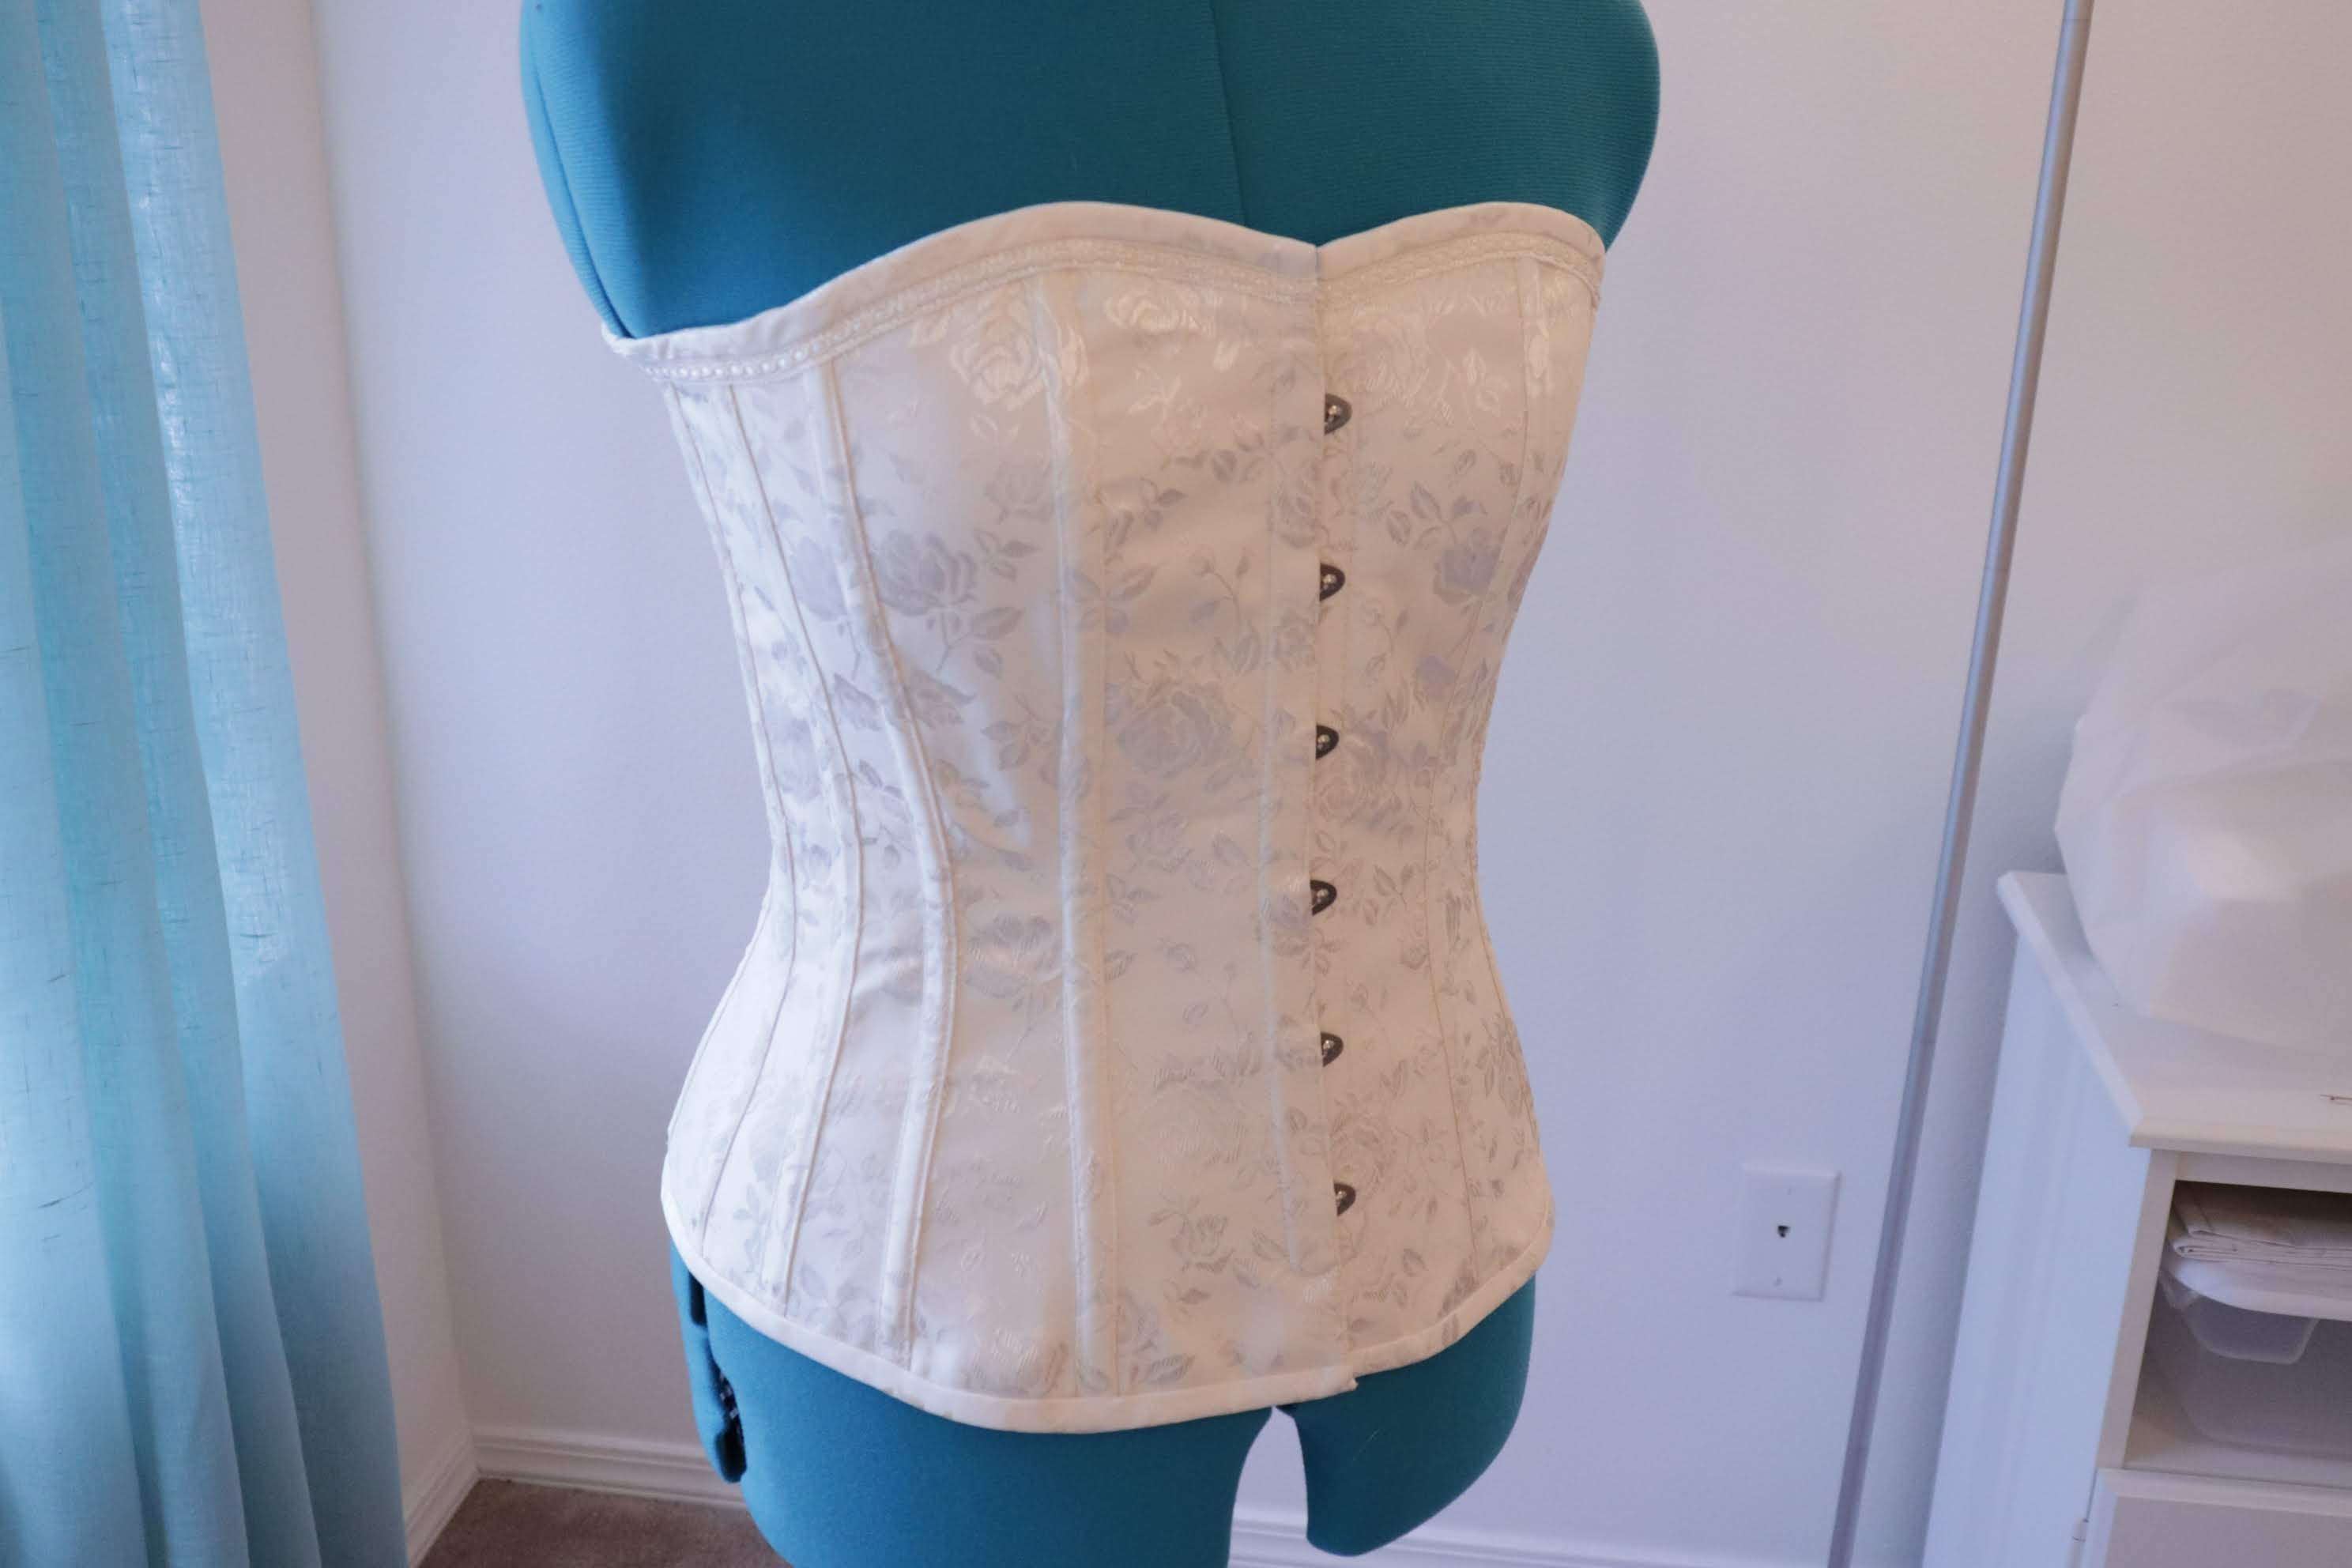
This was the first time I had ever used a busk in a corset, and it was a lot of fun to use. It was a challenge, but I was quite pleased with it in the end. I think I will have to practice my technique in order to help remove wrinkles, but overall I enjoyed the pattern and the process. Alison Smith’s Zara Pattern really was a nice place to start. The curves were gentle and easy to align.

I particularly enjoyed adding the trim. I thought it really added a lot of character to the corset.
The primary reason that I made the corset was to offer support for the Belle/Cinderella dress. The skirt will be quite heavy. I wanted to have a corset to wear under the dress so that the waistband would not dig into your stomach when the dress was worn.

The corset will be worn under the petticoat.
- Adding a Bustle
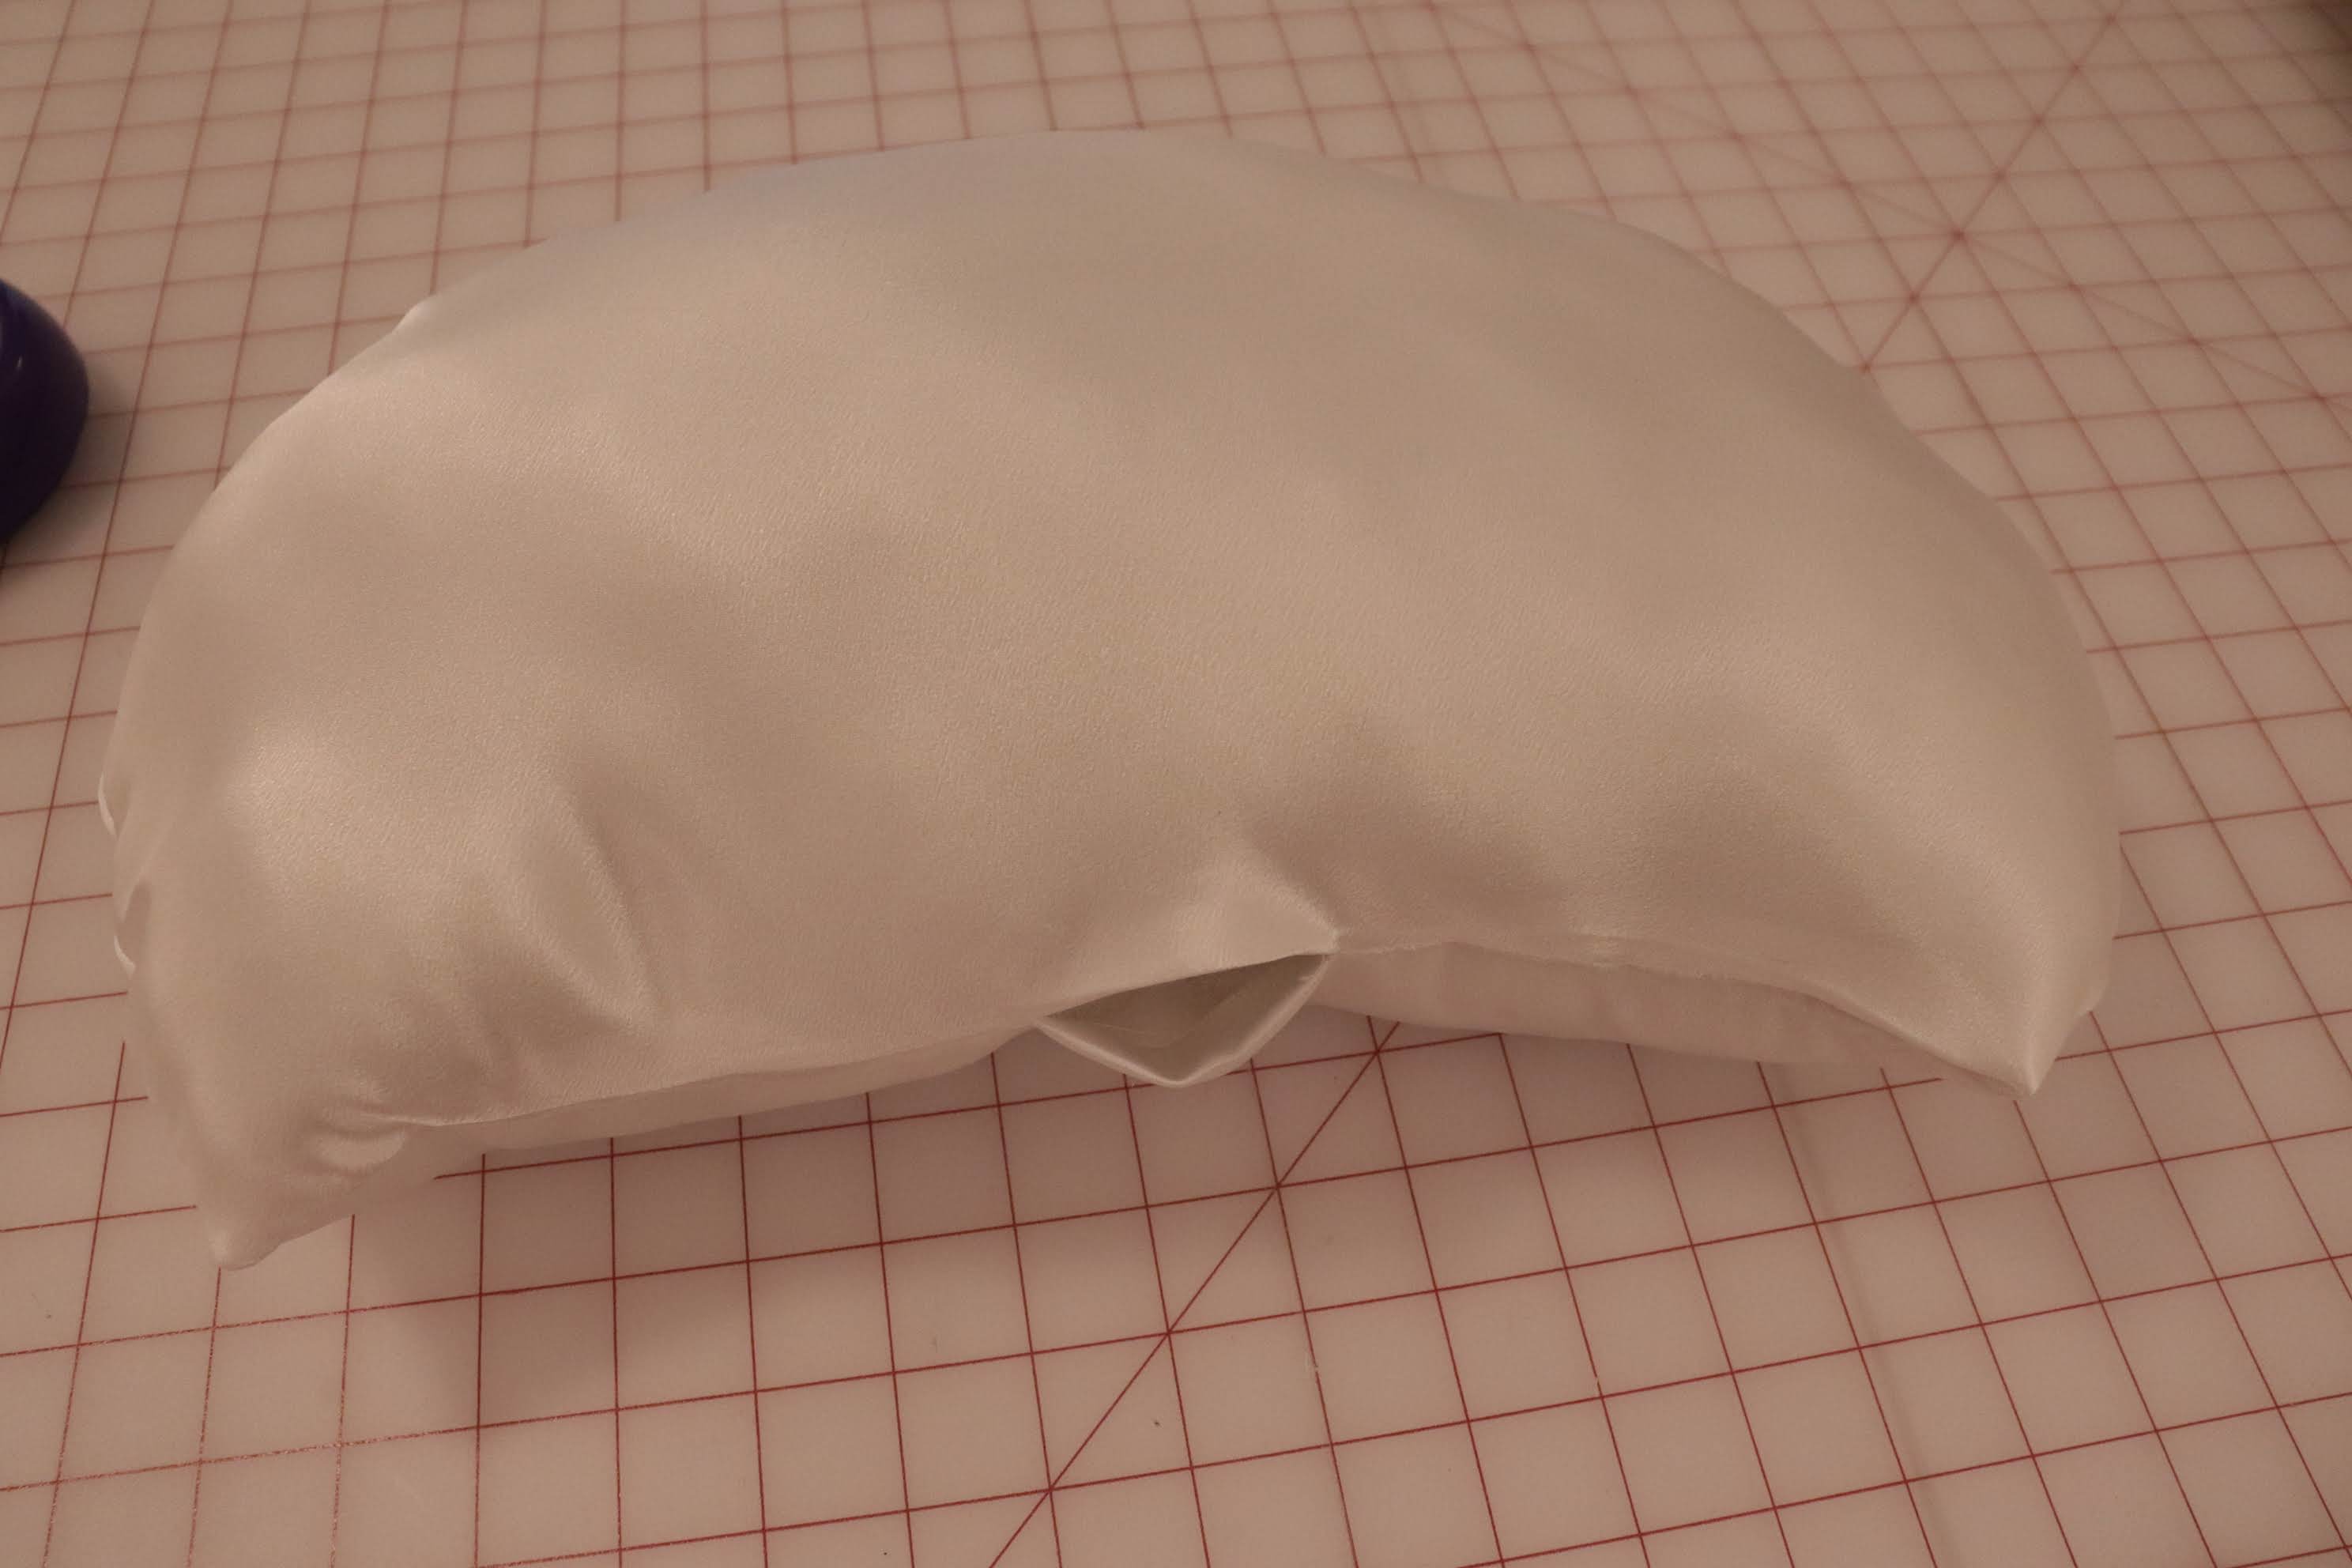
When I began this project I wasn’t planning to add a bustle. I thought I would be satisfied without one, but after consideration I determined that I wanted one after all. So, before applying the 3rd and 4th layers of the petticoat, I decided to make a bustle. Or…as my students and I call it…a butt pillow 🙂
(This did cause me to have to make adjustments to my previous petticoat, so if you plan on using a bustle I would definitely make it before the petticoat.)
To make the bustle I used some scrap crepeback satin that I had, and non-roll waistband elastic. Then, I drafted the pattern. The largest width was my hip measurement ÷ 2. The top width was my waist measurement ÷ 2. The height, was the same measurement. I sewed around the edges with a 1/2 inch seam allowance leaving an opening.

Flipped it right side out and stuffed.
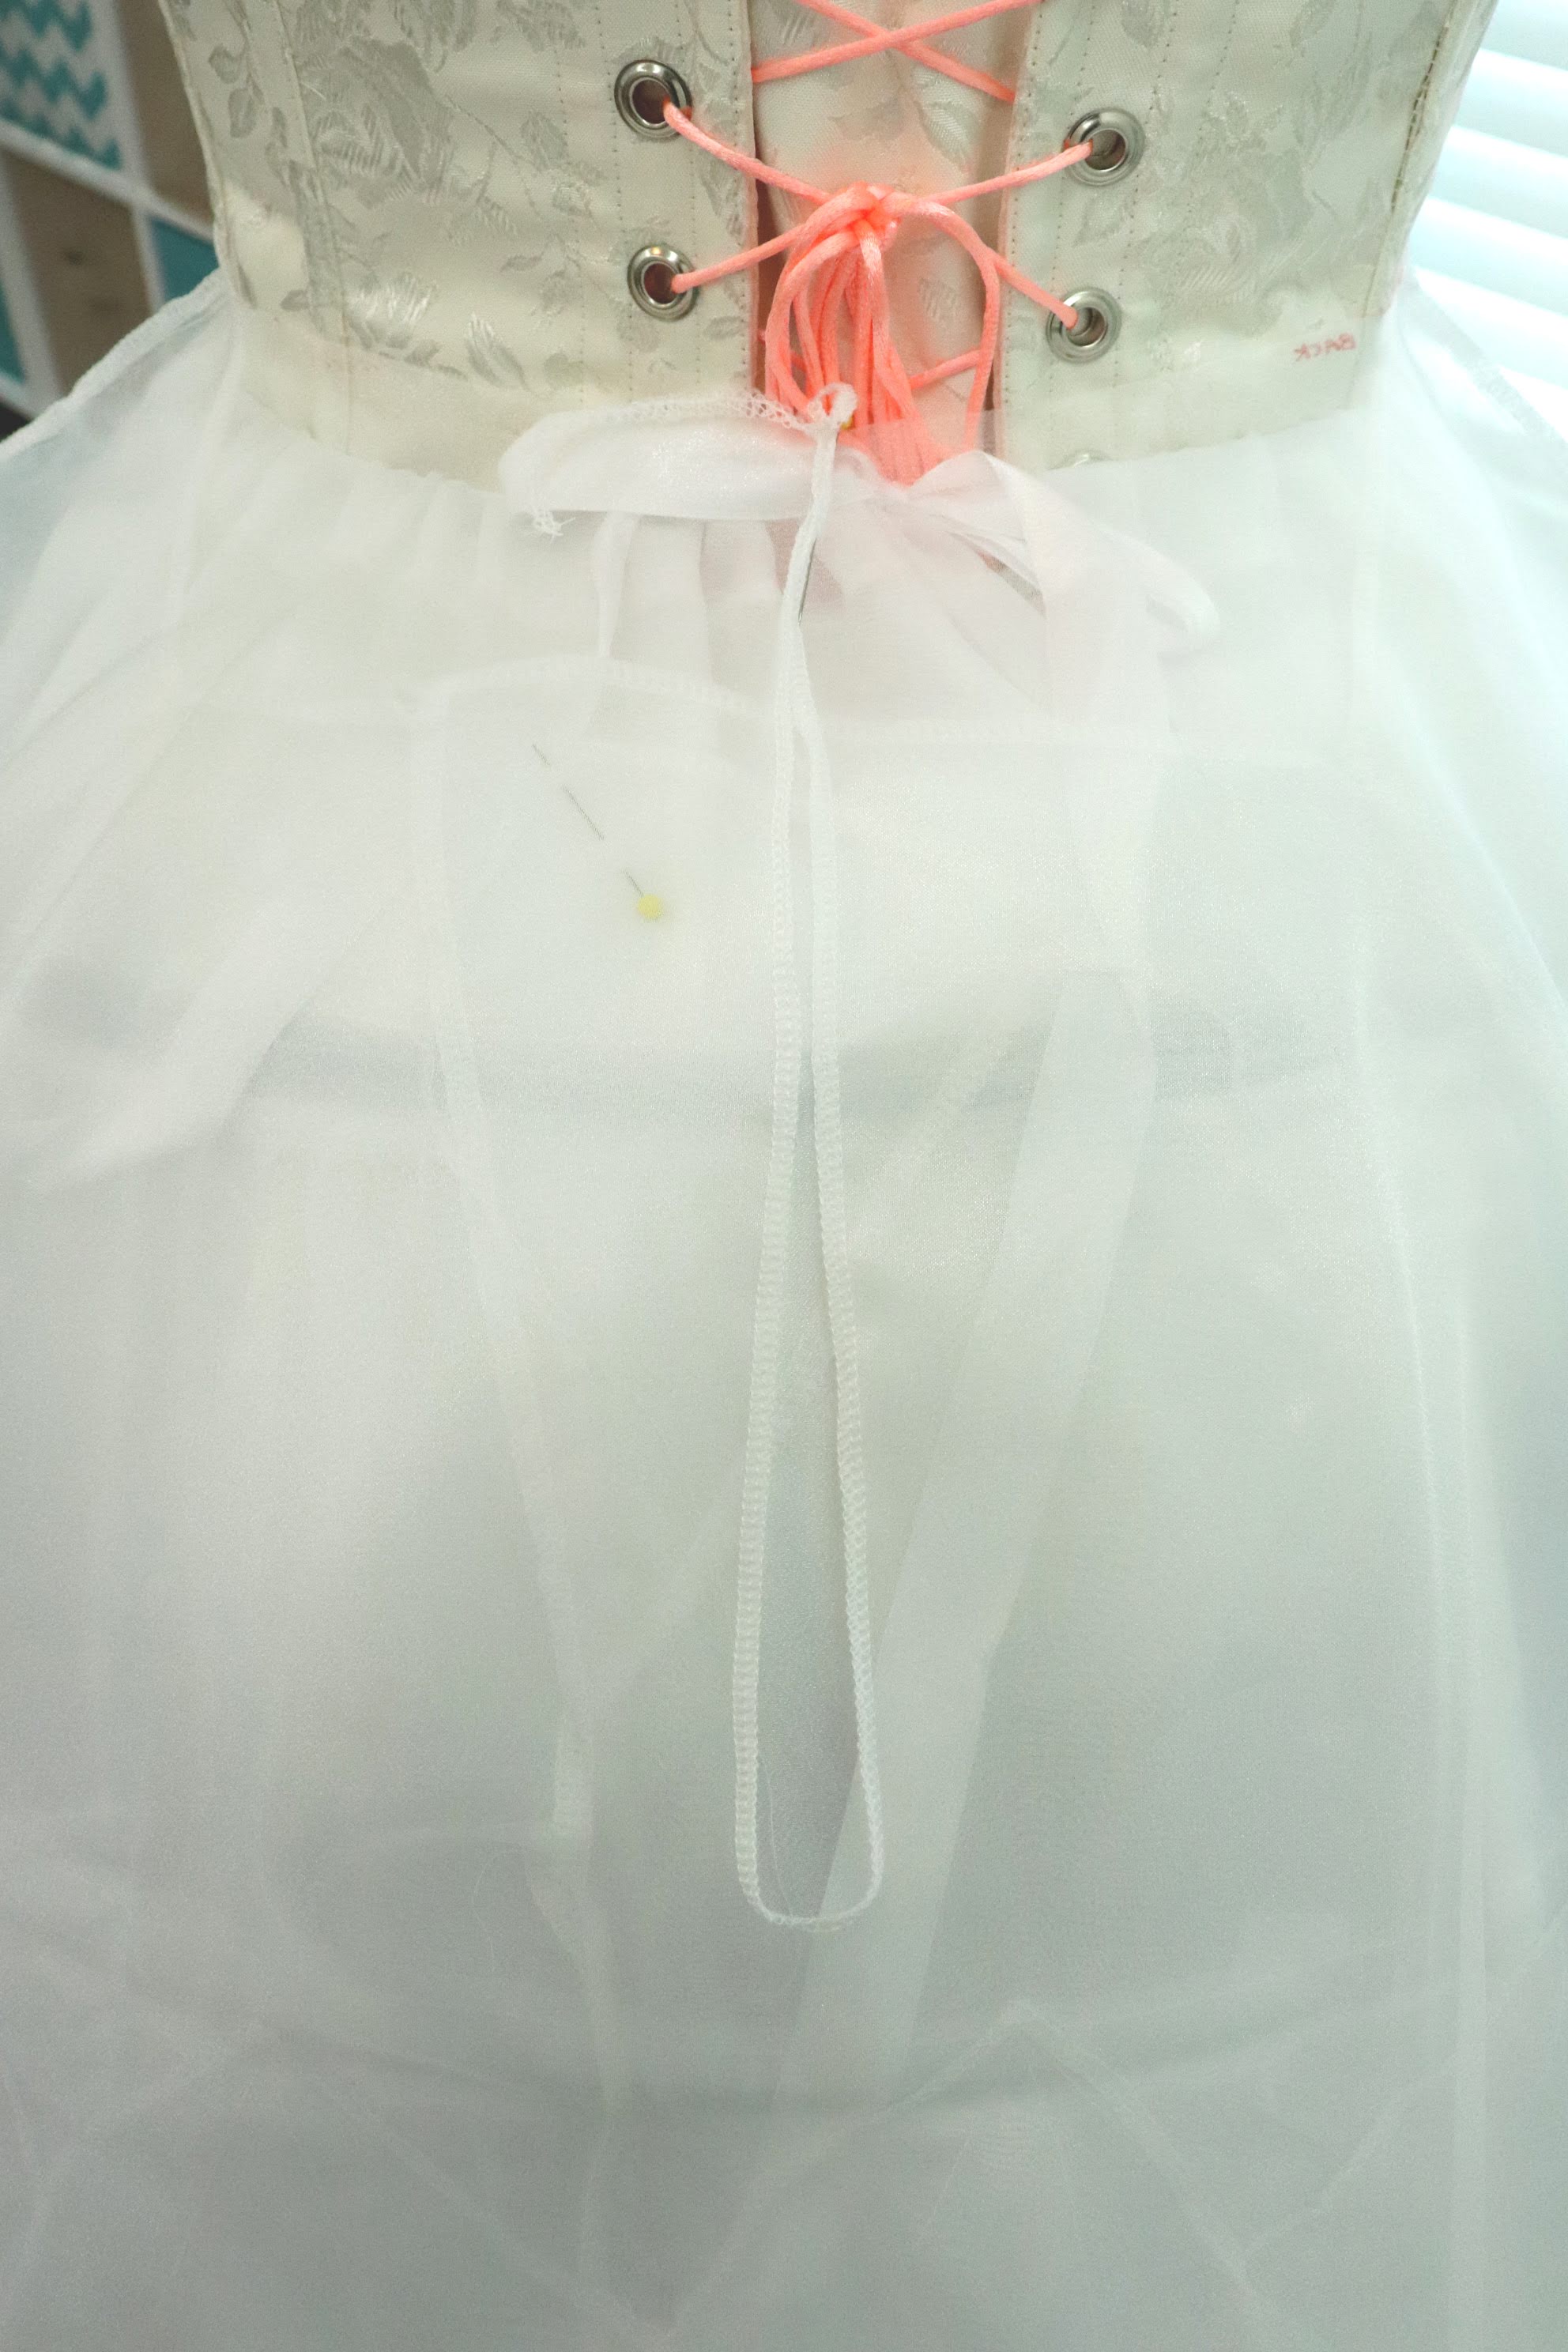
Next, I edge stitched the opening closed. I also pinched this top edge together and stitched again about 3/4 inch away from the edge. This is was to create an area for the waistband.

The waistband was made from 1 inch waistband elastic. There is a lingerie hook at one end. At the other I added a few inches so I could fold it over and sew vertical divisions along the folded area. This creates slots for the hook, so the waistband becomes adjustable.

Next, I pinned the elastic in place underneath the waistband section on the pillow. The center of the elastic (mid sized) was placed at the center of the bustle pillow. I stitched this in place with two rows of stitching.
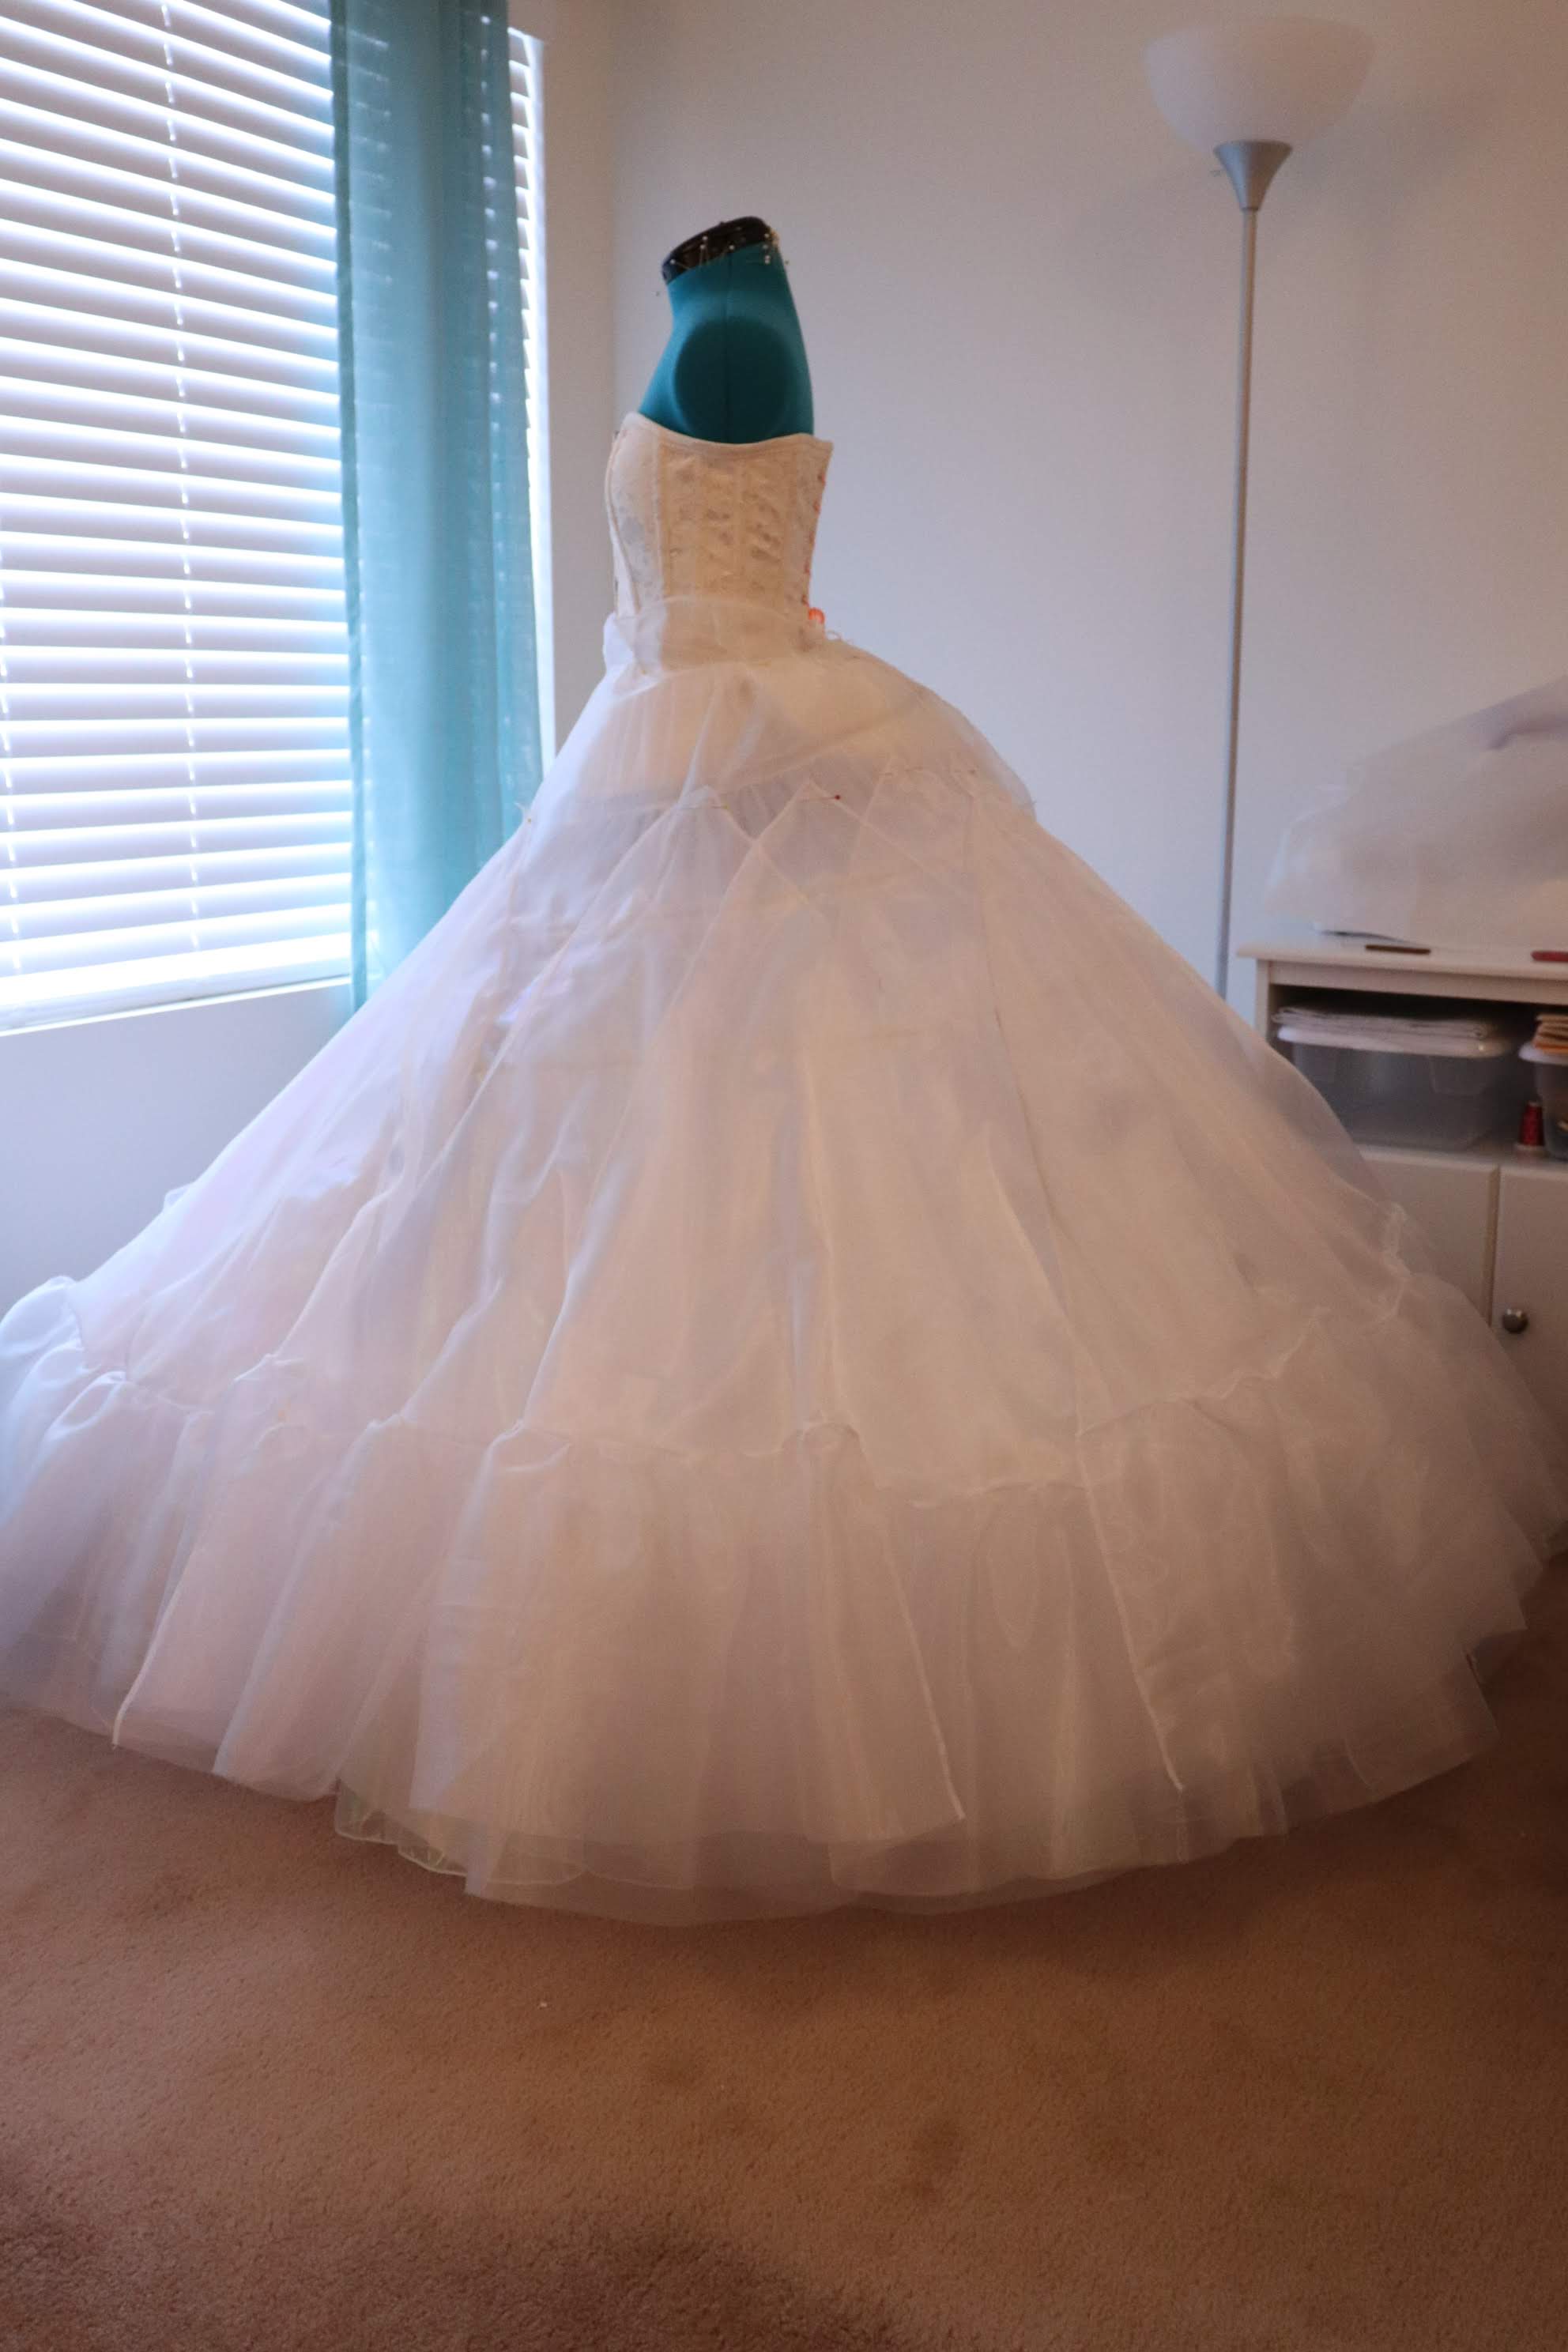
Here it is over the corset, as it will be worn with the dress.

Next, comes the hoop!

As you can see, this changed the positioning of my hoop SIGNIFICANTLY! You could always use a smaller bustle if this is not the look you prefer, but I kind of liked the drama of the shape.
Next, I added the first two layers of my petticoat. It’s so big!
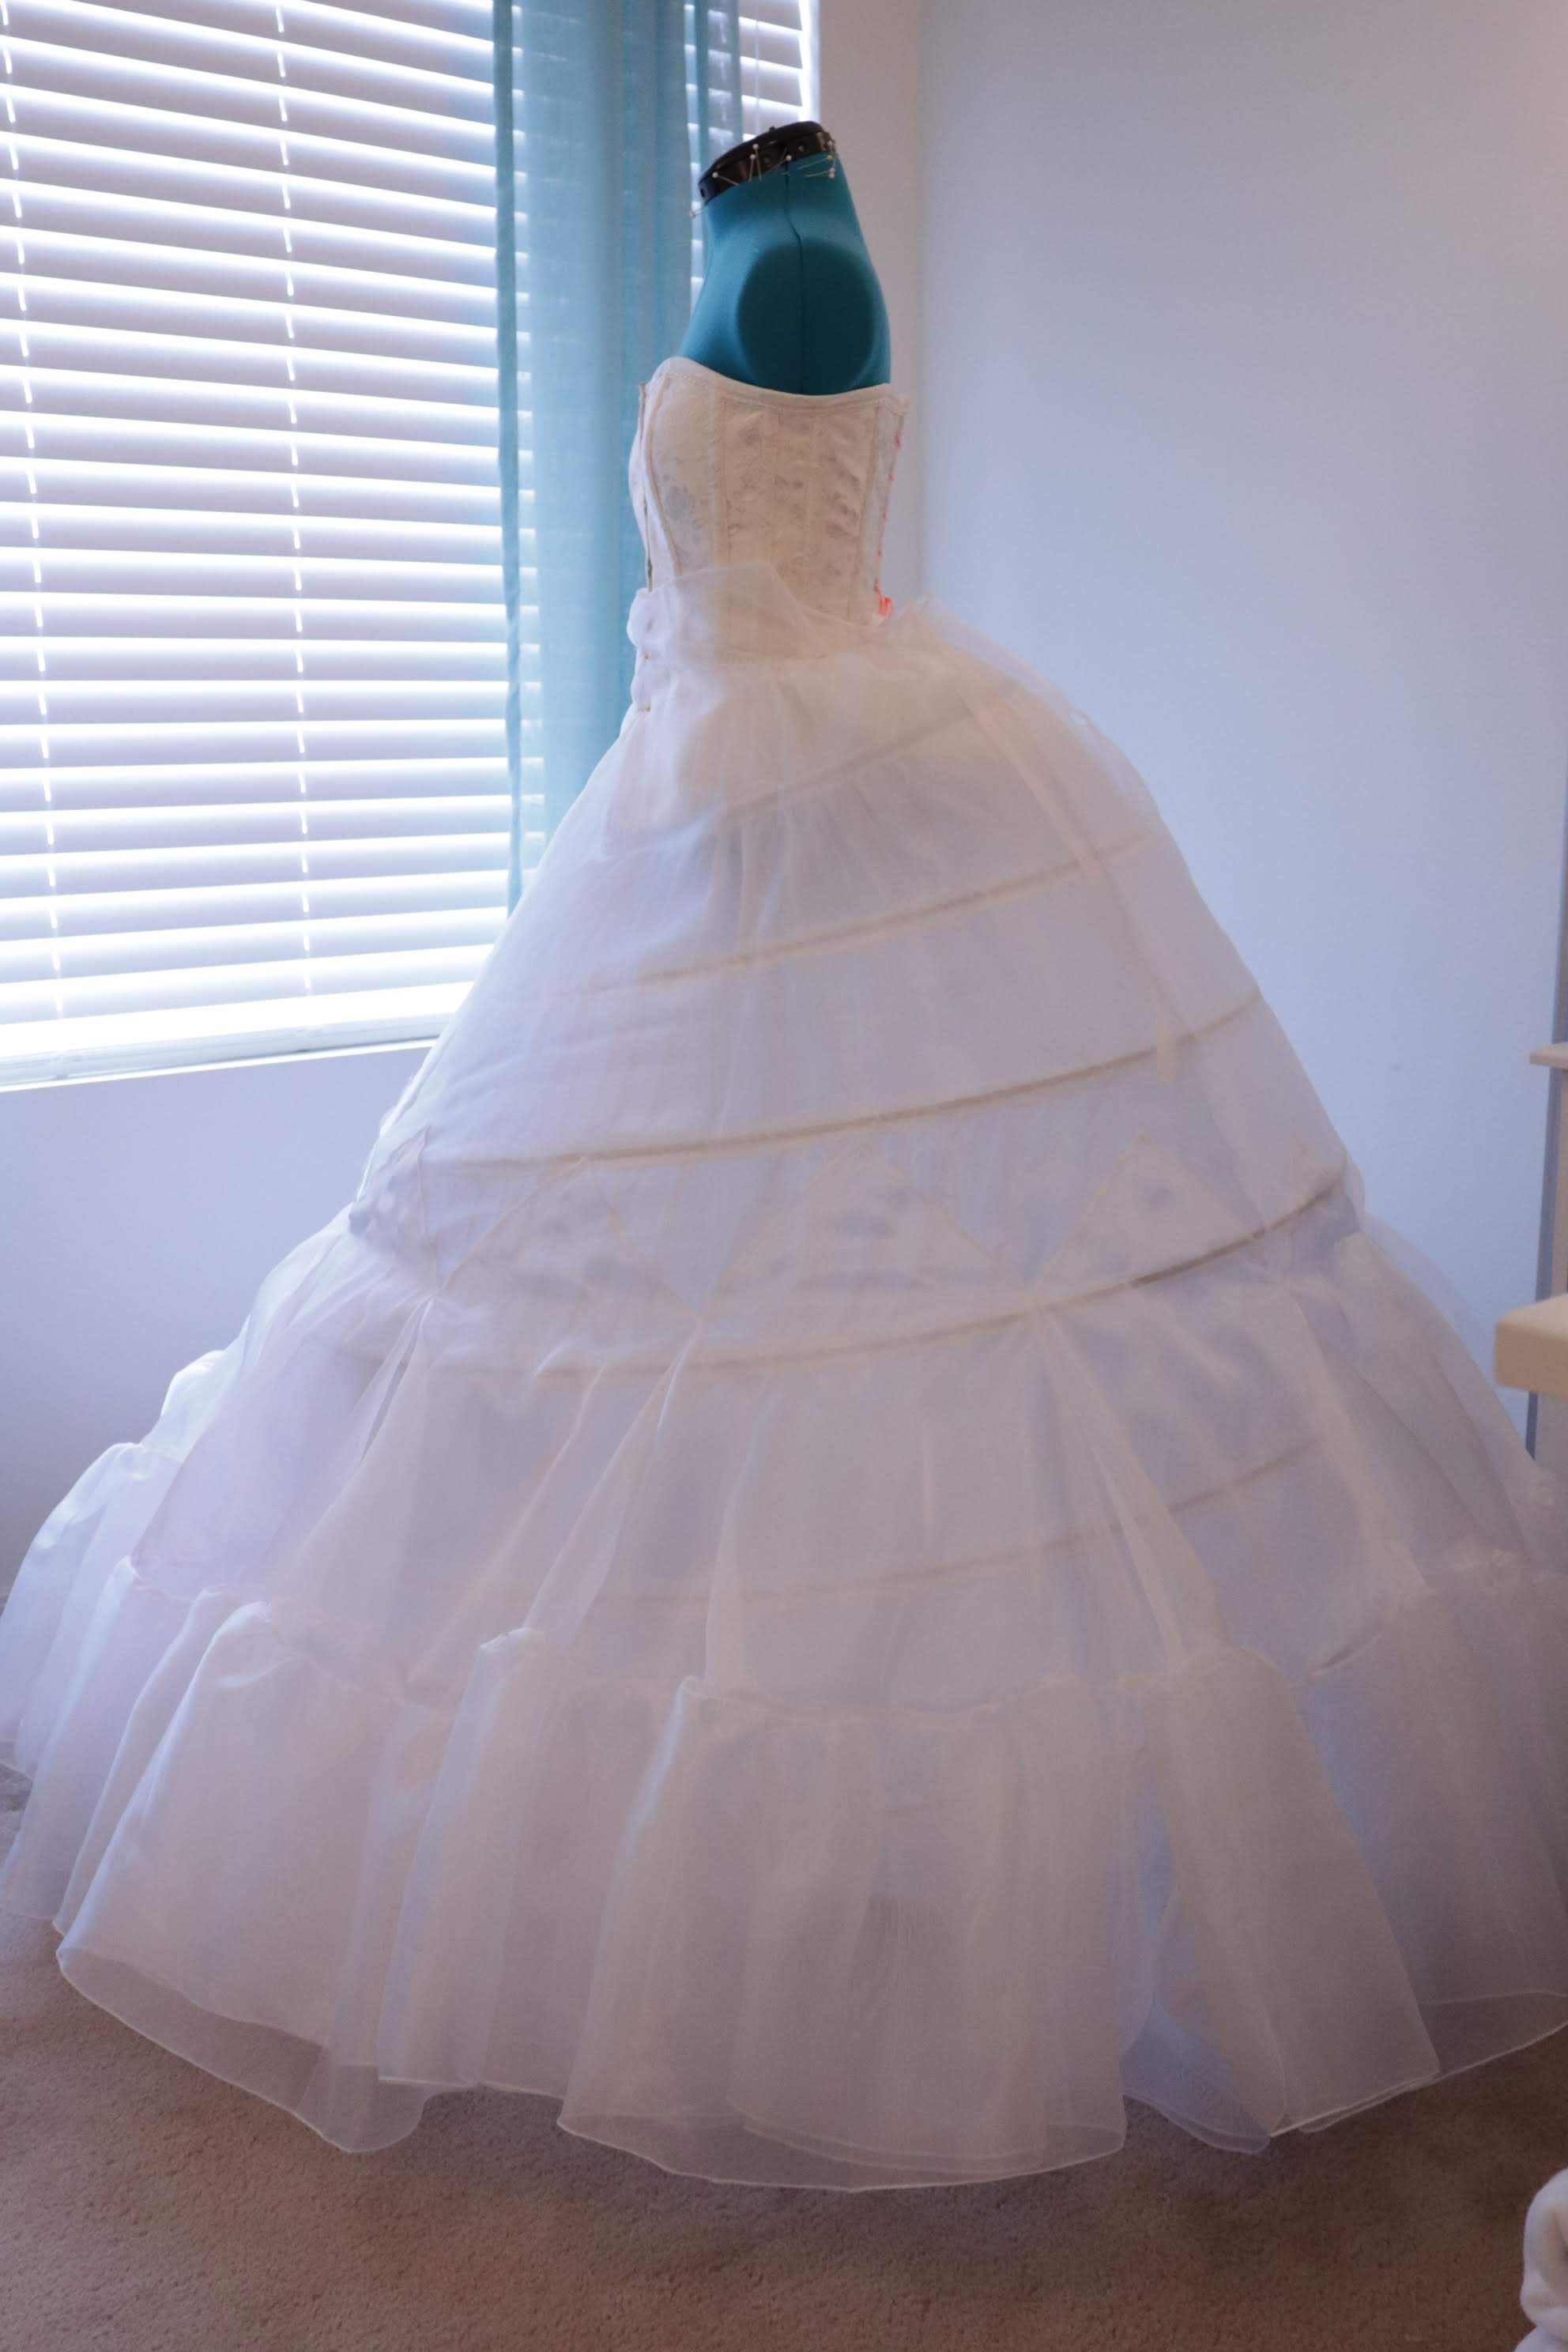
Since I added the bustle, this brought up the back edge of the hoop. To compensate, I had to unpick and drop down the godets along the back side of the skirt a few inches. This made it a bit of a tight fit, but since it will be covered by other layers it wasn’t that big of a deal.
So now, because of the bustle, when I add additional godets, they will not be able to be aligned with the hoop, instead they will have to be placed based on the desired hem length.
- Assembling Petticoat Layers 3 & 4
The Layer 3 godets were added in the same manner as the Layer 2, except, due to the bustle, the back godets are lower on the petticoat than those on the front.

It’s so shiny!
One thing that I noticed occurred on this layer, was that the front end of the petticoat began to poke out. You can kind of see the dramatic angle of the front of the petticoat, while it slopes more gradually in the back.

I decided to compensate for this by adjusting the number of godets on the next layer. I had originally planned for 8 godets in Layer 4. This would be very sufficient if you did not have the bustle altering the shape of the gown. However, given my hoop and the shape created by my bustle, alteration to the next layer was necessary for my petticoat.
I pinned my godets in place to see where they would look best.
IT”S SO FLUFFY!!!! I LOVE IT! The positioning I preferred placed 3 godets on the front of the petticoat and 9 on the back. This required making 4 more godets than planned.
My dogs did make adding the panels a bit of a challenge. Evie here realized the Layer 4 godets were great fun, and decided to take a swim in them.

Not to be left out, Gracie then wanted to take a nap right in the middle of the action. Which meant, my lap. Needless to say, creating the new godets was slow going, but I liked the result.

The godets in the front were sewn together 12 inches from the tips (two seams). All other godets were sewn together 3.5 inches from the tips.
- Petticoat Layer 5
Here it is! The next step to the Belle/Cinderella cosplay tutorial. We are on layer 5 of the petticoat. This layer is constructed differently than the previous layers.
Here was the petticoat after Layer 4.

Layer 5 is a simple circle skirt with a ruffled bottom. Based on the shape of the petticoat to this point I decided I didn’t want the ruffle to be the same length as the previous as it was starting to develop a “ledge” where the line of the skirt would angle down when it reached the ruffle. To compensate for that I decided to make the Layer 5 ruffle 9″ tall instead of 12″.
Reader beware! The next section is riddled with math! I actually love this. I teach math, so I think it is just fabulous when I can incorporate math into my projects. Don’t worry, I will keep it as simple as possible and try to make the calculations clear. If you are working on your own project, you may want a calculator handy as you do these steps.
First, I measured the length of the petticoat. Since the length is not consistent, due to the bustle, I measured the length from the front, sides, and back. In hindsight, if I made it again, I would probably now measure halfway between those points as well, for increased accuracy.

To create the circle skirt I used the measurements I collected. I then needed to determine my waist measurement, for me, approximately 30 inches. Using the formula Radius = Circumference ÷ 6.28, I was able to determine that the radius for my waist was 4.75 inches. However, I need a seam allowance, so the measurement I will cut for my waist is actually 4.25 inches.
I added this length to the measurements needed for the skirt to create my cut pattern.
The largest radius used in my pattern was 47 inches. I used this radius to determine the length of ruffles needed. Circumference = 6.28 x Radius. Plugging in 47 inches for the radius I was able to determine that the circumference of the circle is approximately 300 inches. I doubled this for my ruffle. So, I needed 600 inches of ruffles for this layer of the petticoat. This actually worked out perfectly as the organza I used is 60 inches wide.
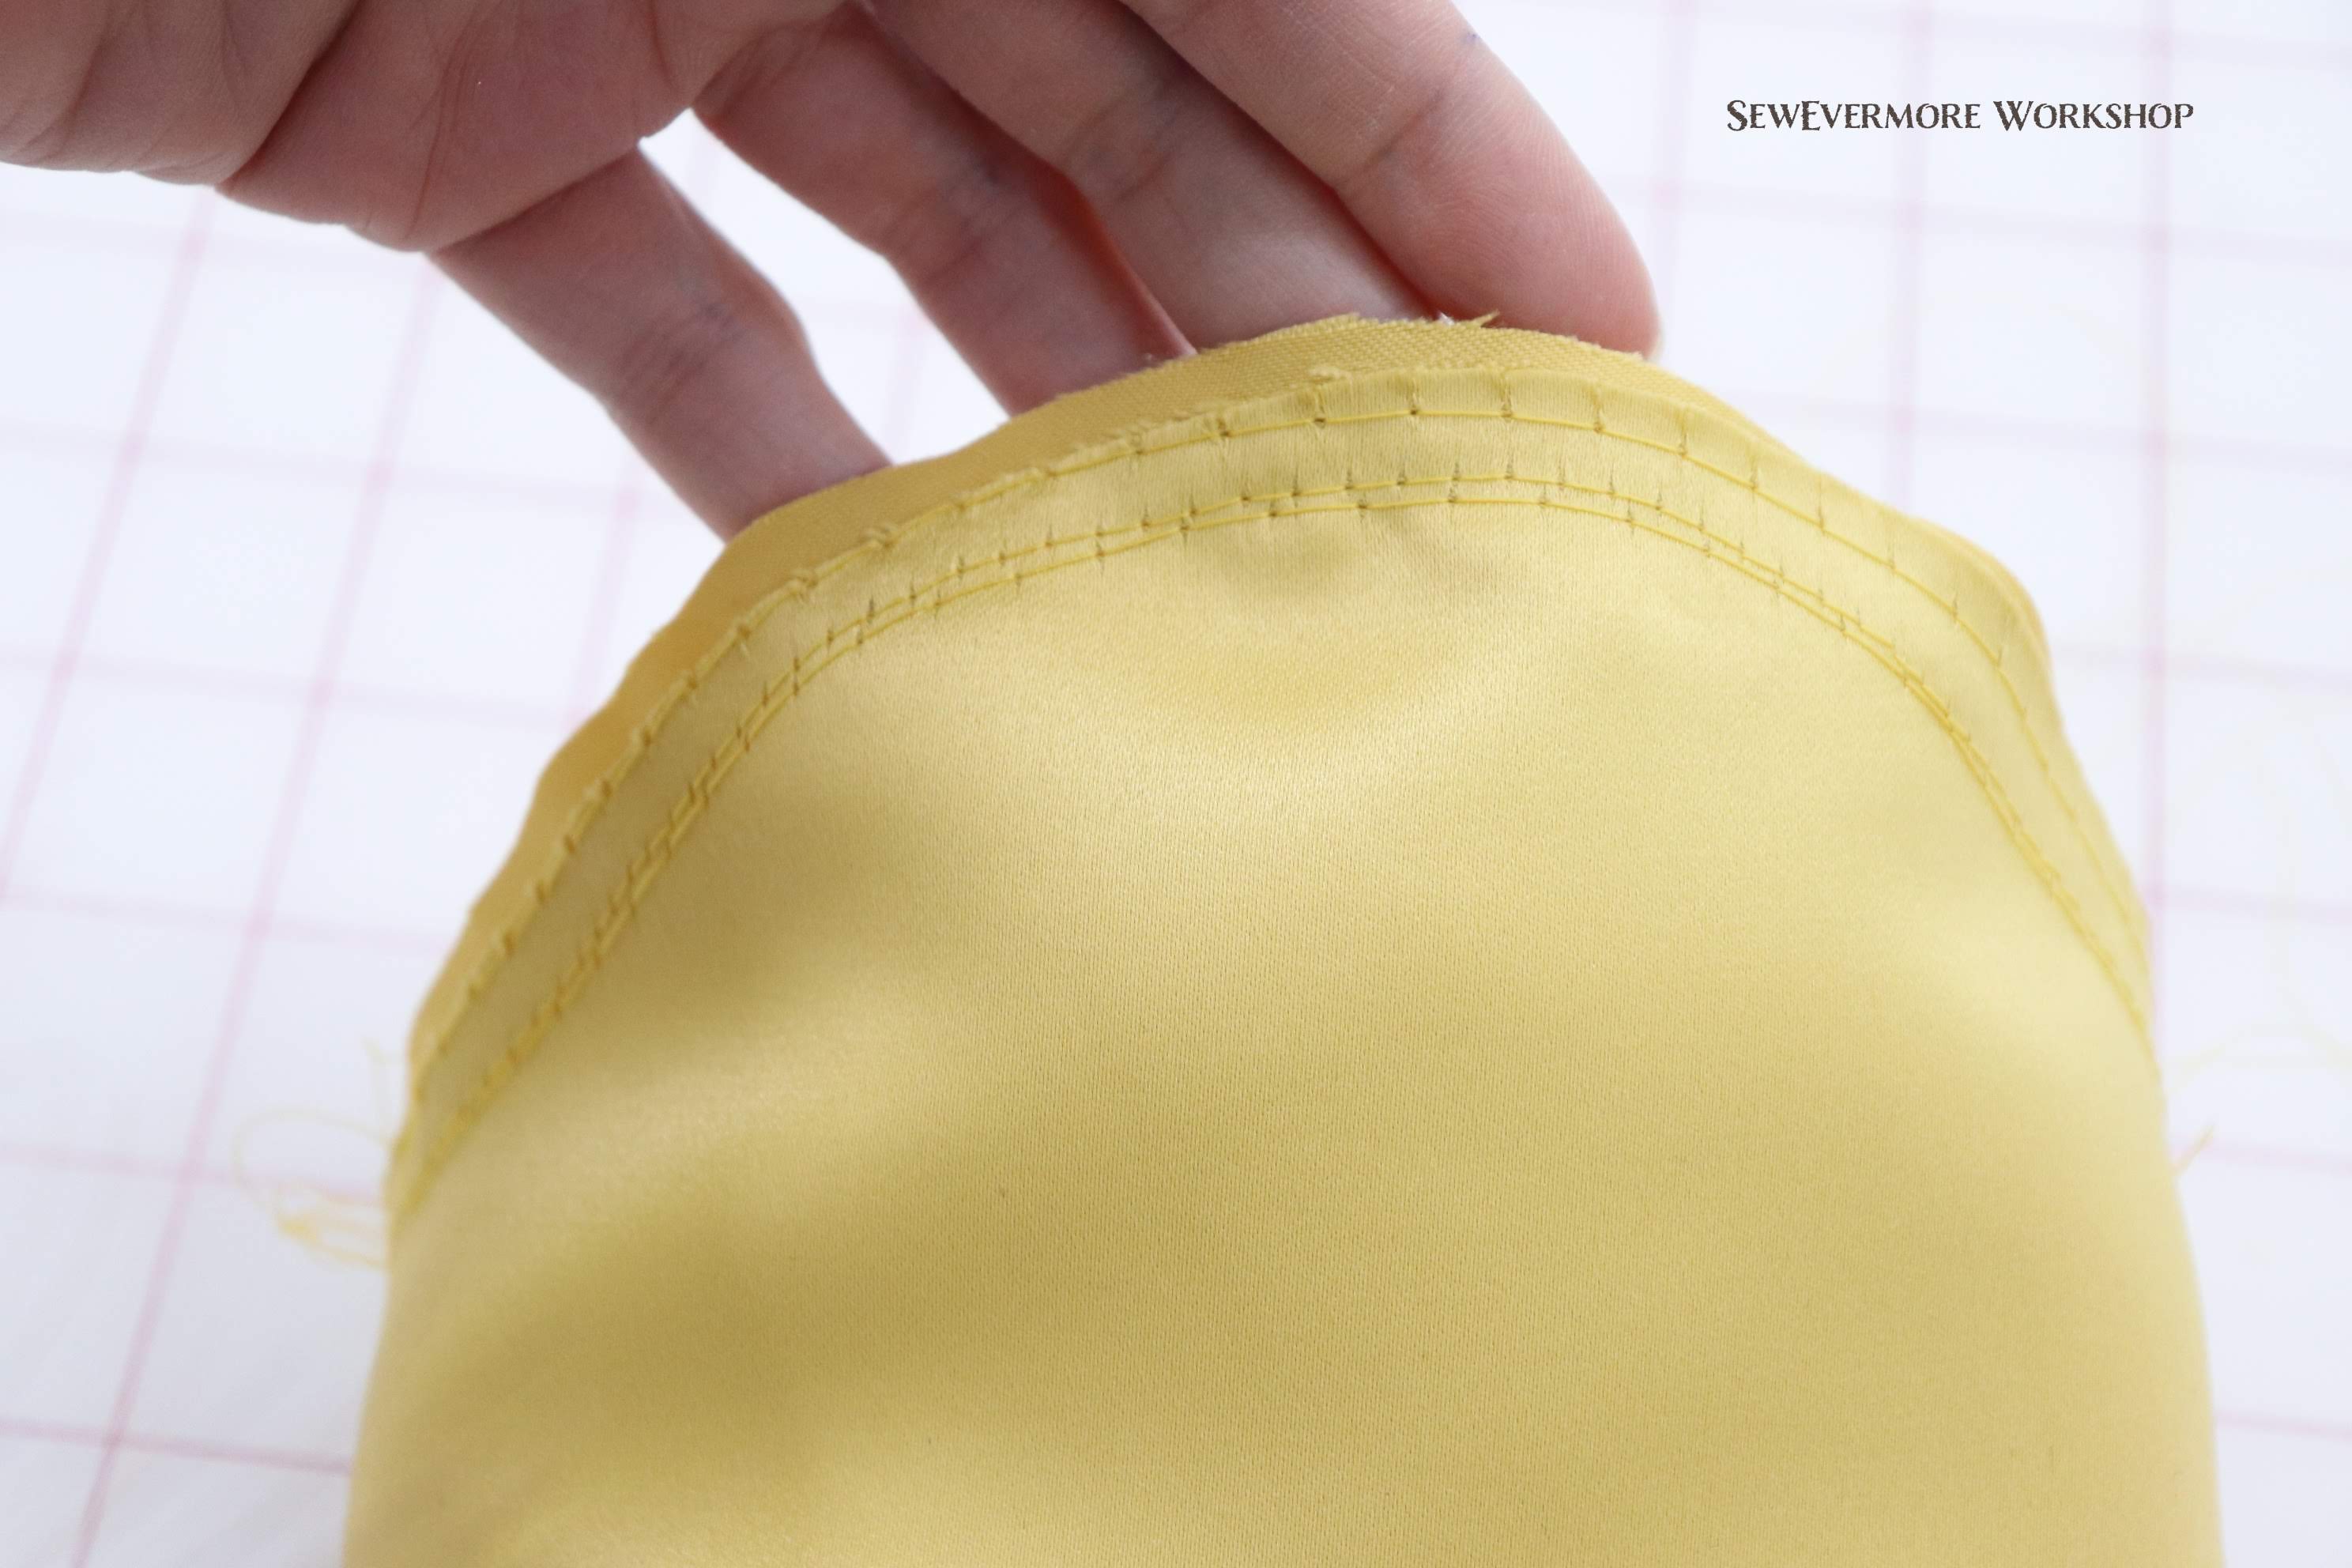
I cut ten 10″ strips that were the length of the fabric (60 inches) and sewed them together along the short edge. I finished both edges of the ruffle (hem and opposite side) using a narrow hem on my serger. I finished the non-hem edge to help prevent fraying as I worked with the gathers. I am very glad I did!
I made a gather stitch along the top edge of the ruffles. Don’t you just love all the fluff!

The organza was not wide enough to cut the whole circle skirt, so I cut it in two sections, front and back.
Using 100 inches of organza fabric, I folded it width wise so I had a double layer of fabric that was 60 inches by approximately 50 inches. Laying the fabric flat, and pinning the edges to hold it together, I drew out the circular shapes from my sketches in the same manner that I drew out the curved sections of the godets. I also drew out the circle for the waist and cut them out.

My yard stick wasn’t long enough to get the job done, so I taped two together. It worked great! I repeated this process for both the front and the back of the skirt.
Once both pieces had been cut I serged the sides together.
I cut an approximately 10 inch slit in the back and serged that edge as well.
I draped the circle over my dress form to make sure it was the right length. It did require a few adjustments. As you can see, the edge closest to the camera is a little long. I trimmed that before adding the ruffle. I think this could have been prevented if I had taken more measurements at the beginning.

I attached the ruffled edge with a straight stitch and then serged the seam to eliminate bulk.
Here is the Layer 5 petticoat complete!

I think I may want to add a bit more volume to the back to create a smoother shape. The next two layers of the petticoat are simple circle skirts, so they won’t add much to the overall appearance. I do really like the shorter ruffle on this layer. I think it prevented the drop off problem I was having previously.
Overall, I think Layer 5 was a success. We will have to see if I decide to add more godets to make it even bigger!

- Additional Godets – Layer 4.5
After staring at my petticoat for quite some time I felt like it was still a bit unbalanced. This probably could have been avoided if I had made the hoop myself, but since I chose not to, I felt like this was something I needed to correct.
I wanted the back side of the petticoat to be fuller. So, I decided to add some additional godets. I am calling this layer 4.5. I removed the ruffled circle skirt and went back to the drawing board.
Since I wanted to add fullness to the back and sides, but not the front, I decided not to have the godets go all of the way around.
I cut 6 more godets. The triangular sections had a radius of 29 inches. For the ruffles I cut 9 rectangles that were 16 inches by the width of the fabric. One and a half rectangles were sewn together to create a 90 inch ruffle for the bottom of each godet. This required an additional 7 yards of fabric.
Instead of creating a loop with the godets, I left one of the seam open creating a long chain rather than a ring. Centering the godets on the back of the petticoat, 3 on the left, 3 on the right. I attached them above layer 4. I then hand stitched the sides in place connecting this new layer to layer 4 so they would stay in place.


Once the new set of godets were in place I put the ruffled circle skirt layer back on. The result was not perfect, but I was much happier with the overall shape.
Yes! This is what I was going for!
The lesson I learned…don’t be afraid to change your mind along the way, or to go back and fix your mistakes. You will be a lot happier with the result if you do!
- Finishing the Petticoat
The petticoat layers are finished! Hooray! Now to finish off the petticoat, it needs a waistband.
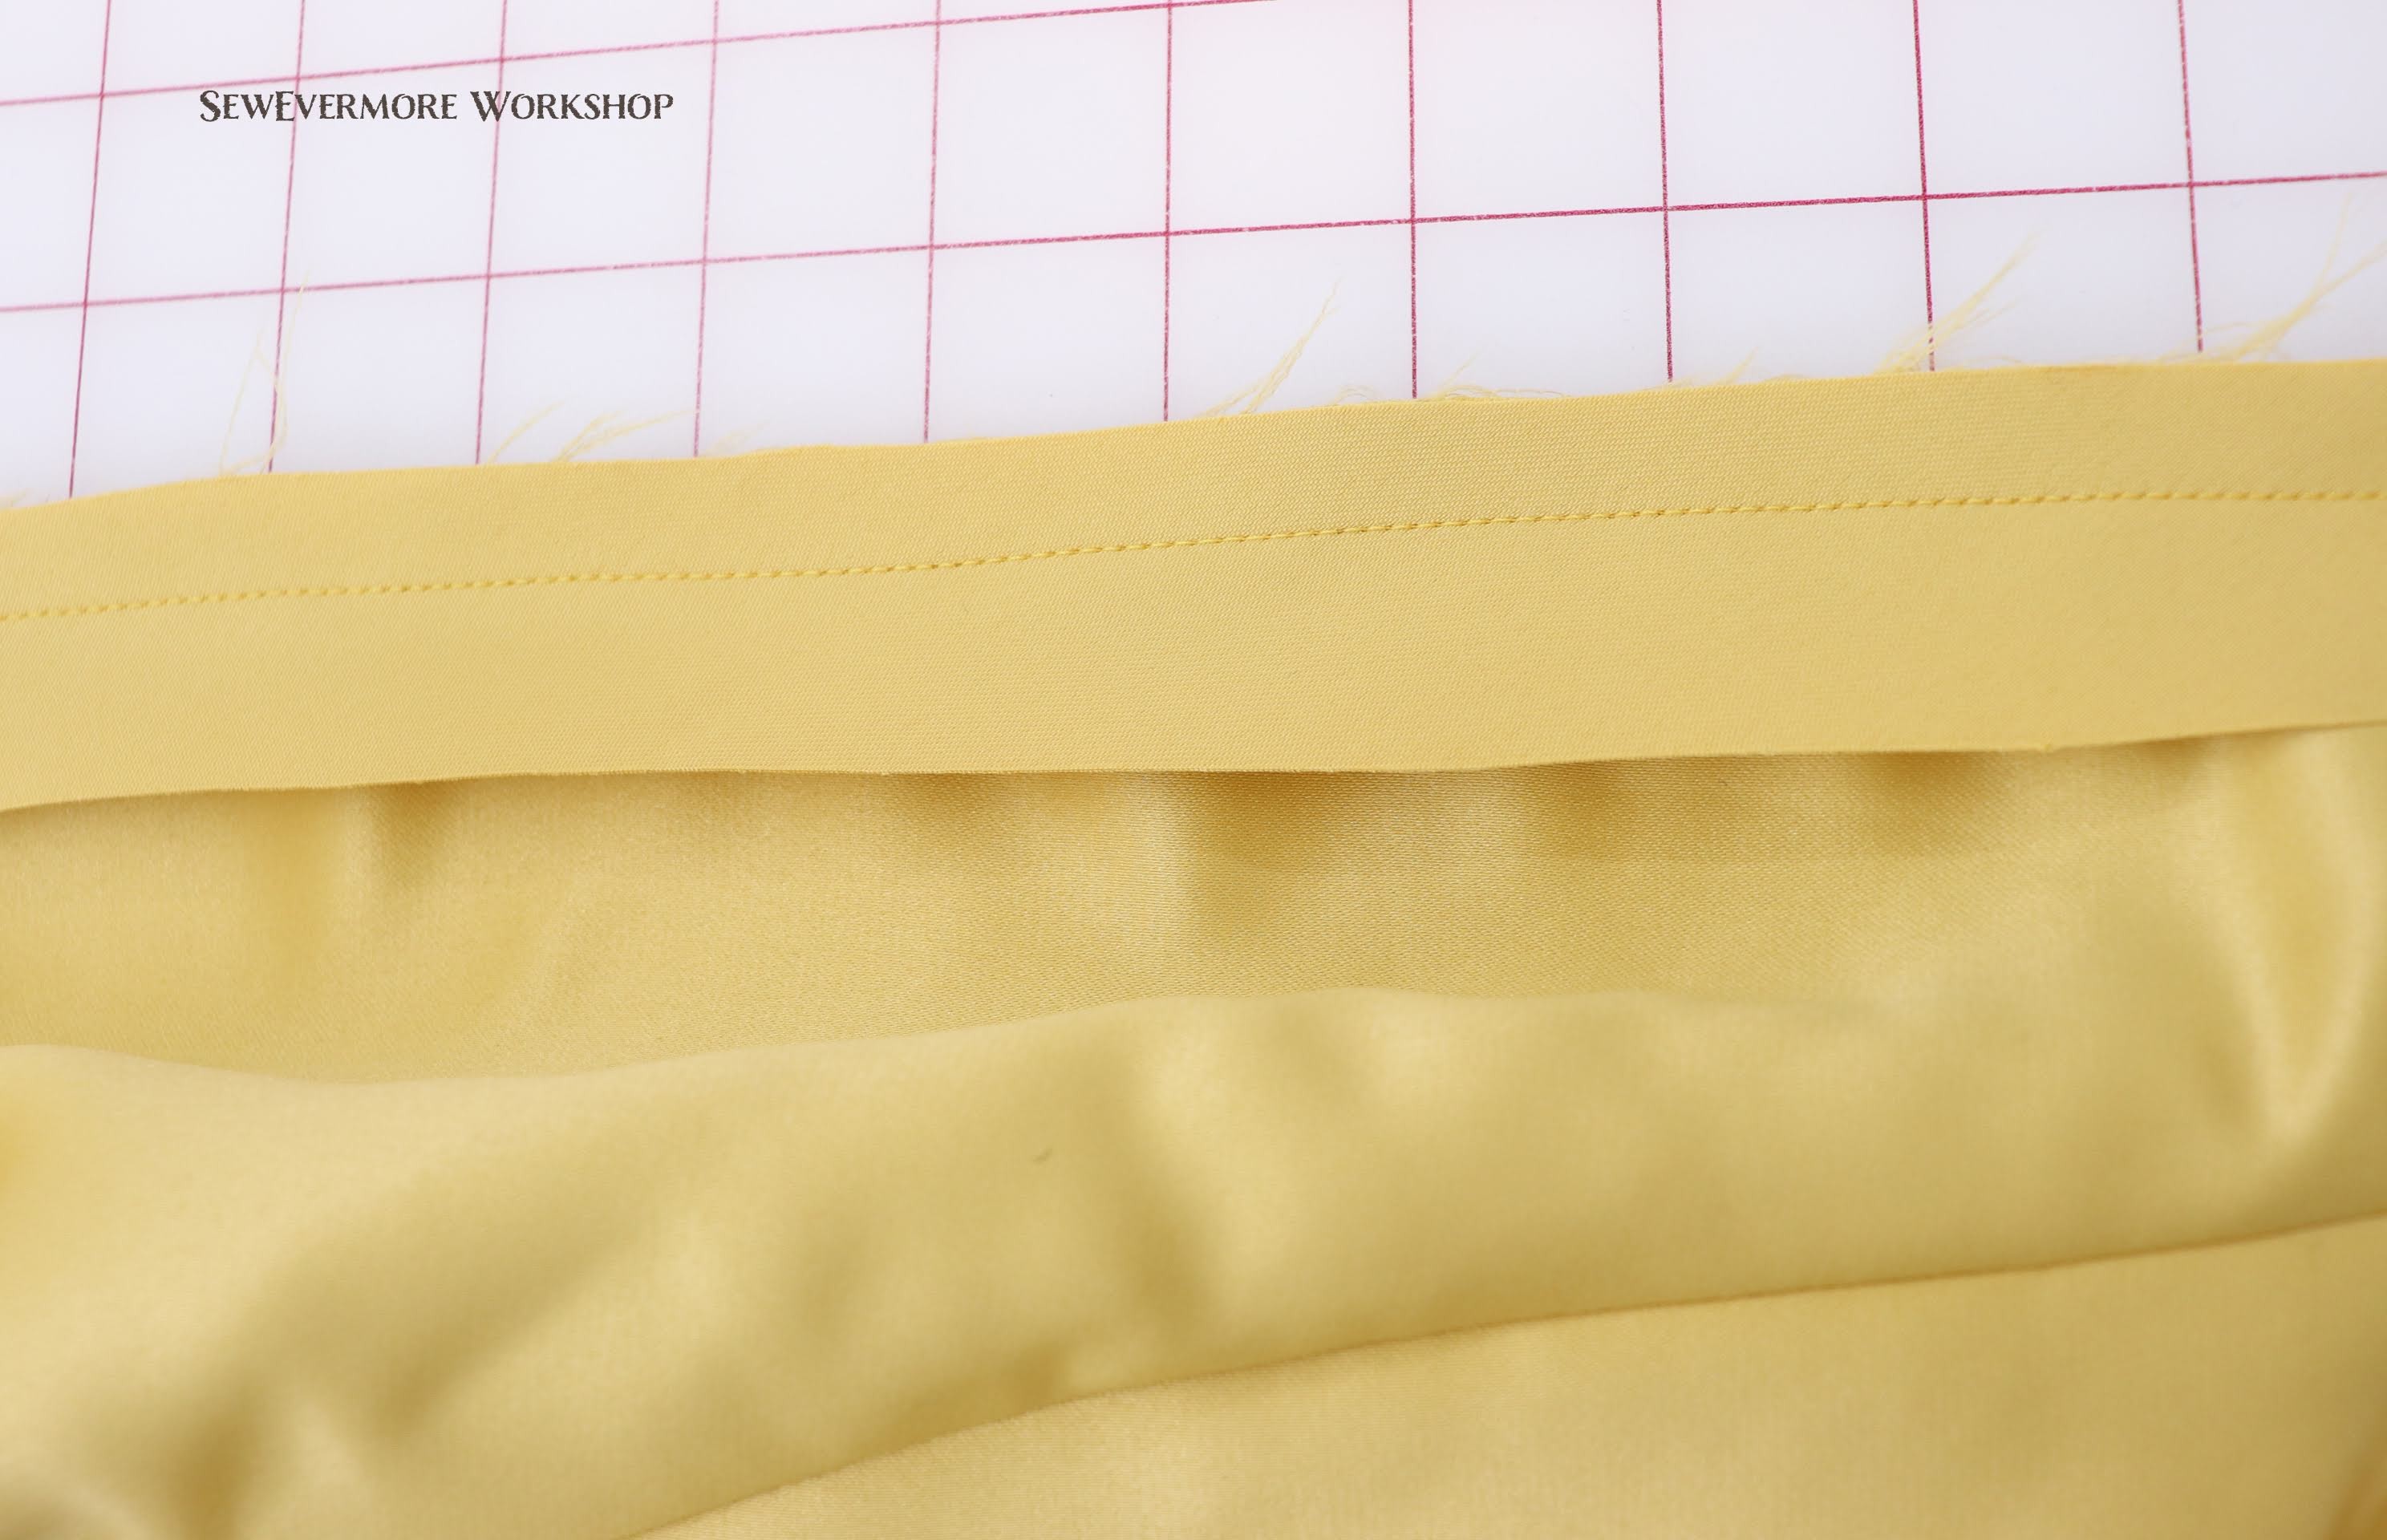
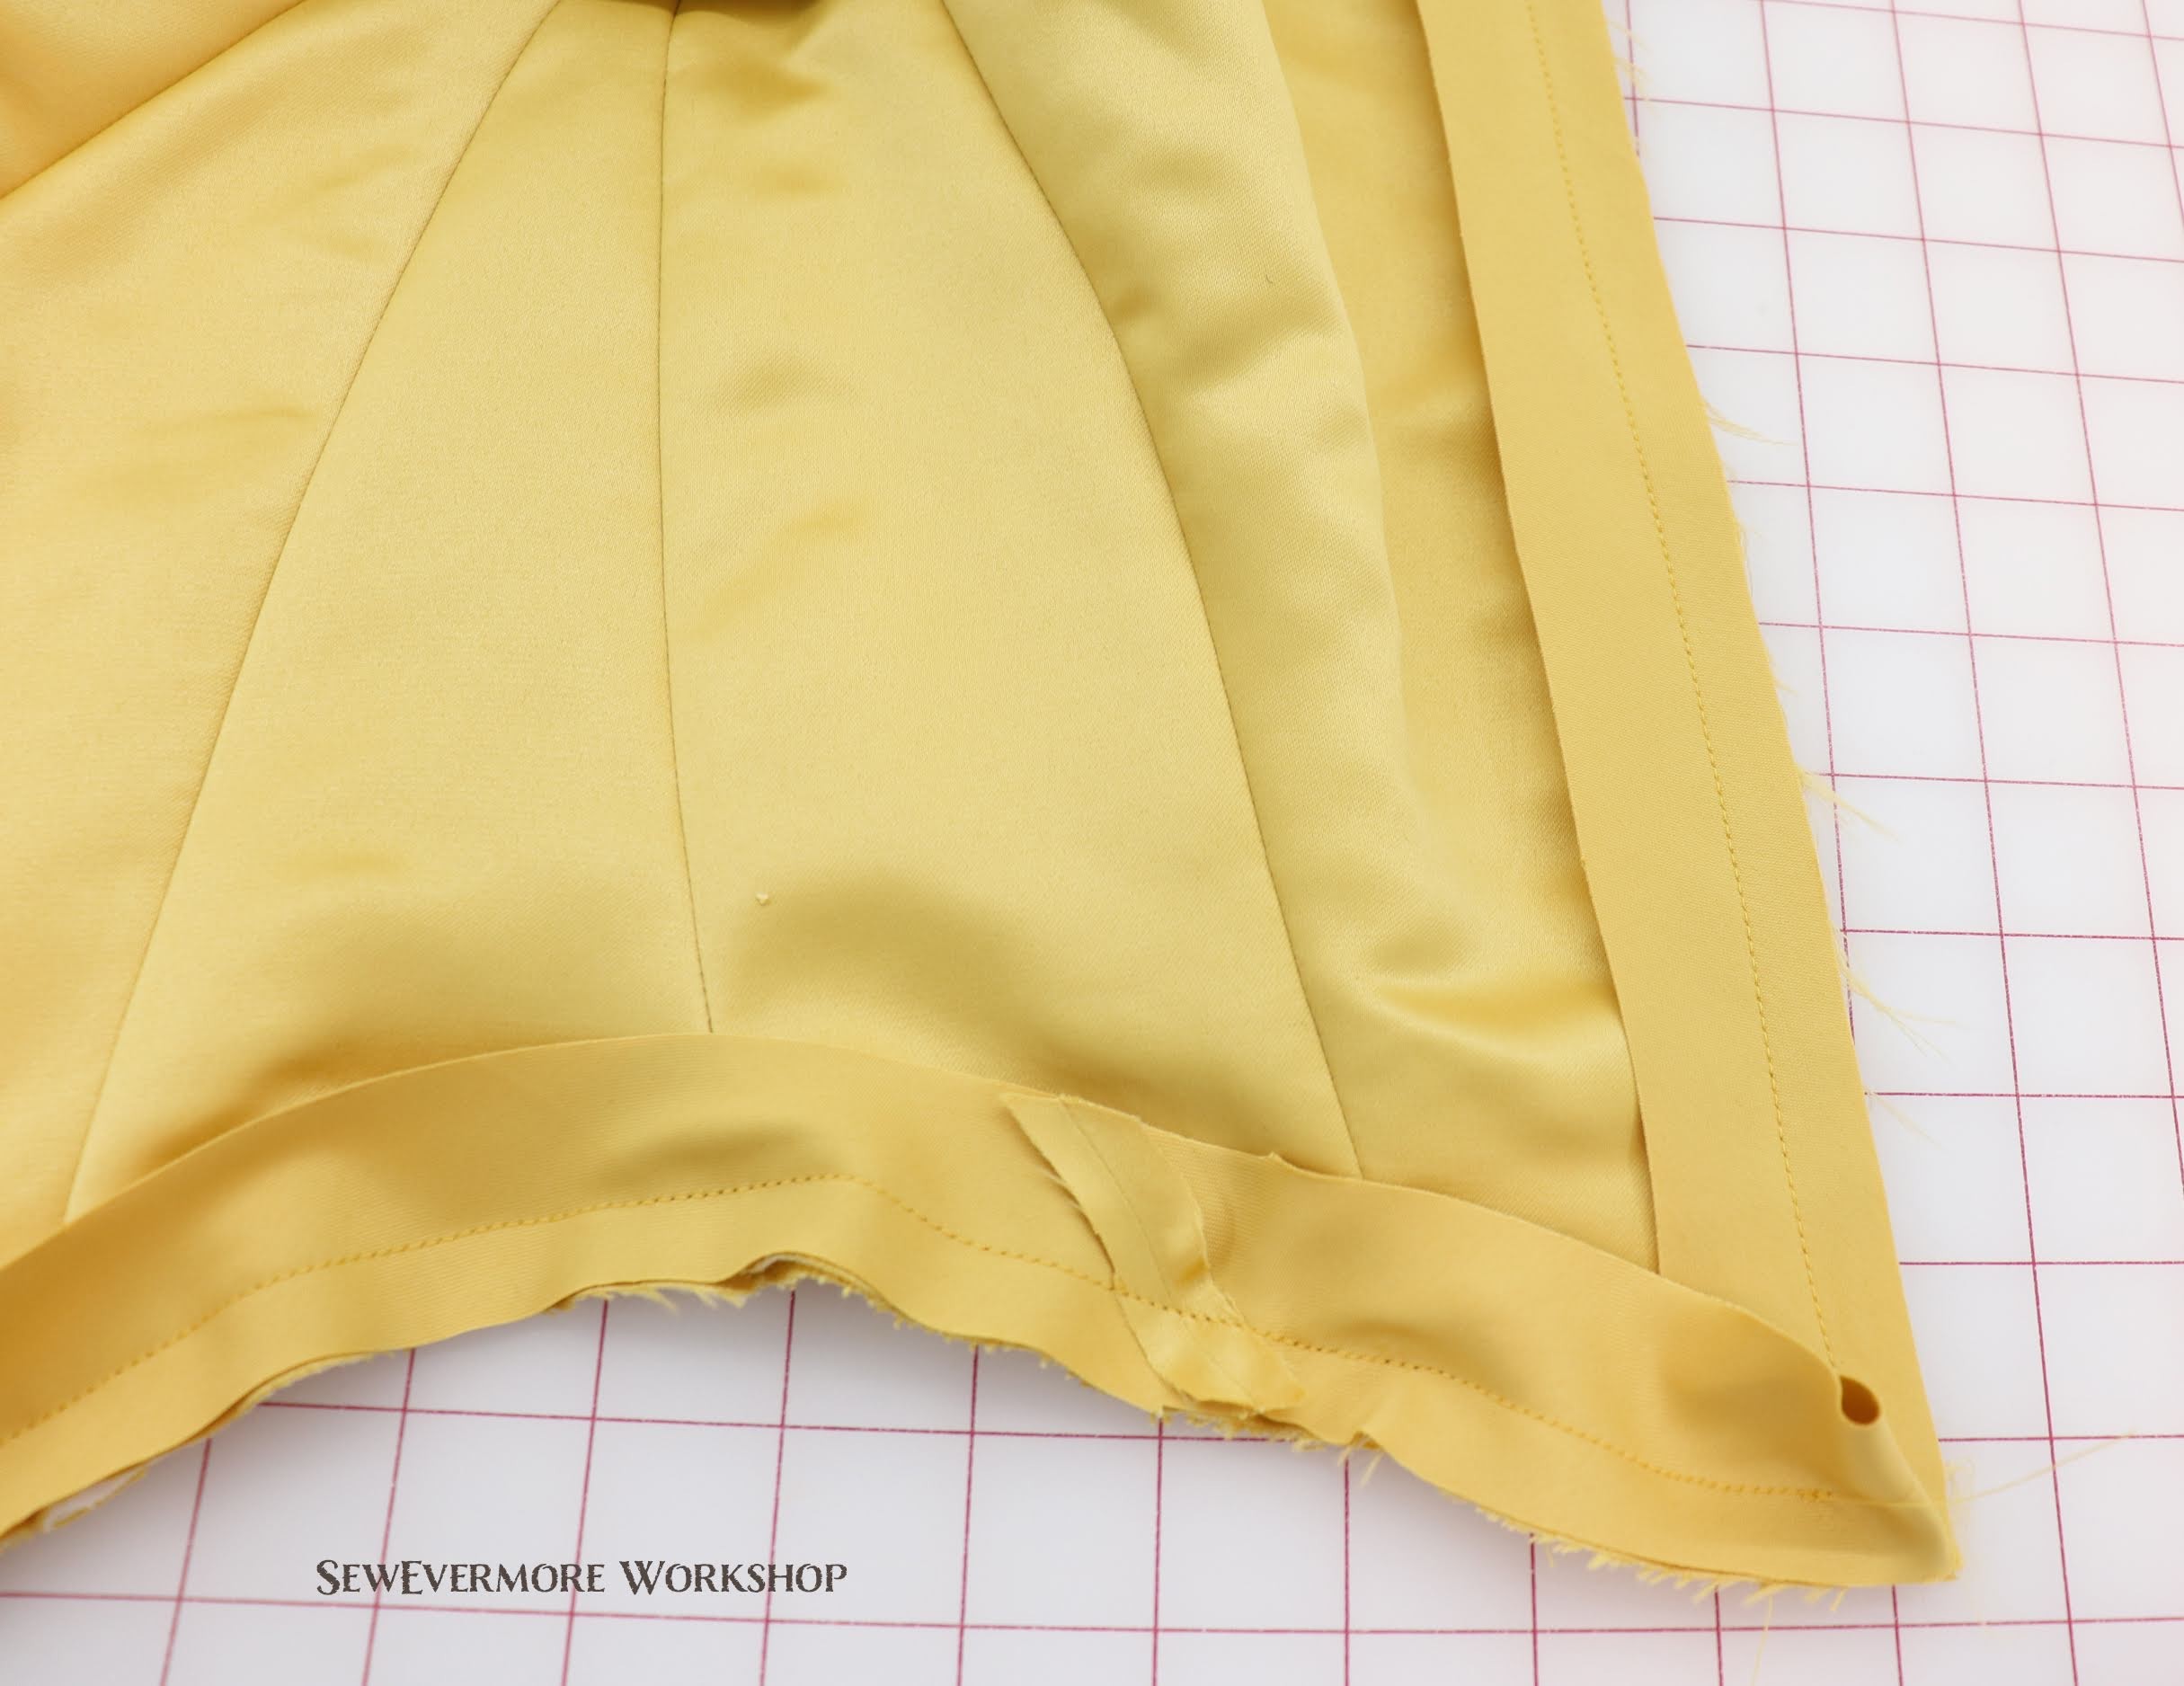
I pinned the top of the ruffled circle skirt to the top of the godet layer at the waist and stitched the two layers together. (Other than the ruffled circle skirt, only the first petticoat layer reaches the waist.) I trimmed off the excess in the back and serged the waist and the edges of the back slit.
I then cut a 4 inch by width of fabric rectangle from the organza.
Next I folded it in half creating a 4 x 30 inch rectangle and serged the edges. Since I needed a 29 inch waistband, this worked perfectly for me.
Next, I folded the rectangle in half lengthwise (skinny like a hot dog) so that the serged edges were touching. I then aligned those serged edges with the serged edges of the petticoat waist and pinned them together.


I stitched the waistband to the petticoat using a 1/2 inch seam allowance. Then folding the waistband up, I top-stitched the seam allowance in place. I used two rows of stitching for added strength. This may not have been necessary, but it made me feel better 🙂
Using the same method I used for the bustle, I created an elastic waistband and slid it through the channel. I probably could have made the waistband channel a bit narrower, but overall I was happy with it. The elastic slid in easily, and it lays well.

Having the waistband attached finally finishes the petticoat! Huzzah!

I definitely like the shape after adding Layer 4.5 with the back godets.
The petticoat is done! I love it!!!

- Petticoat Measurement & Yardage Summary
To review making the petticoat I thought it might be helpful to summarize the dimensions and amount of fabric used. The yardage used is approximate.
The Casa Organza fabric was purchased online at Joann+ for $1.27 per yard. (40 yards had to be purchased to get this price.)
Layer 1 – Skirt with Ruffle
Fabric used: Casa Organza White. 58 inch width.
Amount of fabric used: about 7 yards
3 A-line skirt sections about 48 inches long.
Ruffle: Cut 5 Rectangles, 26in x Width of Fabric.
Layer 2 – 18″ Godets
Fabric used: Casa Organza White. 58 inch width.
Amount of fabric used: 7.5 yards
Number of Godets: 12
Godet Radius: 18 inches
Length of Bottom Curve: ≈ 30 inches
Ruffle: Cut 12 Rectangles, 13in x Width of Fabric. One rectangle used per ruffle.
Layer 3 – 24.5″ Godets
Fabric used: Glitterbug White Pearlized Sheer. 44 inch width.
Purchased: $3 per yard. Joann+ (Had to purchase 20 + yards for this price)
Amount of fabric used: 13 yards
Number of Godets: 10
Godet Radius: 24.5 inches
Length of Bottom Curve: ≈ 40 inches
Ruffle: Cut 20 Rectangles, 13in x Width of Fabric. Two rectangles used per ruffle.
Layer 4 (Without Bustle) – 29″ Godets
Fabric used: Casa Organza White. 58 inch width.
Amount of fabric used: 8 yards
Number of Godets: 8
Godet Radius: 29 inches
Length of Bottom Curve: ≈ 47 inches
Ruffle: Cut 12 Rectangles, 13in x Width of Fabric. One and a half rectangles used per ruffle
Layer 4 (WITH Bustle) – 29 ” Godets
Fabric used: Casa Organza White. 58 inch width.
Amount of fabric used: 12 yards
Number of Godets: 12
Godet Radius: 29 inches
Length of Bottom Curve: ≈ 47 inches
Ruffle: Cut 18 Rectangles, 13in x Width of Fabric. One and a half rectangles used per ruffle.
Layer 4.5 (WITH Bustle) – 29″ Godets
Fabric used: Casa Organza White. 58 inch width.
Amount of fabric used: 7 yards
Number of Godets: 6
Godet Radius: 29 inches
Length of Bottom Curve: ≈ 47 inches
Ruffle: Cut 9 Rectangles, 16 in x Width of Fabric. One and a half rectangles used per ruffle.
Godets placed on back and sides only.
Layer 5 – Circle Skirt with Ruffle
Fabric used: Casa Organza White. 58 inch width.
Amount of fabric used: 8.5 yards
Circle Skirt Radius: Approximately 47 inches
Length of Bottom Curve: ≈ 300 inches
Ruffle: Cut 10 Rectangles, 10 in x Width of Fabric.
Totals yards used: Approximately 55 yards
- Beginning the Underskirt
With the petticoat done it is time to start thinking of the dress itself. If you are making a Cinderella dress up next are circle skirts! Since I am mimicking that style for my Belle dress, I will be doing the same.
The first thing I did was decide what colors to do the circle skirts. If you are using sheers, it helps to layer the fabrics before hand to see what they will look like.
For my skirt I chose to layer circle skirts in yellow, white pearl, and gold. The yellow fabric I purchased was brighter than I expected. Adding the white and gold on top of it tones down the intensity of the color.
Using the same method I did when cutting the circle skirt for Layer 5 of the petticoat I cut circle skirts with a 56 inch radius. (4.25 inches for the waist and 52 inches for the length of the skirt.)
This is a few inches longer than I actually need, but since this part of the skirt will be visible on the outside of the final dress, I didn’t want to chance accidentally cutting it too short.
Depending on the circumference of your petticoat, and the fullness you want in your skirt, a circle skirt may or may not be large enough for you. You can always add godets at the sides to make the skirt fuller. This was not necessary for me.
A 56″ circle skirt in Sunshine Yellow.
This was cut in two pieces, each using about 120 inches of 60 inch wide Casa Organza fabric from Joann+ in Sunshine Yellow. Each piece is a semi-circle and they were serged together at the sides to create a full circle. Approximately 7 yards used.
56 inch “almost” circle skirt in Glitterbug White Pearlized Sheer.
I ran out of the white pearl fabric, so I was not able to create a full circle skirt, but it was plenty big for what I needed. This skirt was cut using 6 sections. Each section has a radius of 56 inches and was cut so that the arc at the bottom of the skirt extended all of the way across the 44 inch fabric. It probably would have been better if I had 7 or 8 sections, but I don’t think it made a big enough difference for me to go out and purchase more fabric. If I was making the Cinderella dress I may have had a different opinion, but since I am making Belle, and the top portion of the skirt will be covered with an overlay I didn’t find in necessary. All 6 sections were serged together to create a wide skirt. Approximately 8 yards used.
I really liked using the pearl for this layer. The shimmer of the fabric is visible underneath the next organza layer, but is subdued. It gives a nice iridescent effect without looking cheap or over the top.
A 56″ Gold circle skirt.
This layer was also made using Casa Organza. I don’t recall the exact color. It was purchased in store during a 70% off sale. Approximately 7 yards used.
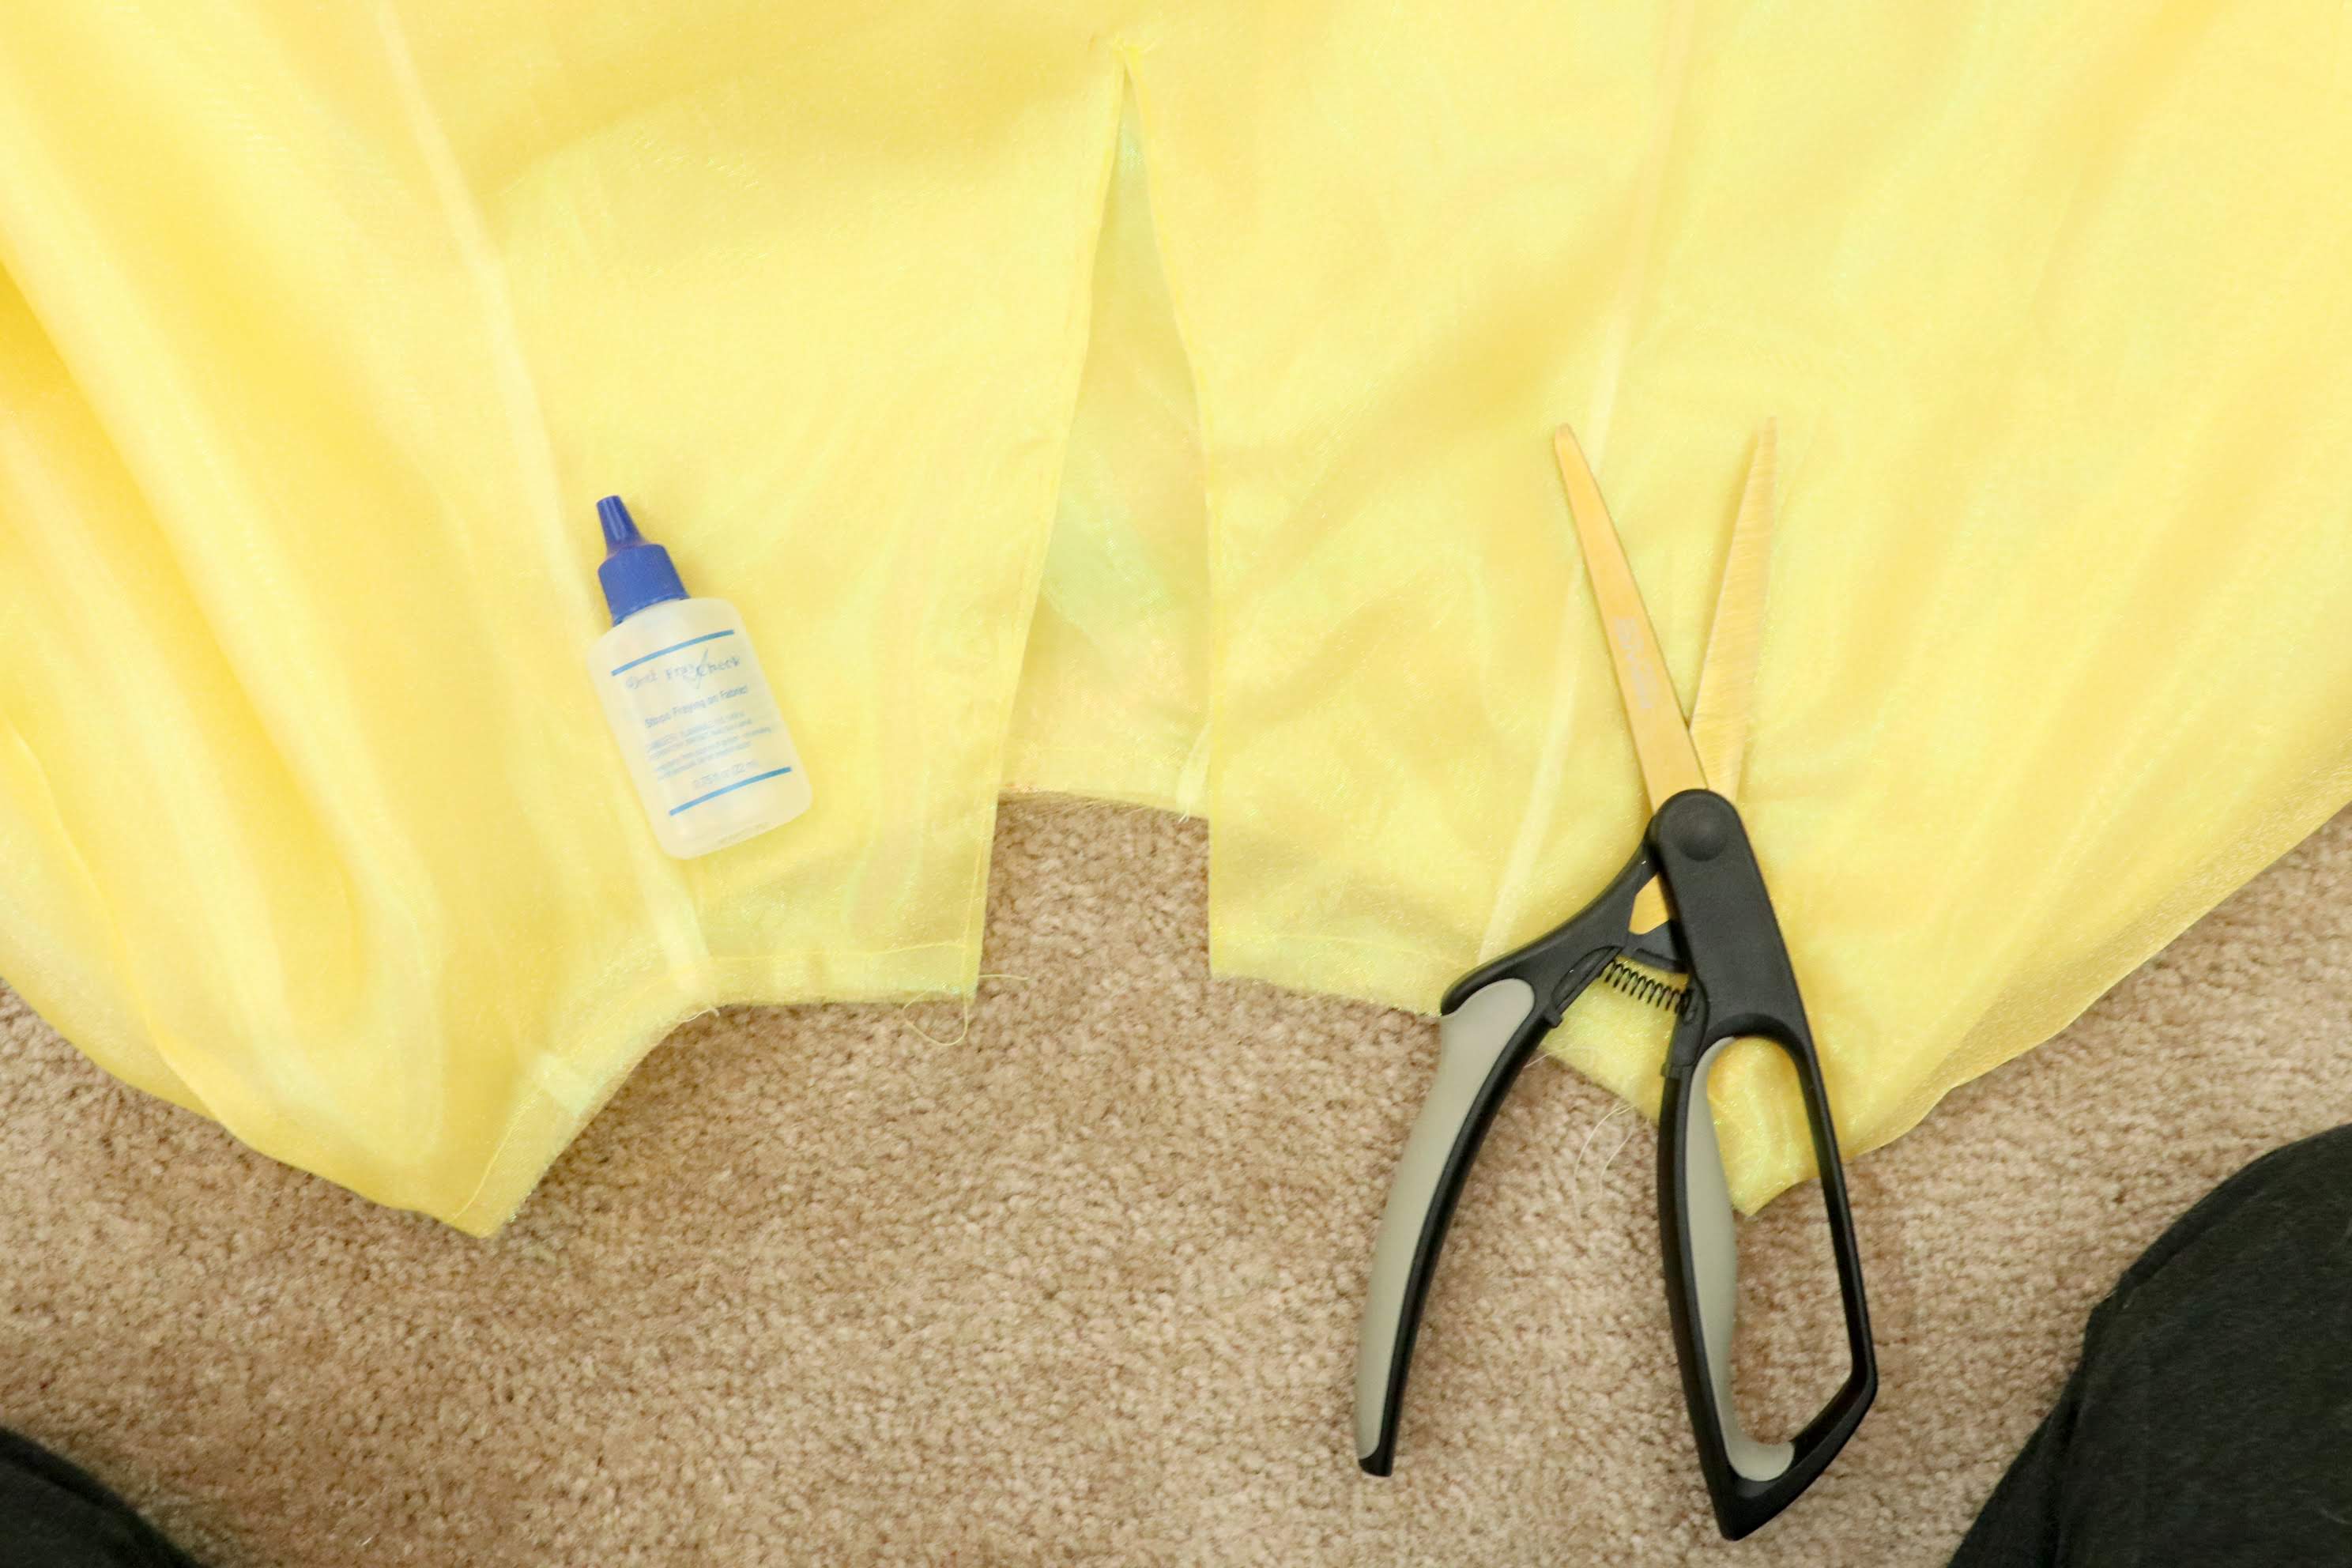
I placed the pearl skirt inside the gold, and the yellow inside the pearl, to create a 3 layer skirt.
I pinned all three layers together at the waist and basted them together at the top.

I measured 9 inches down the center back and stitched 2 rows of stitching about 3/16 inches apart along that center line. I then cut between the stitches to create a back opening. I used fray check to seal the raw edges. I plan on binding this in the future.
The circle skirts are done! If you were creating a Cinderella dress, you would now be ready to add a waistband and/or move on to the overskirt.
As for me, I am not yet finished with my underskirt. Since my dress will be Belle I wanted to have a bit more of a “bell” shape to the skirt. I decided to add another layer to the understirt that was a traditional tiered petticoat. I’m not sure how it will look, if the final dress will be better with or without it, but I wanted to give it a try.

The top tier of the petticoat is a circle skirt with radius 12 and 14 inches. (14 in the back). The second tier is composed of three 16 inch by width of fabric (60″) rectangles. The third tier is composed of six 16 inch by width of fabric rectangles. The final tier is a ruffle composed of twelve 8 inch by width of fabric rectangles.
I serged each tier together and then serged along one long edge of each tier to help prevent fraying when gathering.

Up next? A lot of gathering! It’s a good think I have Neflix!
- The Underskirt – Part 2
With the 3 underskirts constructed I wanted to see what they looked like over top of the petticoat. This was the result.
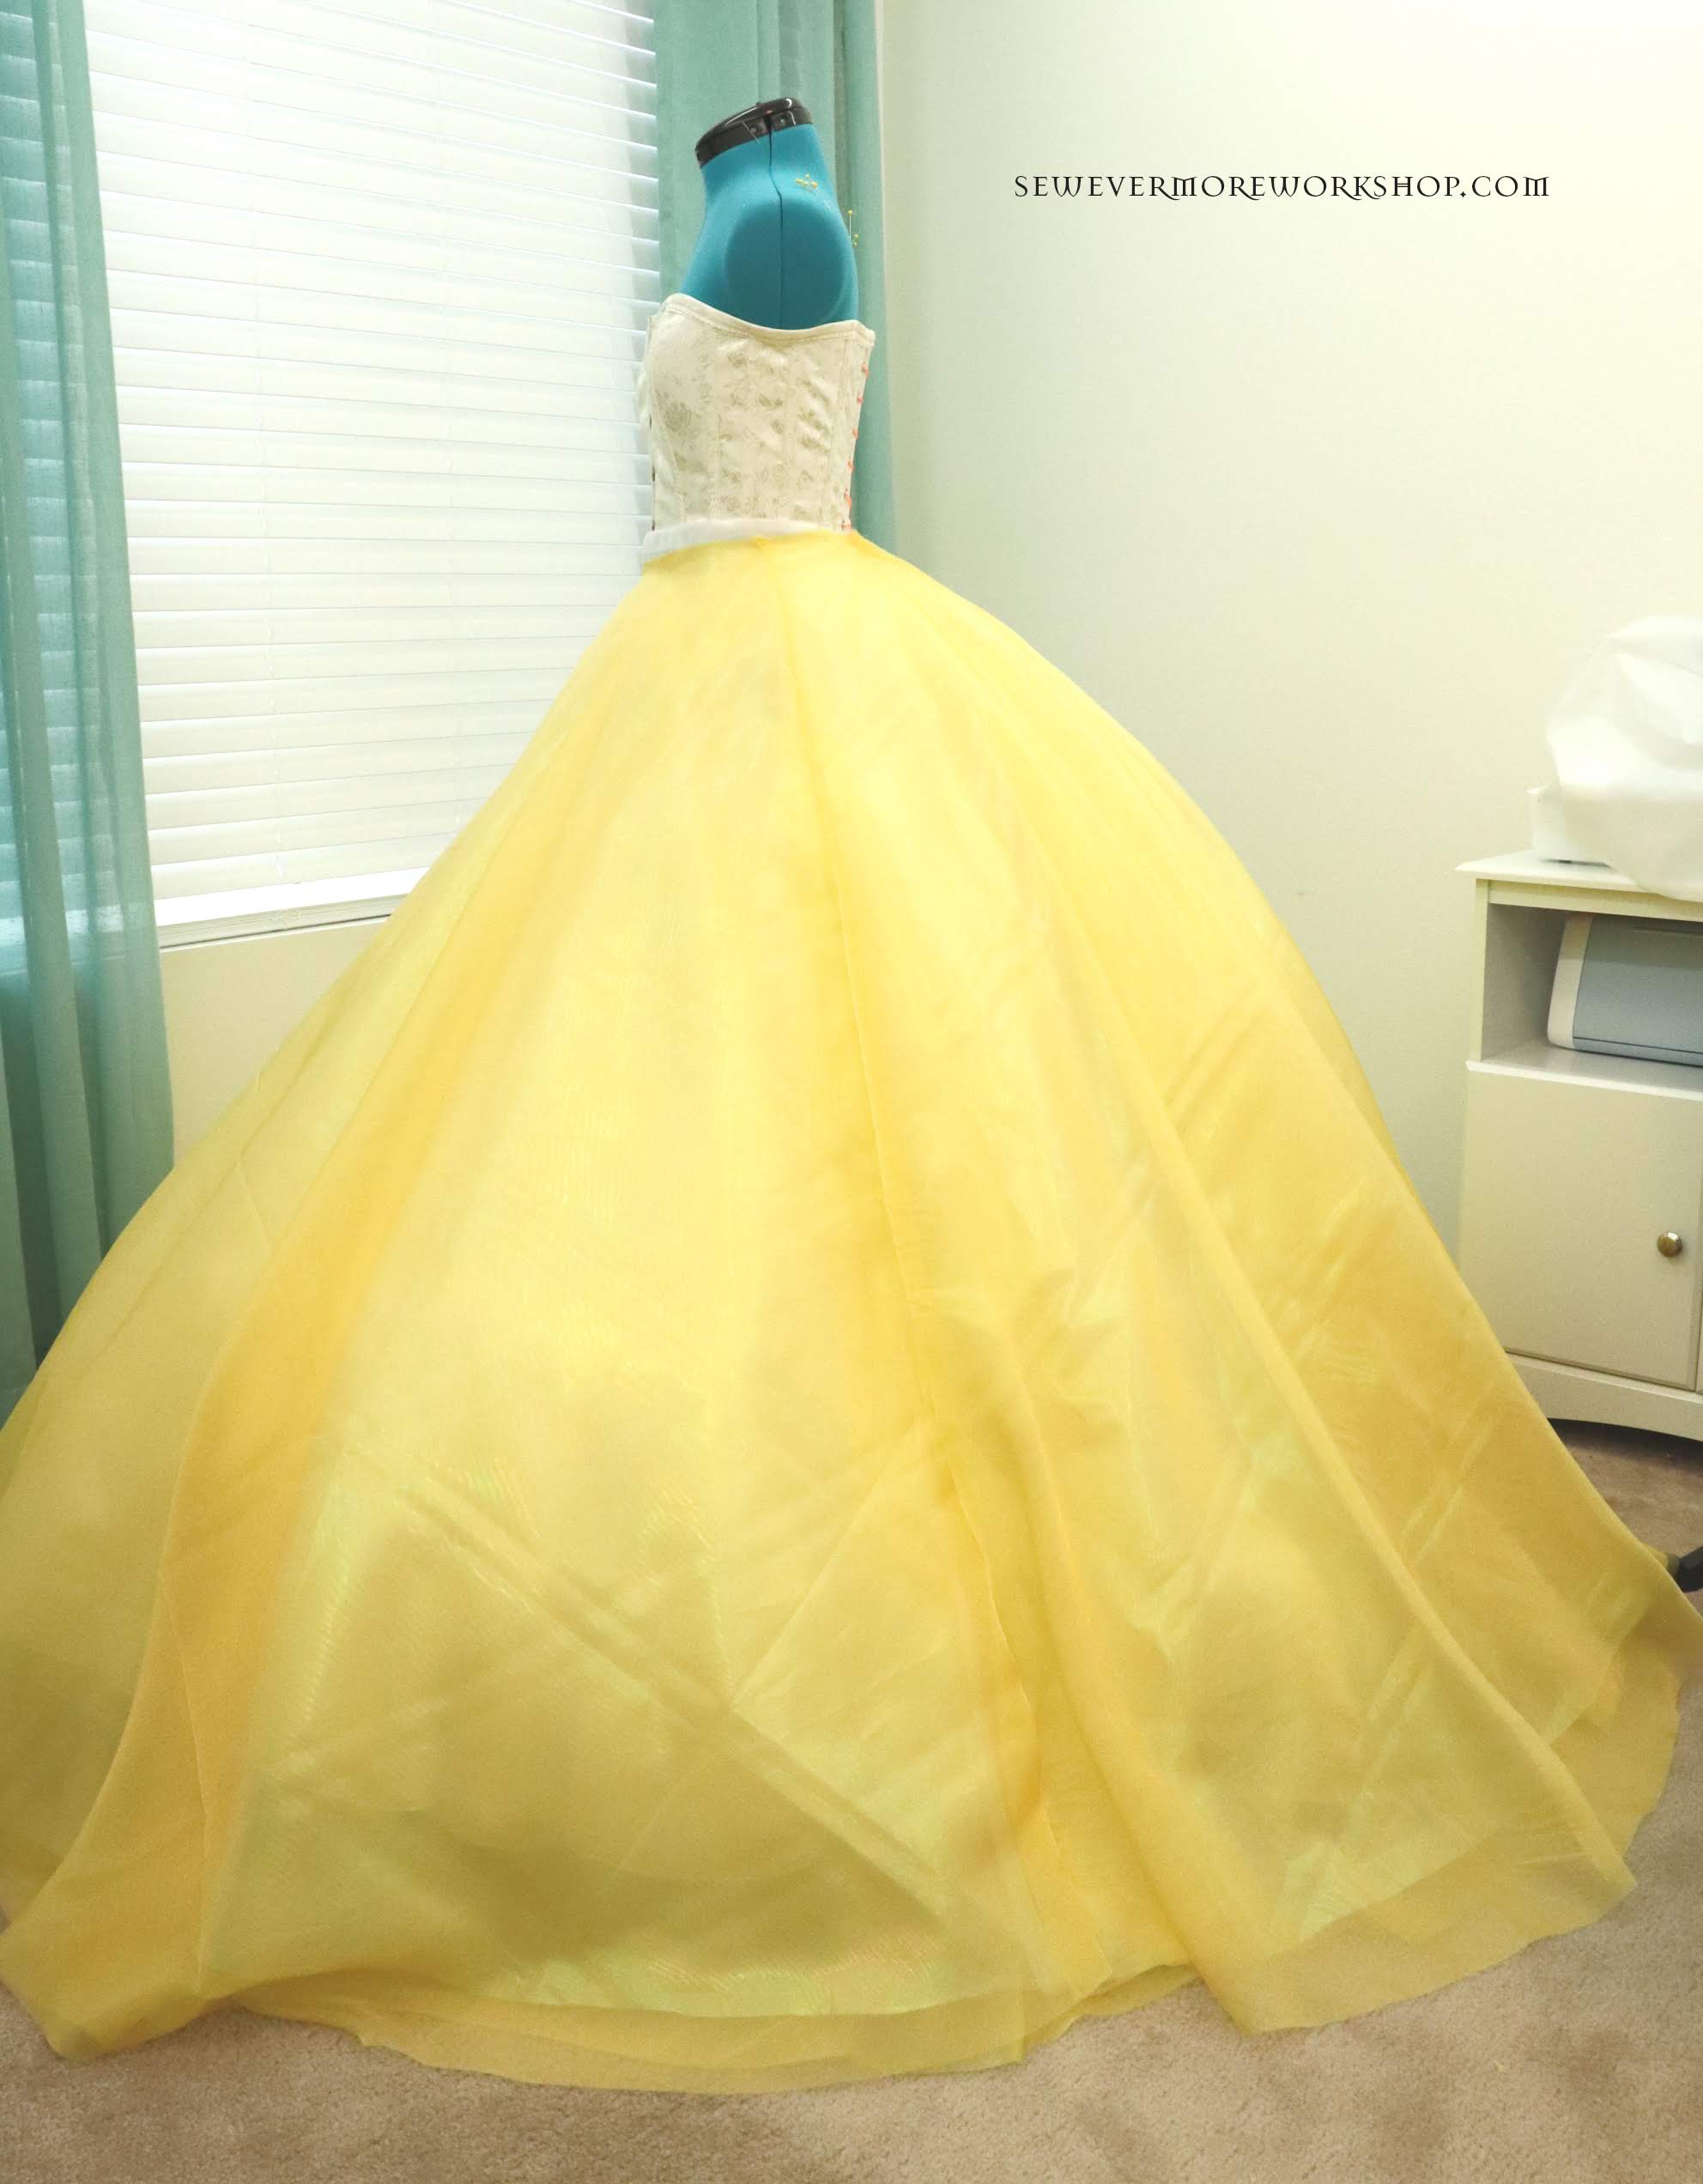
I cut the circle skirts too long on purpose, as I didn’t want to have to worry about the possibility of them being too short. I will hem them to the correct length later.
The resulting skirt has a very angular shape. The godets really make the skirt have more of an A shape rather than a bell. If I were making the Cinderella dress, I could be done with the underskirt layers at this point, but since I do want a bell shape for my Belle dress, I went ahead and created the regular layered petticoat to add to the underskirt.
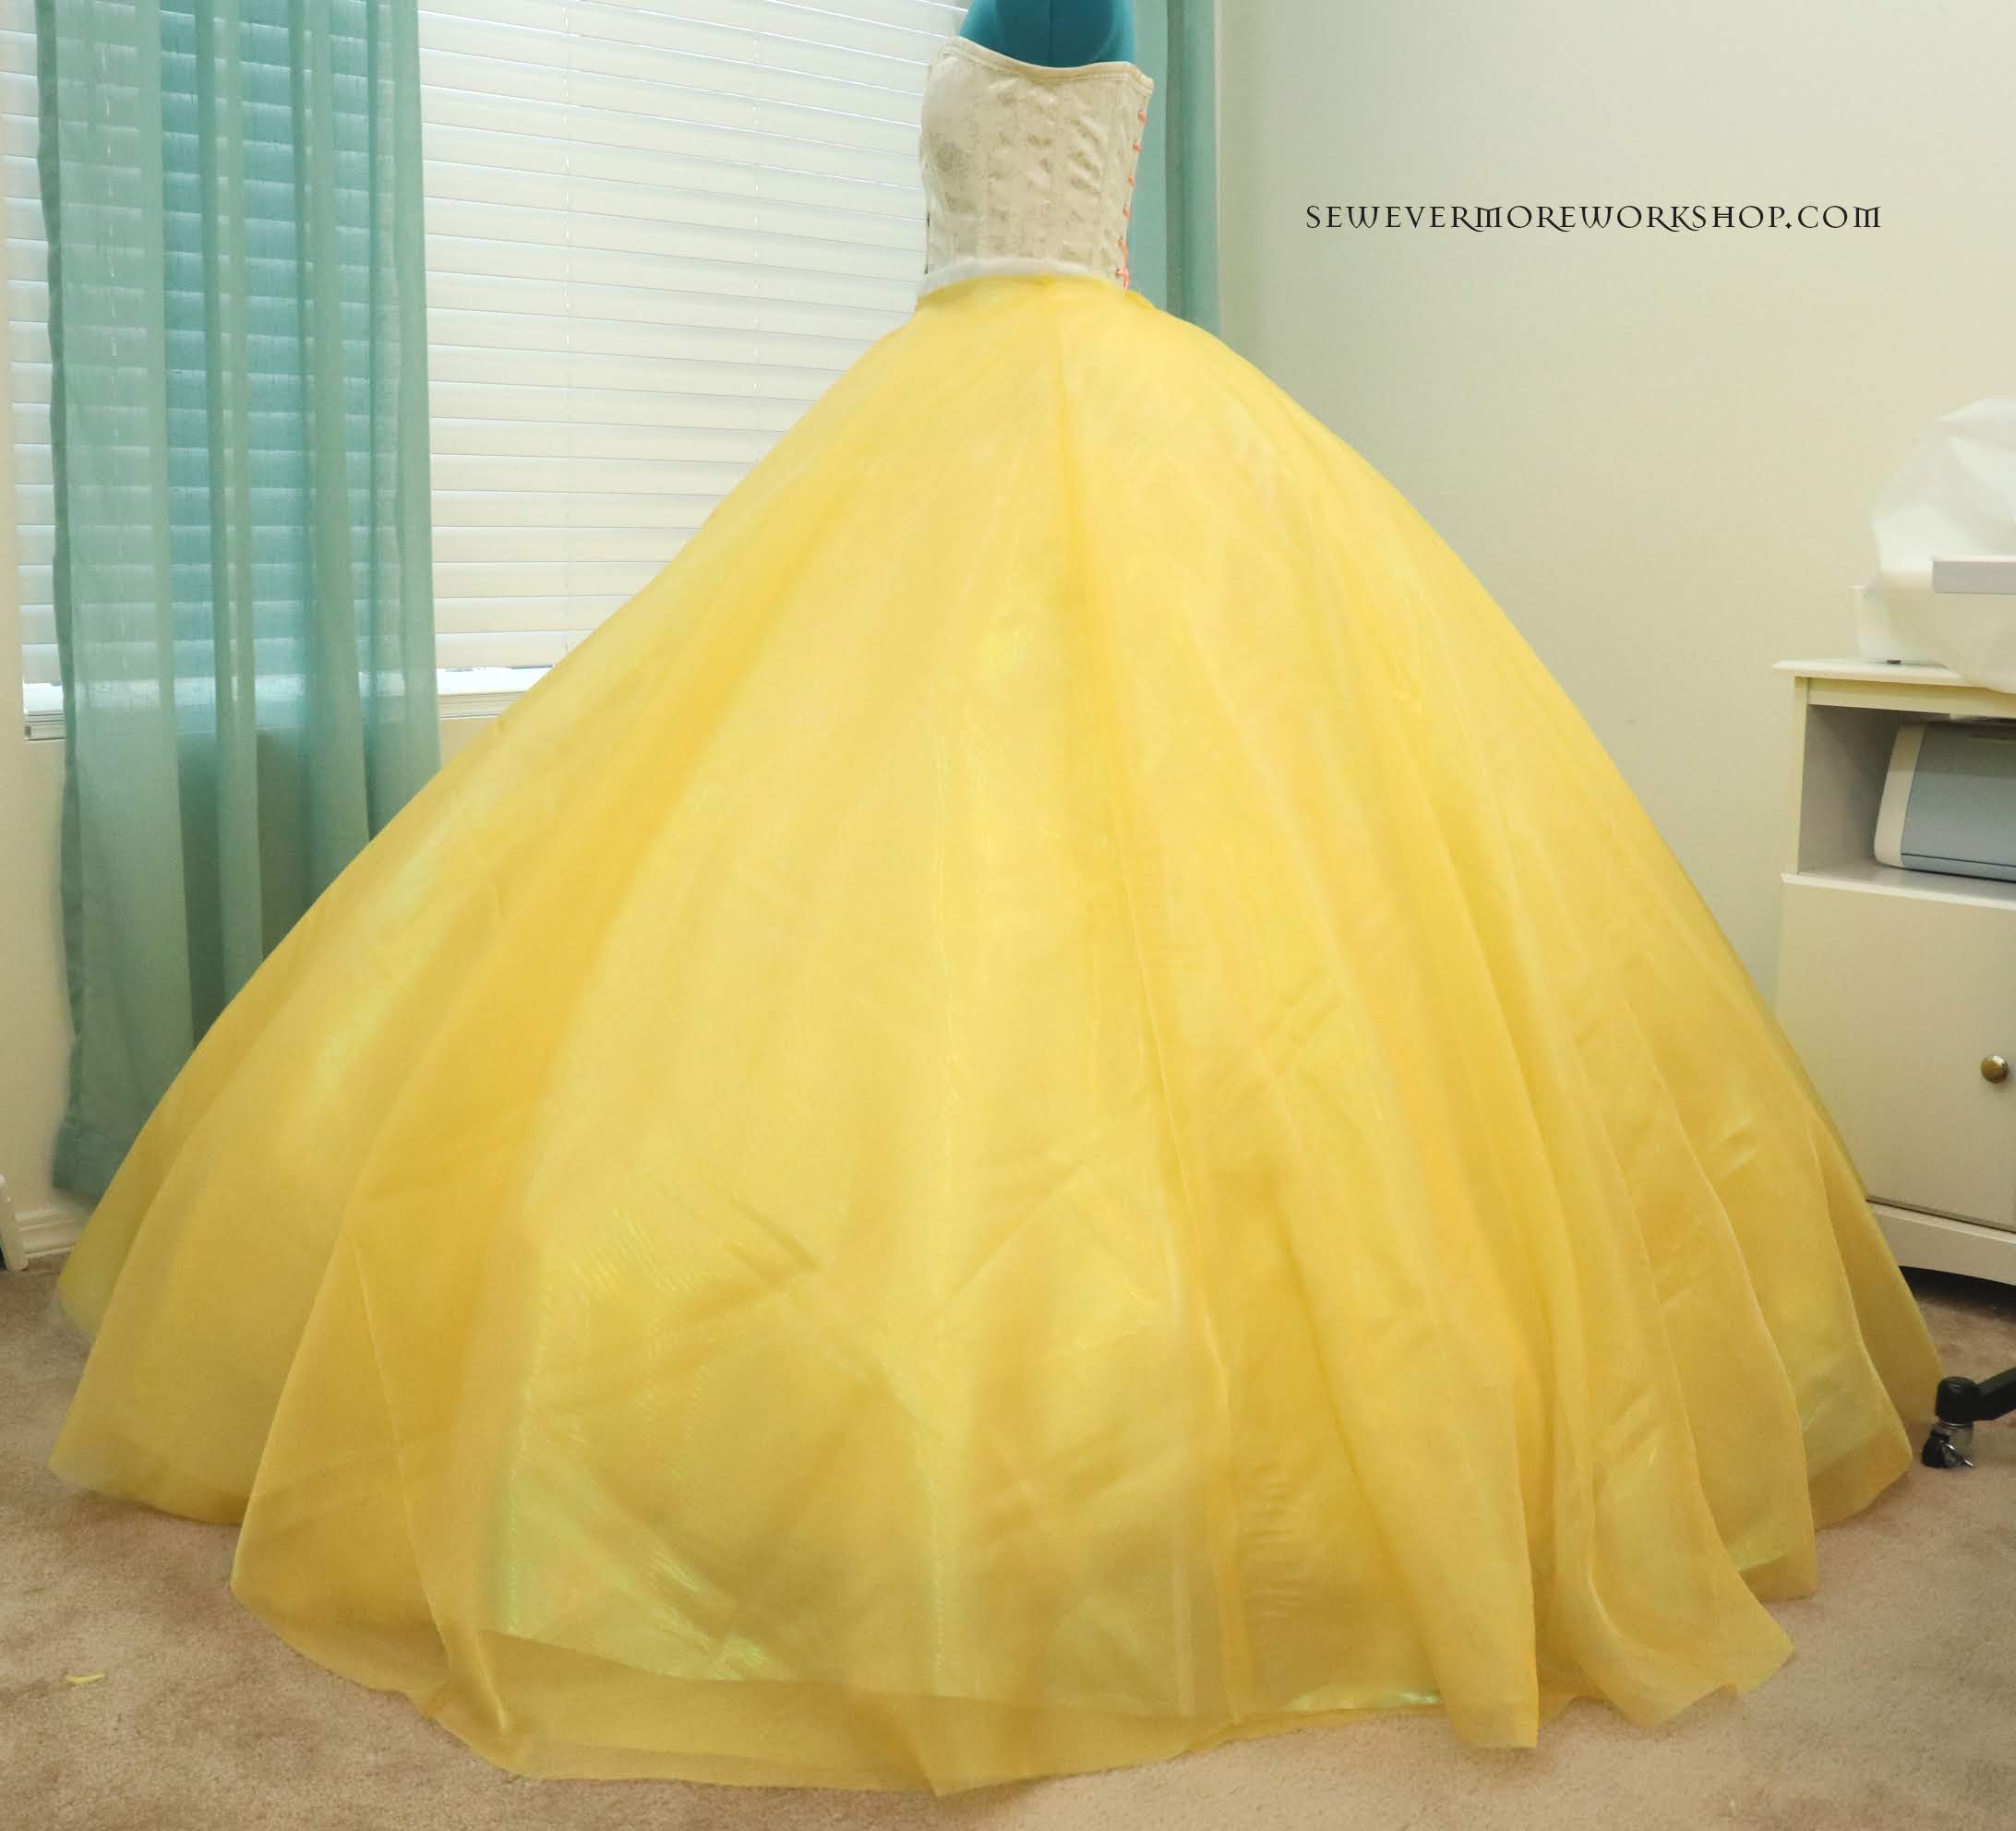
It took quite some time to do all of the gathering, but I think it was worth it.

Adding this layer softened the look of the skirt.
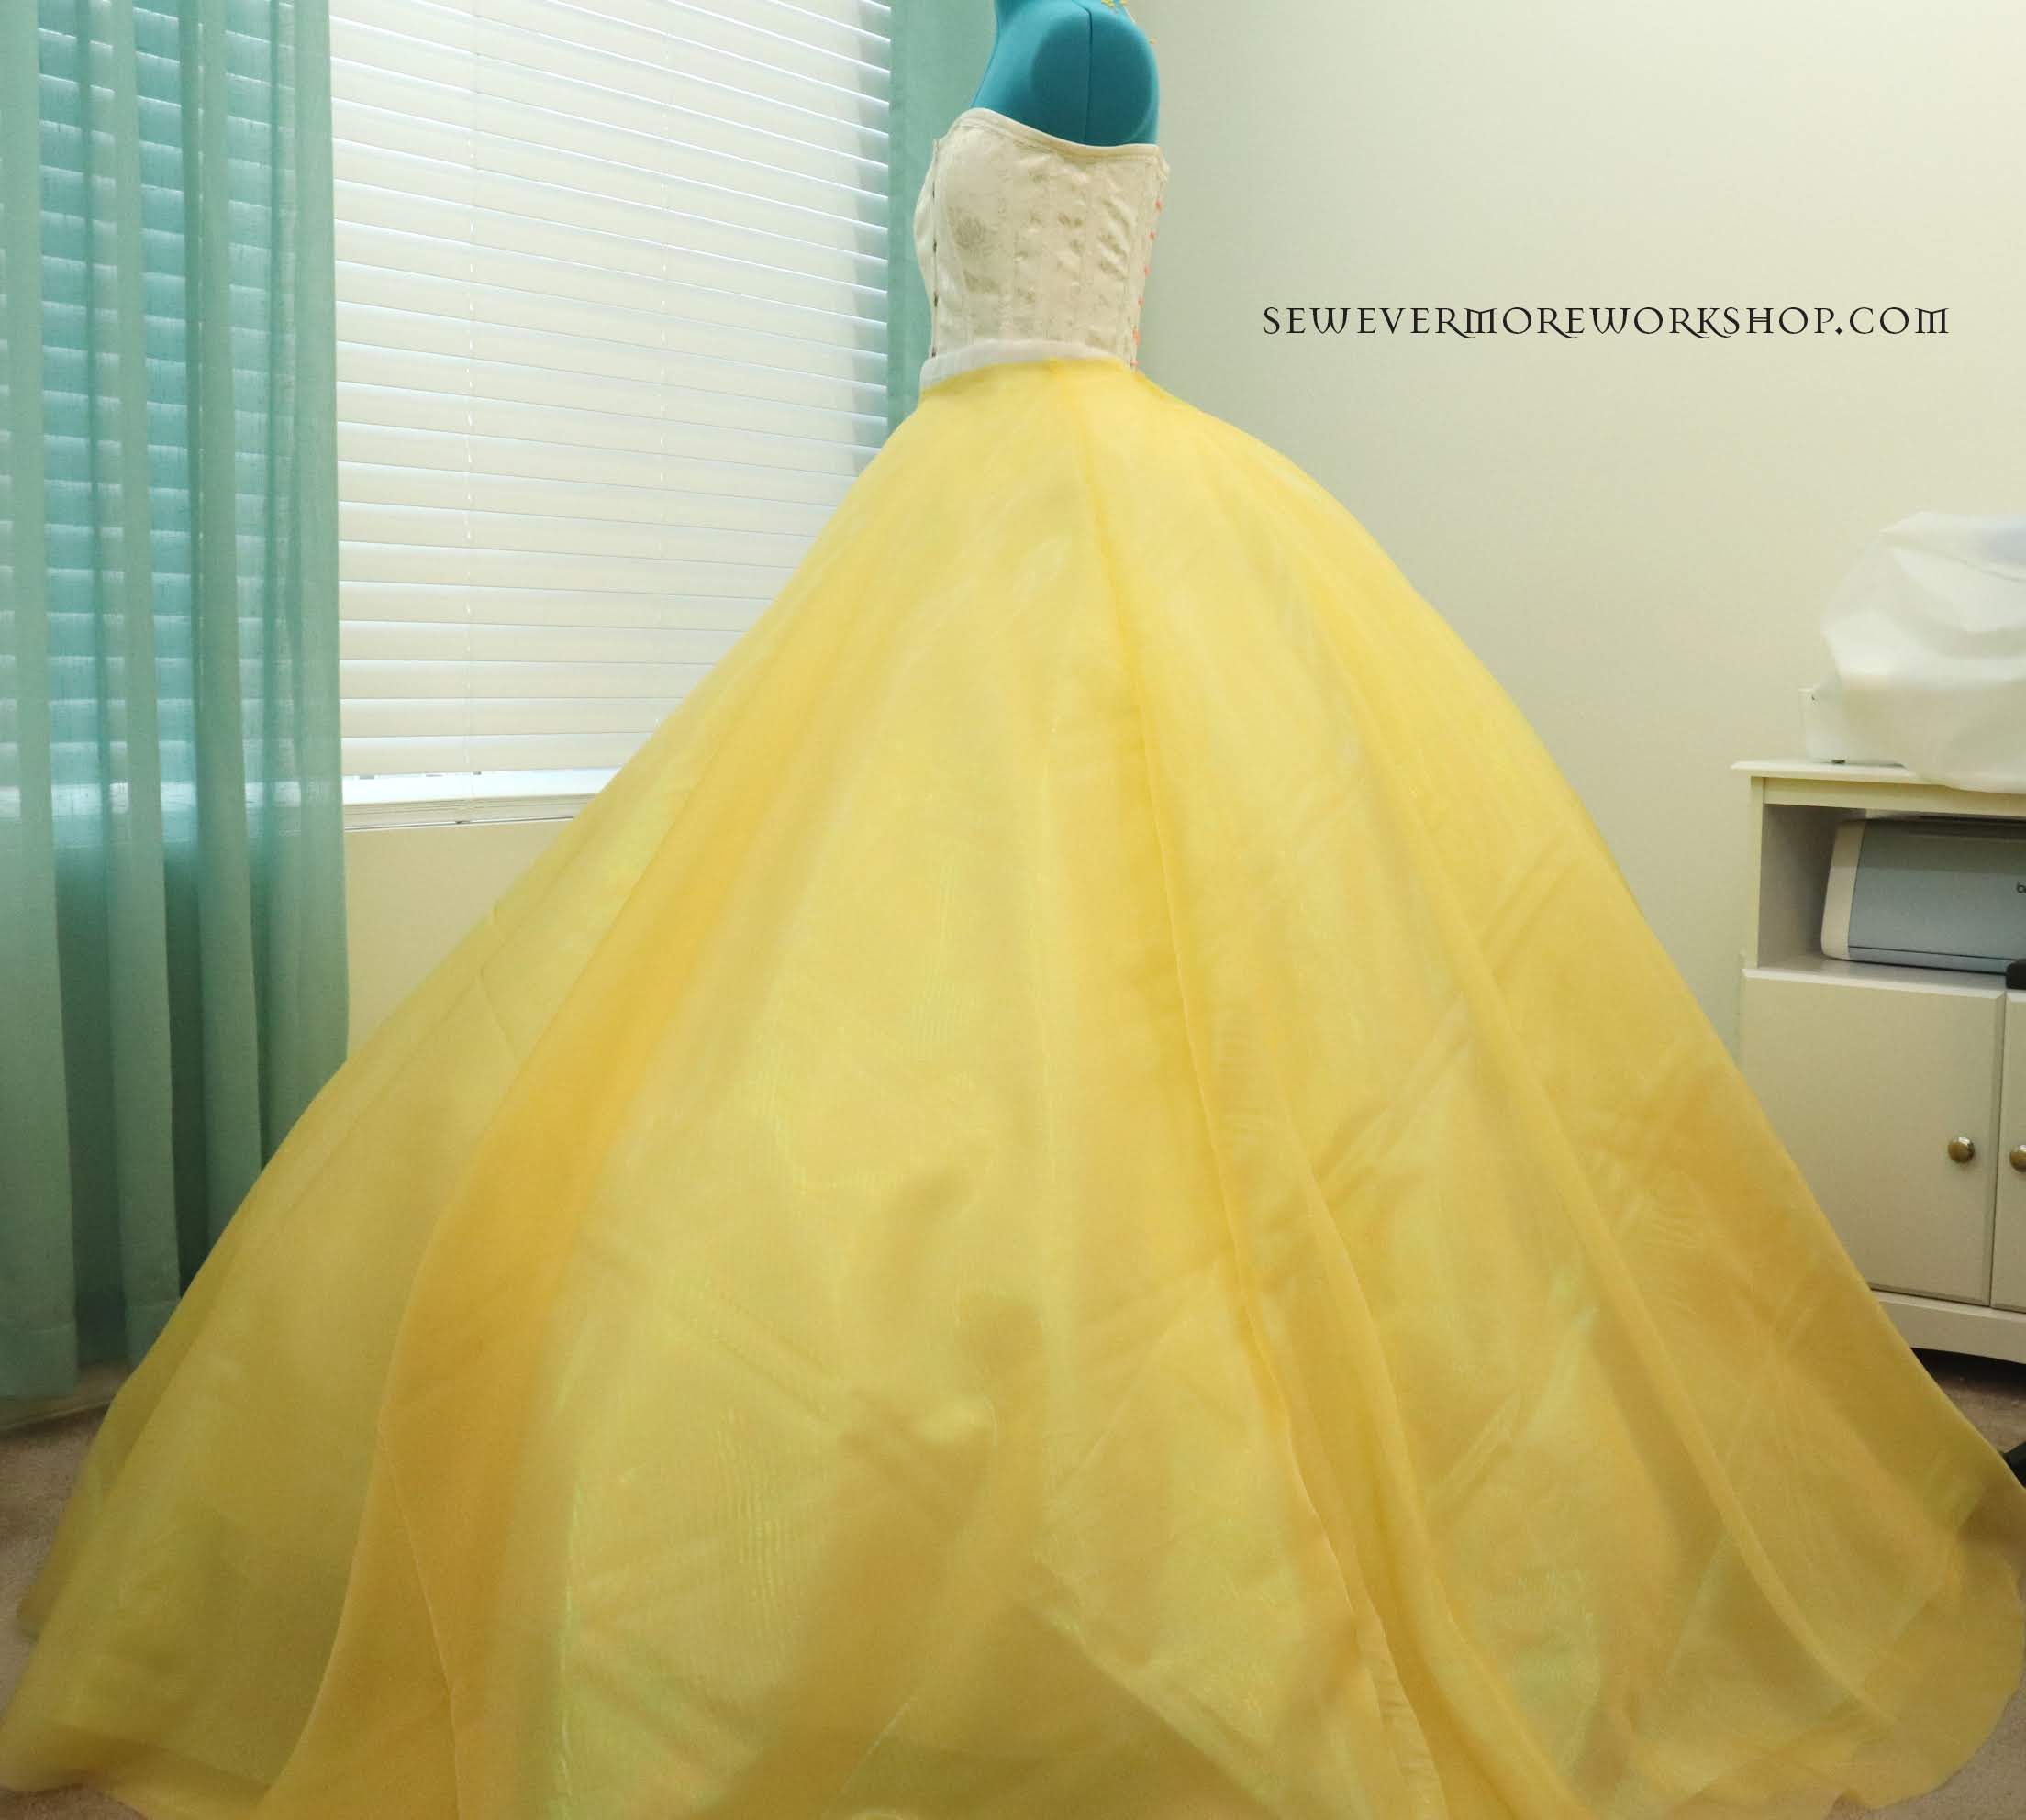
I am glad I added the additional layer.
before I add the over skirt and make the waistband for the underskirt I want to construct the bodice. The reason I want to do this first is to ensure that that waist of the skirt and over skirt will be completely hidden under the bodice.
Up next, drafting the pattern…
- Lace
Now that the underskirt is complete it is time to add some decoration!
I plan to add a lace overlay to the top of the skirt. Since I was not sure how much lace I would need I started by simply draping the lace over the underskirt.
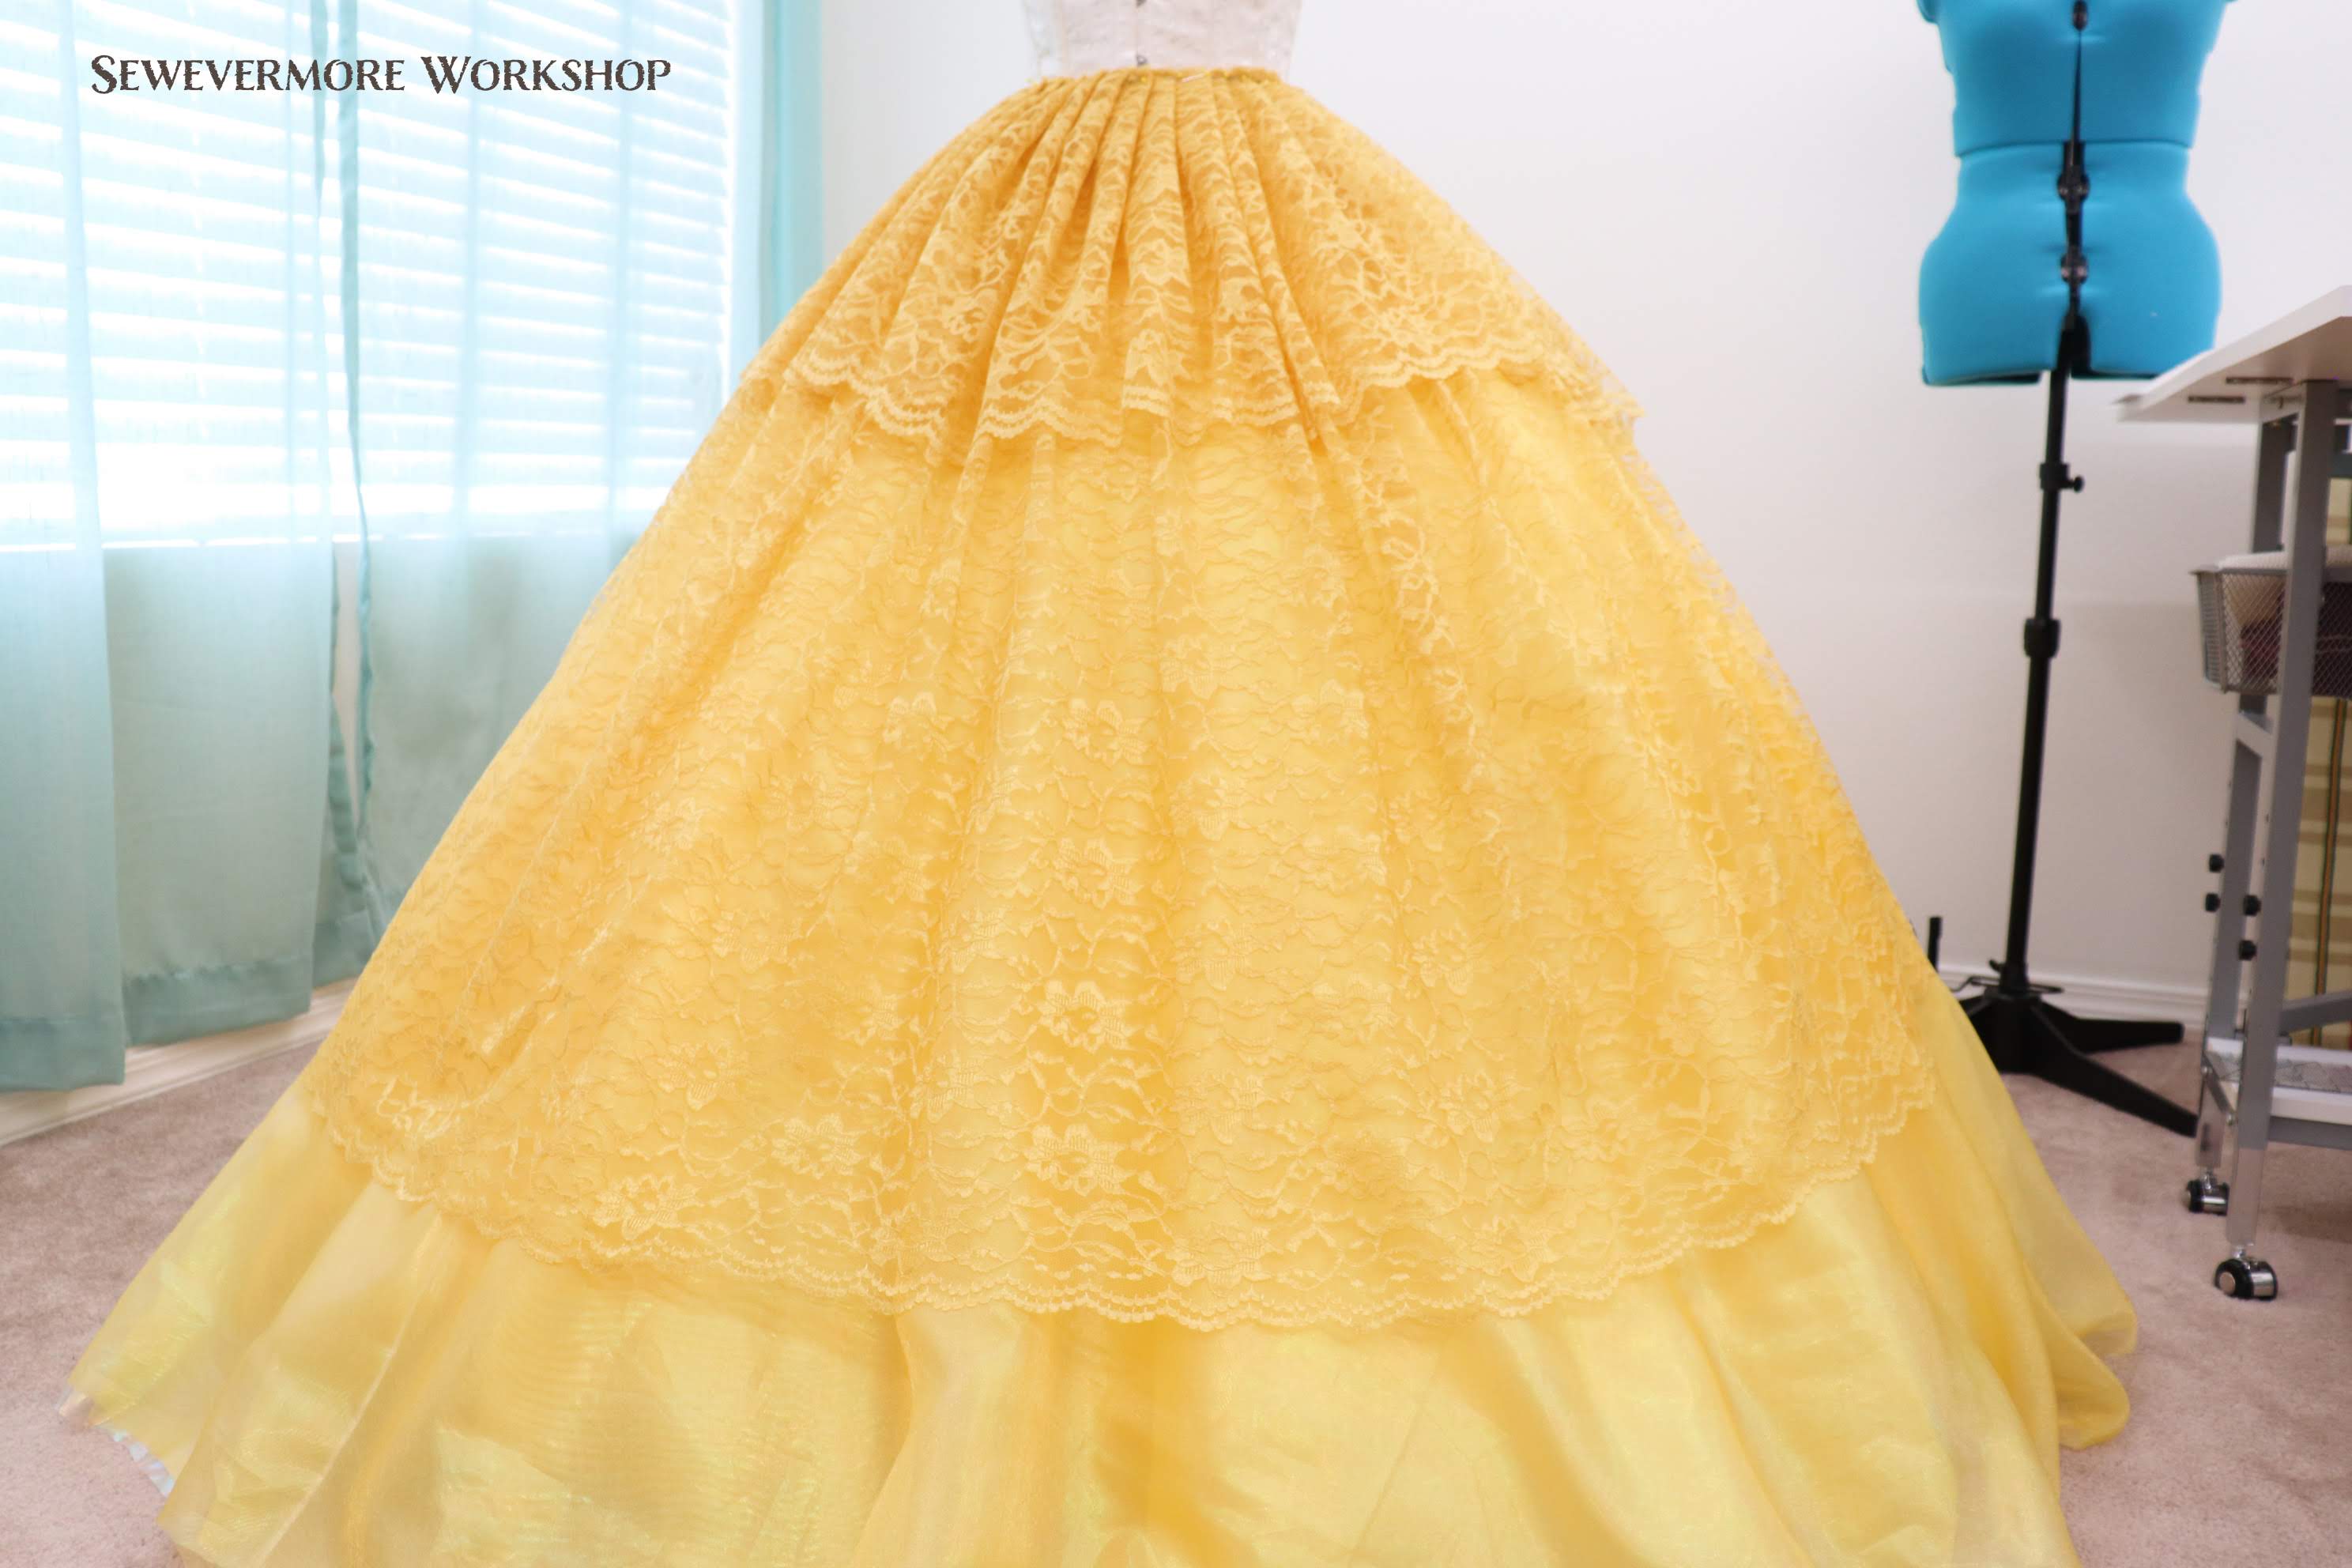
I don’t want the lace to extend all of the way to the bottom, so I folded over the top edge to make an approximation for the length of the lace.

Since I prefer pleats rather than gathers I pinned the lace in pleats around the waist to see what fullness I could achieve.
It turned out that I needed more lace than expected. I used everything I had, but wish I had a few more yards. However, since I don’t know if it is still available I will just use what I have.
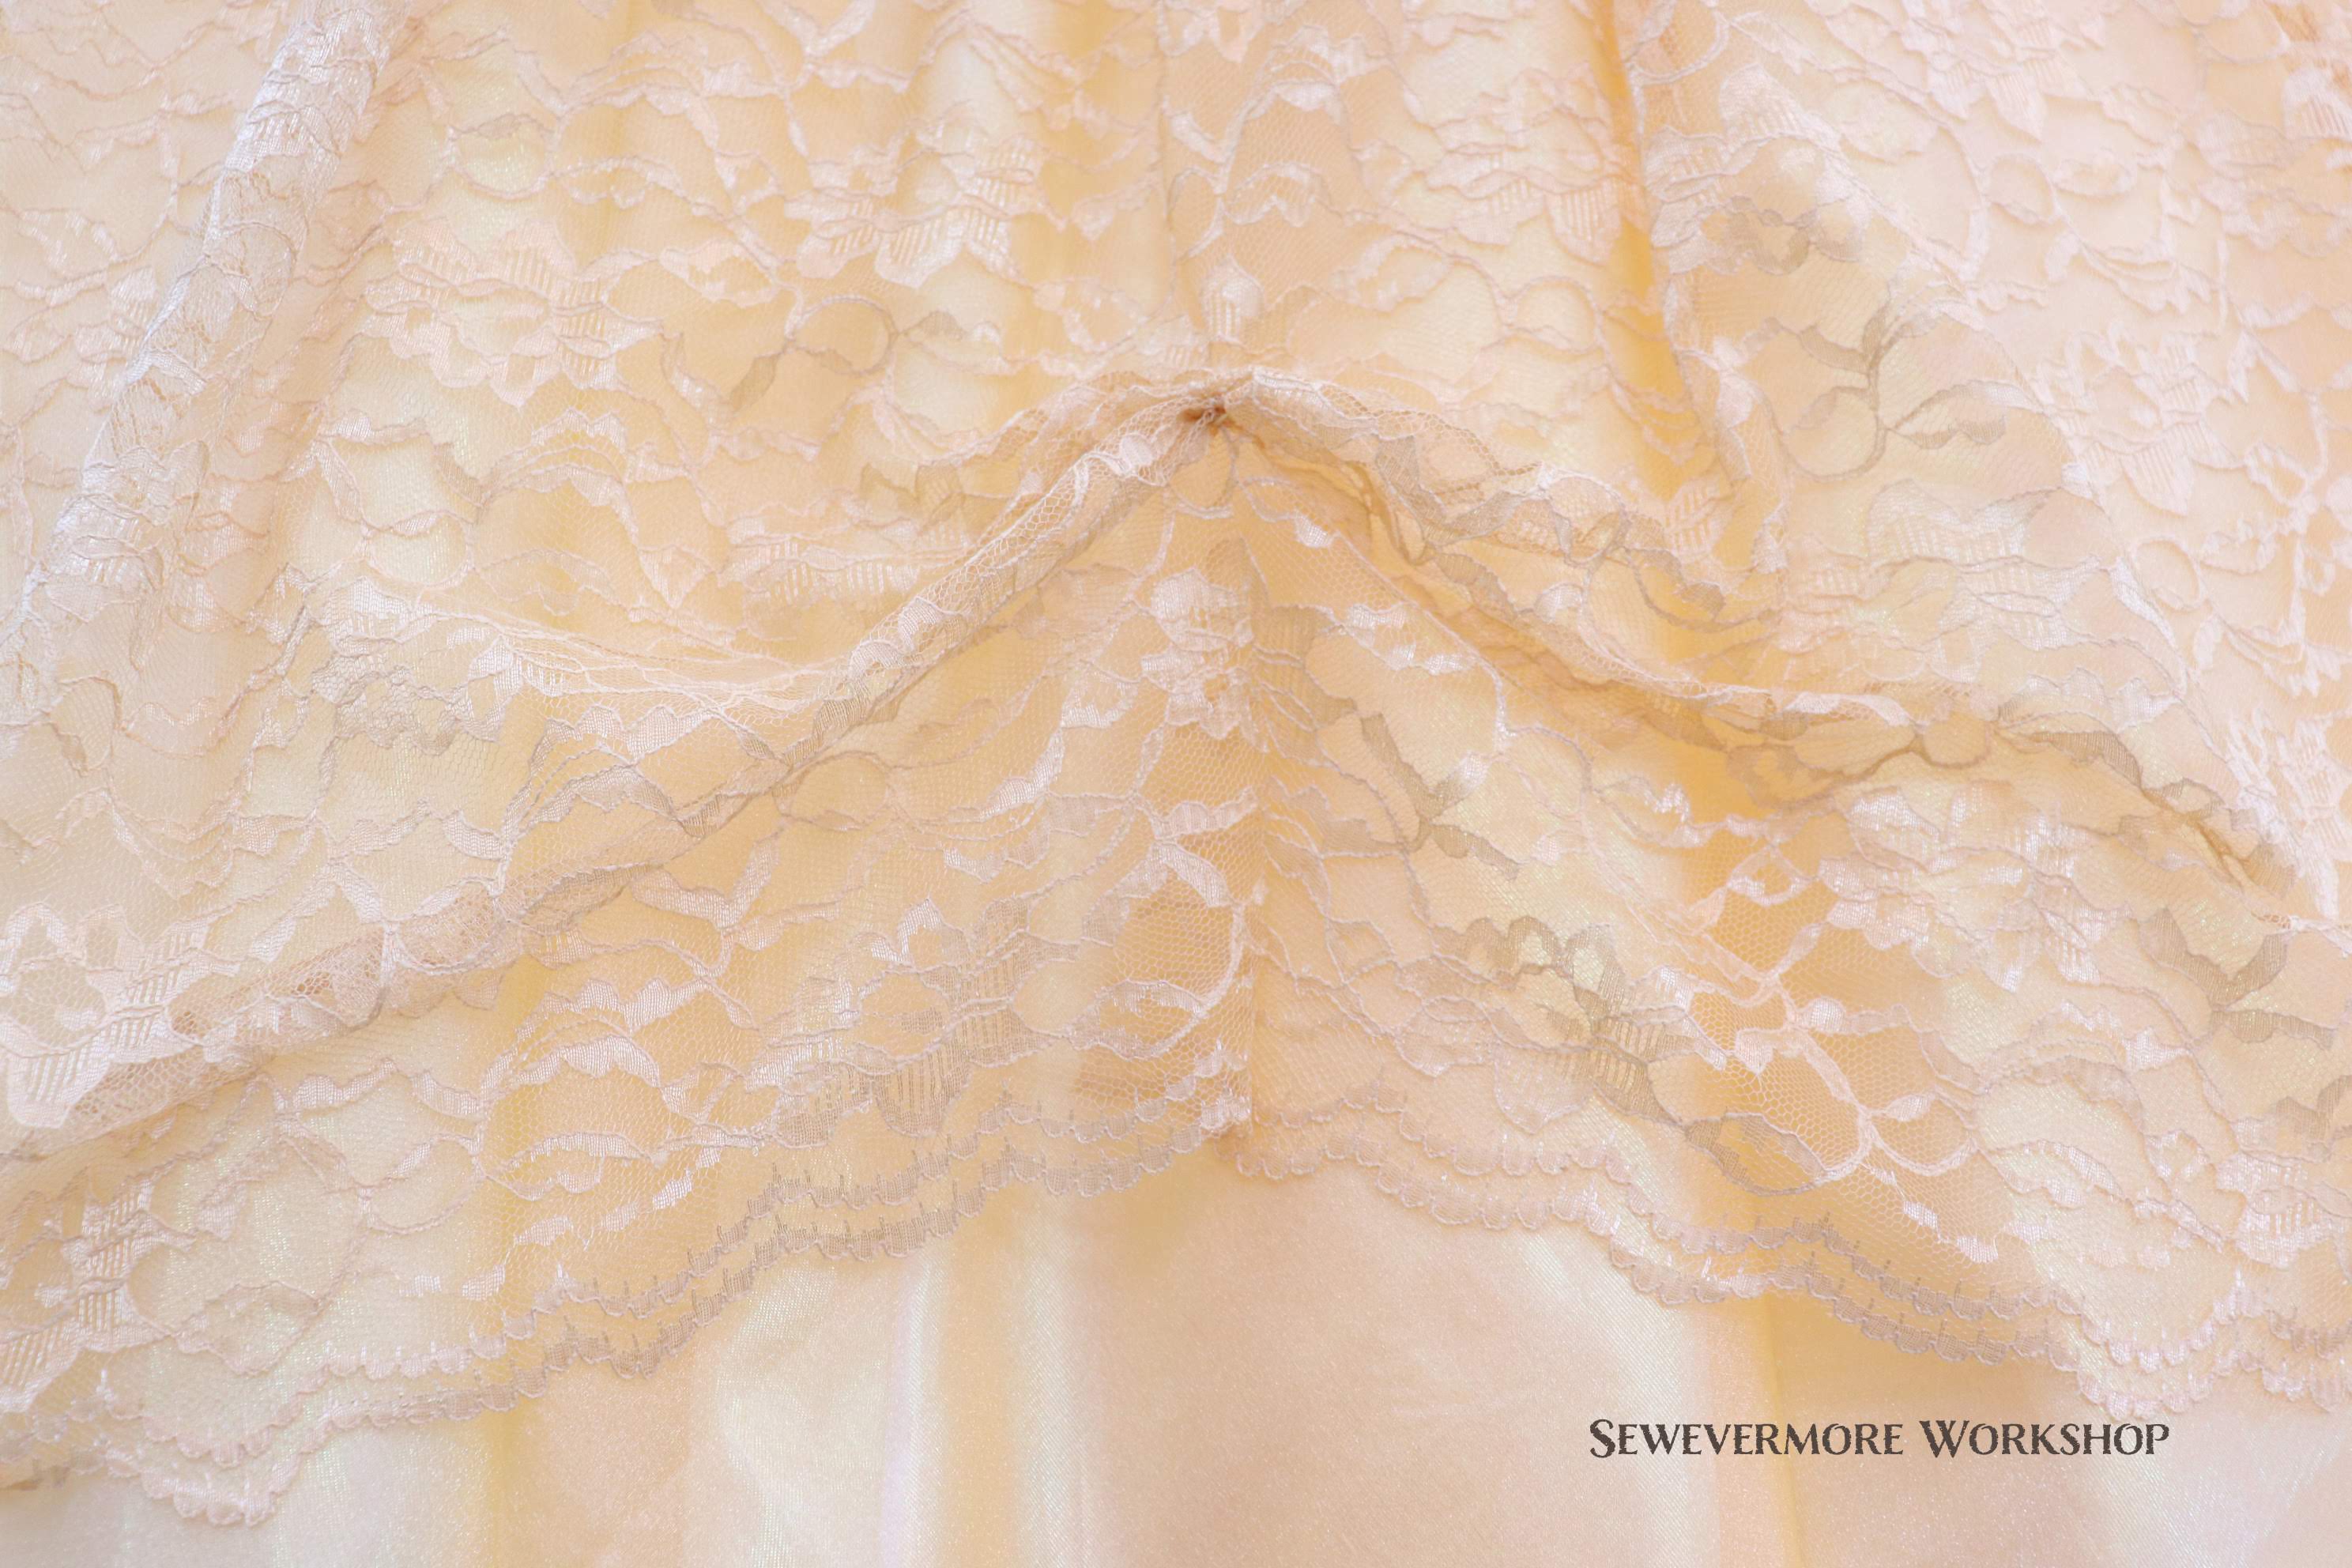
Once the lace was on place I played with different swoop sizes at the bottom of the lace to give the “Belle” effect to the dress.

First, I tried large swoops of fabric.

Then I tried a smaller size.

After considering both options I preferred the look of the smaller swoops.

There ended up being nine swoops around the width of the skirt.
I want to add a rose to the peak of each later 🙂
- Draping Lace
After my first few attempts at draping the lace I decided to try a different method.
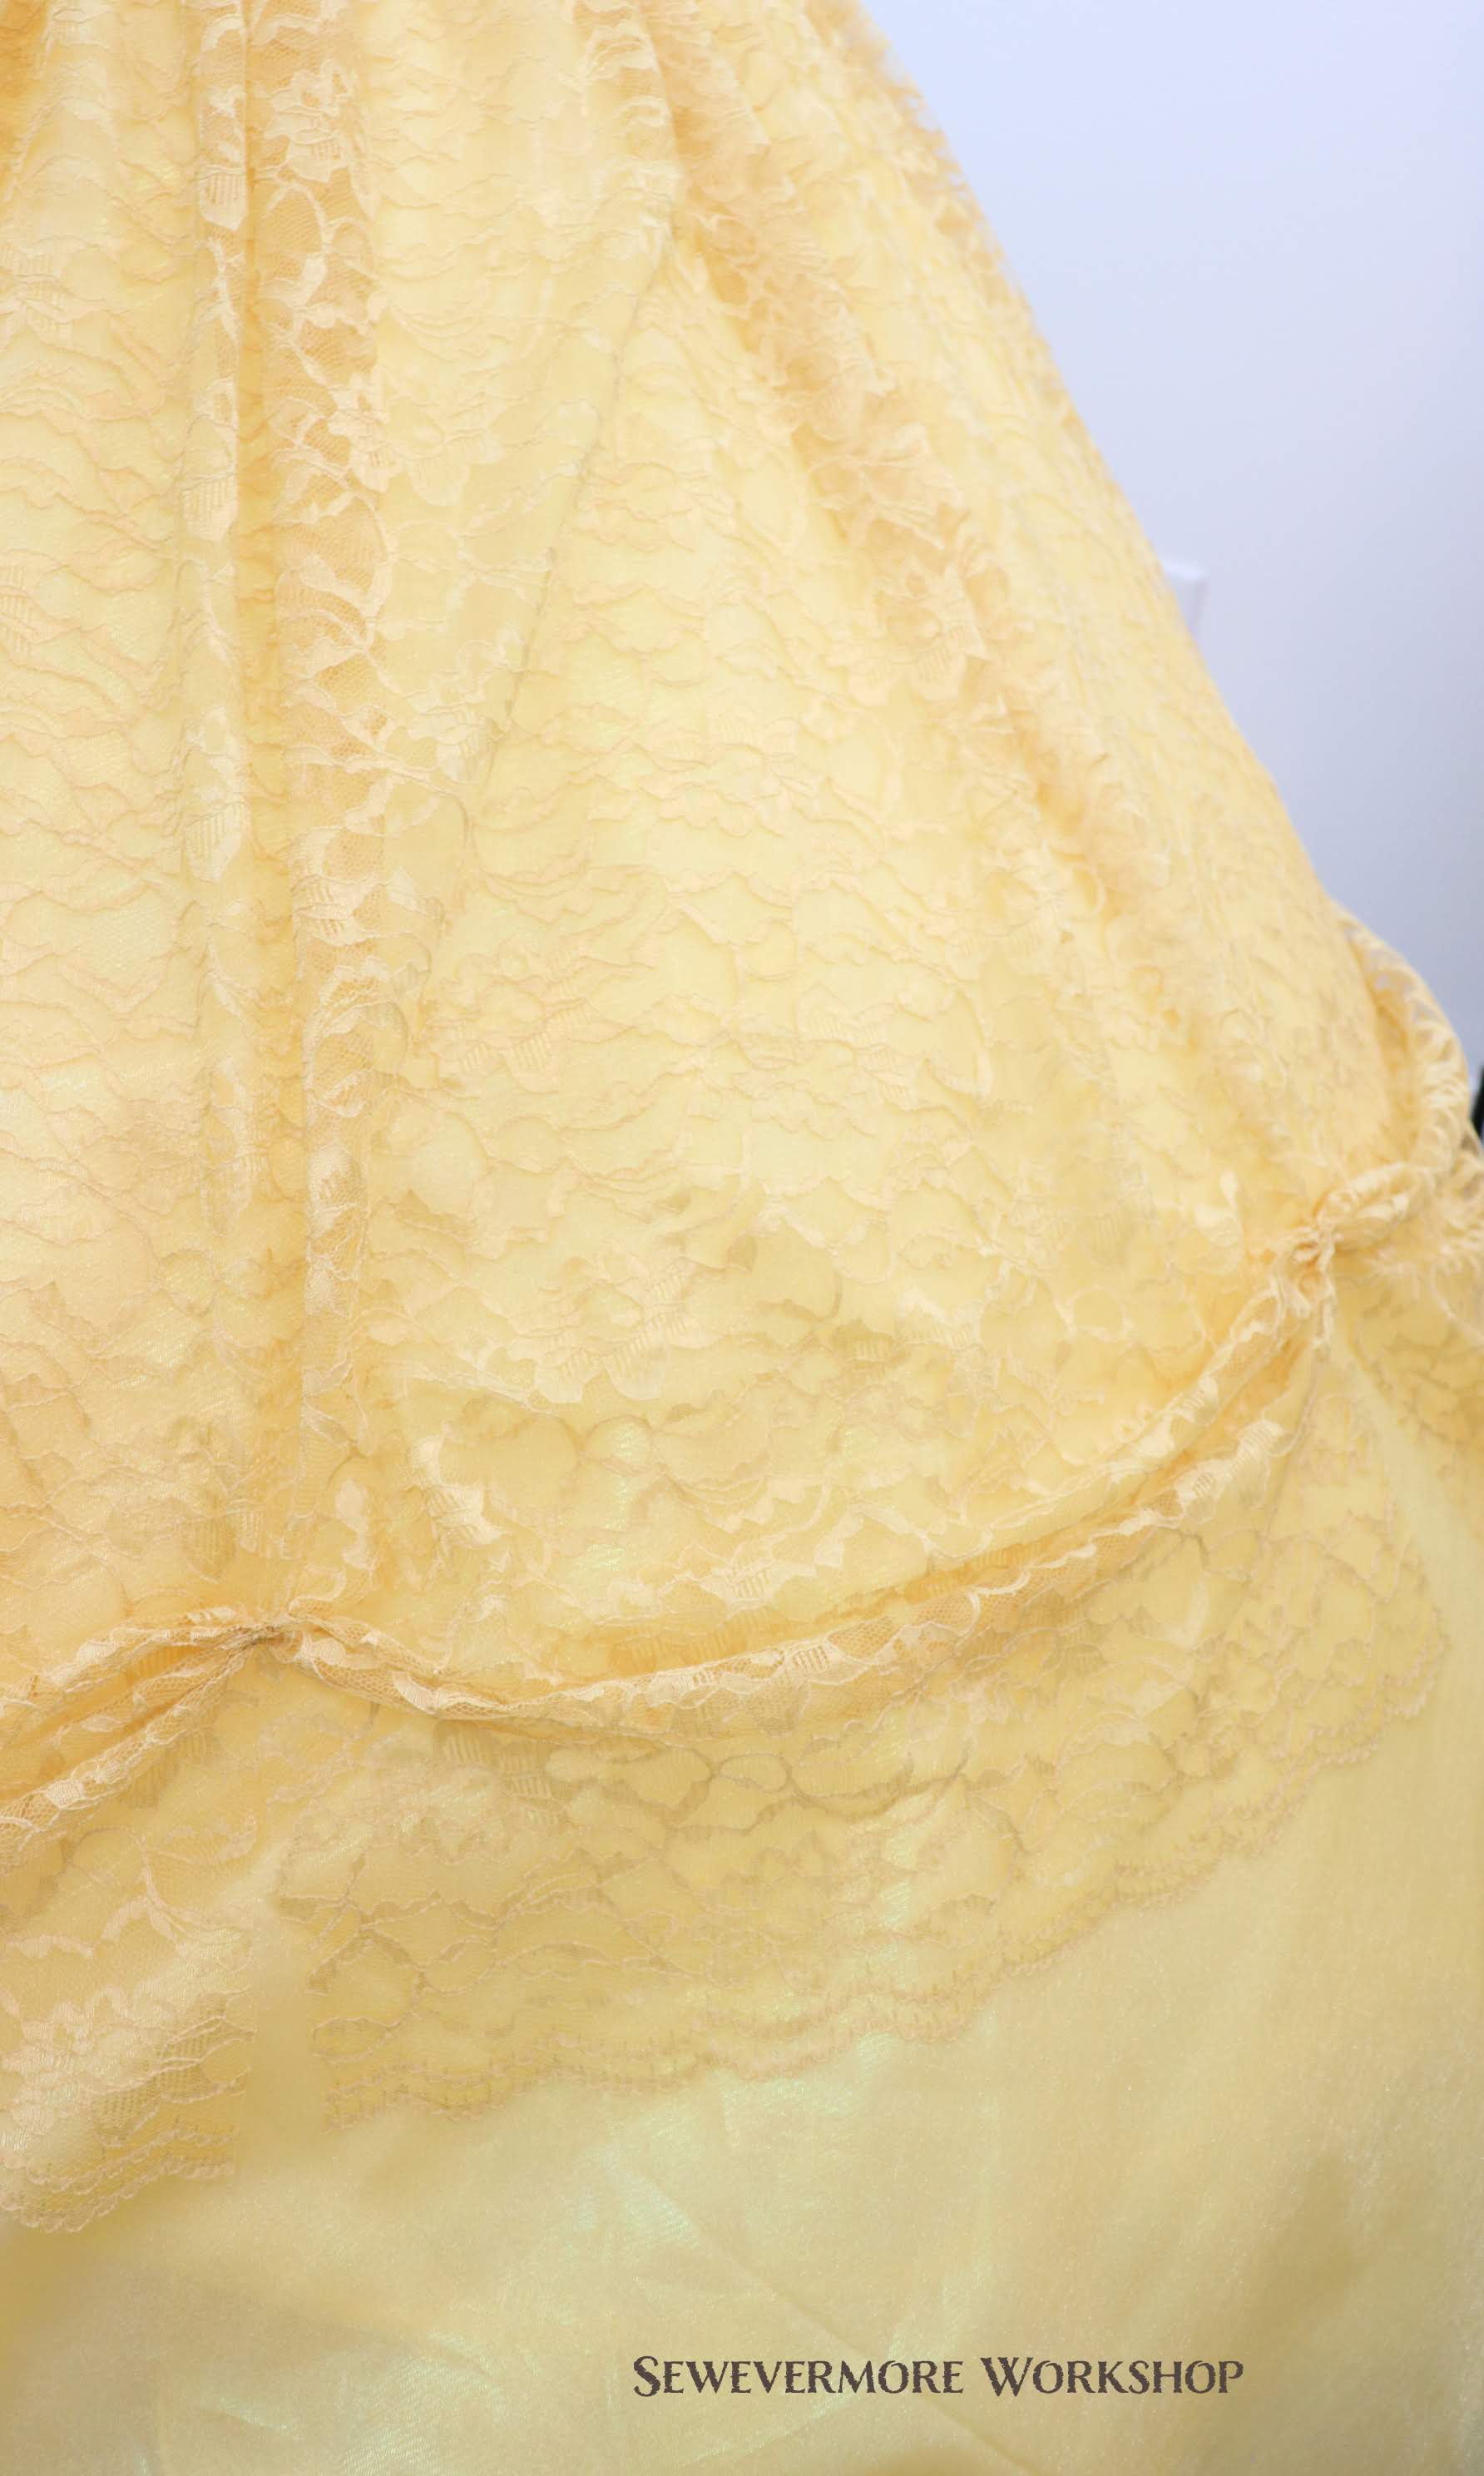
I wanted to see how the swoops of lace would lay differently if there was a slit in the lace verses simply having the fabric gathered.
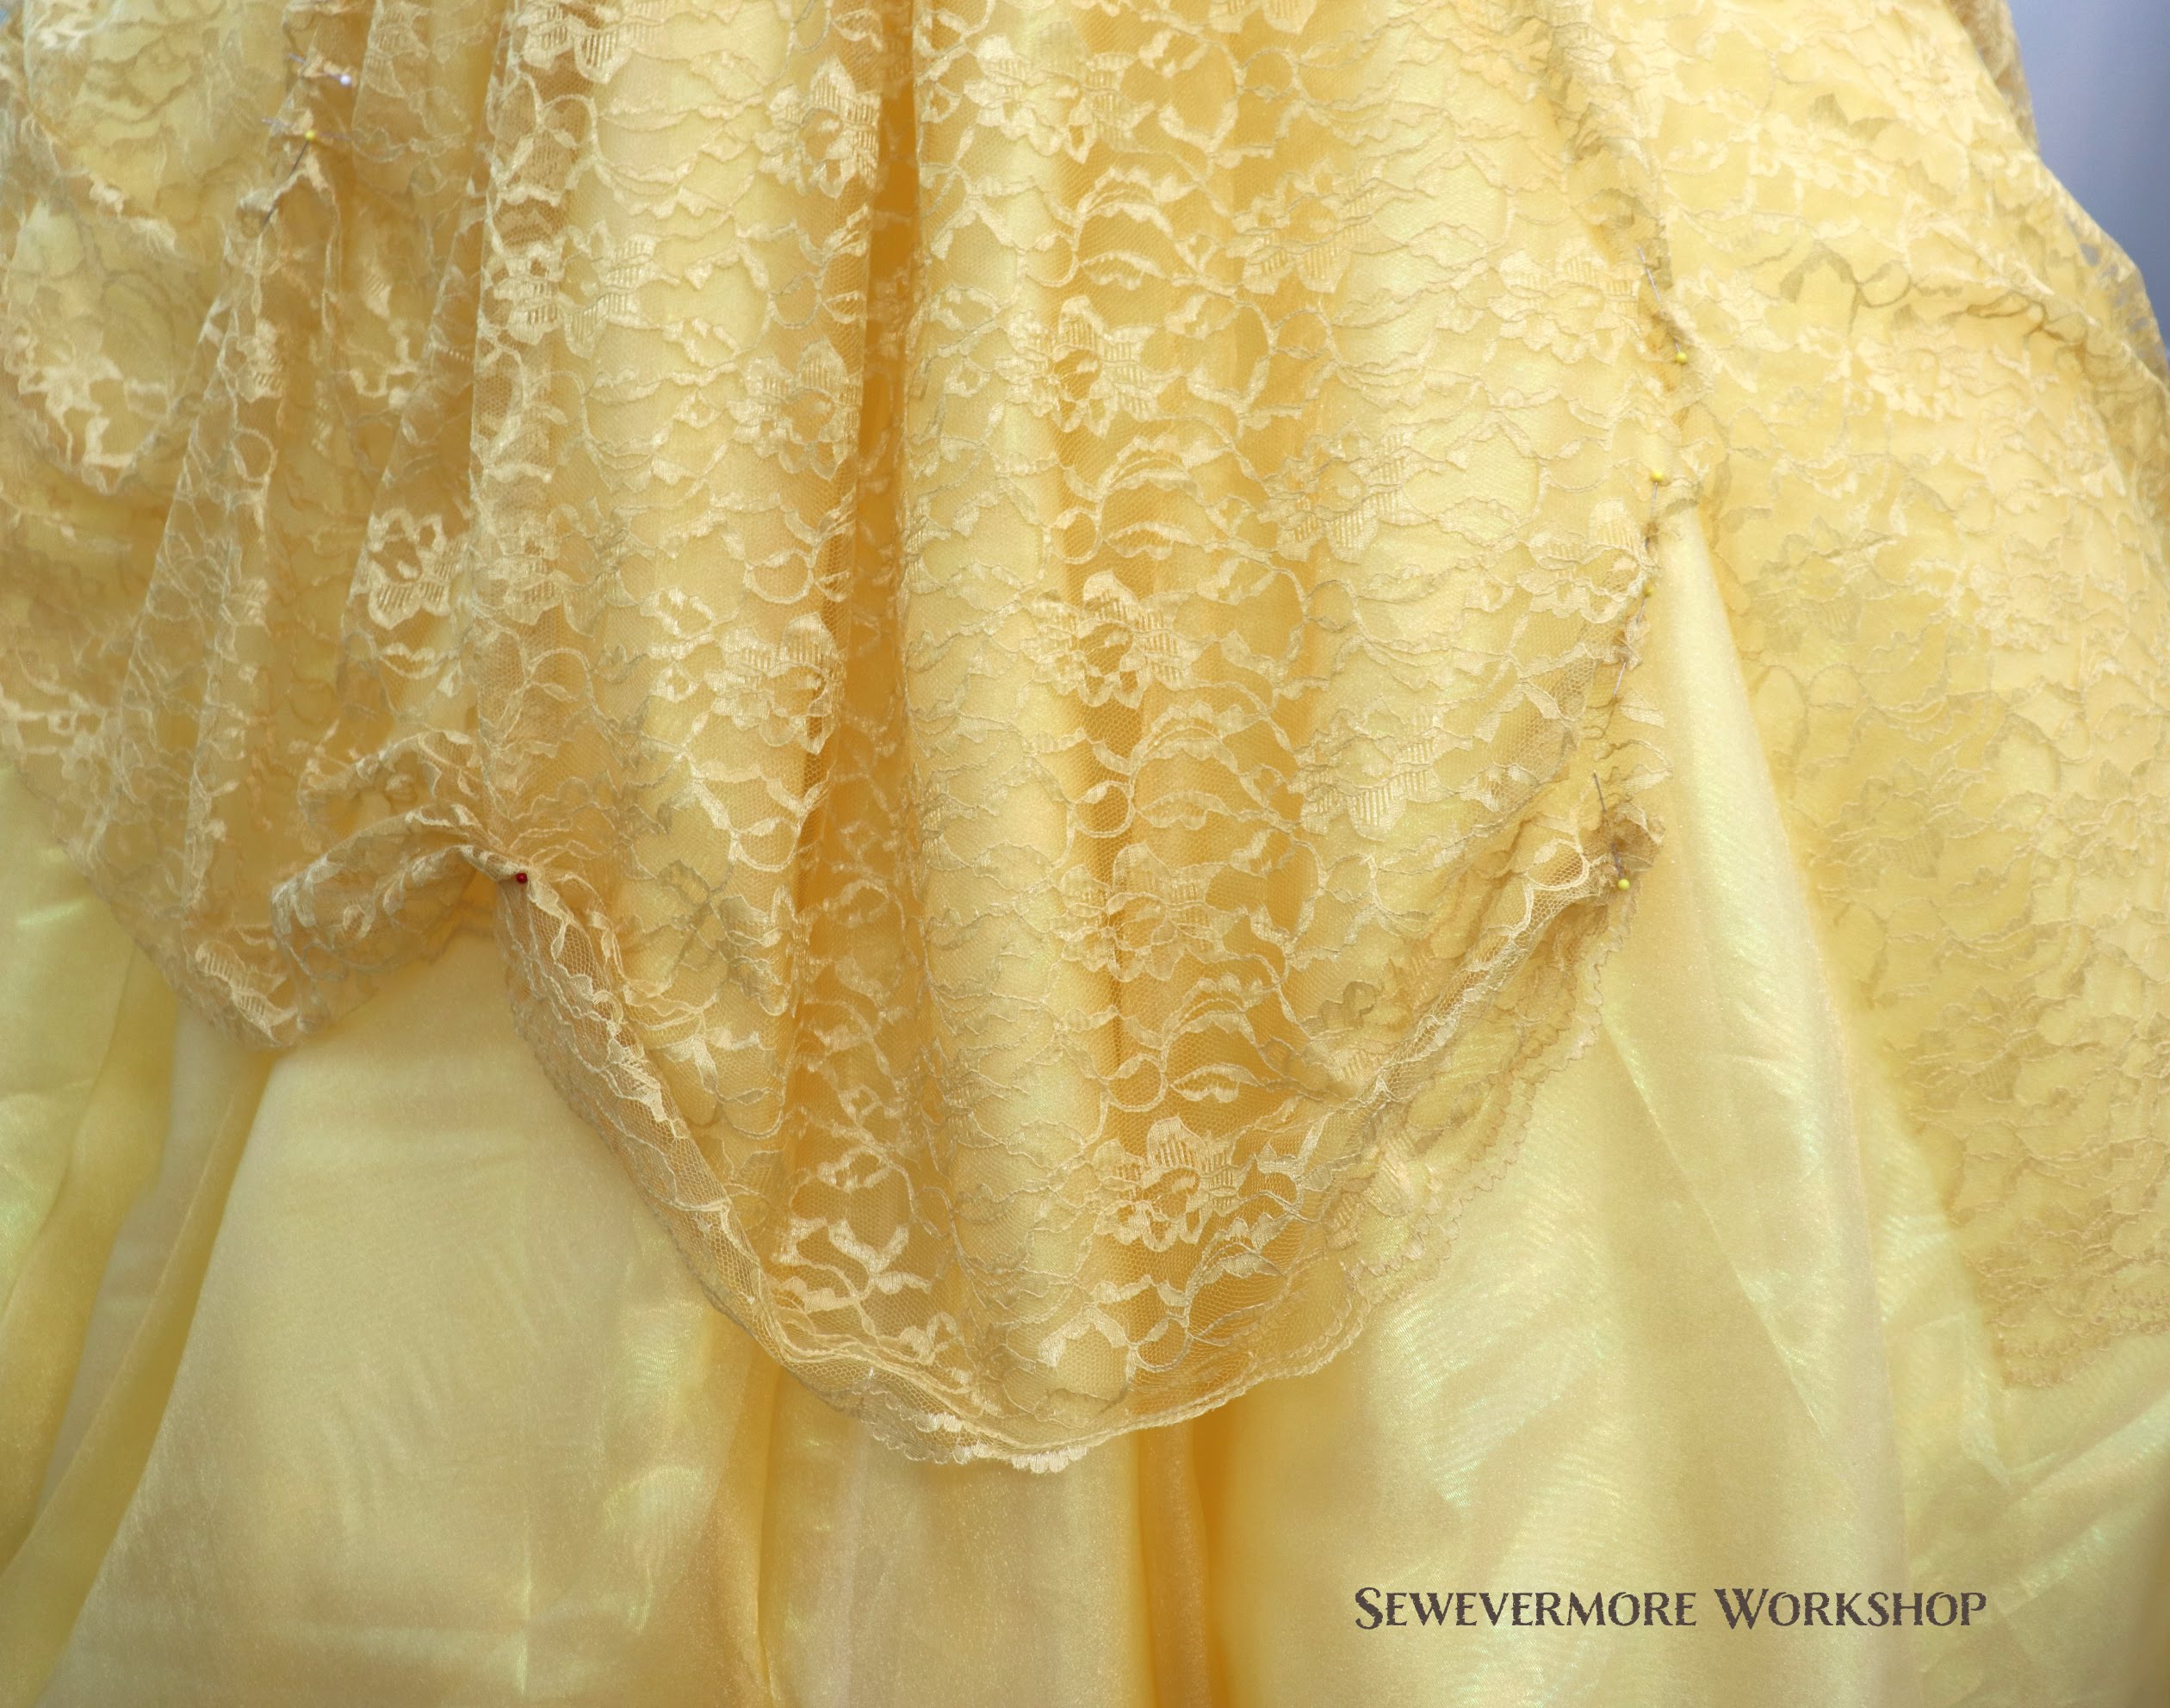
As you can see, a slit in the lace can create a longer and slimmer drop in the fabric.
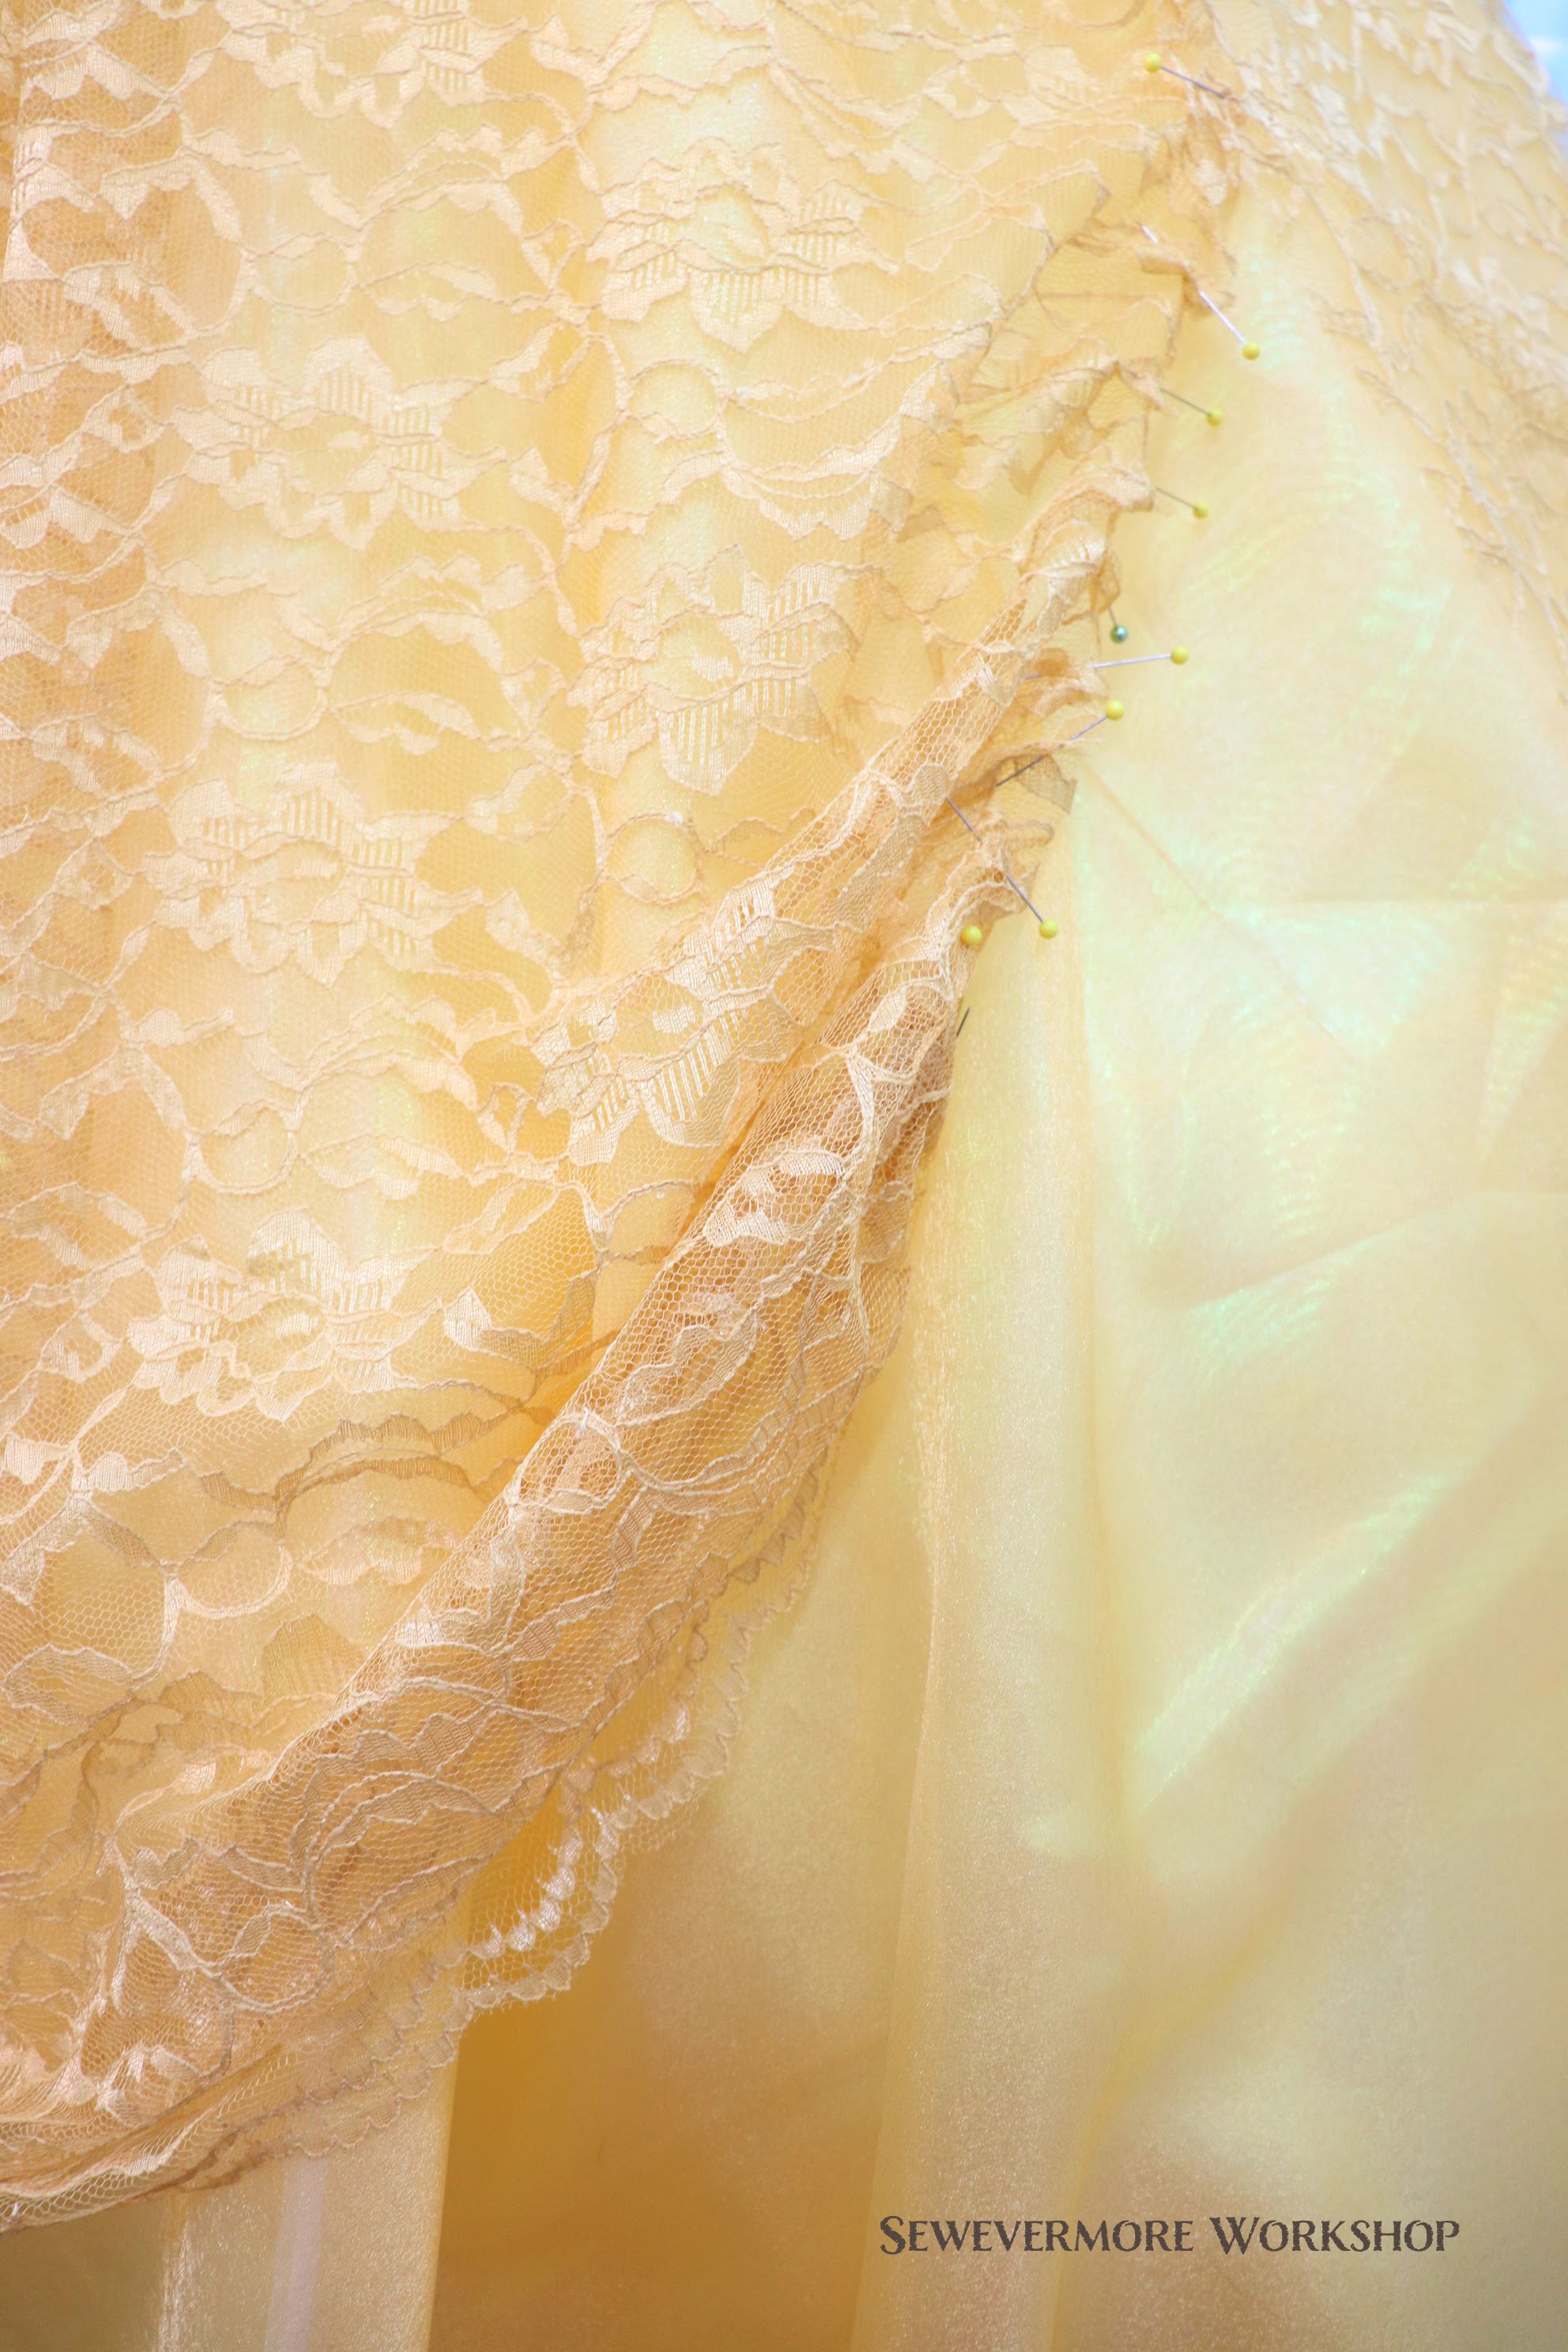
However, you do lose a bit of the fullness that was present from just gathering.
I think I will go with a small slit, to add a bit of length, but hopefully keep much of the soft fullness of the gathered drapes.
- Attaching the Lace
Once I had a good idea for how to drape the lace, it was time to attach it.
As I was beginning this process, I decided I wanted all of the yellow layers of the skirt to be connected, and all of the white to be separate, so I could wear the white petticoat with other things.
As a result, my first step was to put the yellow circle skirts, and the yellow gathered petticoat layer together.

I placed the ruffled layer inside the circle skirts, aligned the center front, and pinned all four layers together at the waist.


Evie wanted to help. Thank goodness she is cute, since she isn’t terribly helpful!

Next, I took it to the machine and stitched them together with a 1/2 inch seam allowance around the waist.

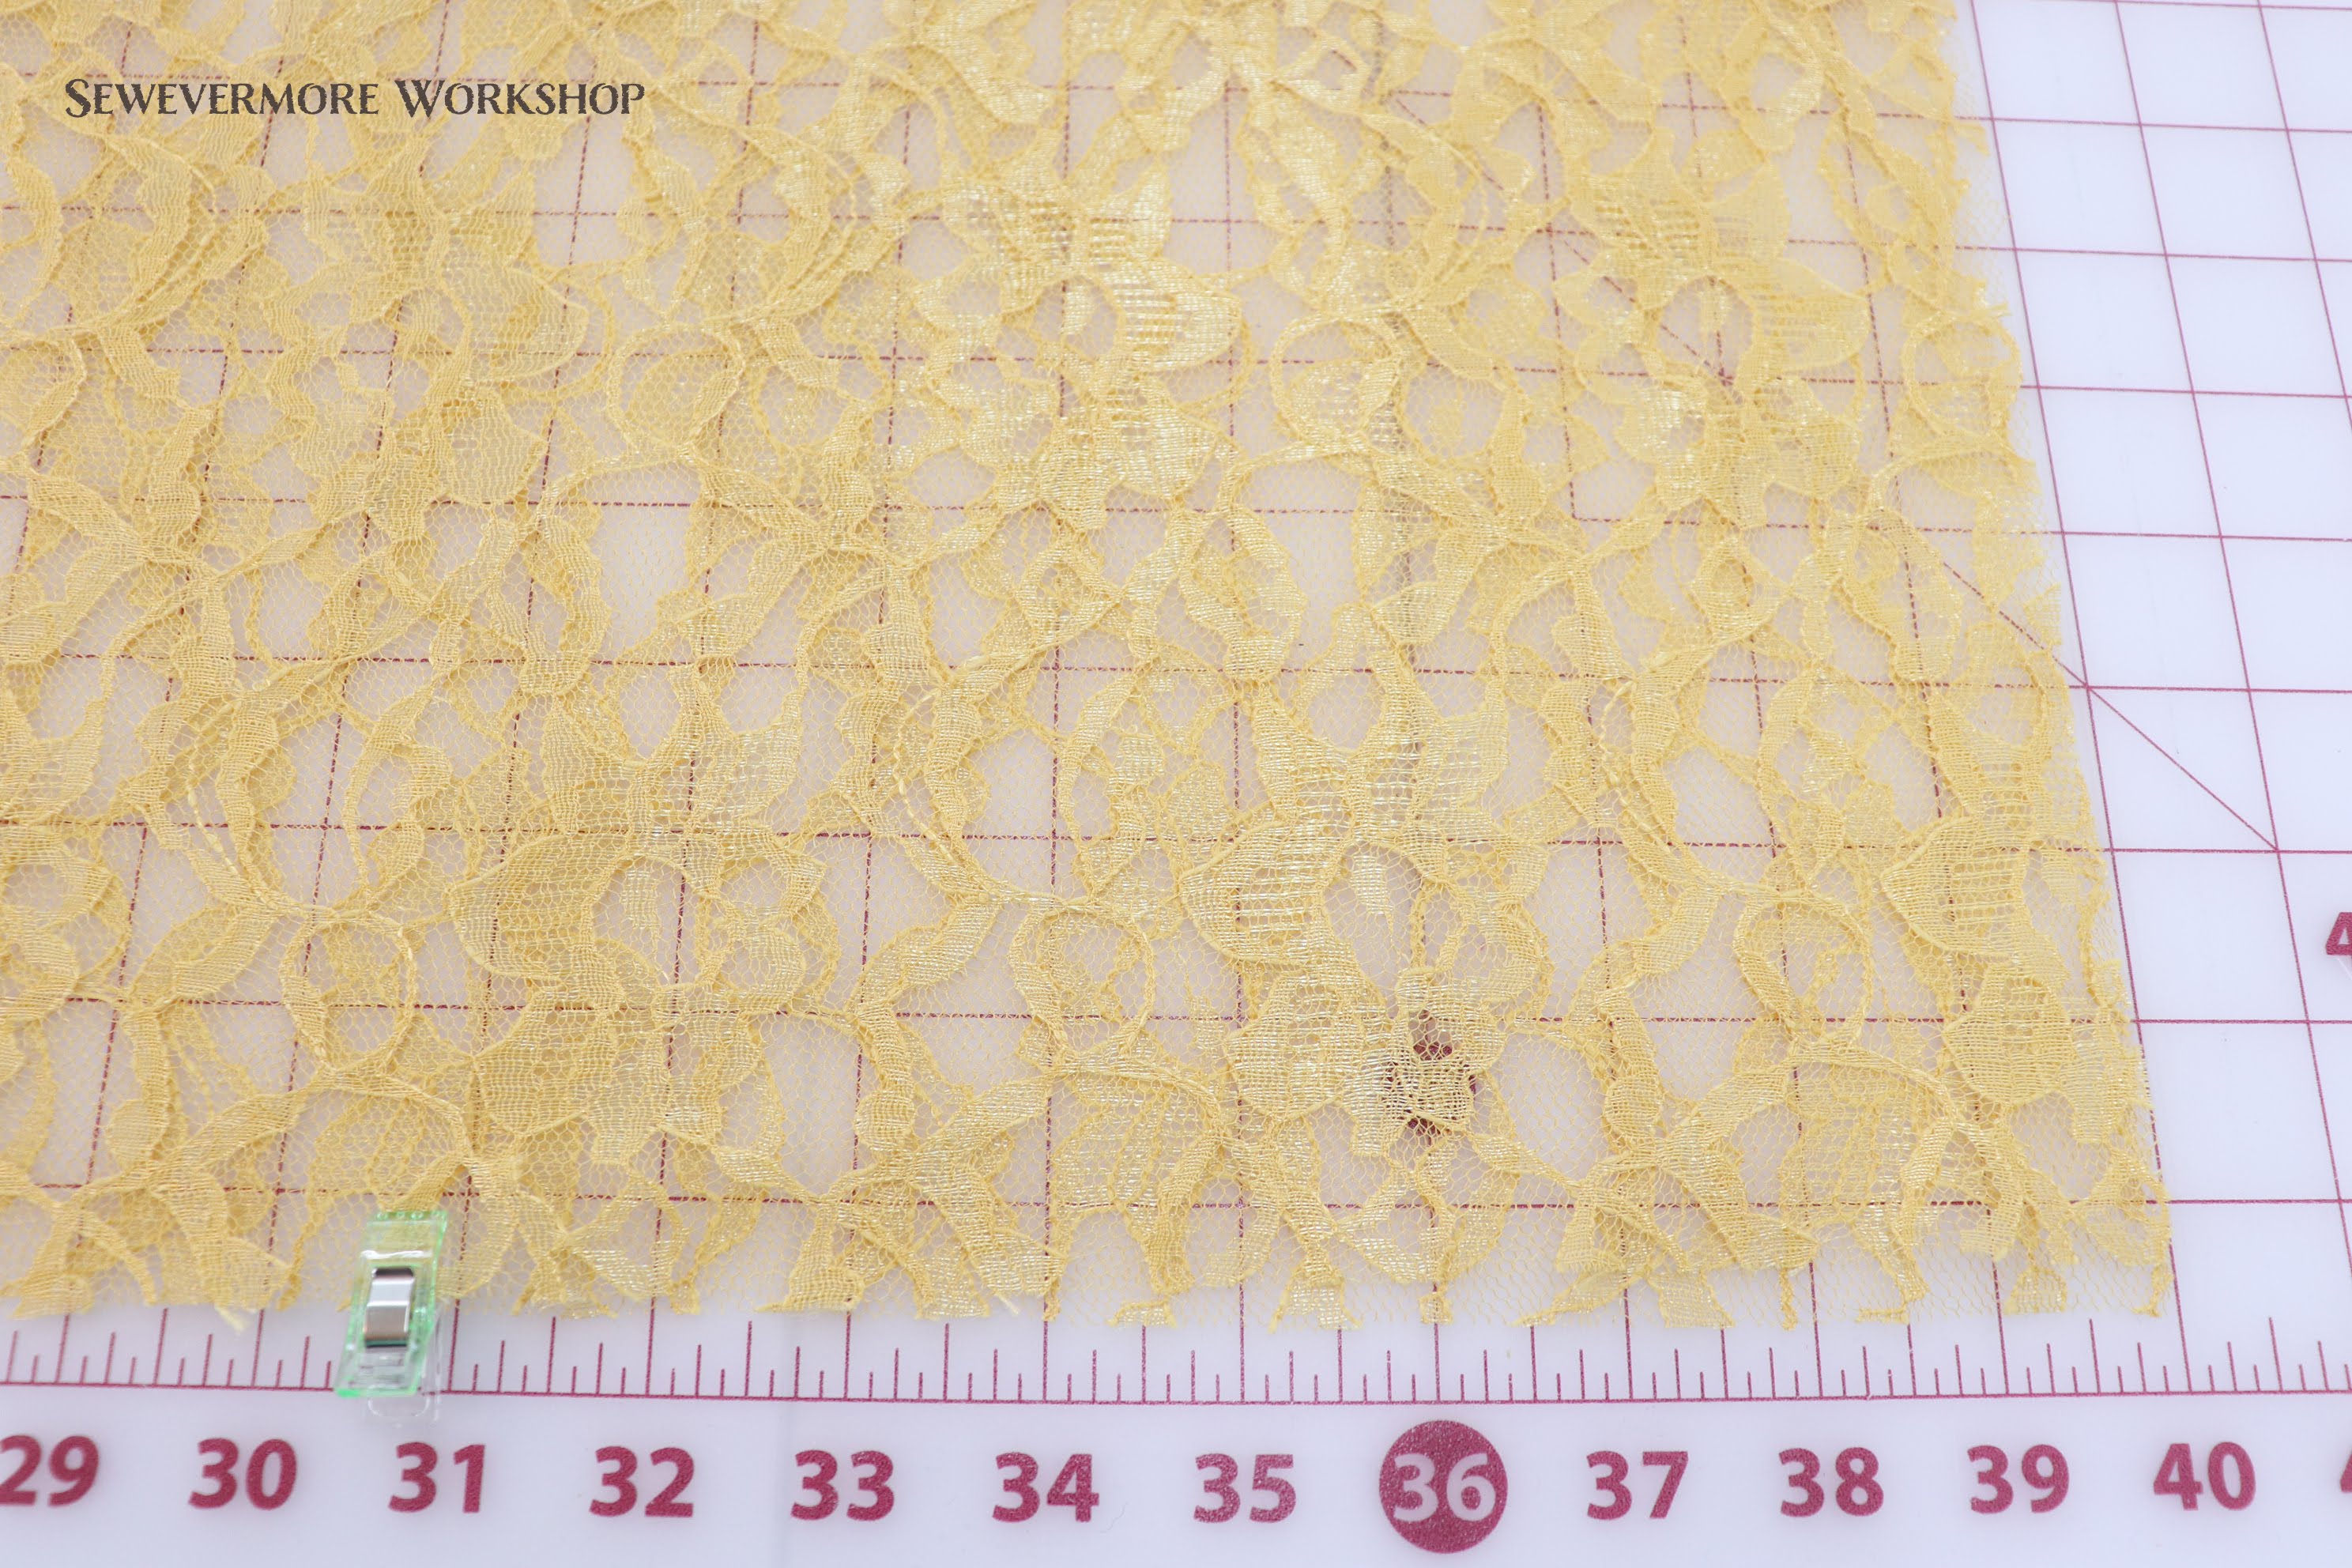
Now, I was ready to work with the lace. I started with 5 yards of JoAnn’s Casa Collection 58″ lace in Ochre. It is a great value, only about $5 per yard with a 50% of coupon. I wish I had purchased a few more yards of lace, 6 – 7 yards probably would have been better for a fuller or longer drape, but as I didn’t want to invest anymore in materials…we will make 5 yards work!
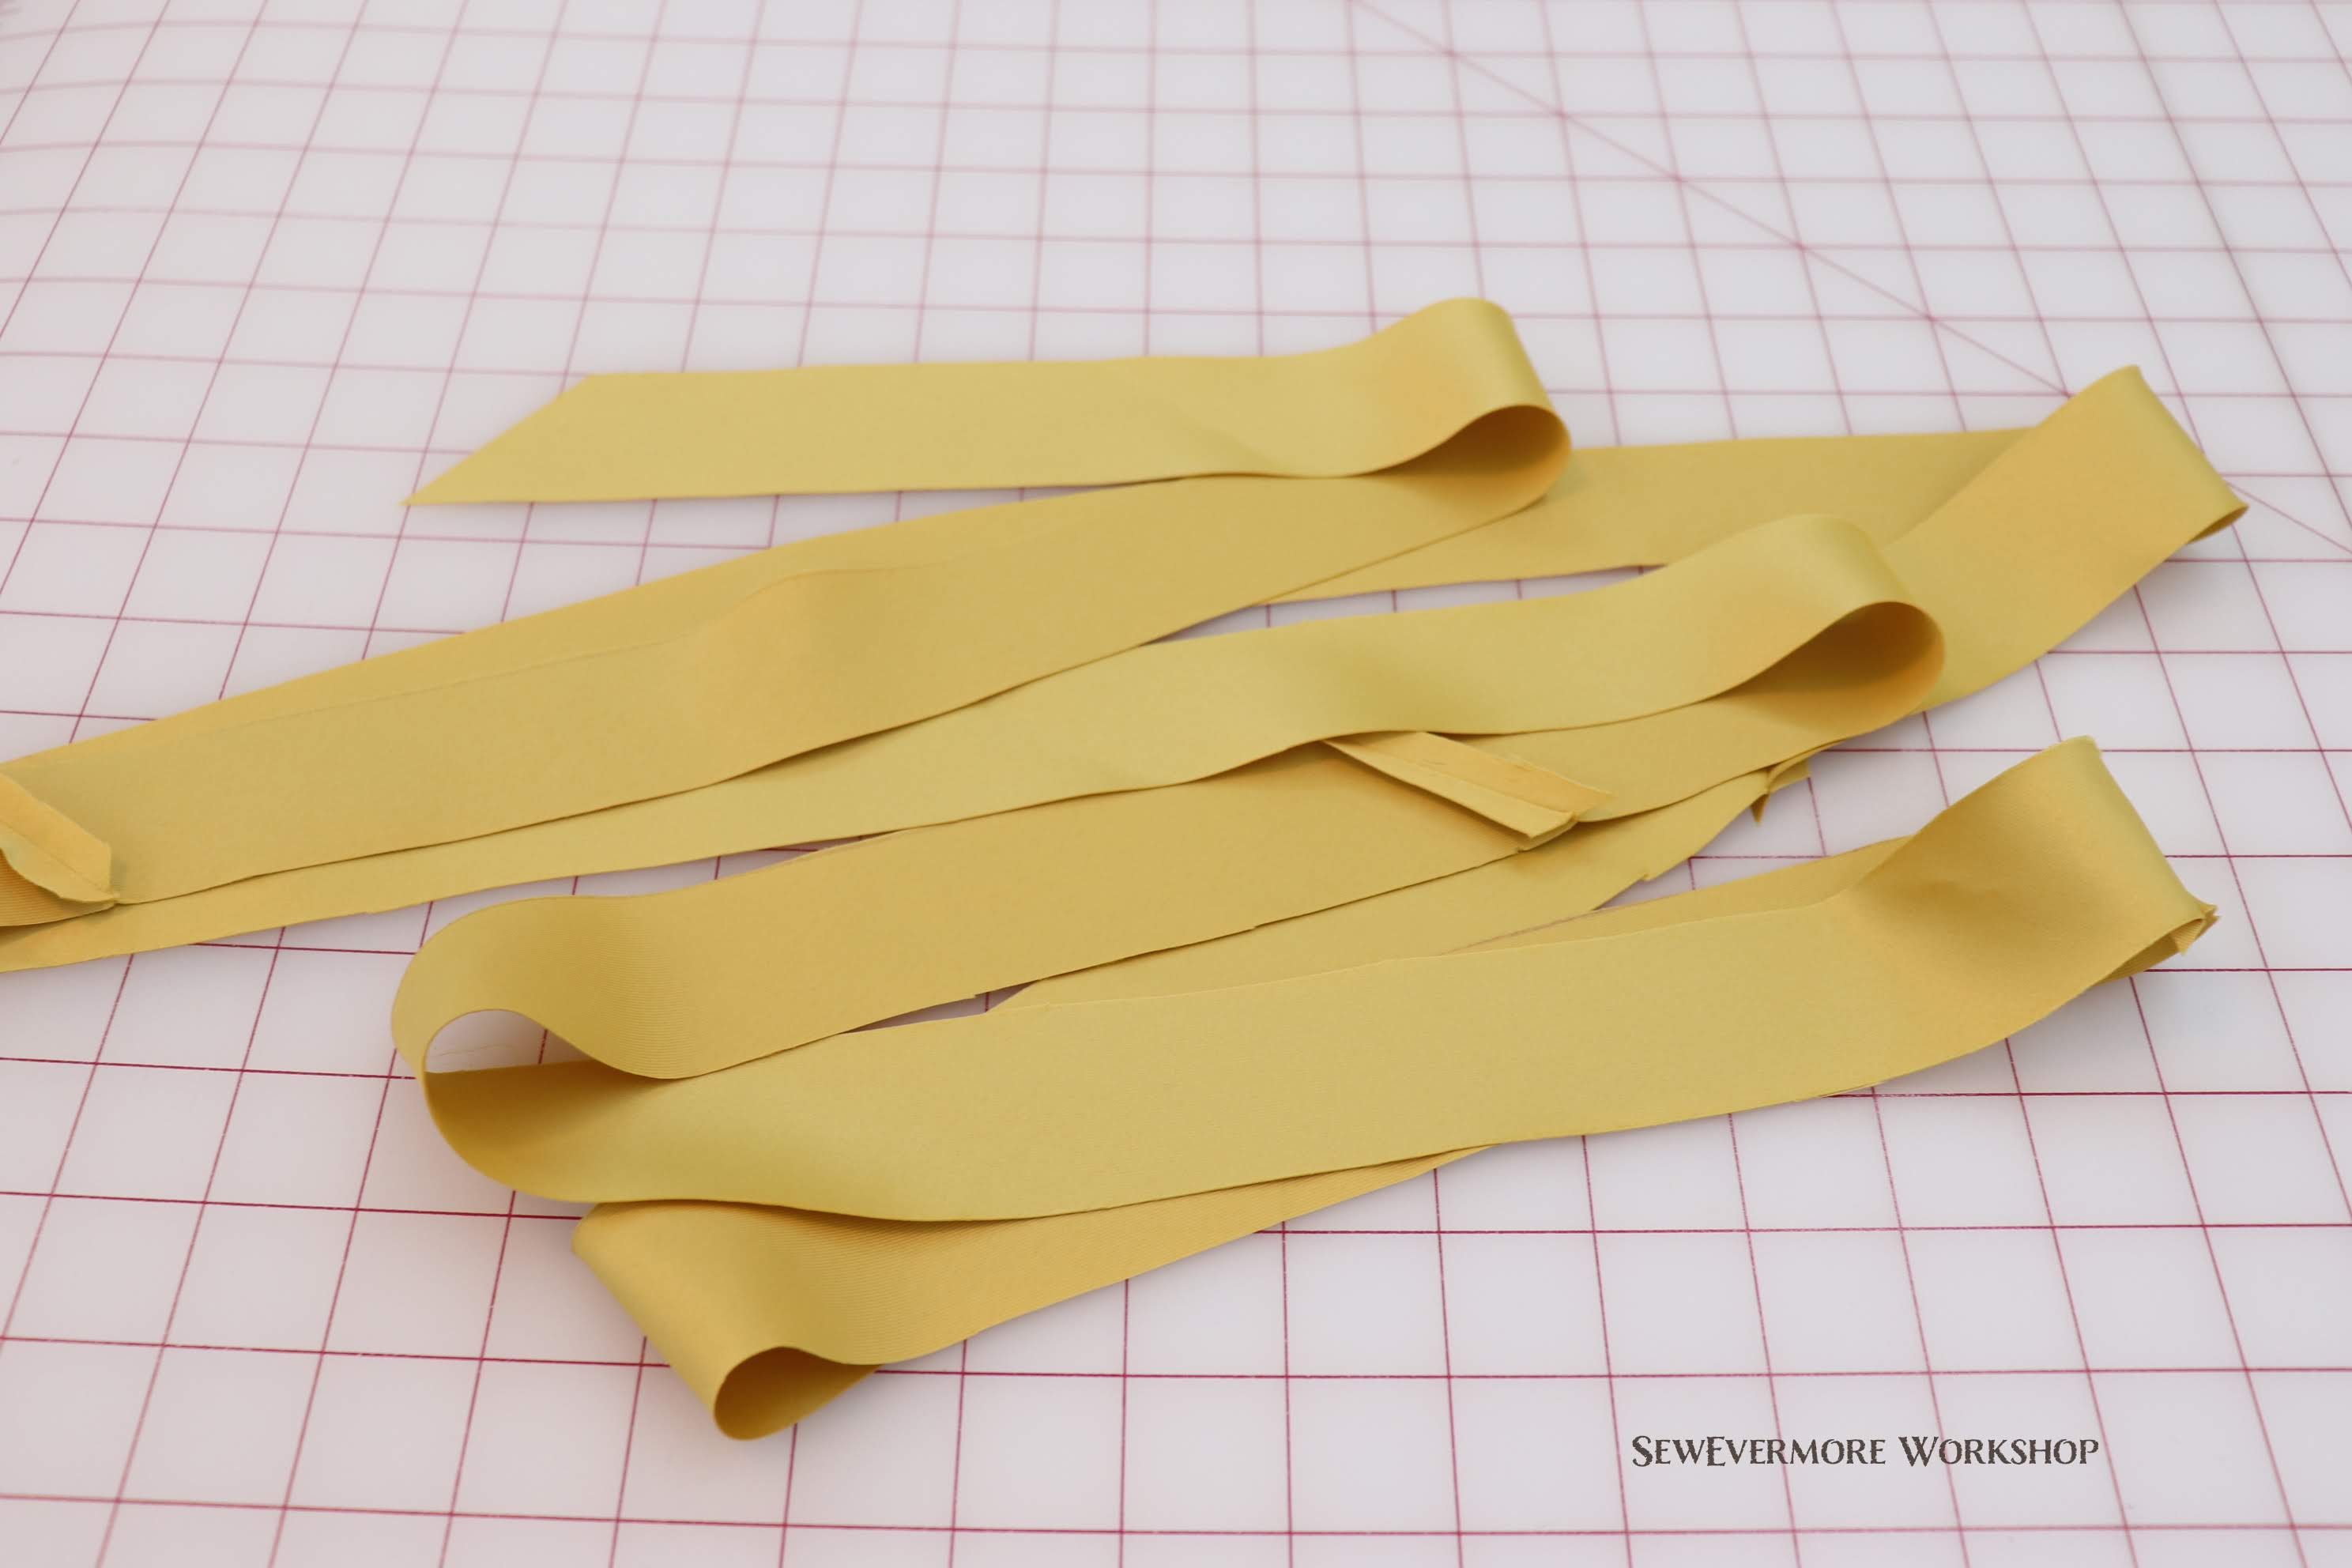
I began by trimming the lace to be 40 inches tall, rather than 58 inches. After cutting I had lace that was 5 yards by 40 inches. (I will use the part that was trimmed off for accents and details later.)
I folded the lace in half with right sides together. I marked 9 inched down from the top edge (the scalloped finished edge of the lace is the bottom), and 6 inches up from the bottom, and pinned in between. I left 9 inches open at the top for the center back opening, and the bottom 6 inches open for the draped swoops of fabric.

I stitched between the two marks. This created a big loop of lace.

Next, I folded the lace fabric into quarters and used clips to mark the quarter sections. (Pins tend to fall out of lace.) Each quarter section was about 45 inches along the top raw edge.


I then marked the waistband section of the skirt into quarters as well.
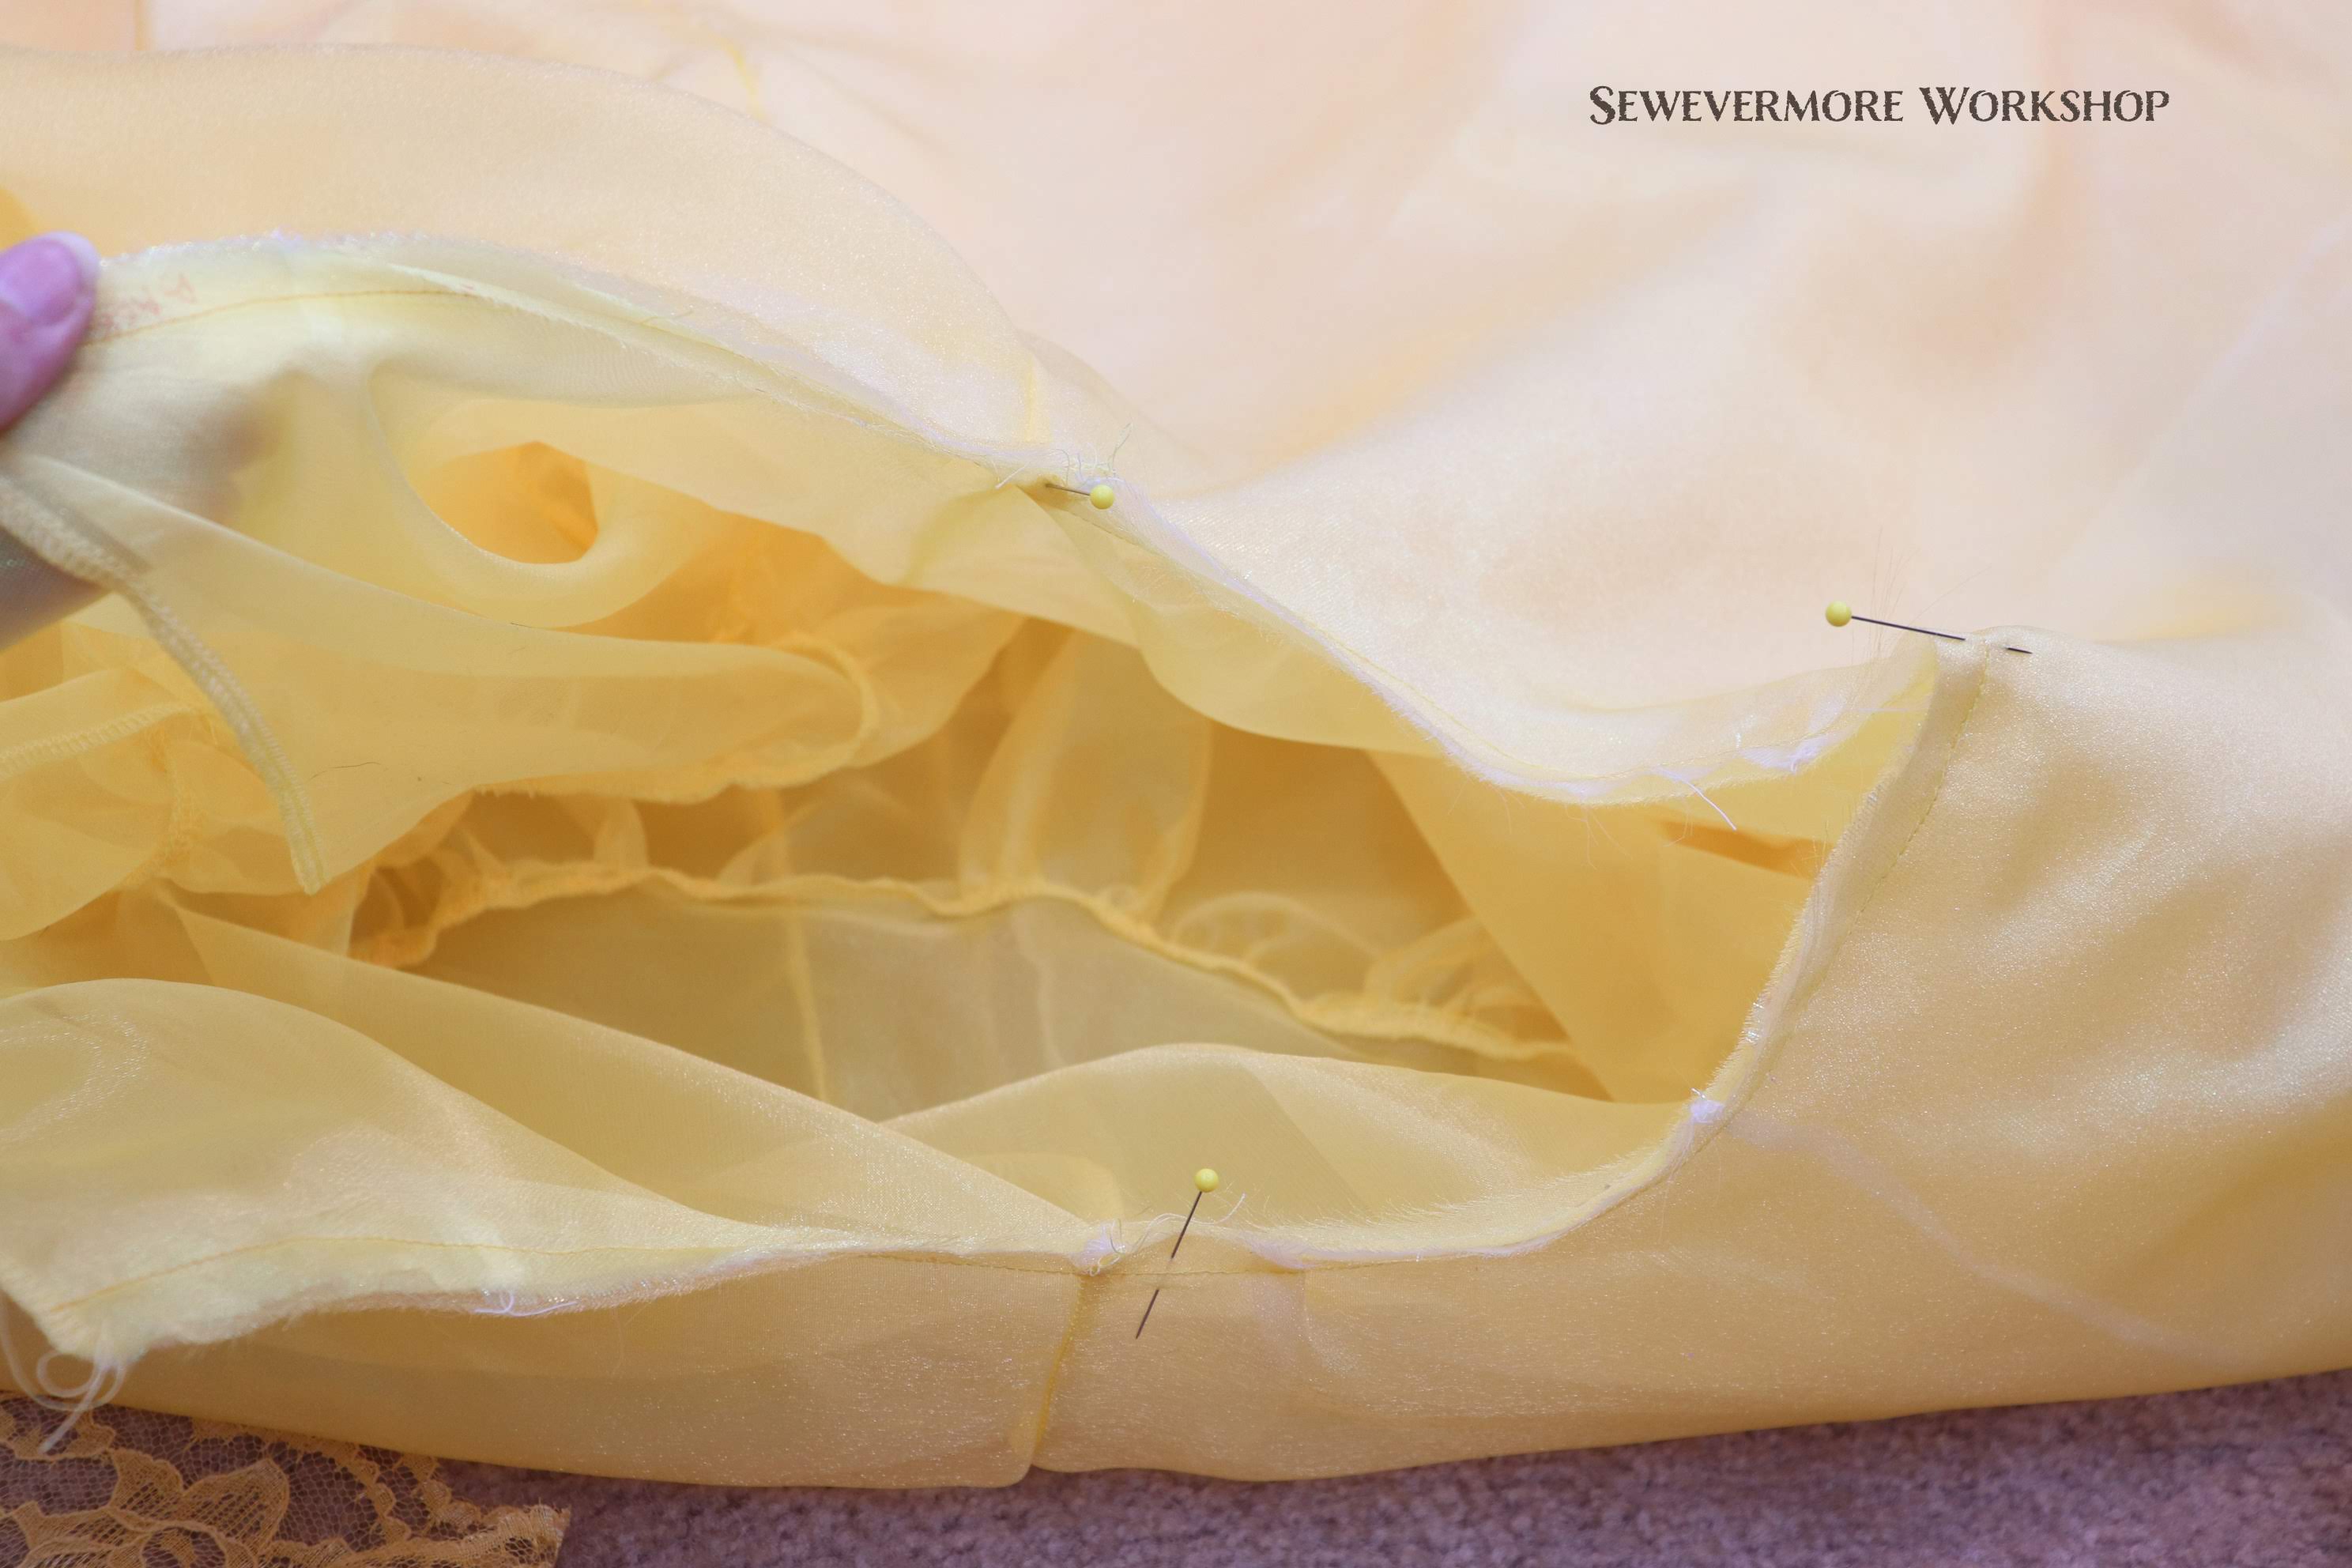
I placed the skirts inside the lace, making sure the lace was right side out, and aligned the quarter sections. You will notice that the lace is MUCH bigger than the waistband.

To bring in the waist I created pleats, similar to what I did when draping the fabric. When making the pleats I found that my pleats overlapped about 2/3 to 3/4 of the time. For example, if my pleats were 1.5 inches long, they would overlap the previous pleat by about 1 inch or a touch more. I didn’t really measure, so this took a little playing with, but in the end I was happy with the results. I stitched the pleats in place in sections using a 1/2 inch seam allowance.

The pleats go in opposite directions. They fold toward the back of the skirt, so at the center front they meet and then point different ways.

The lace is now attached to the skirt! Hooray.
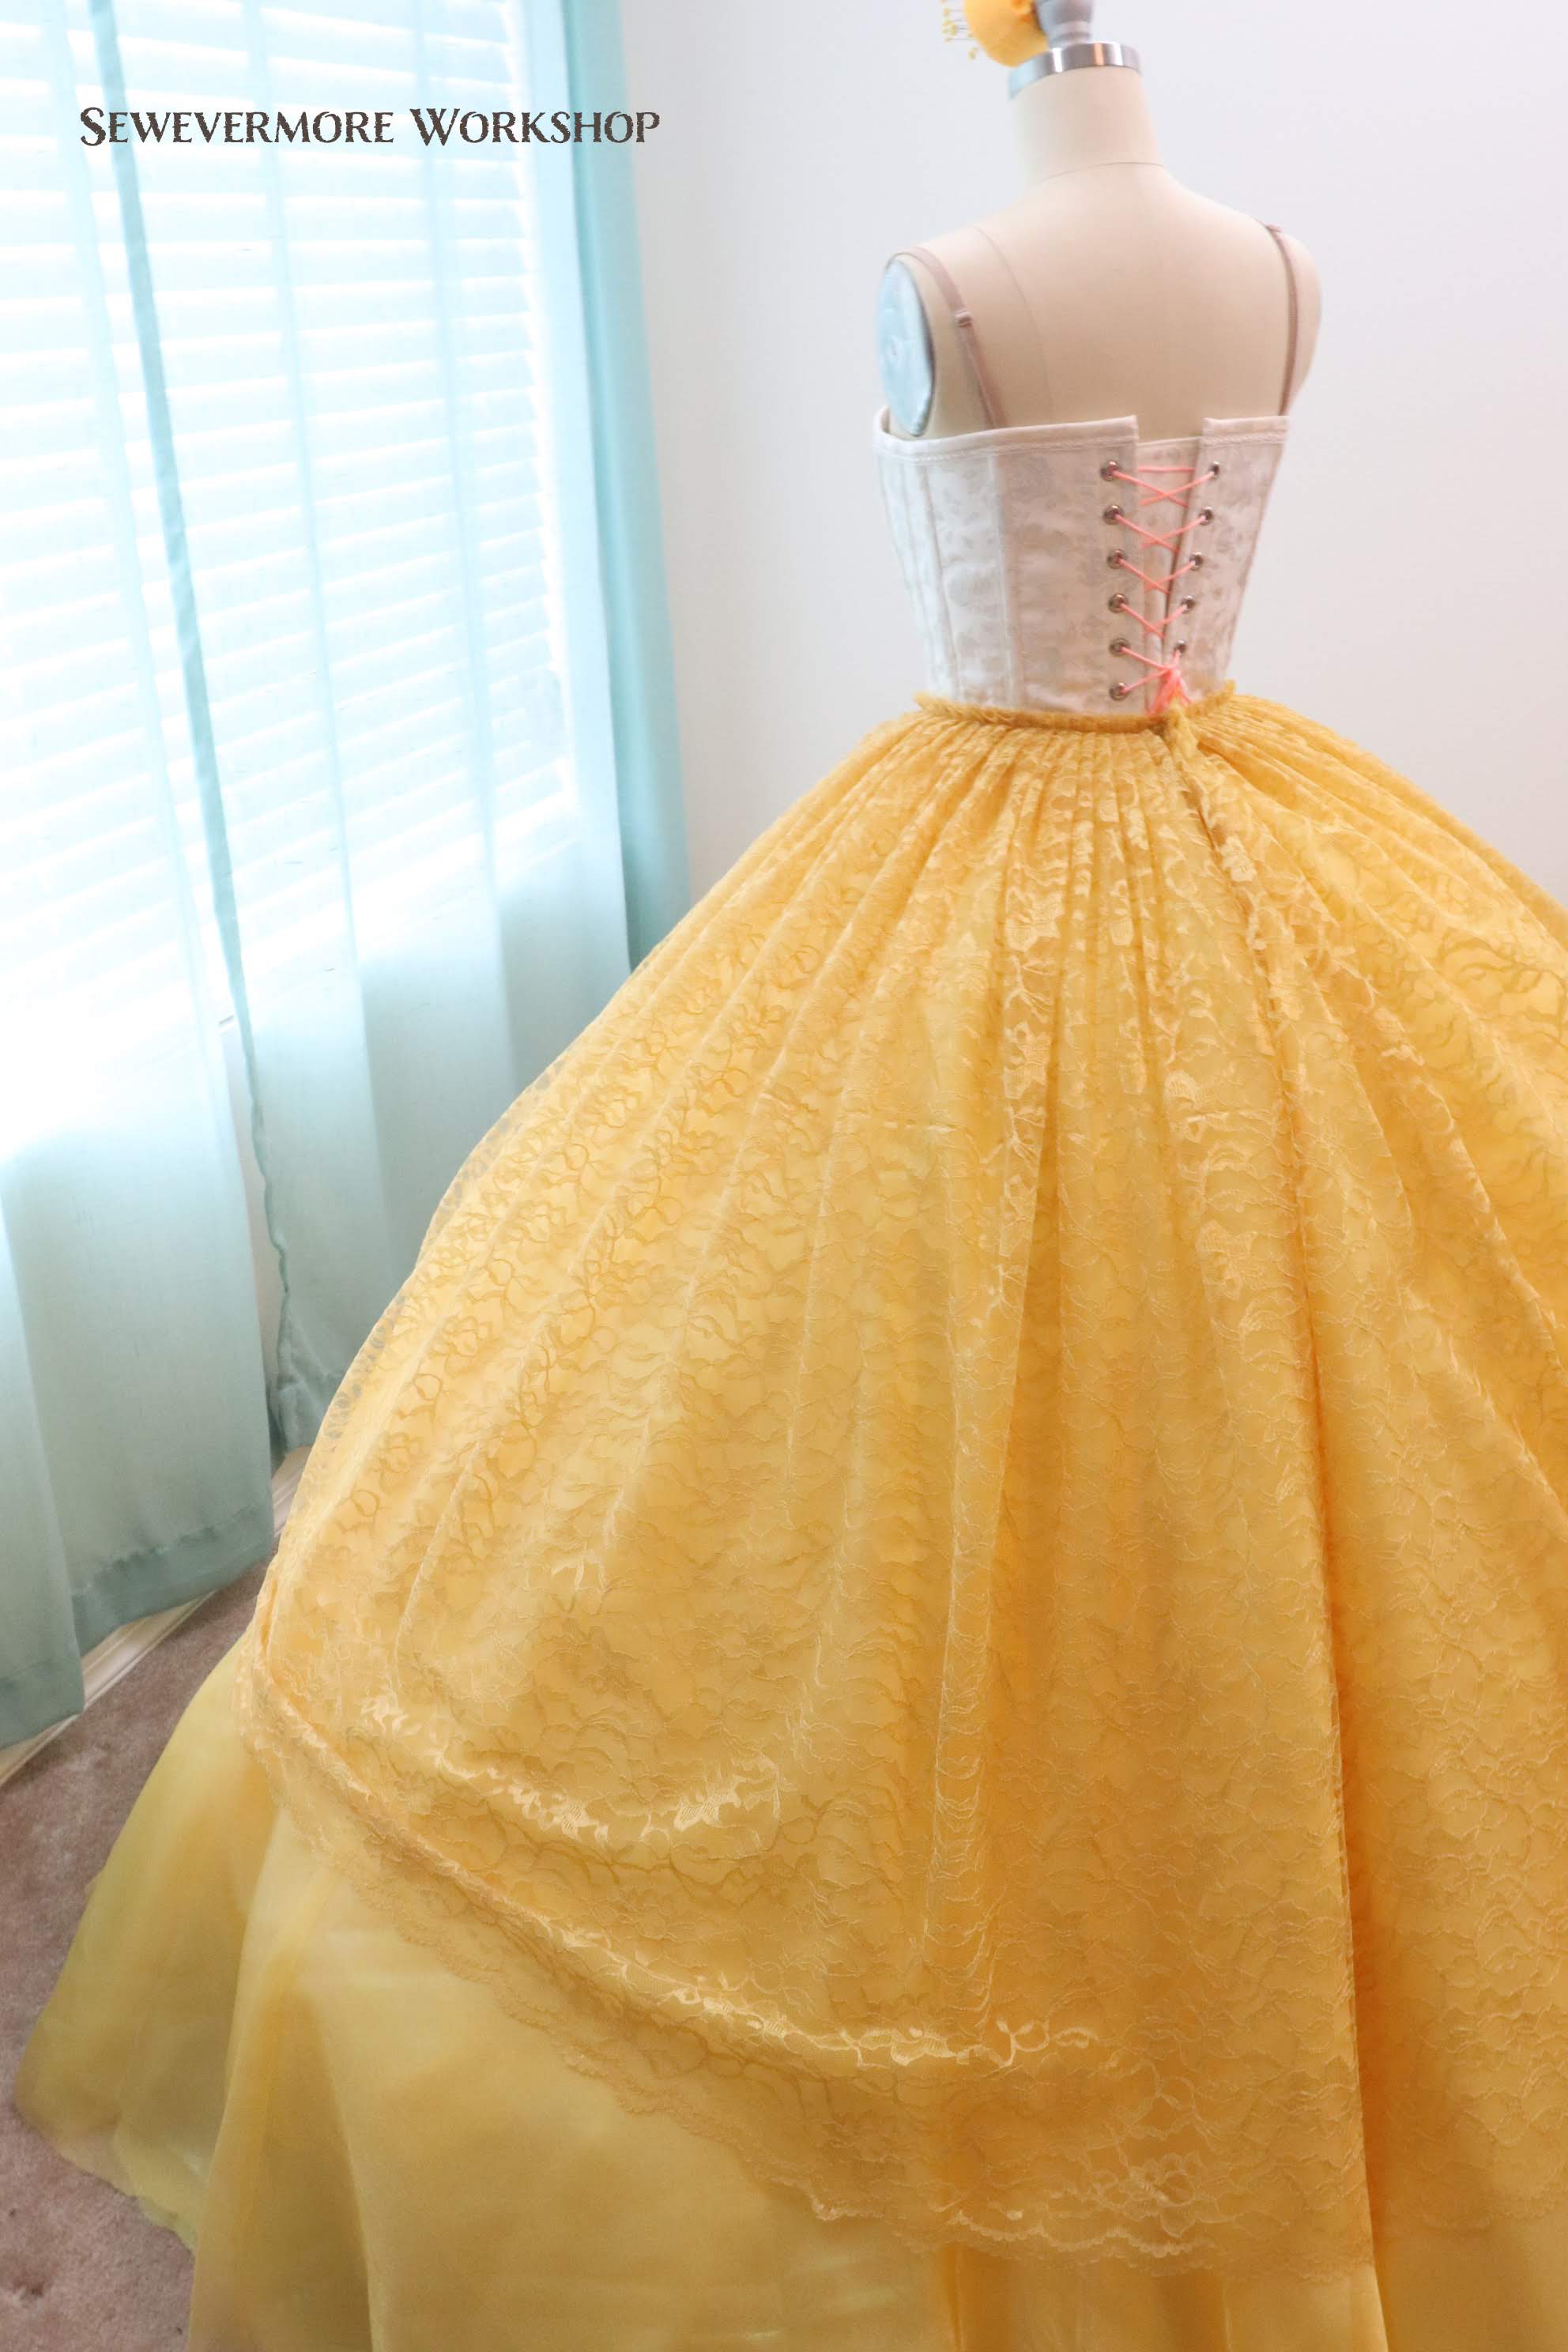
You will notice that the lace is a bit snug around the skirt. Raising it up higher will help eliminate this. If you had an extra yard or two you also would have that problem. Not to worry though, 5 yards will work!
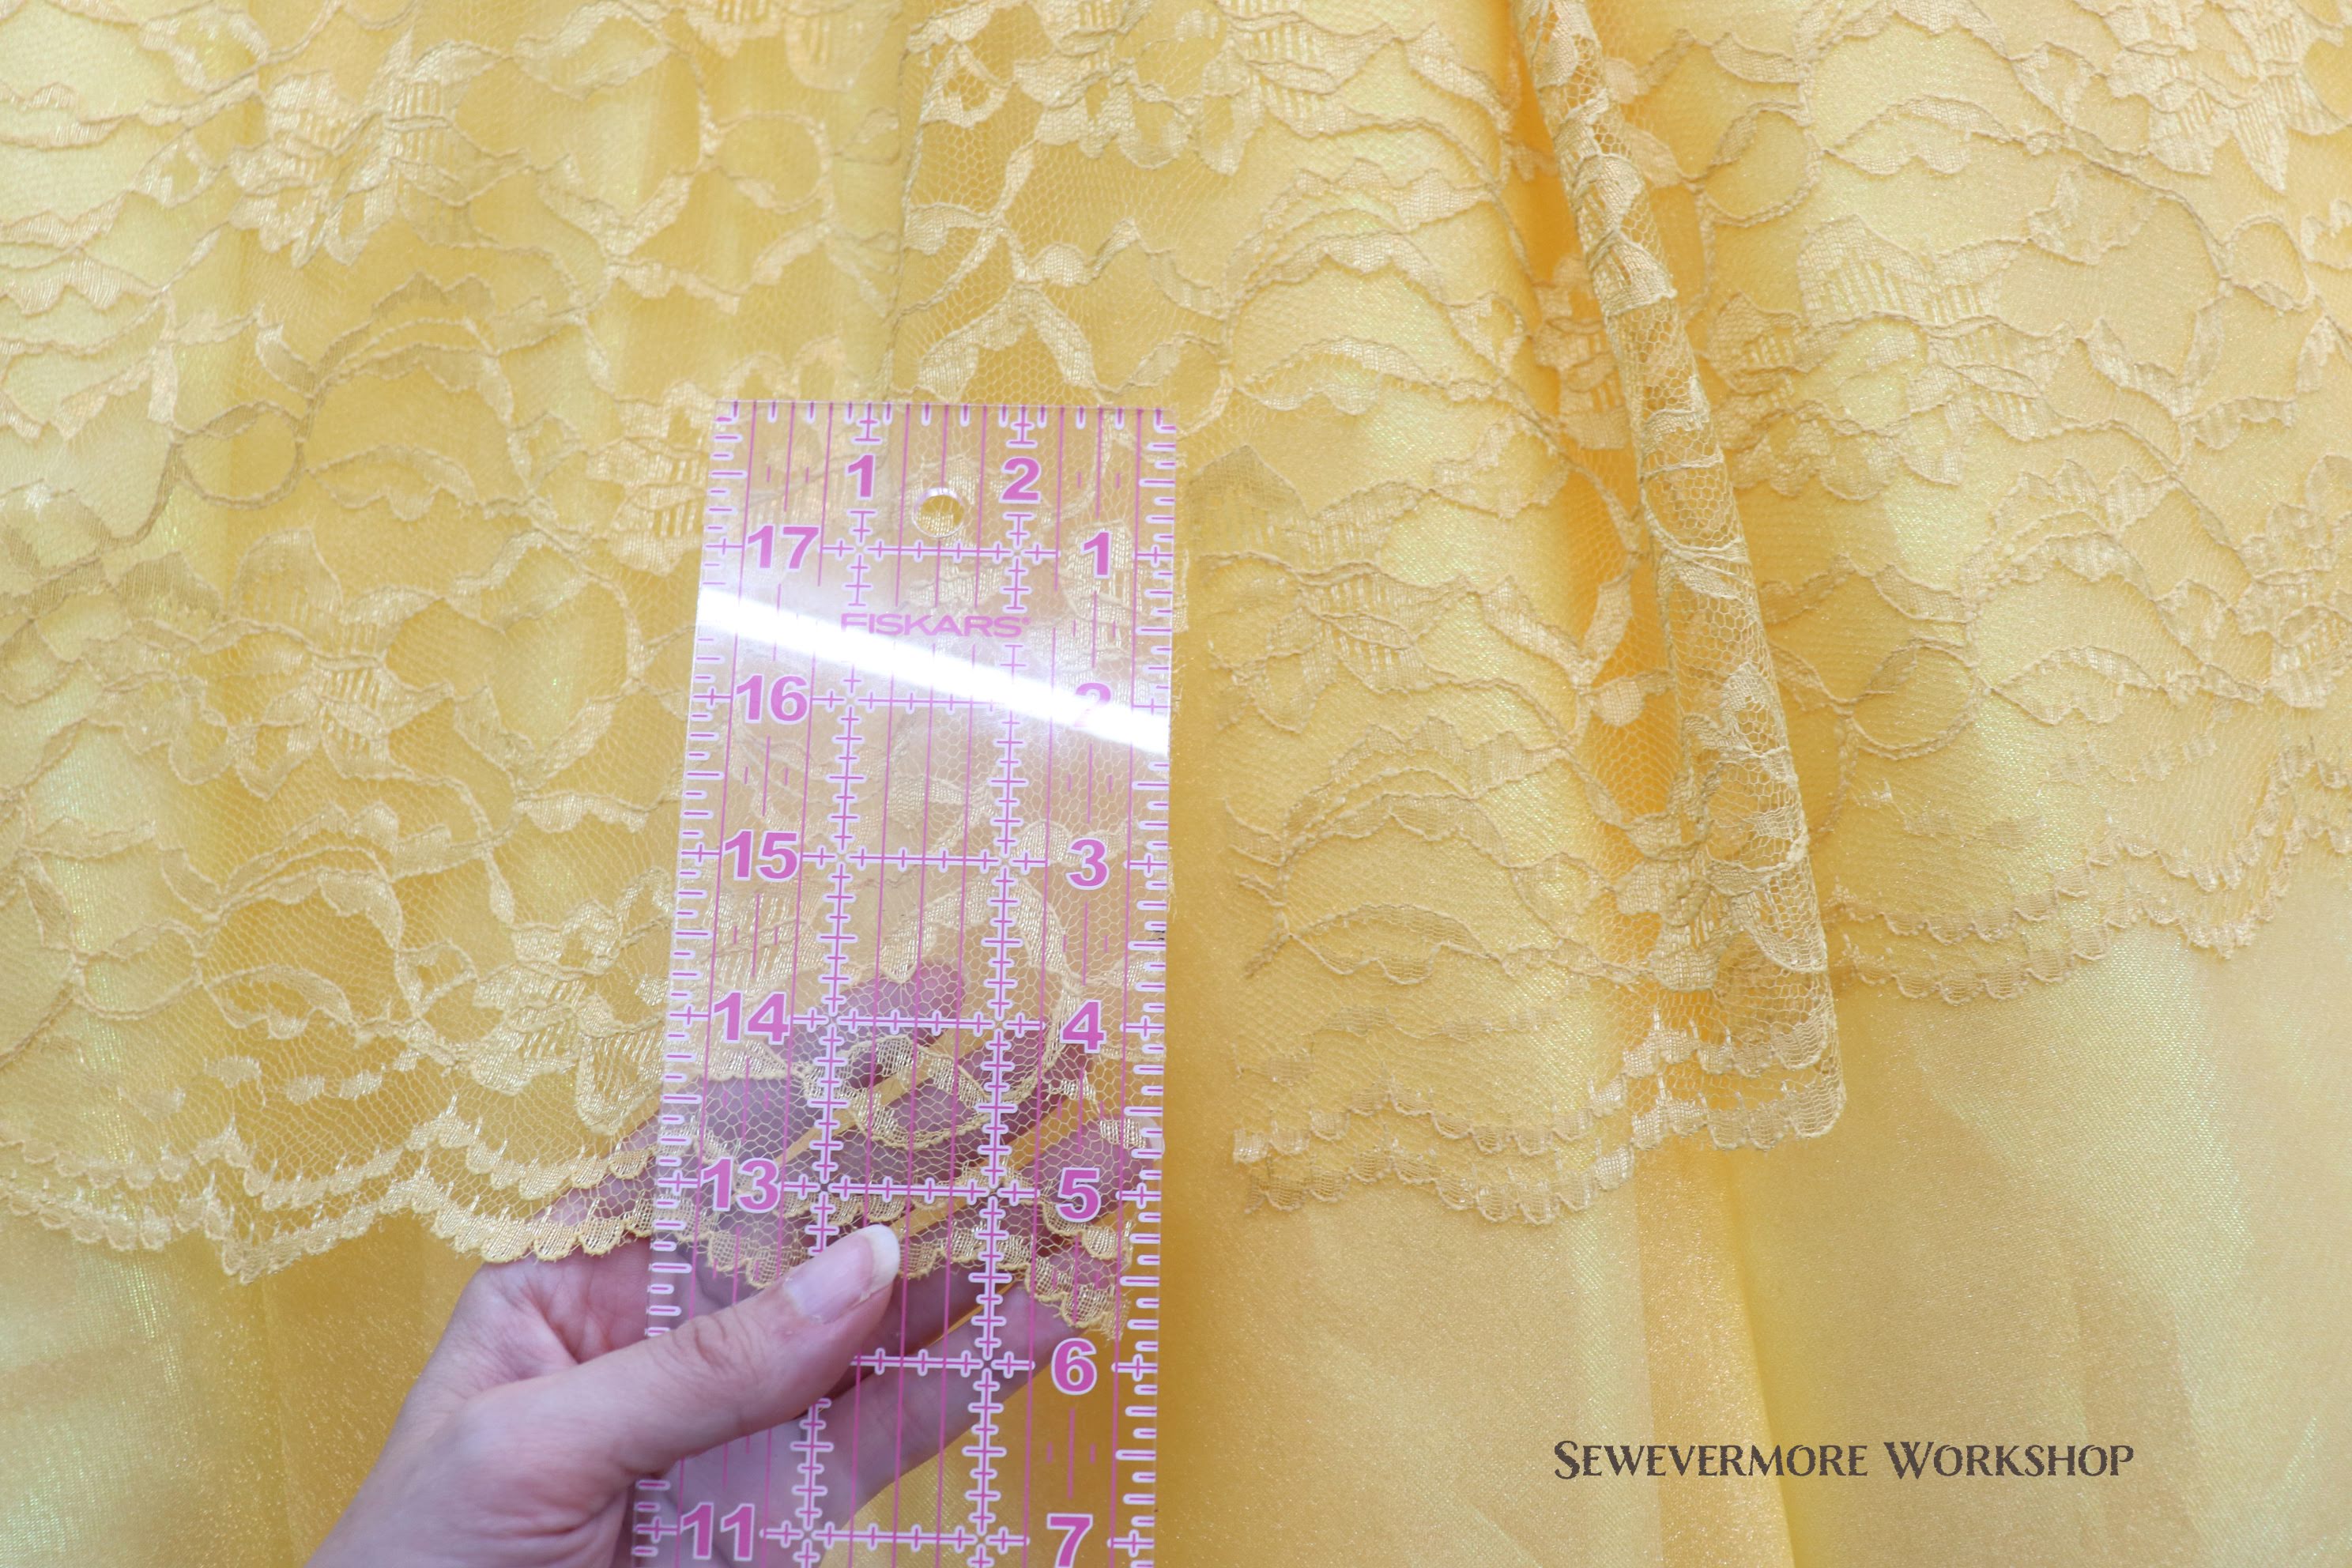
Next, let’s begin with the swoops of lace. I started by marking off 18 inch sections along the bottom edge. At each 18 inch mark I cut a 6 inch vertical slit…and marked 6 inches straight above that. If I had to do this again, I would do so when the material was flat, perhaps with an air erase marker or something, so that I could ensure my markings were accurate and forming right angles.
At the top of each slit I did 6 inches of vertical gather stitches by hand. I used a long doll needle to make the work faster.
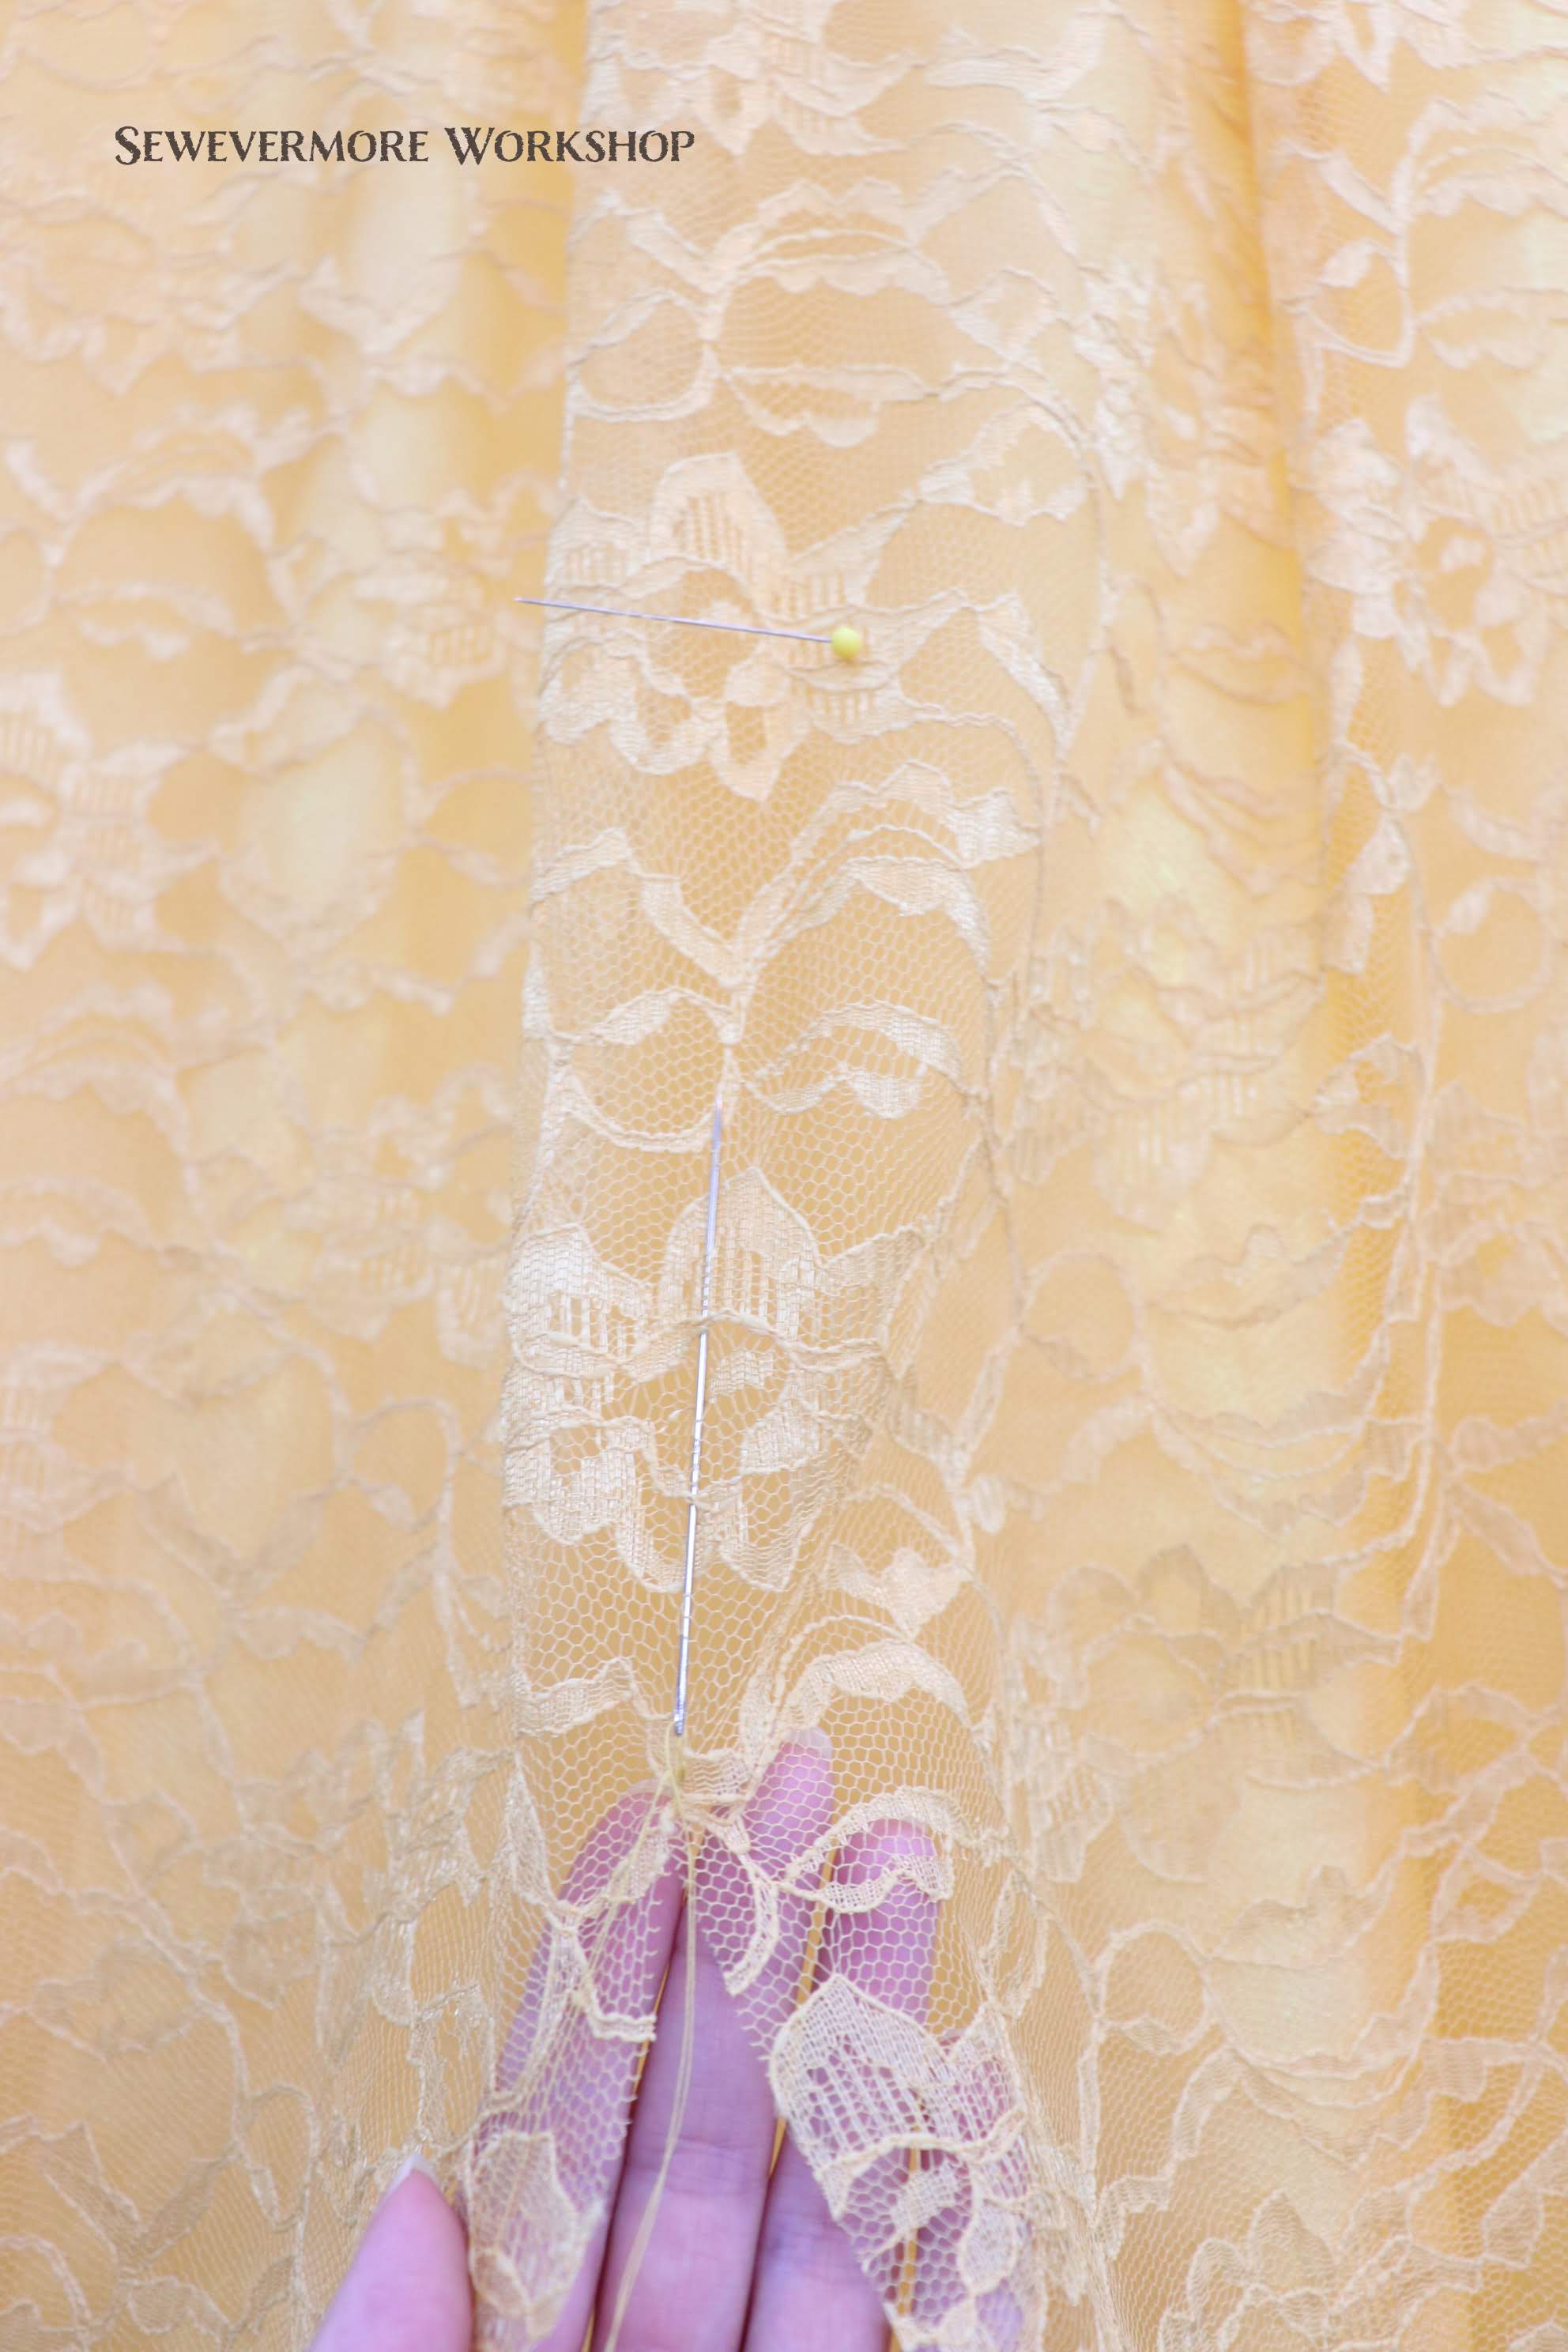
I pulled the gather stitches tight and made a knot.

This created nice little bunches in the lace which will be the top of the swoops of fabric.
I was pretty pleased with how they turned out.
I still plan to go back and work with the slit sections to add to the look of the drape, and I might increase the length of the gathered sections. We will see!
- Padding a Dress Form
After spending so long working on the skirt of my Belle Dress I noticed that my hoop was starting to sag. As a result, I decided to give the poor abused hoop, that has been holding so much weight for months, a break. I decided to focus on the bodice.
However, when I thought about draping a bodice for the dress I realized I had a problem. My dress form wasn’t the right size.
In the past I have always used an adjustable dress form. It has worked really well for me and I have made dozens of costumes using it. The beauty of an adjustable form is that whenever I am making something for another person, it can be modified. However, I always ran into problems when making something for me because it just wasn’t my size. I am a pear shape and to get the hips to fit the shoulders and bust always ended up being way too large and wide. Sigh. While I could usually adapt my pattern to plan for this, it was a complication I would prefer not to have to deal with consistently. So, when my adjustable form started to die I invested in professional dress form from The Shop Company.
When I bought my standard size dress form I knew I would need to pad the form to make it my size and shape. I tried purchasing a kit that contained foam pieces and a cover, but it didn’t work for my shape, and didn’t look great.
So, now that I am determined to begin working on the bodice of the Belle dress, I really want a dress form that fits! So, I will pad it on my own.
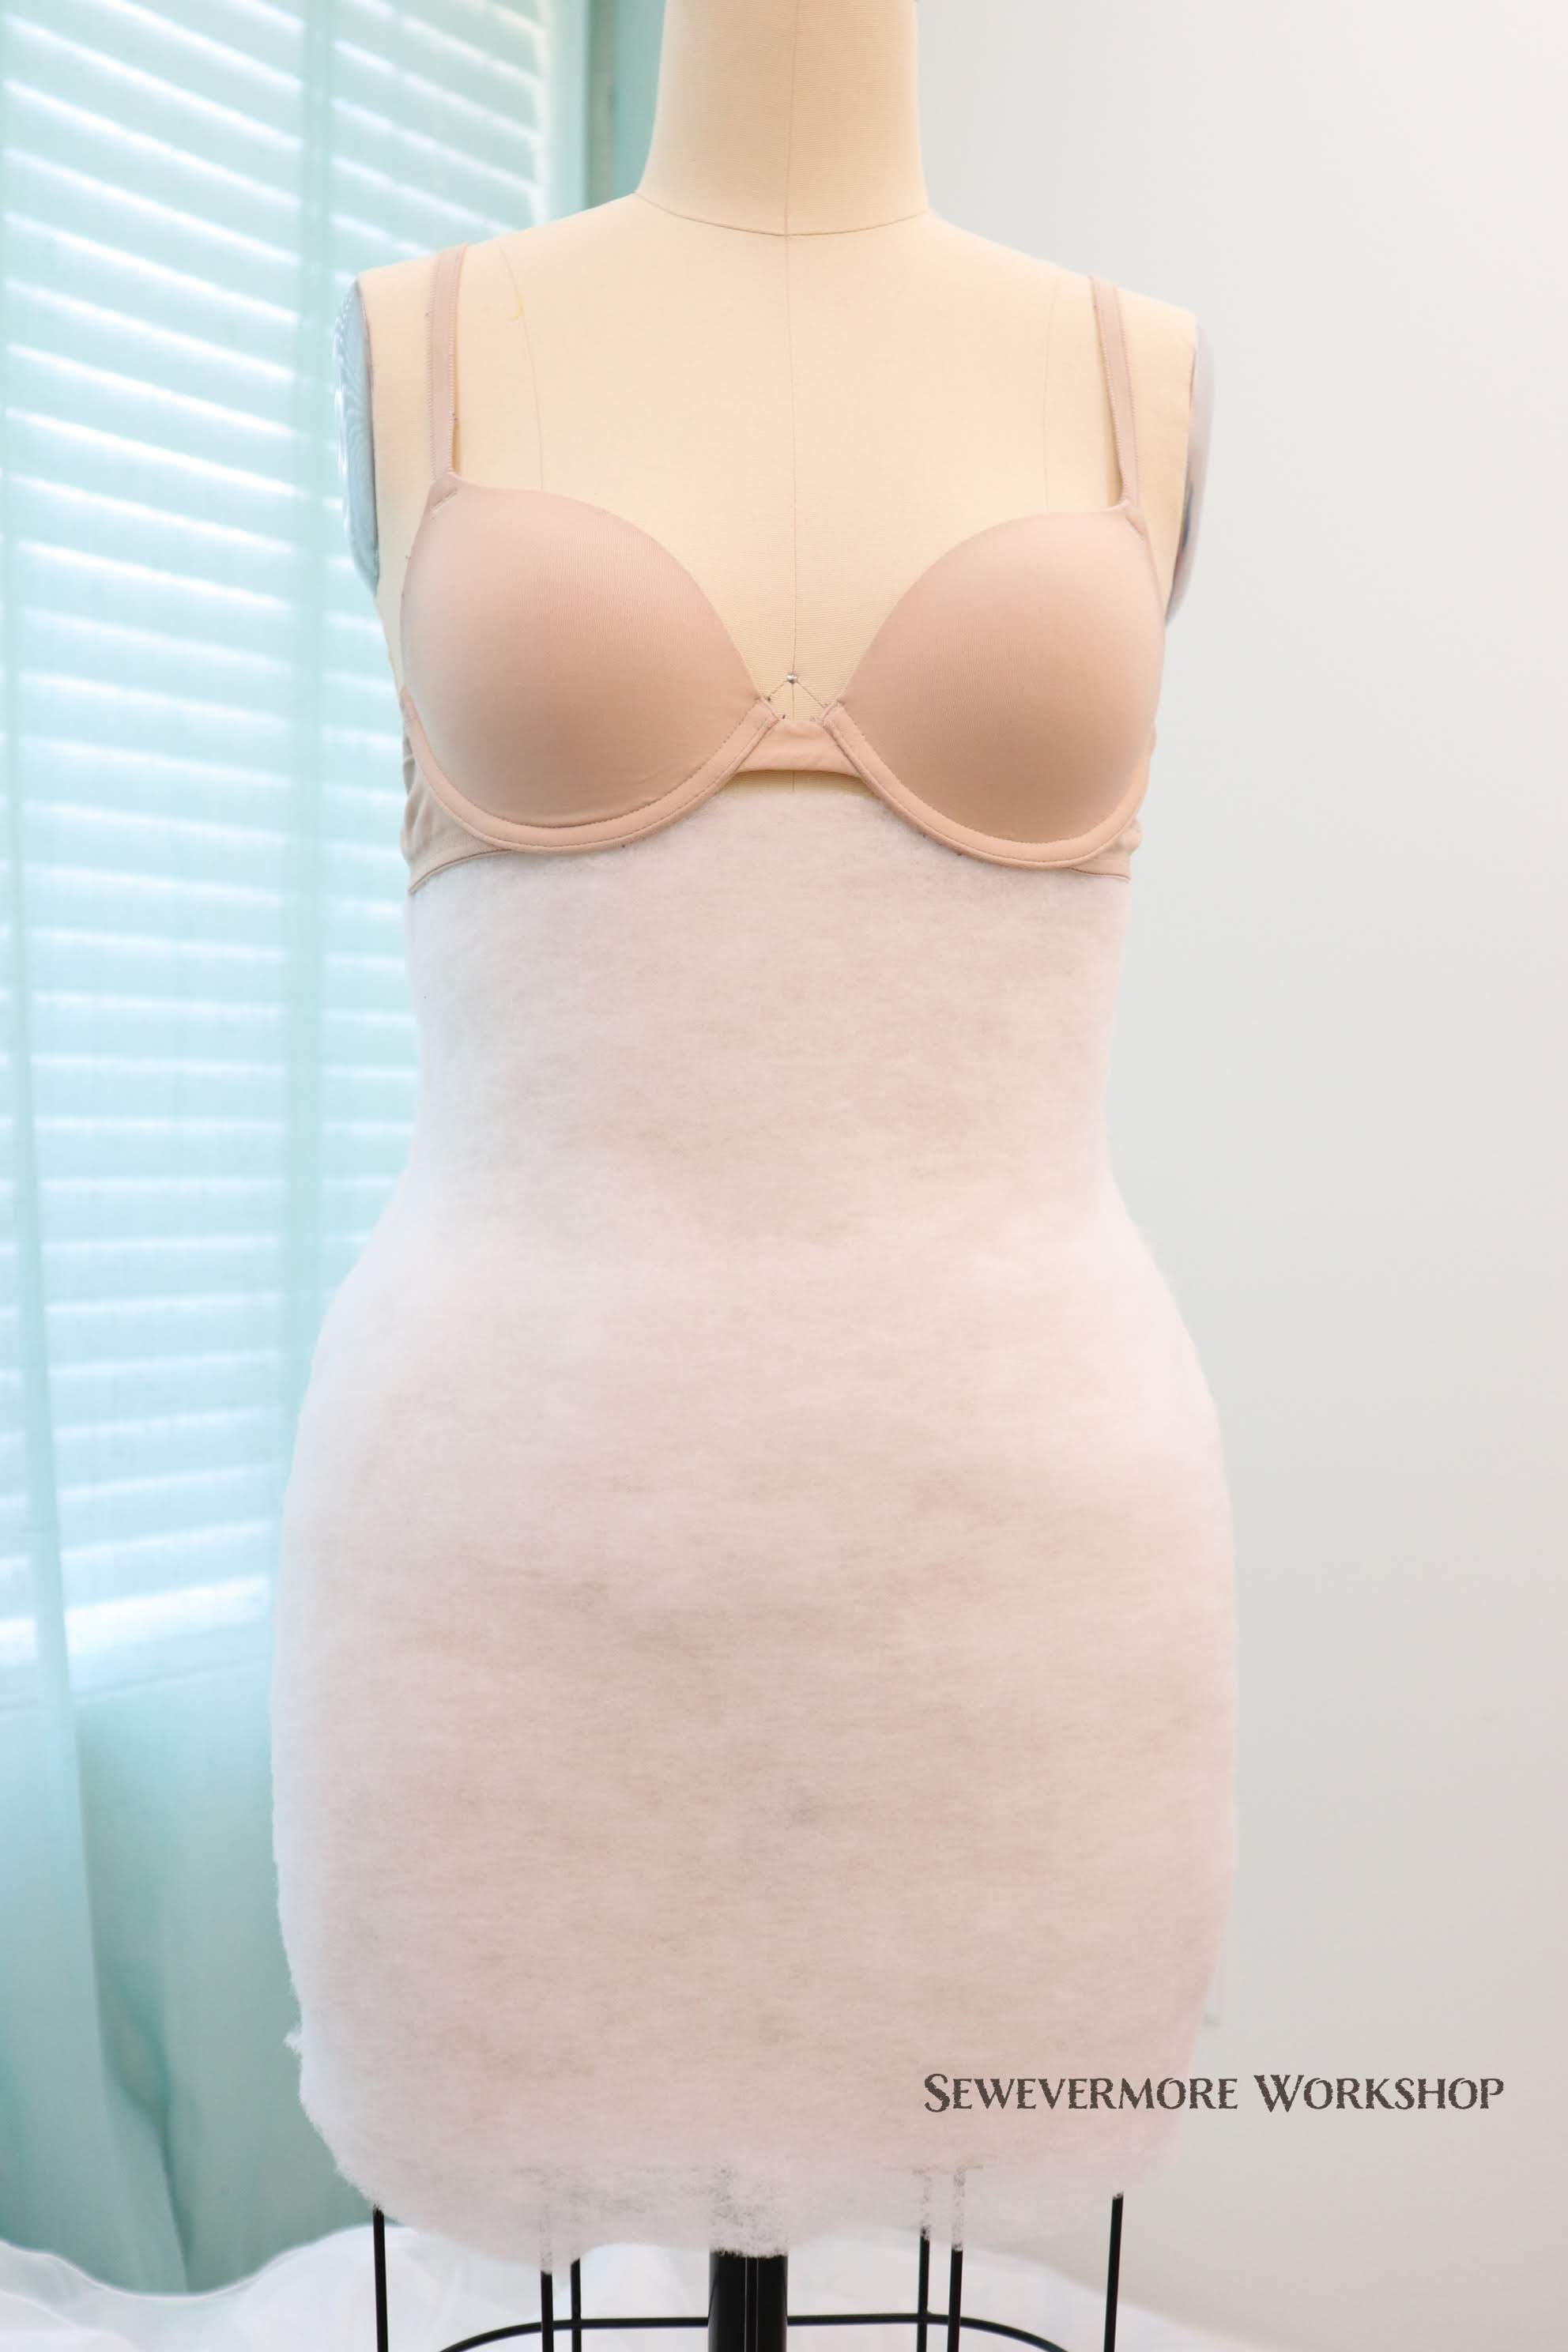
As I had seen someone else do in the past, a great way to pad the bust is to use an old bra. This one had been out of commission for a while, but it was my shape. It added just enough circumference to match my measurements.
Next, I wrapped the dress form in batting. As I mentioned before, I am pear shaped, so the top of the dress form was perfect, but my hips and waist are quite a bit larger. So, no batting on the top for me.
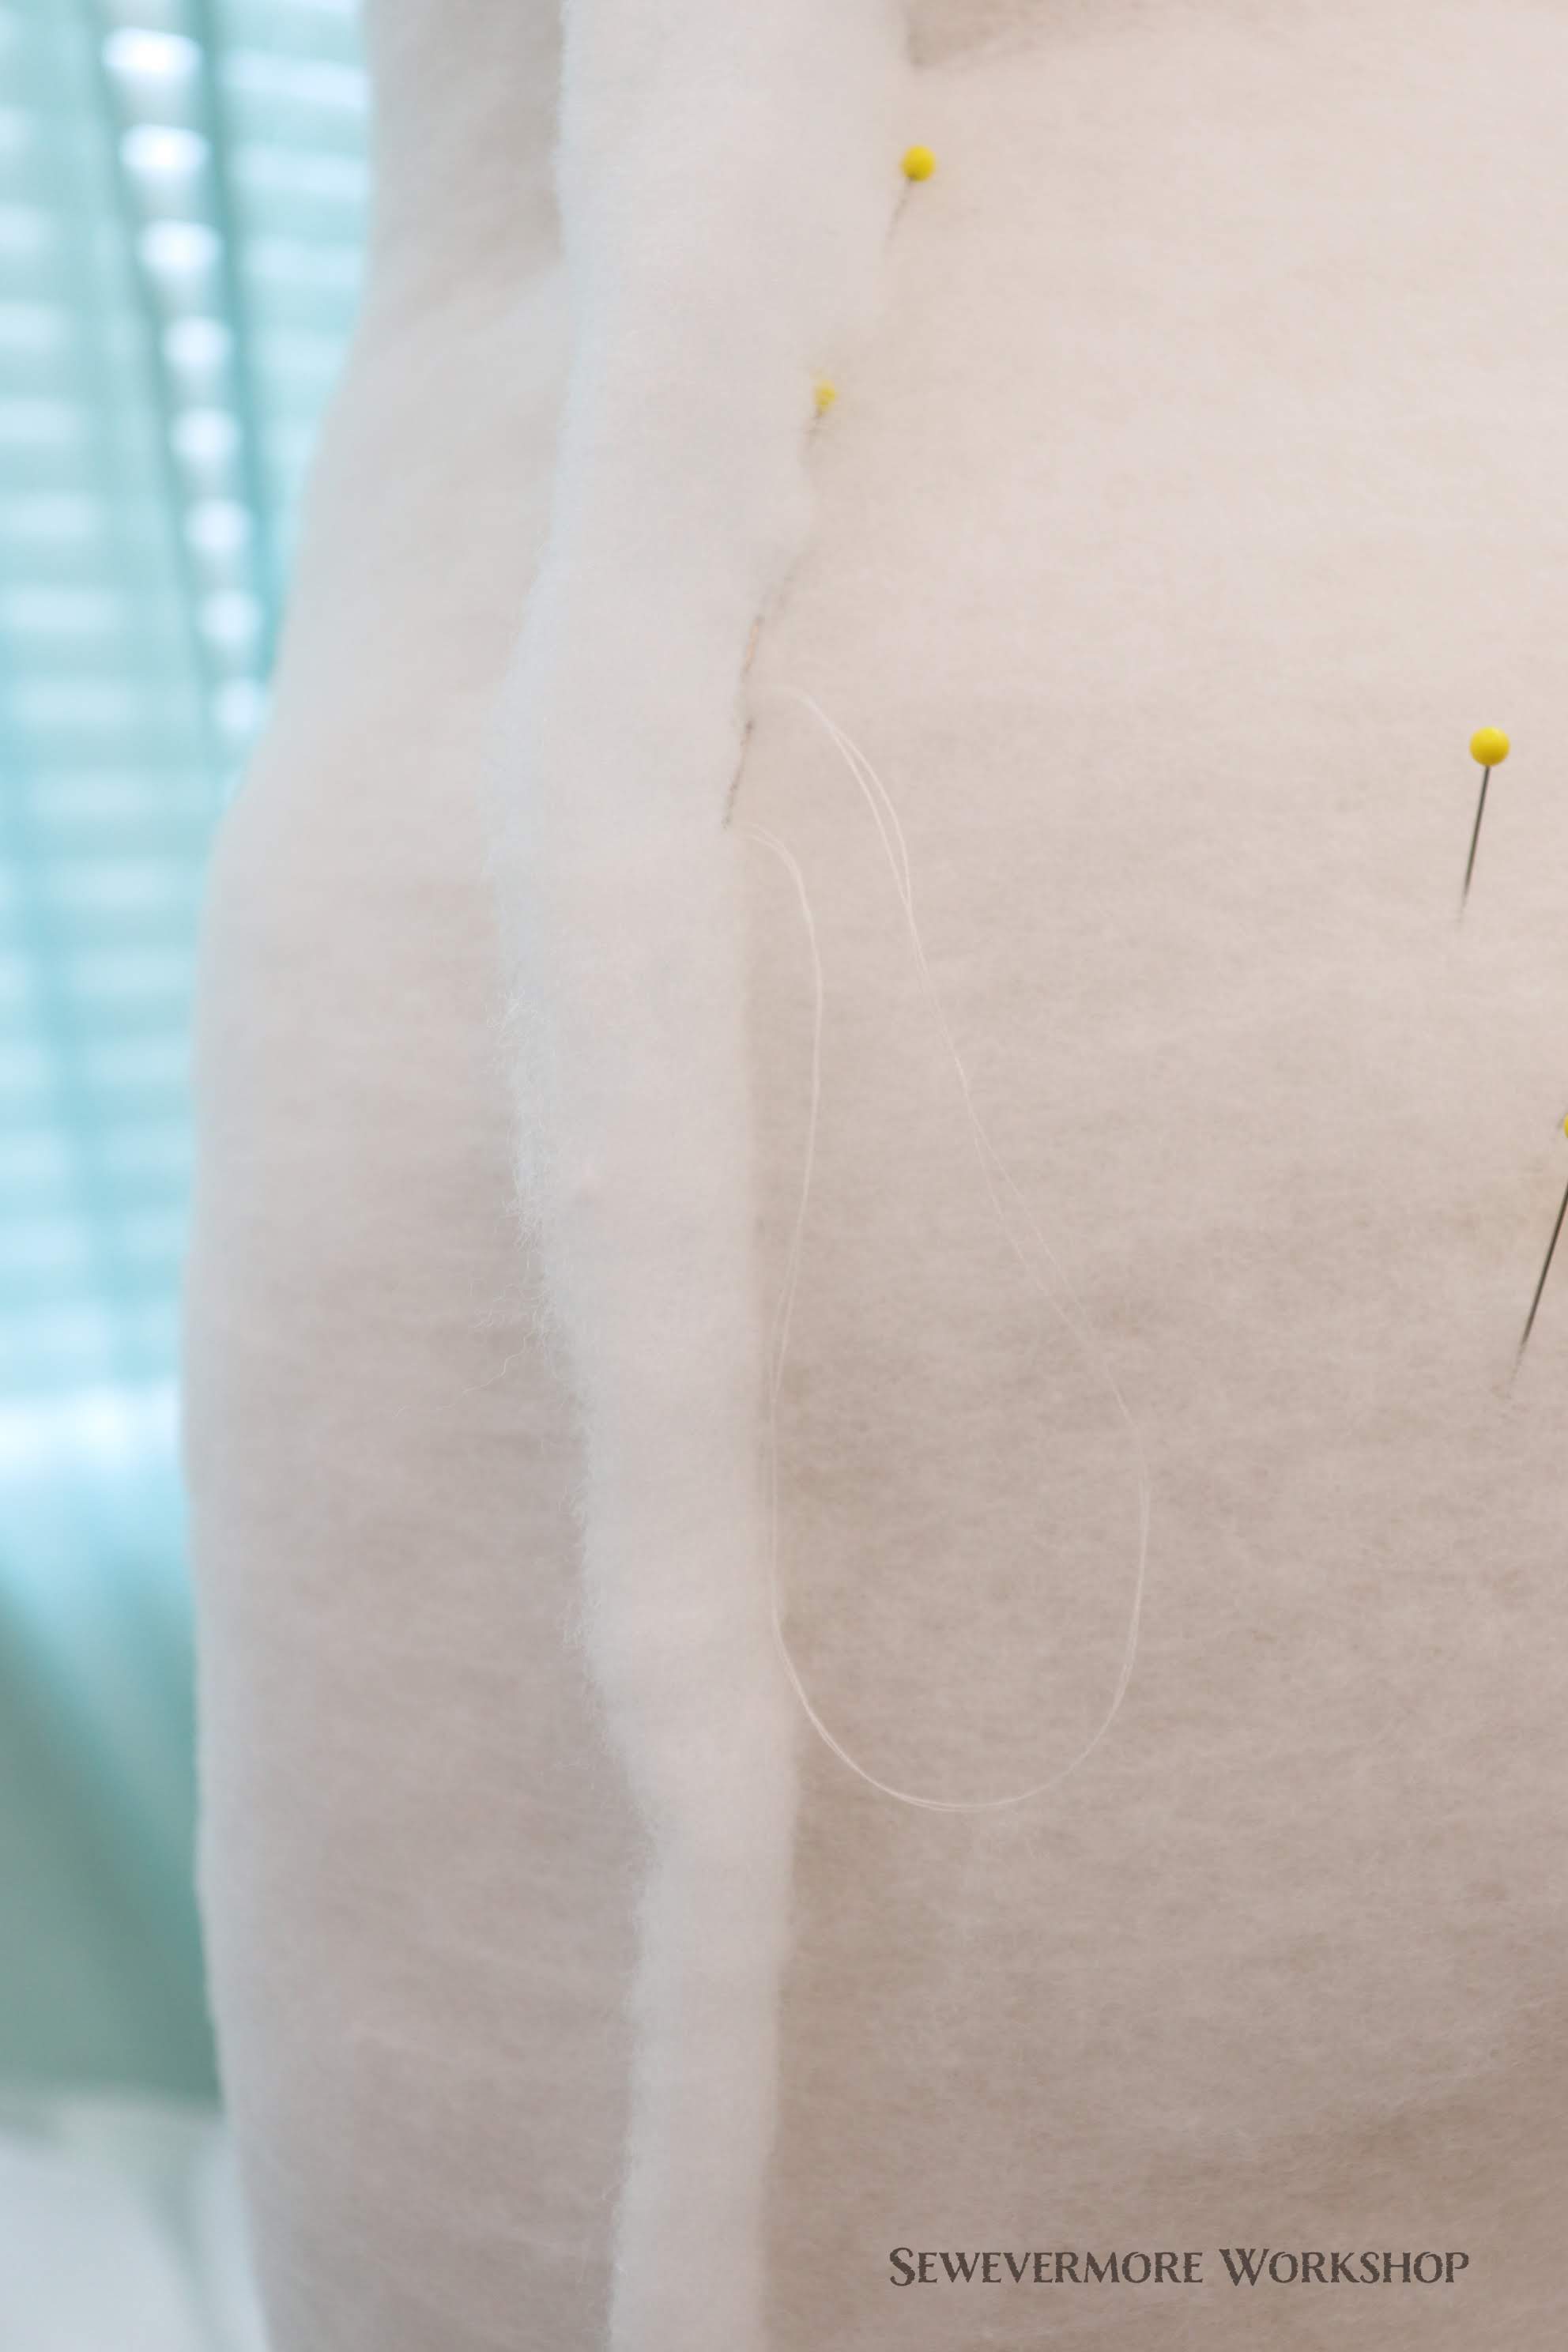
One layer of batting wasn’t enough. I added two layers all of the way around, plus a few strips and ovals in between the two layers to widen the hips, pad the belly, and shorten the waist.
I tried to align the side and back seams of the batting with the seams on the dress form. I stitched the seams to fit by hand. Then I trimmed the seam allowances.
I didn’t want the batting to be visible and exposed when using the dress form. I doesn’t look too great, and it would probably get snagged and messed up easily. So, I decided to make a cover. After the batting was in place. I draped the dress form with a nude colored scuba knit.
I pulled and tucked until I had a shape I liked. I used a heat erase pen to mark the center, arm holes, and pin placement.
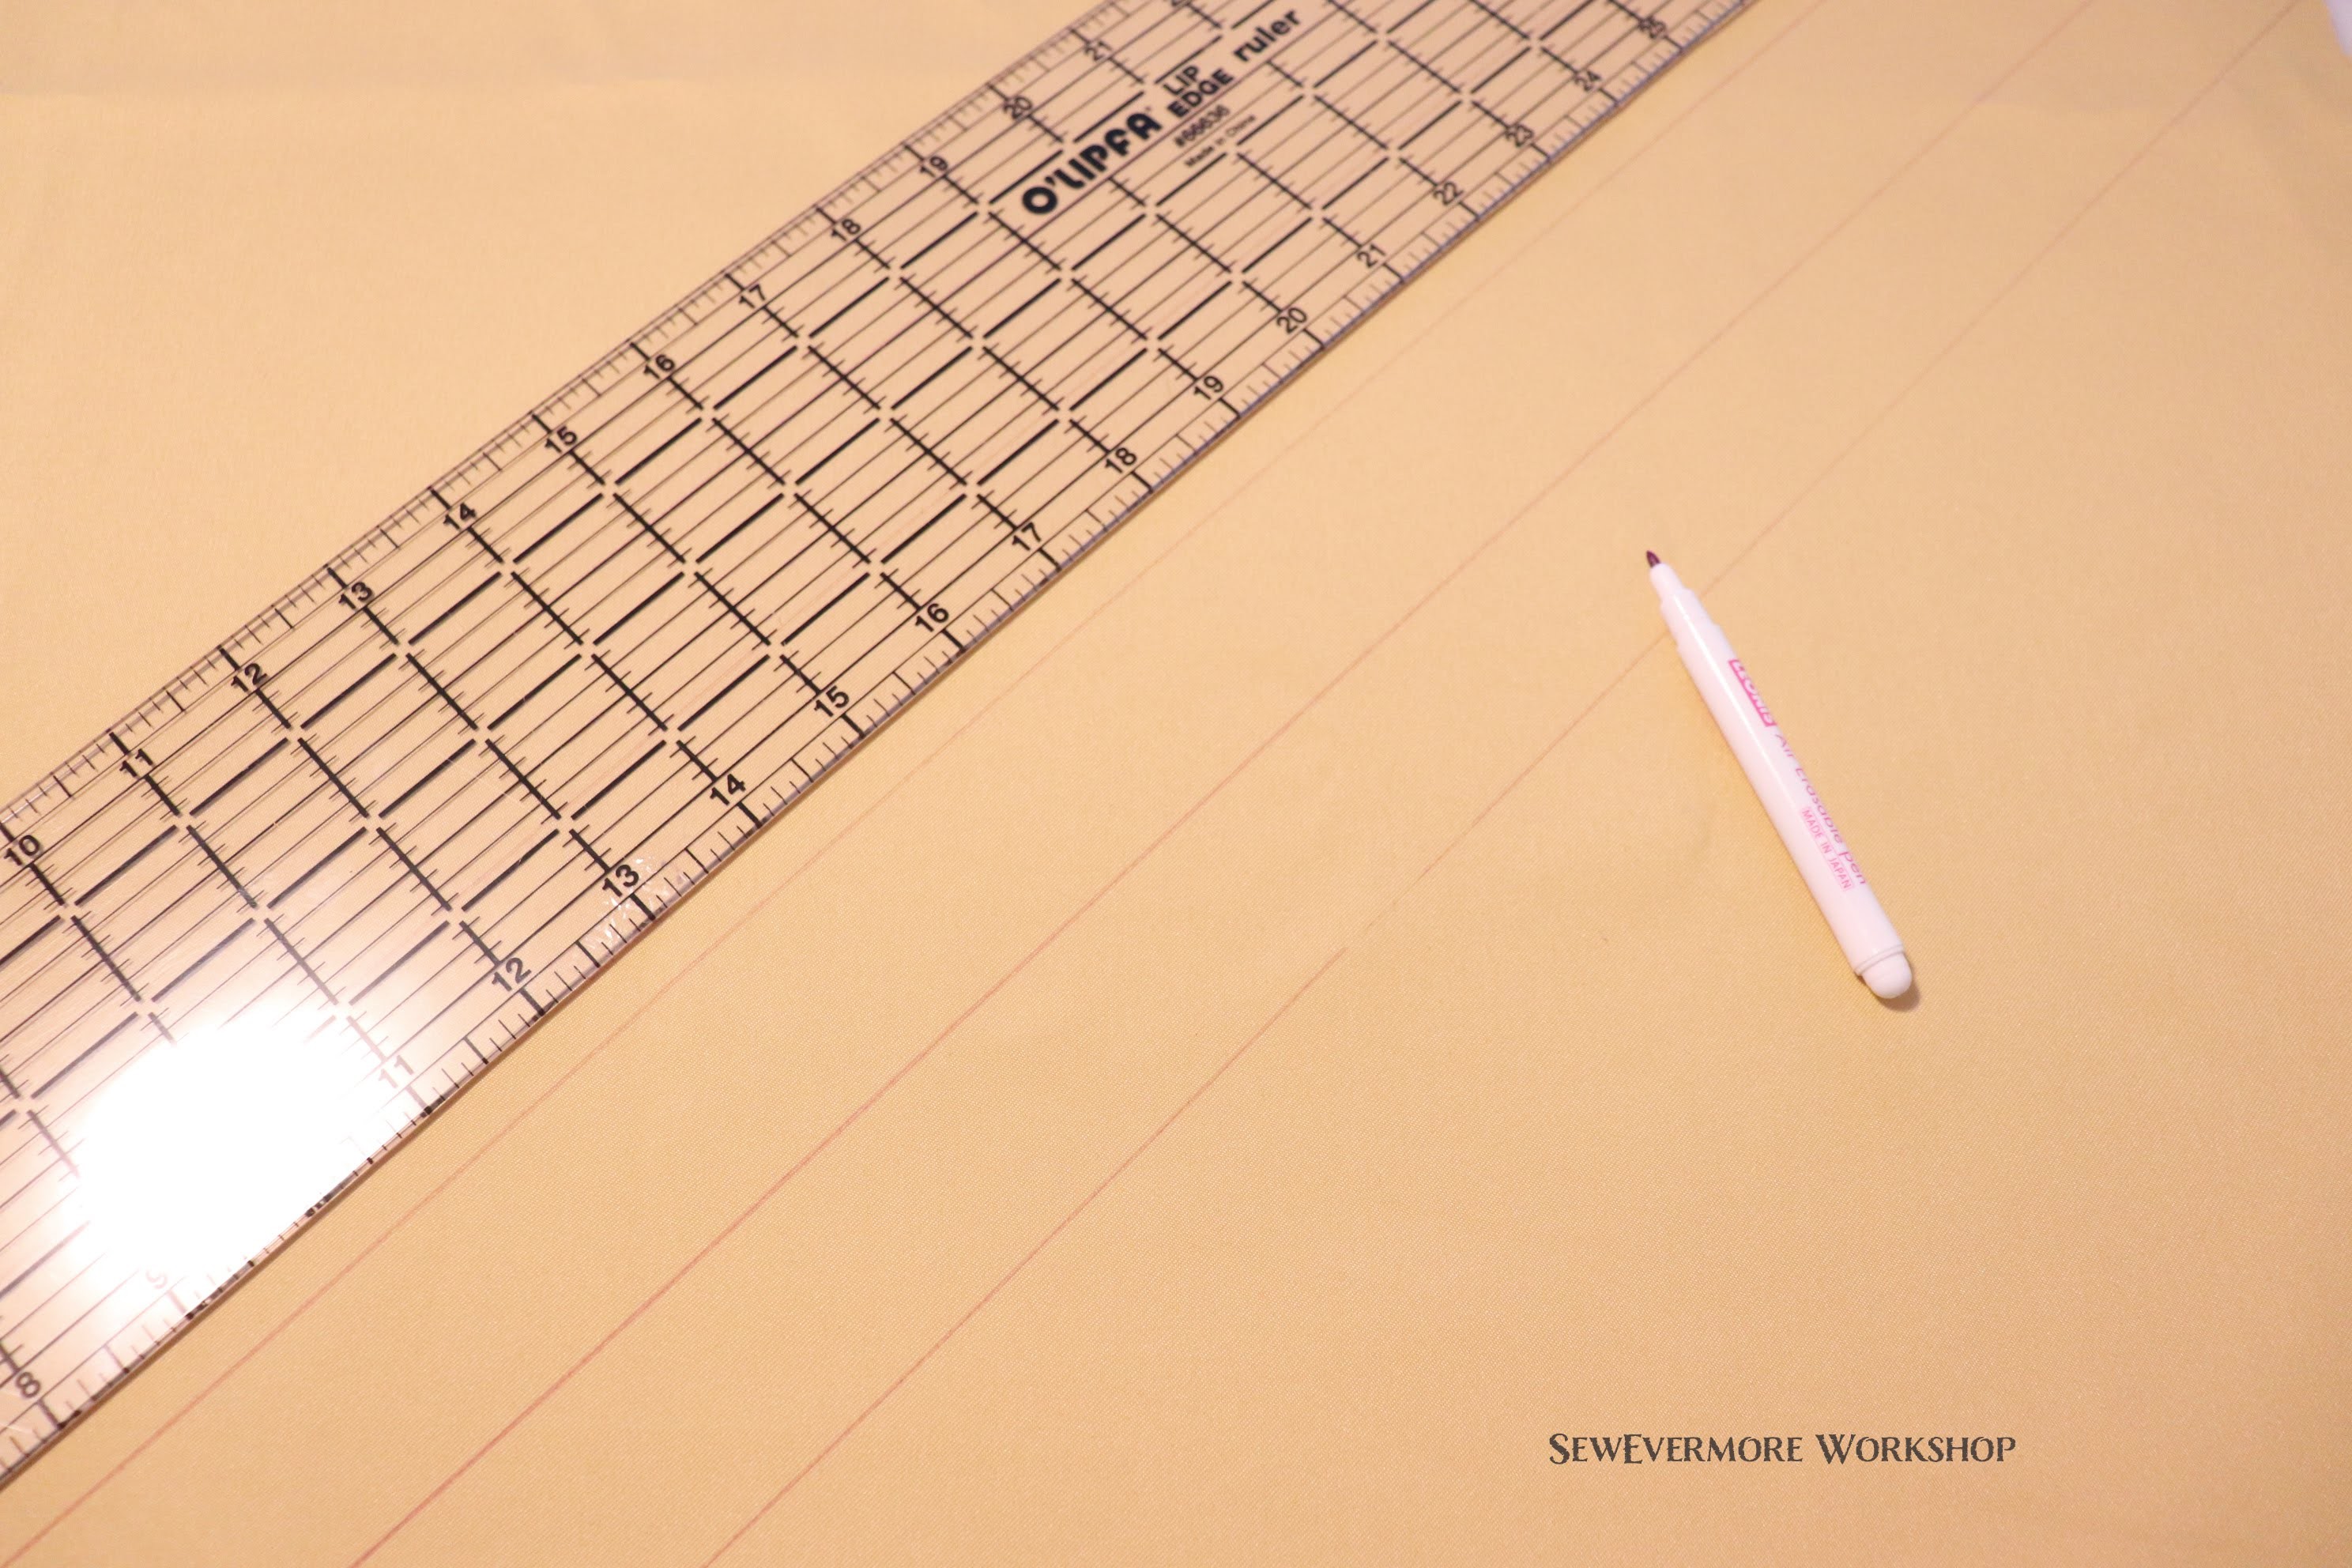
After I took out all of the pins I placed the fabric flat on my table. You can see the basic shape of the dress form, but the lines are jagged and crooked. Design rulers to the rescue!

I used the design rulers and an air erase maker to straighten the lines. When I draped the knit I pinned on both sides on the dress form to ensure I had the right shape, but to make a pattern you only need half. One front side, and one back side. I chose the side that had the best shape, and used them to make my pattern.

I smoothed out the curves and eliminated all of the jagged lines. Once The lines were nice I traced the shape onto Swedish Tracing Paper so that I can use it again in the future if I need to. It might be nice to have dress form covers in different colors, depending on what project I am working on.
I cut out the pieces with a 3/8 inch seam allowance and sewed it together using a triple stitch for all seams except the hem, on which I used a zigzag as it needed the most stretch.
I was so pleased with how it turned out. My dress form still looks so nice and new, but it is ME shaped! I can’t wait to use it.

- Draping the Bodice
Now that everyone is settling into the new school year I feel like I finally have time to sew. Hooray!
Today I worked on draping the bodice. Draping is a process used to create your own garment pattern. This is one of my favorite steps in the dressmaking process.
I have had good experiences with many store bought patterns, and still use them when I try new styles or techniques. I have definitely learned a lot from them. That said, I greatly prefer making my own patterns. Overall, I feel like I get a better fit, with fewer adjustments being necessary. If you are not comfortable making your own pattern or if you don’t have a dress form, store bought patterns can work just great! With cosplay so popular nowadays, there are many wonderful store bought patterns that could be used to make a corset bodice. Just note that if you do use a store bought pattern it may require additional adjustment to create a good fit for you.
Since I am making my own pattern I hope my newly fitted dress form will help me with this process! (See my previous post.) It is good to note, that a bodice has a left and right side that are mirror images in most cases. As a result, you only need to drape half the bodice to create the pattern.
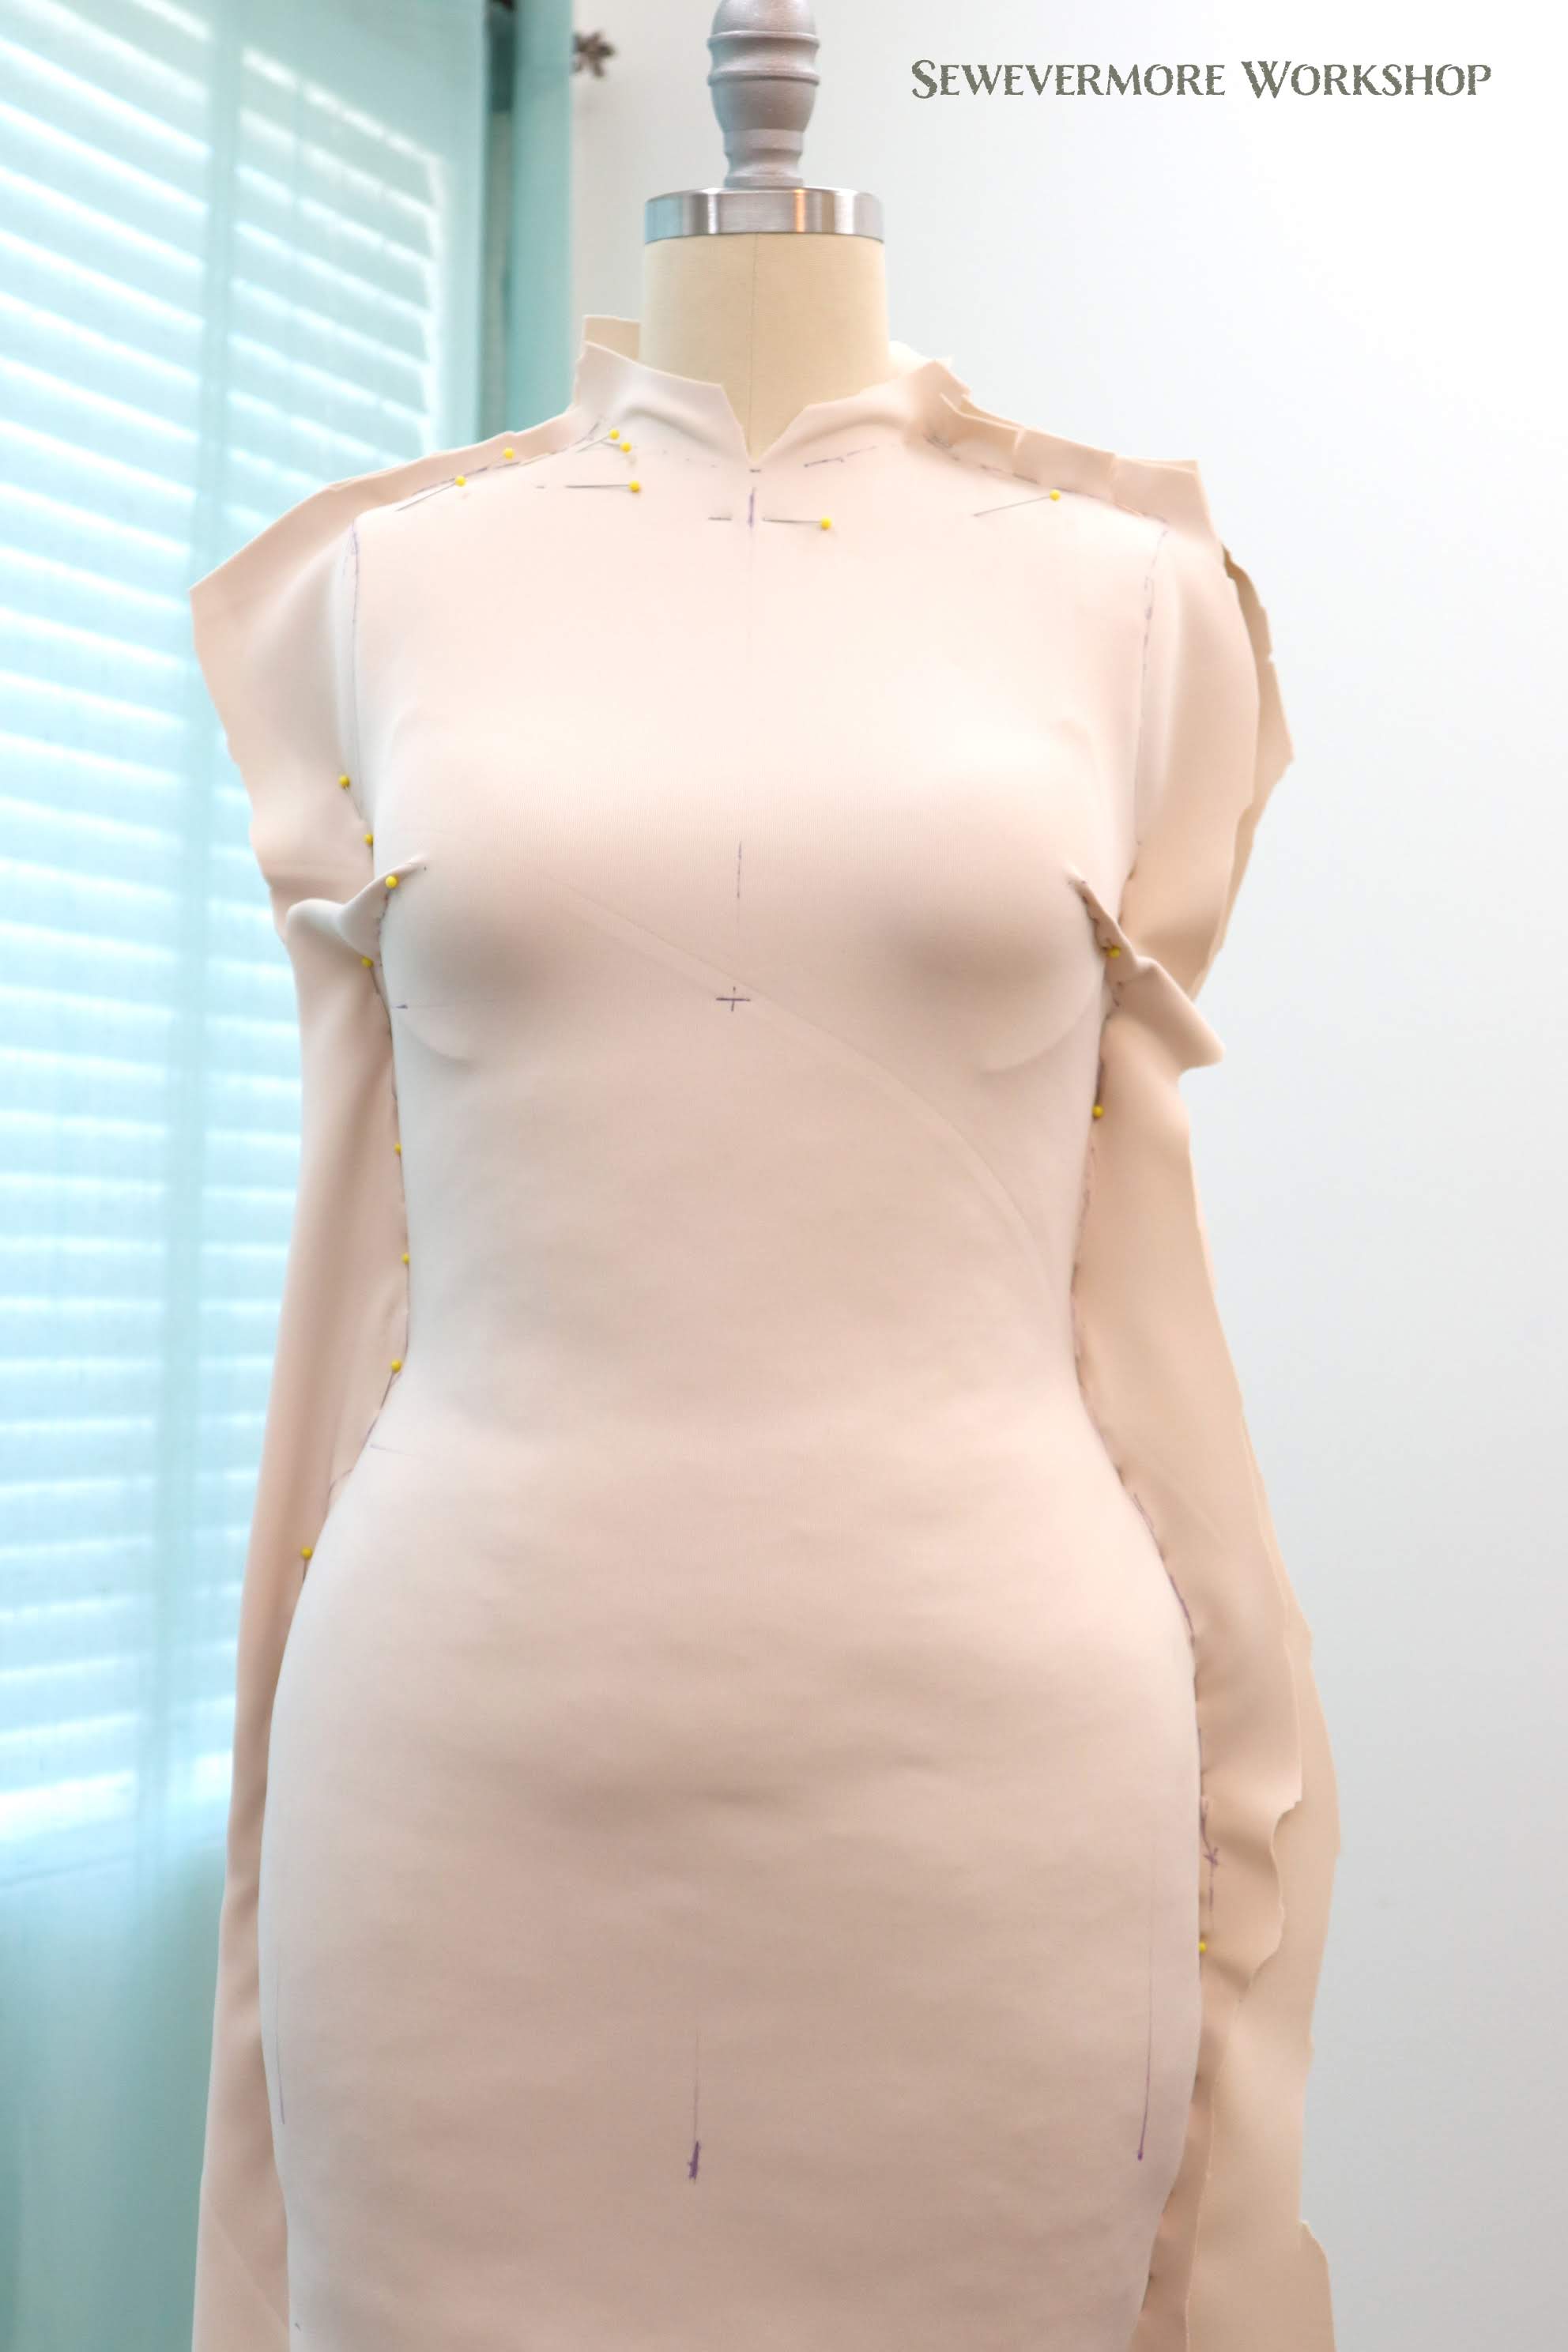
I began by draping a piece of muslin over the dress form. Be sure to make note of the grainline of the muslin and keep it vertical on the dress form. I like to secure the fabric at the center front first. Then I begin to pin the muslin into the desired shape, taking care to make sure the seams are as smooth as possible, and placed in flattering and easily maneuverable areas.
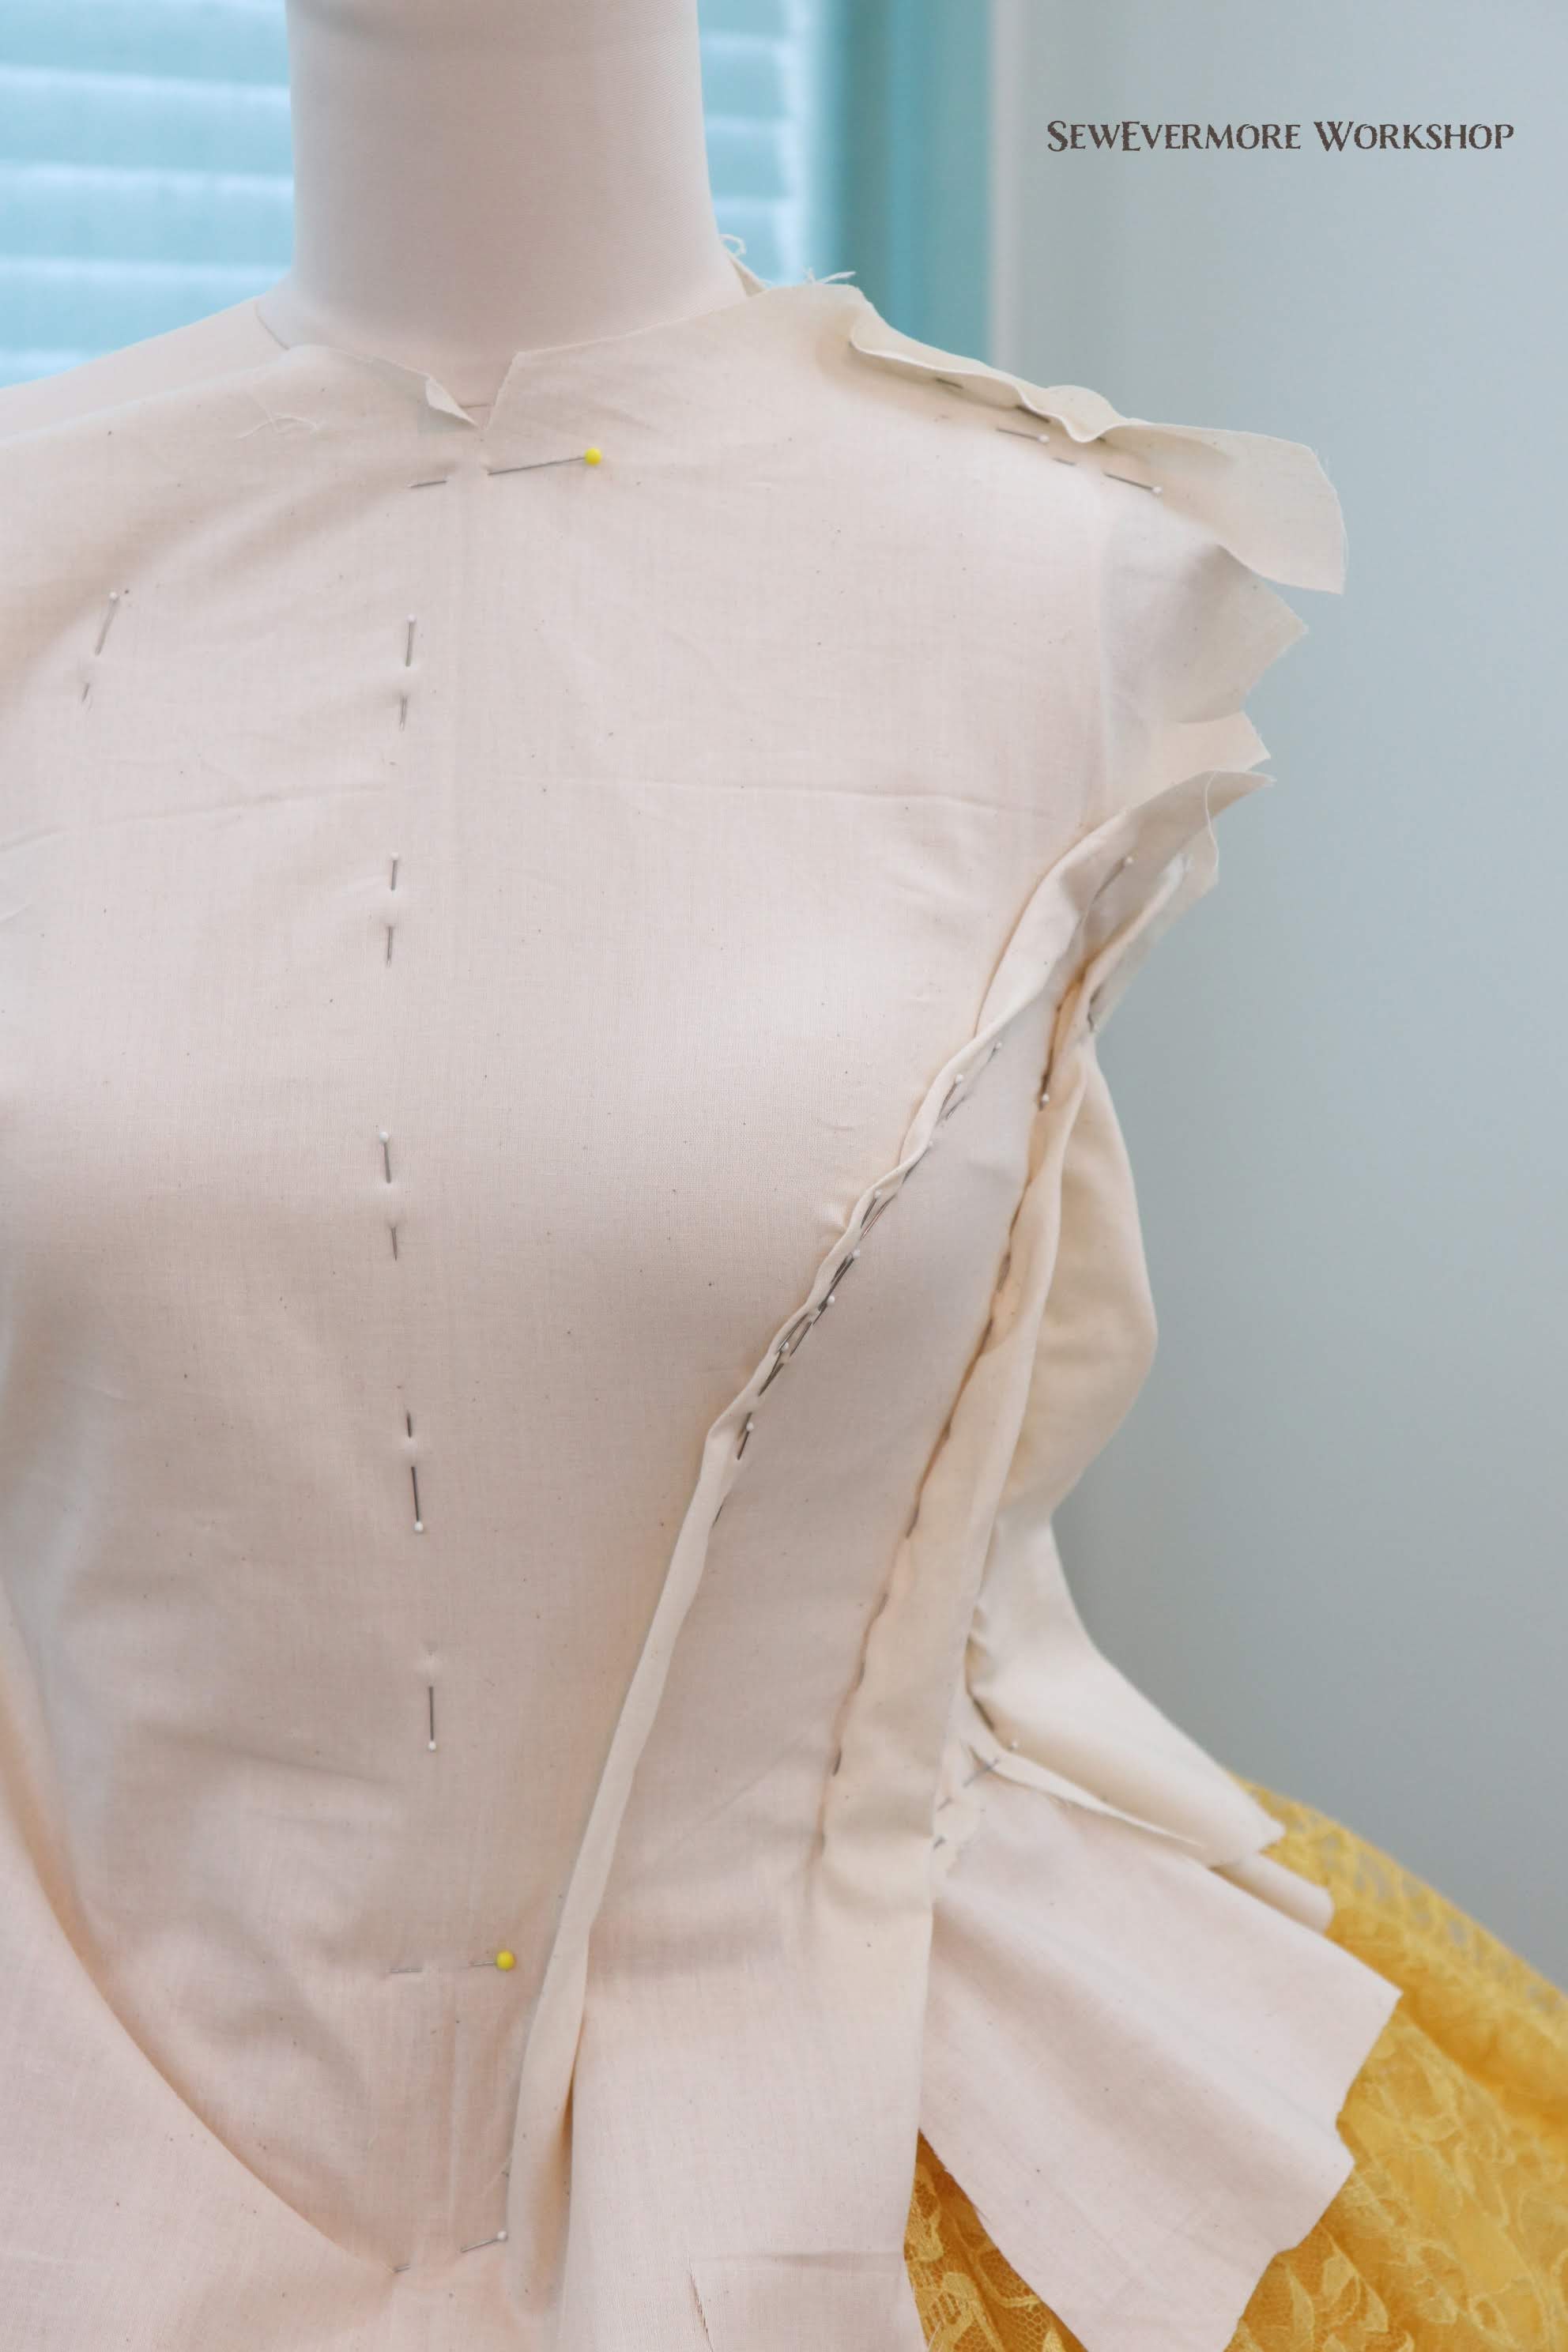
This can take practice, and is sometimes filled with trial and error. There were several seams that I had to re-pin a few times to create the look I was going for.
I find it helpful to be careful regarding the intersection of seams. It can be difficult to work with them if they are too close together or join in awkward places. I find this is particularly important in places such as under the arms, where you don’t want a lot of unnecessary bulk.

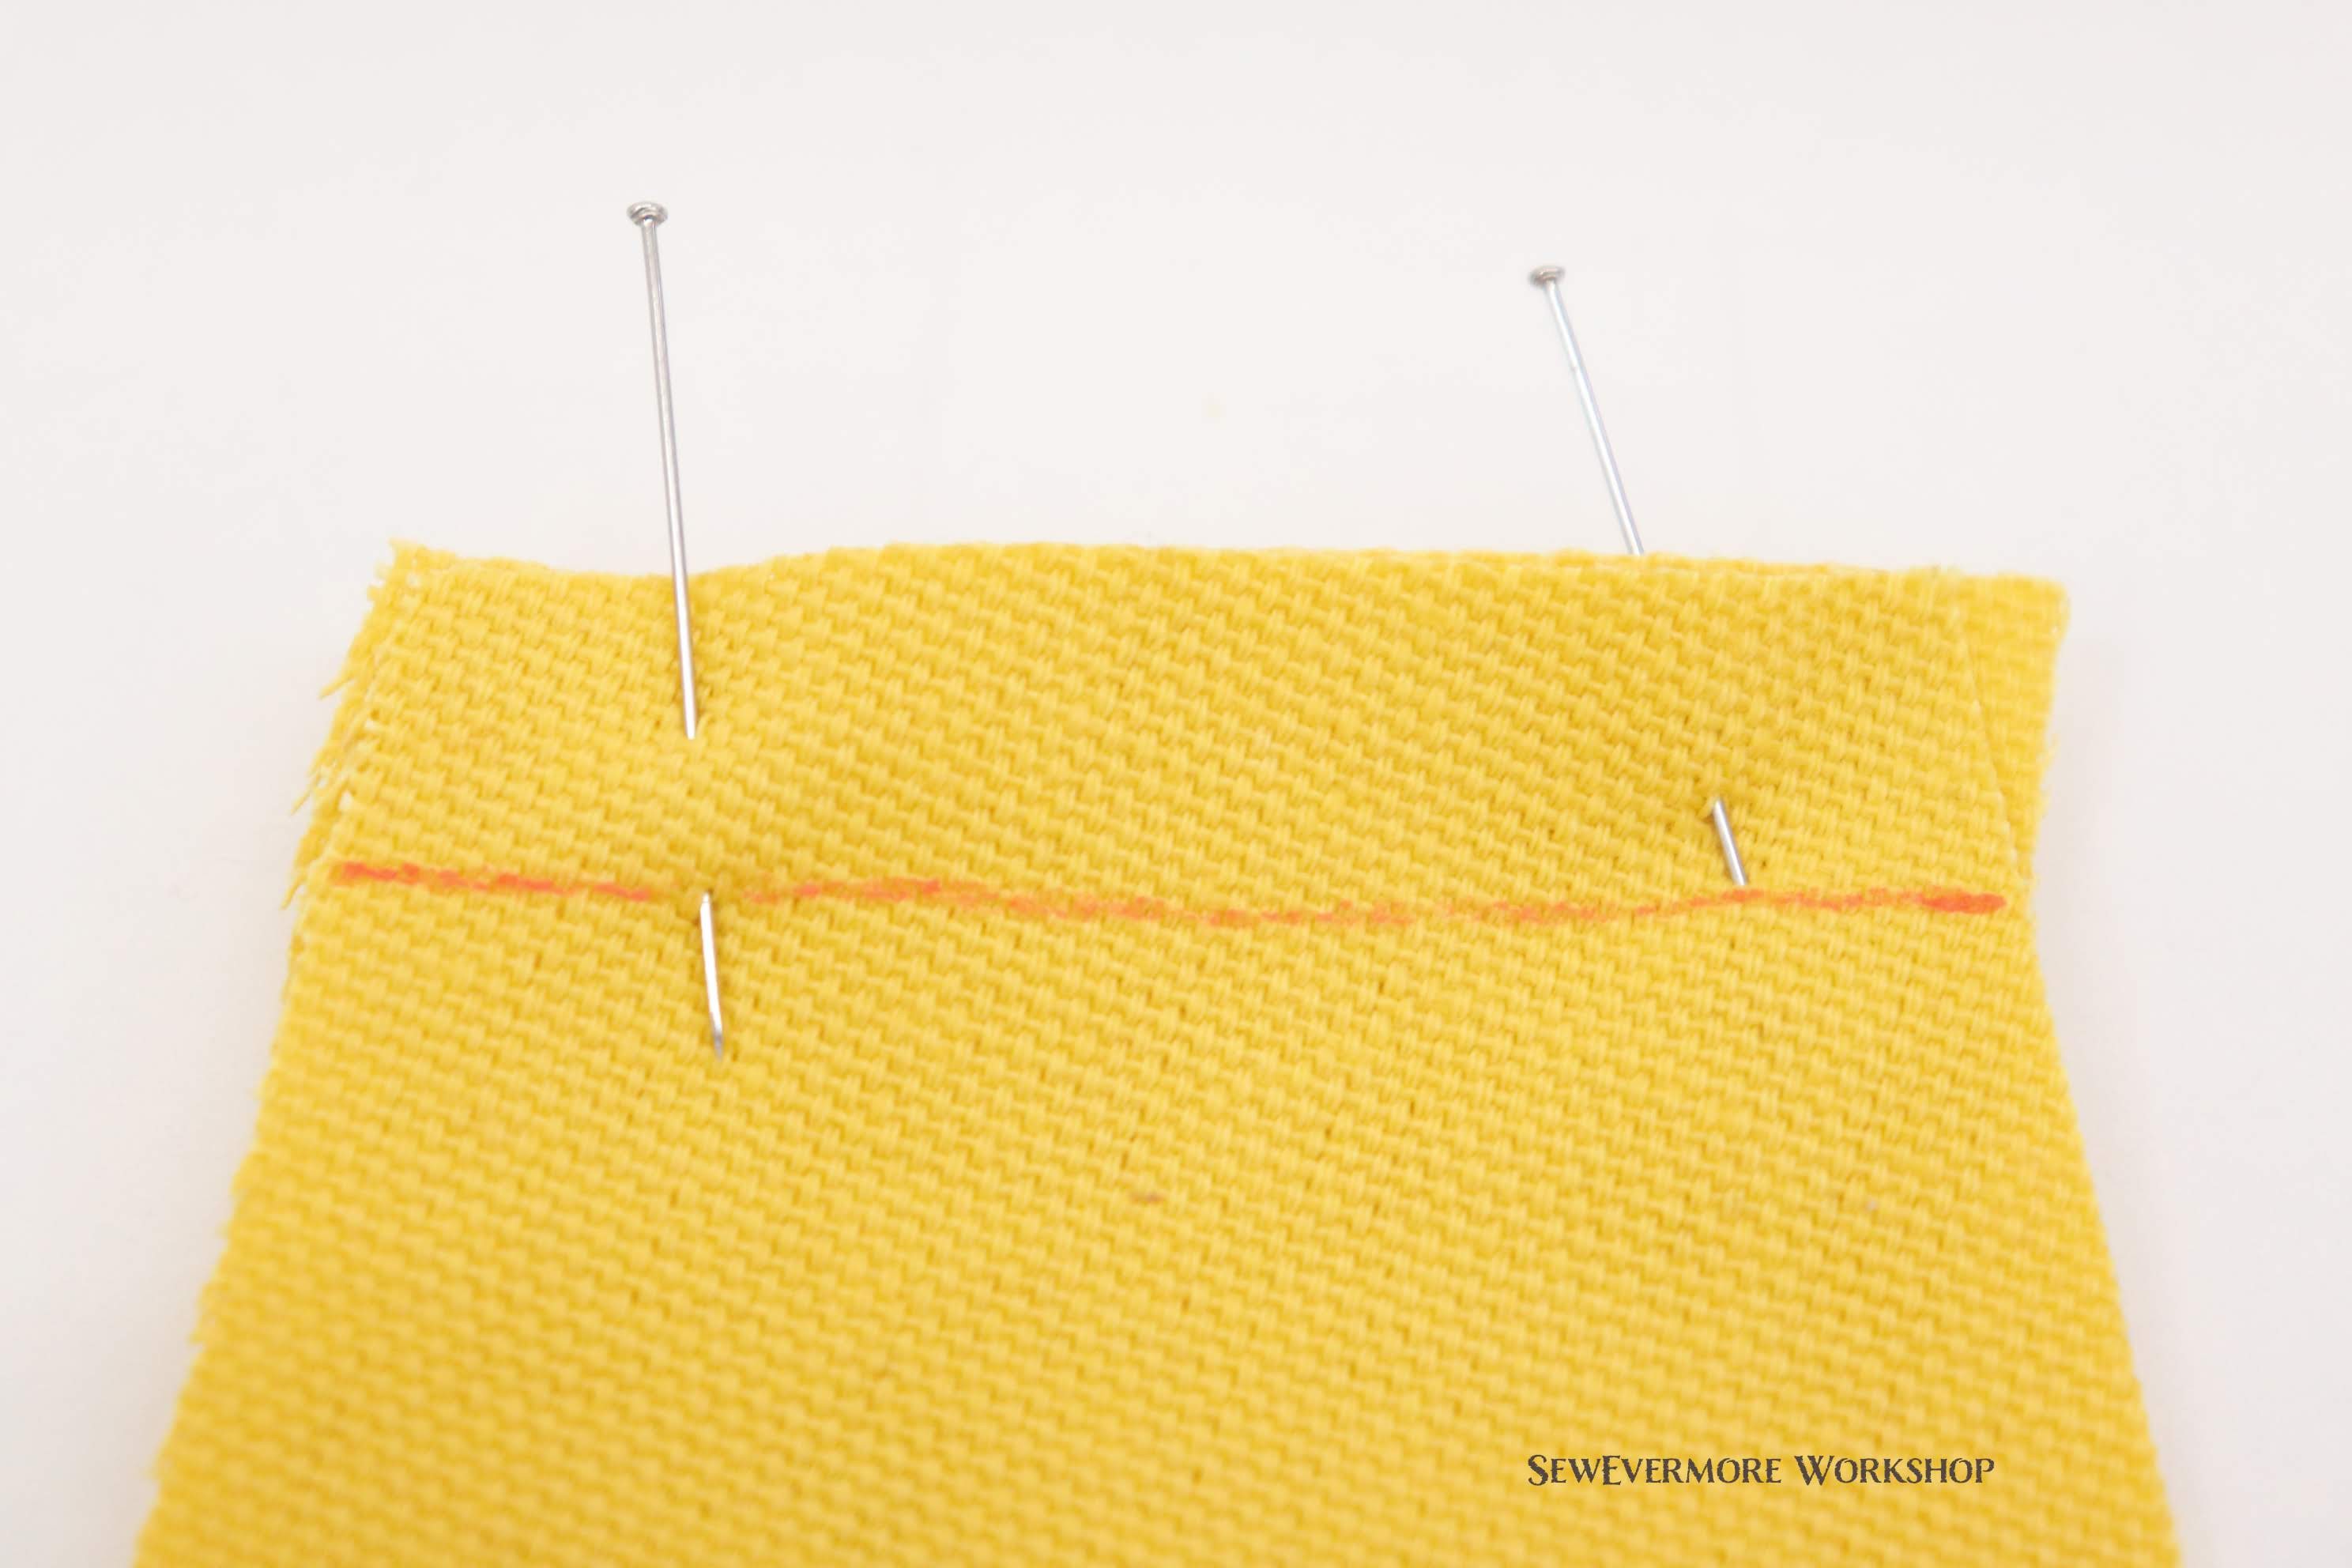
Once I have the seams pinned the way I like, I start to play with the edges. I began by using 1/8 inch draping tape to create possible necklines. I purchased the tape, and a lot of my draping and pattern making supplies, from pgm. My dress will be worn at a school with strict modesty guidelines, so the dress can’t be sleeveless. So, my dress will have cap sleeves which will be hidden under the “collar”, hence the necklines shown.
That said, the beauty of draping your own bodies is that you can make it whatever shape works best for you! The sky is the limit! Most of these methods will work regardless of your particular shape, unless it is drastically different.
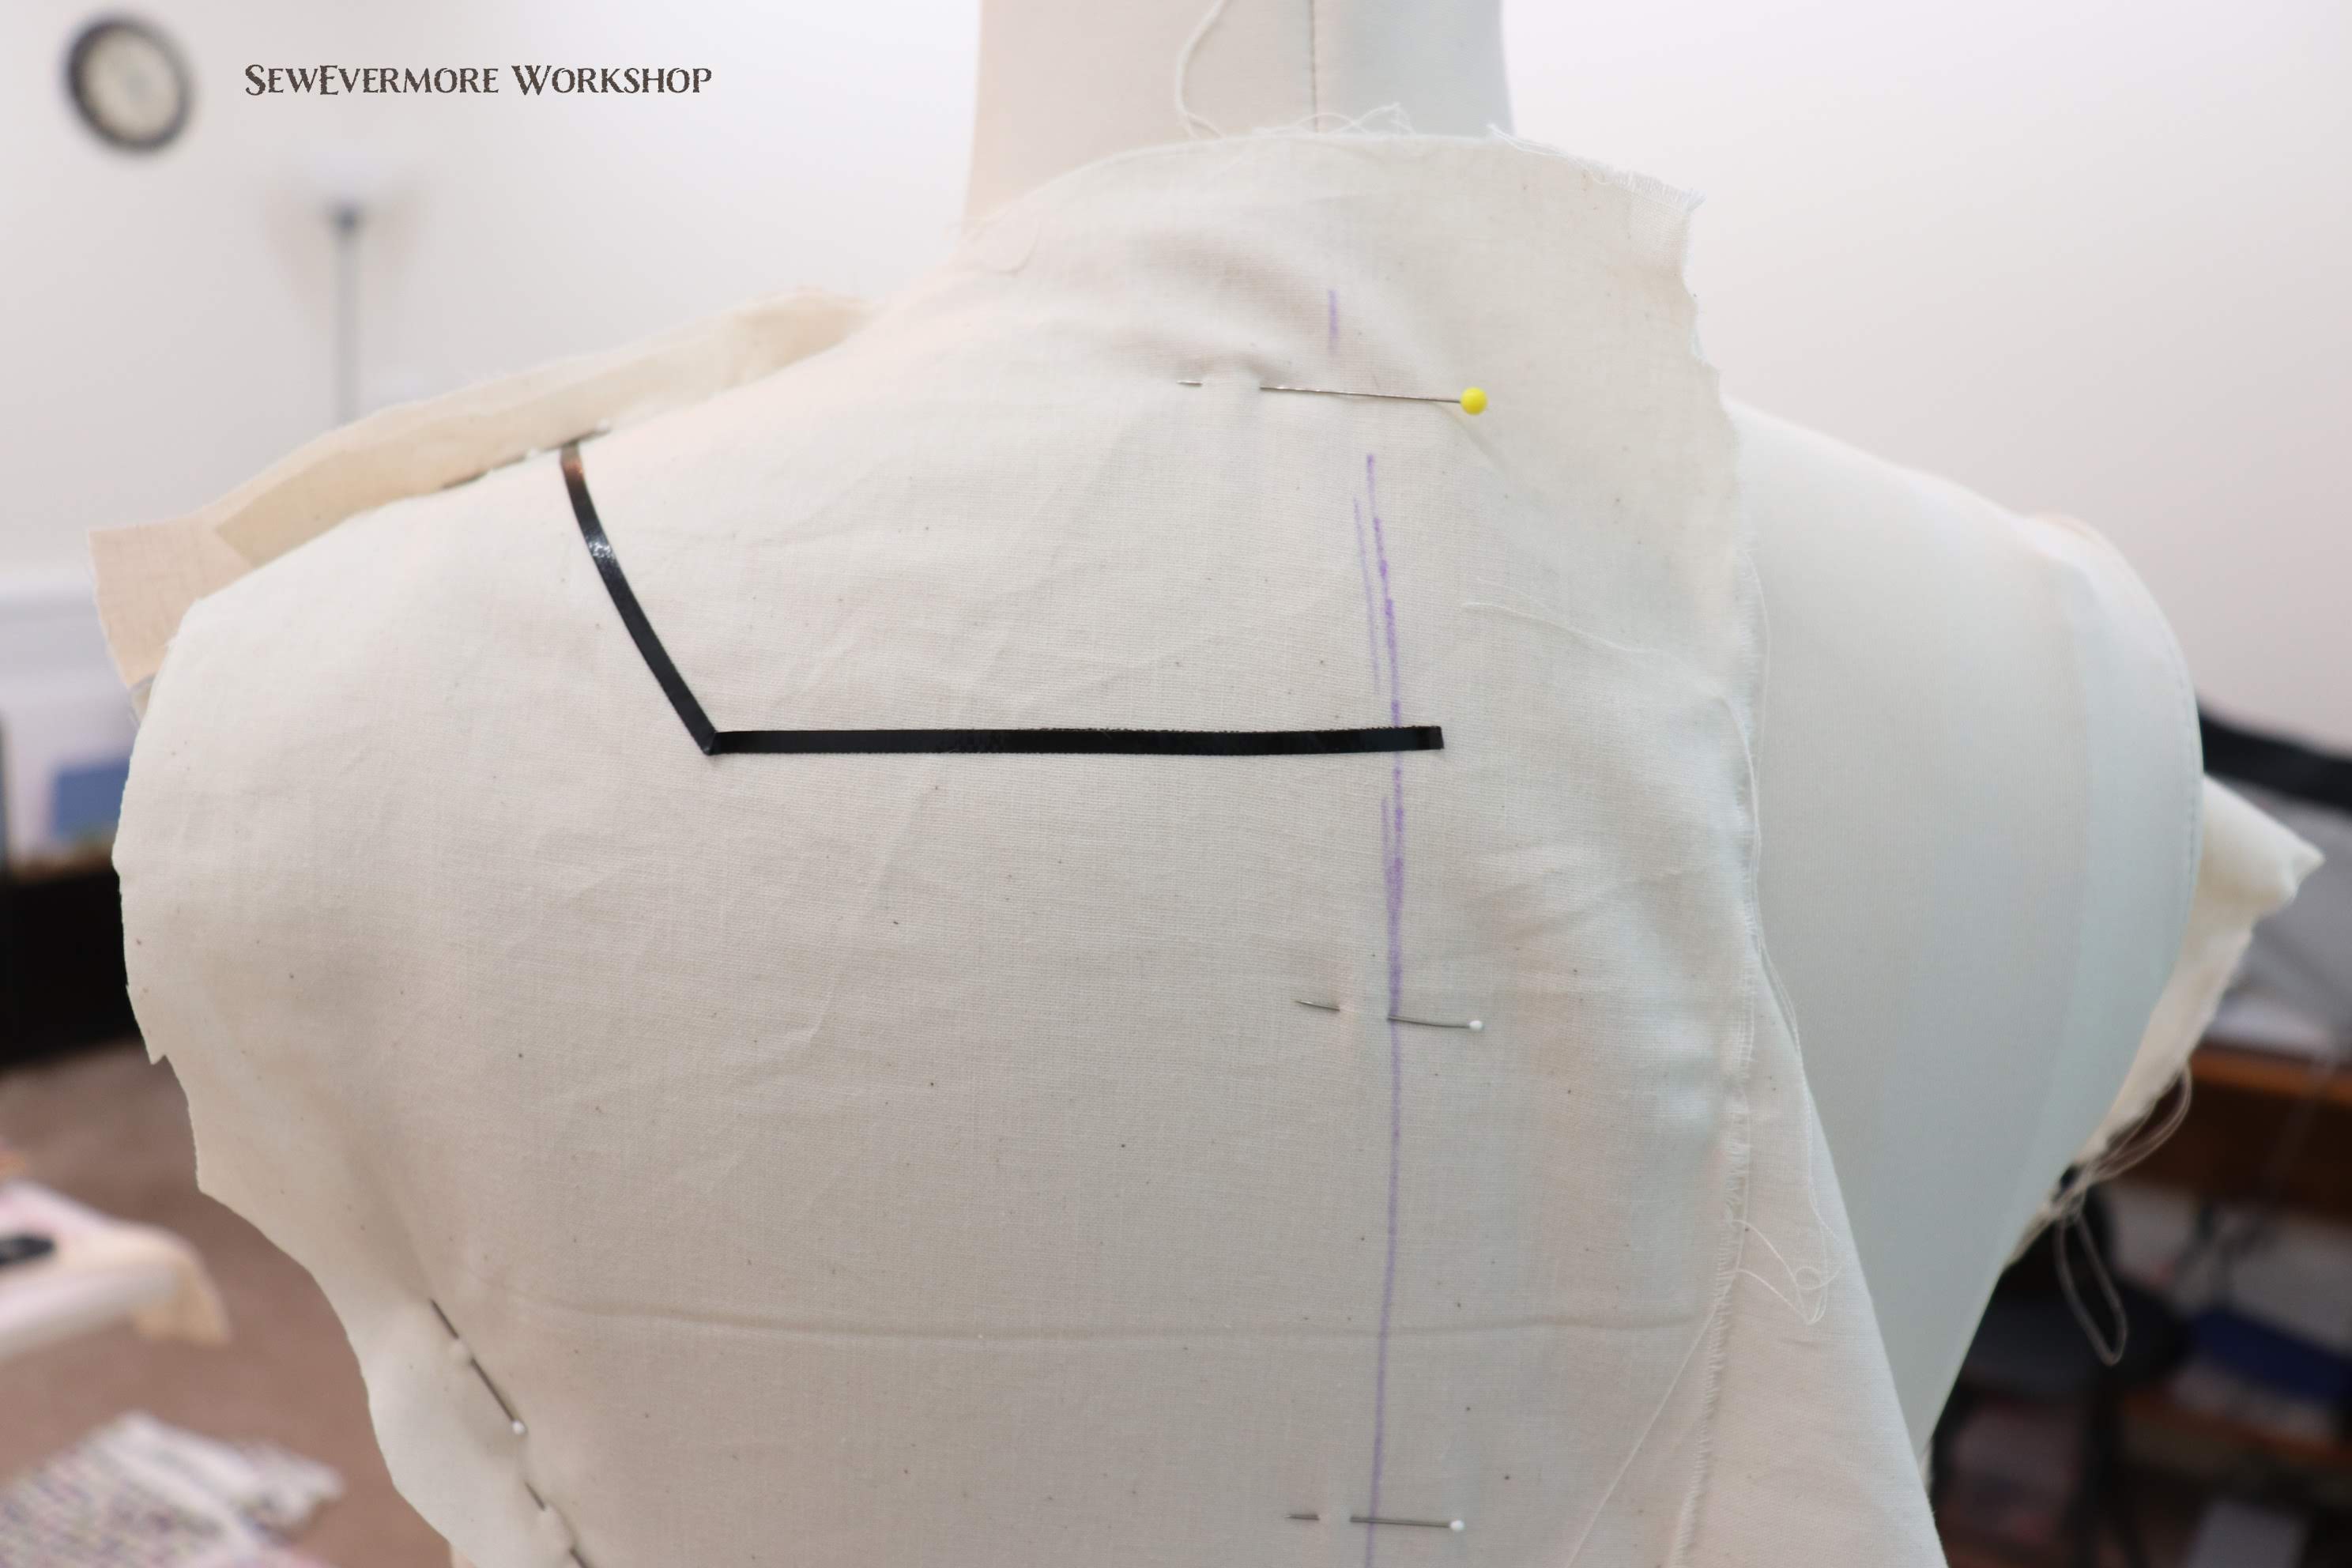
 I have only recently started using the draping tape, but I find that I like it. It is bold, which gives great lines, and it is easy to move until you decide on a final position. I decided to go with the blue line.
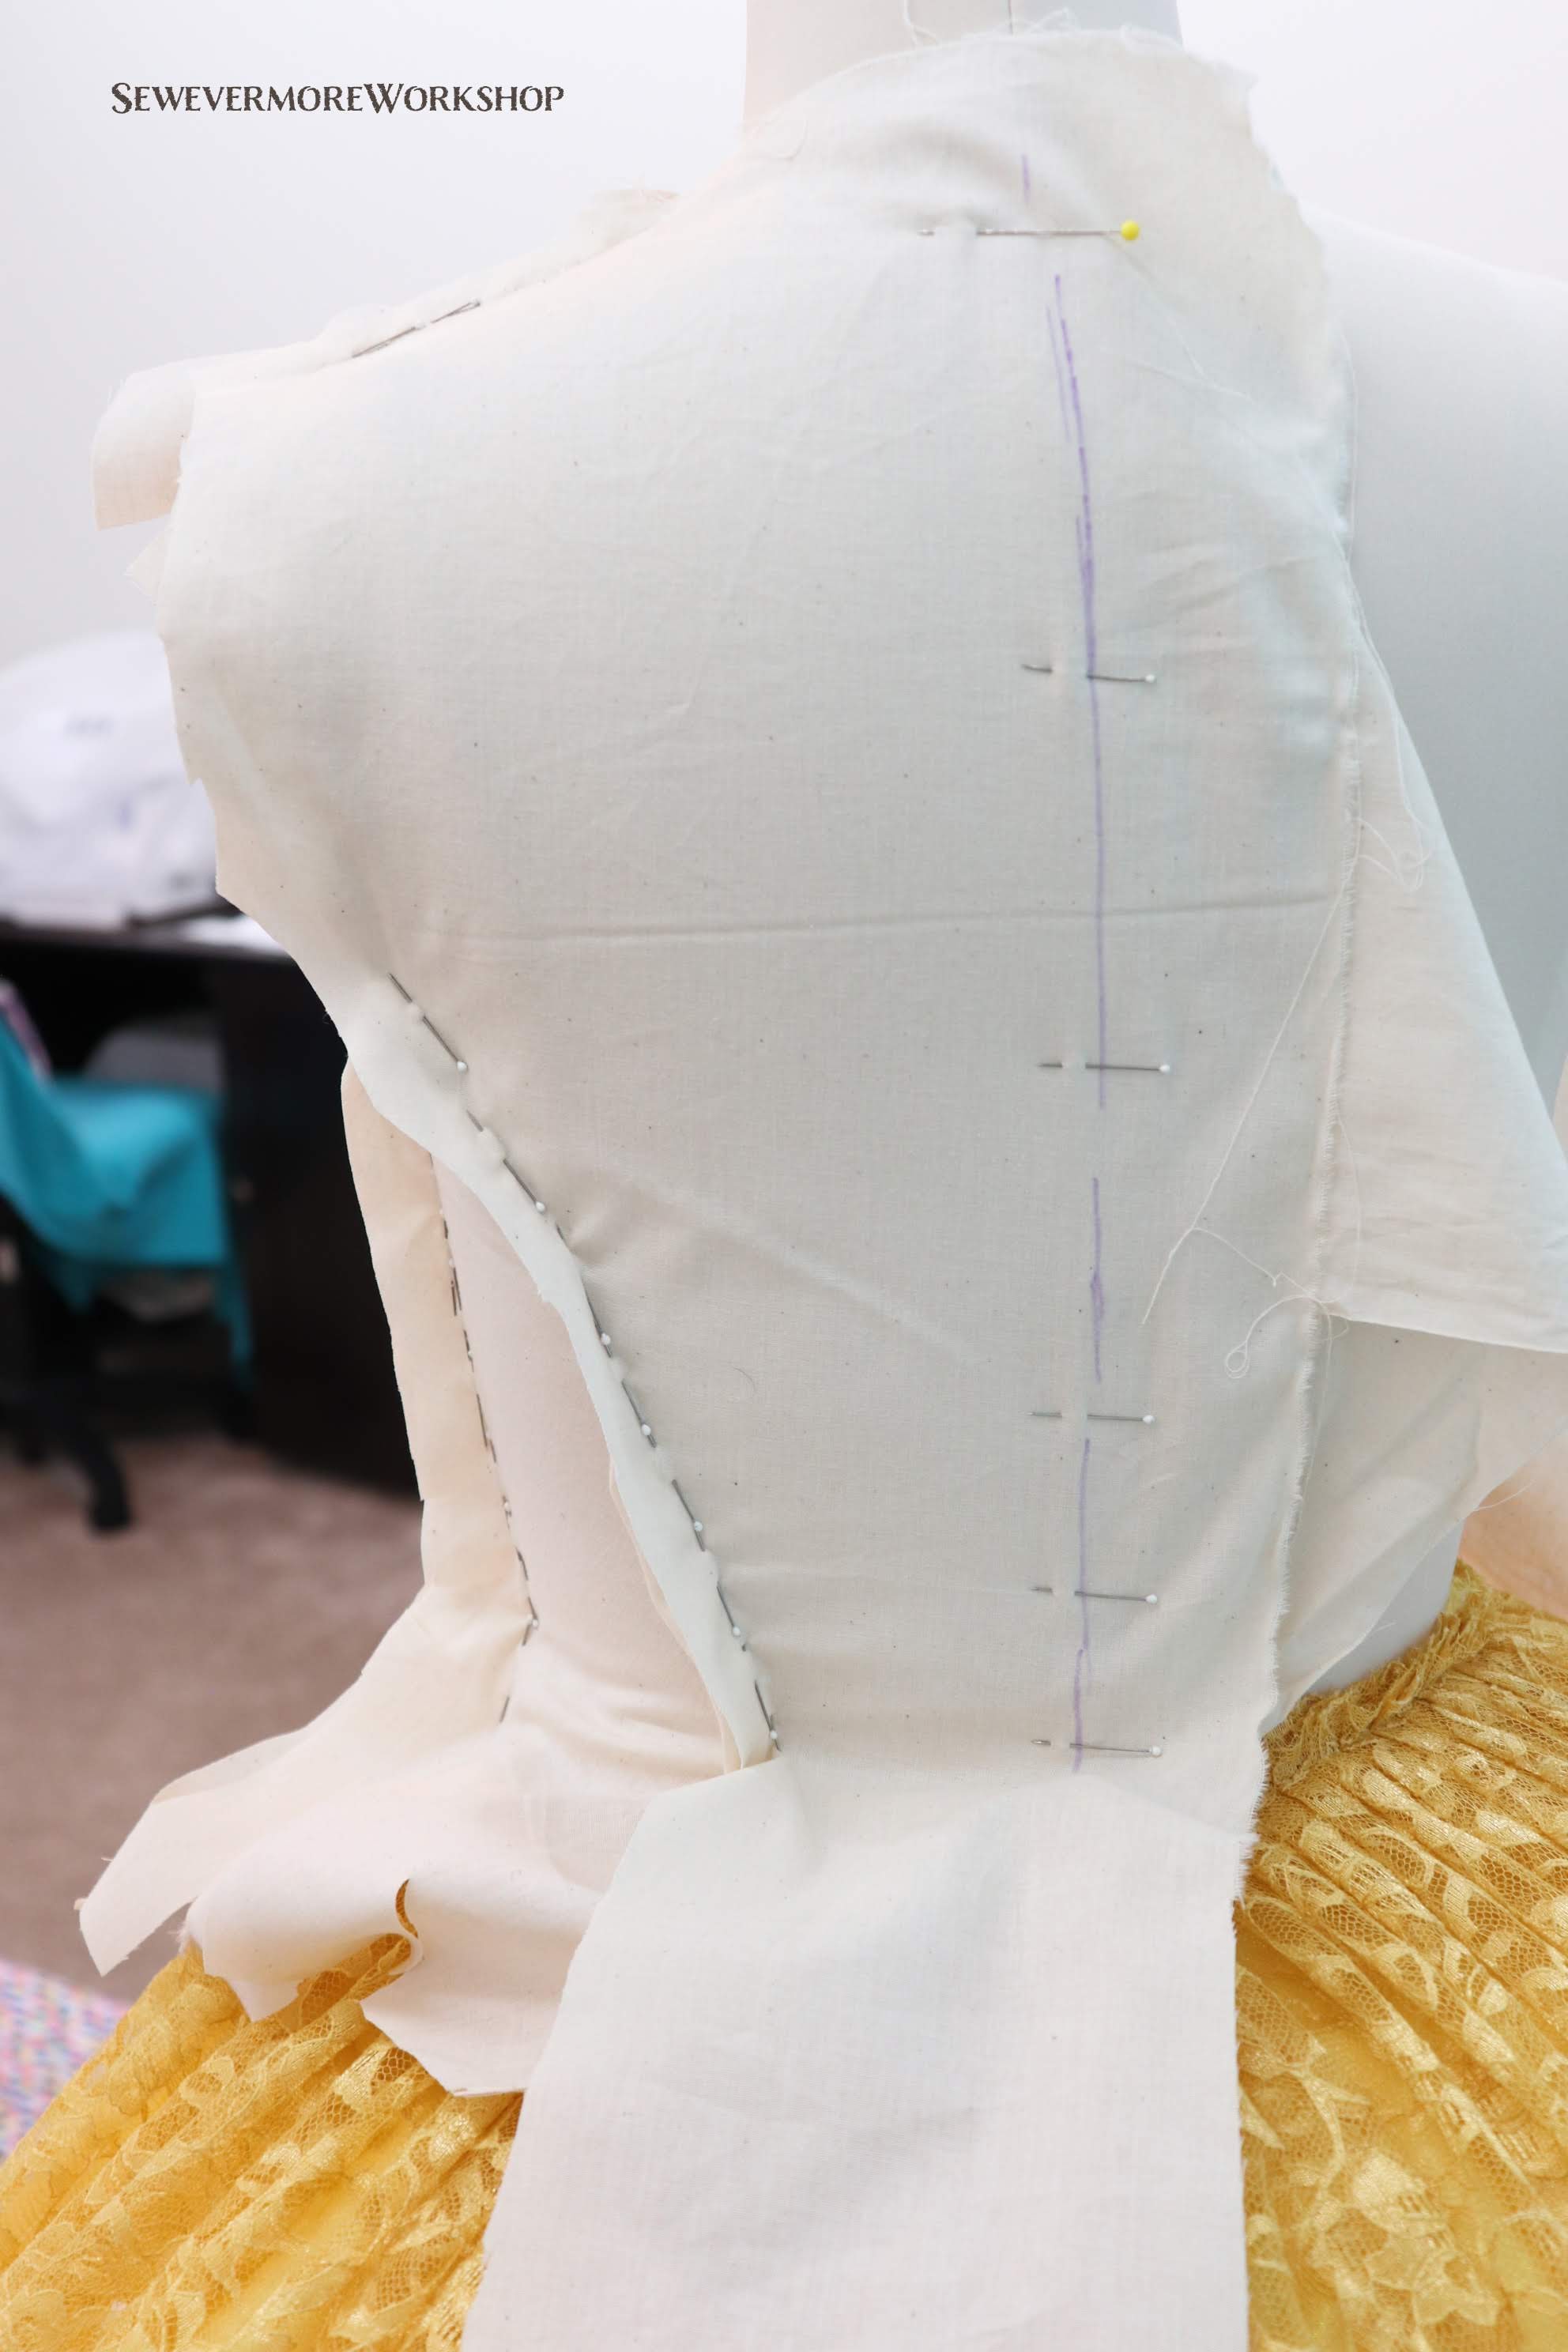
Next up was the back neckline. I started by making sure the shoulder lines matched up.

From the shoulder line I continued on to shape the back neck line.
I then used tape to mark the sleeve holes.

It is important to mark key locations such as the center front, waistline, joining points, etc. I like to simply use a ballpoint pen for this, but others prefer pencils or other marking tools. I would not use anything that smudges or could bleed through.

At this point I was pretty content with the progress of my pattern, so it was time to mark the seams. I did this by marking along the pin lines. Be sure to do this on both sides of the seam, along the front and back of the pins, so each pattern piece or section is defined.
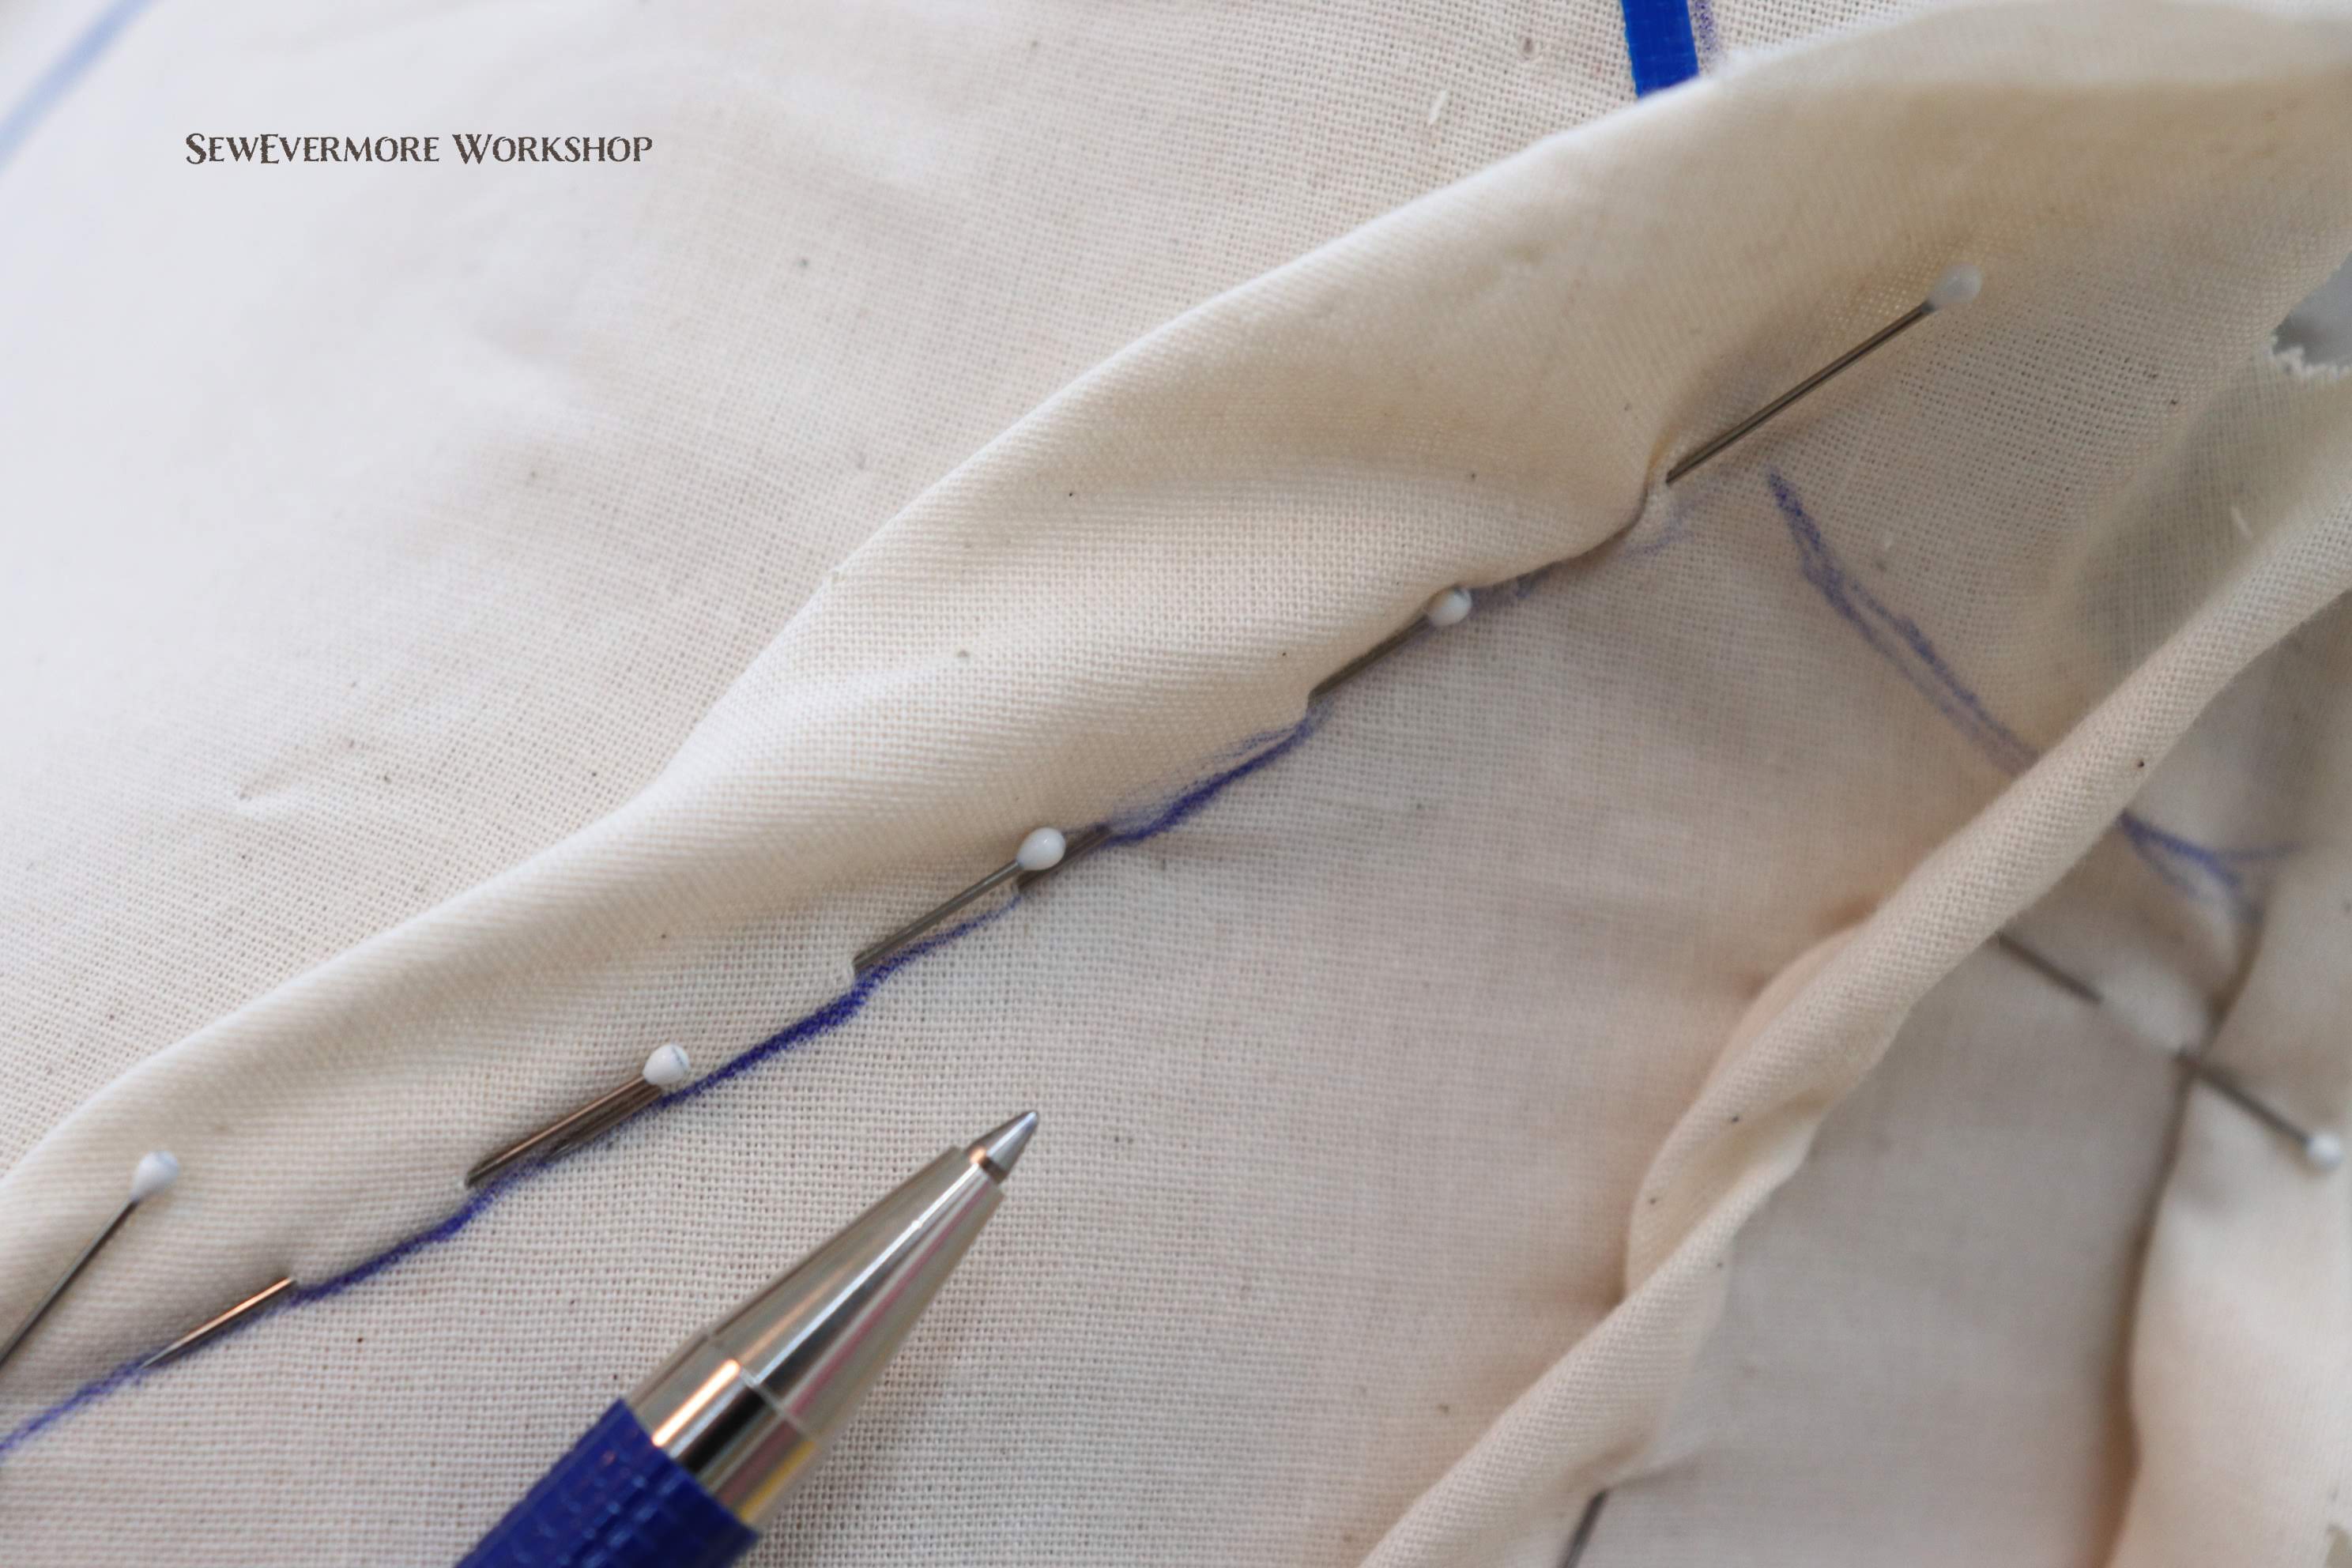
Do this for all seams. Mark the center back and along the taped edges as well. Once my seams were marked I began drawing a line for the bottom of the bodice.

When in doubt I prefer to make the bodice a little longer rather than shorter. You can always shorten a pattern later, I find it is much more difficult to lengthen it. If I have multiple lines for an edge, I will grab a different colored pen to draw my final line so the correct line is obvious when I remove the muslin from the dress form.

Before I remove the muslin I like to label each piece: front, side front, side, etc. Sometimes I will also label them numerically 1, 2, 3, etc. starting with the center front and working to the center back.

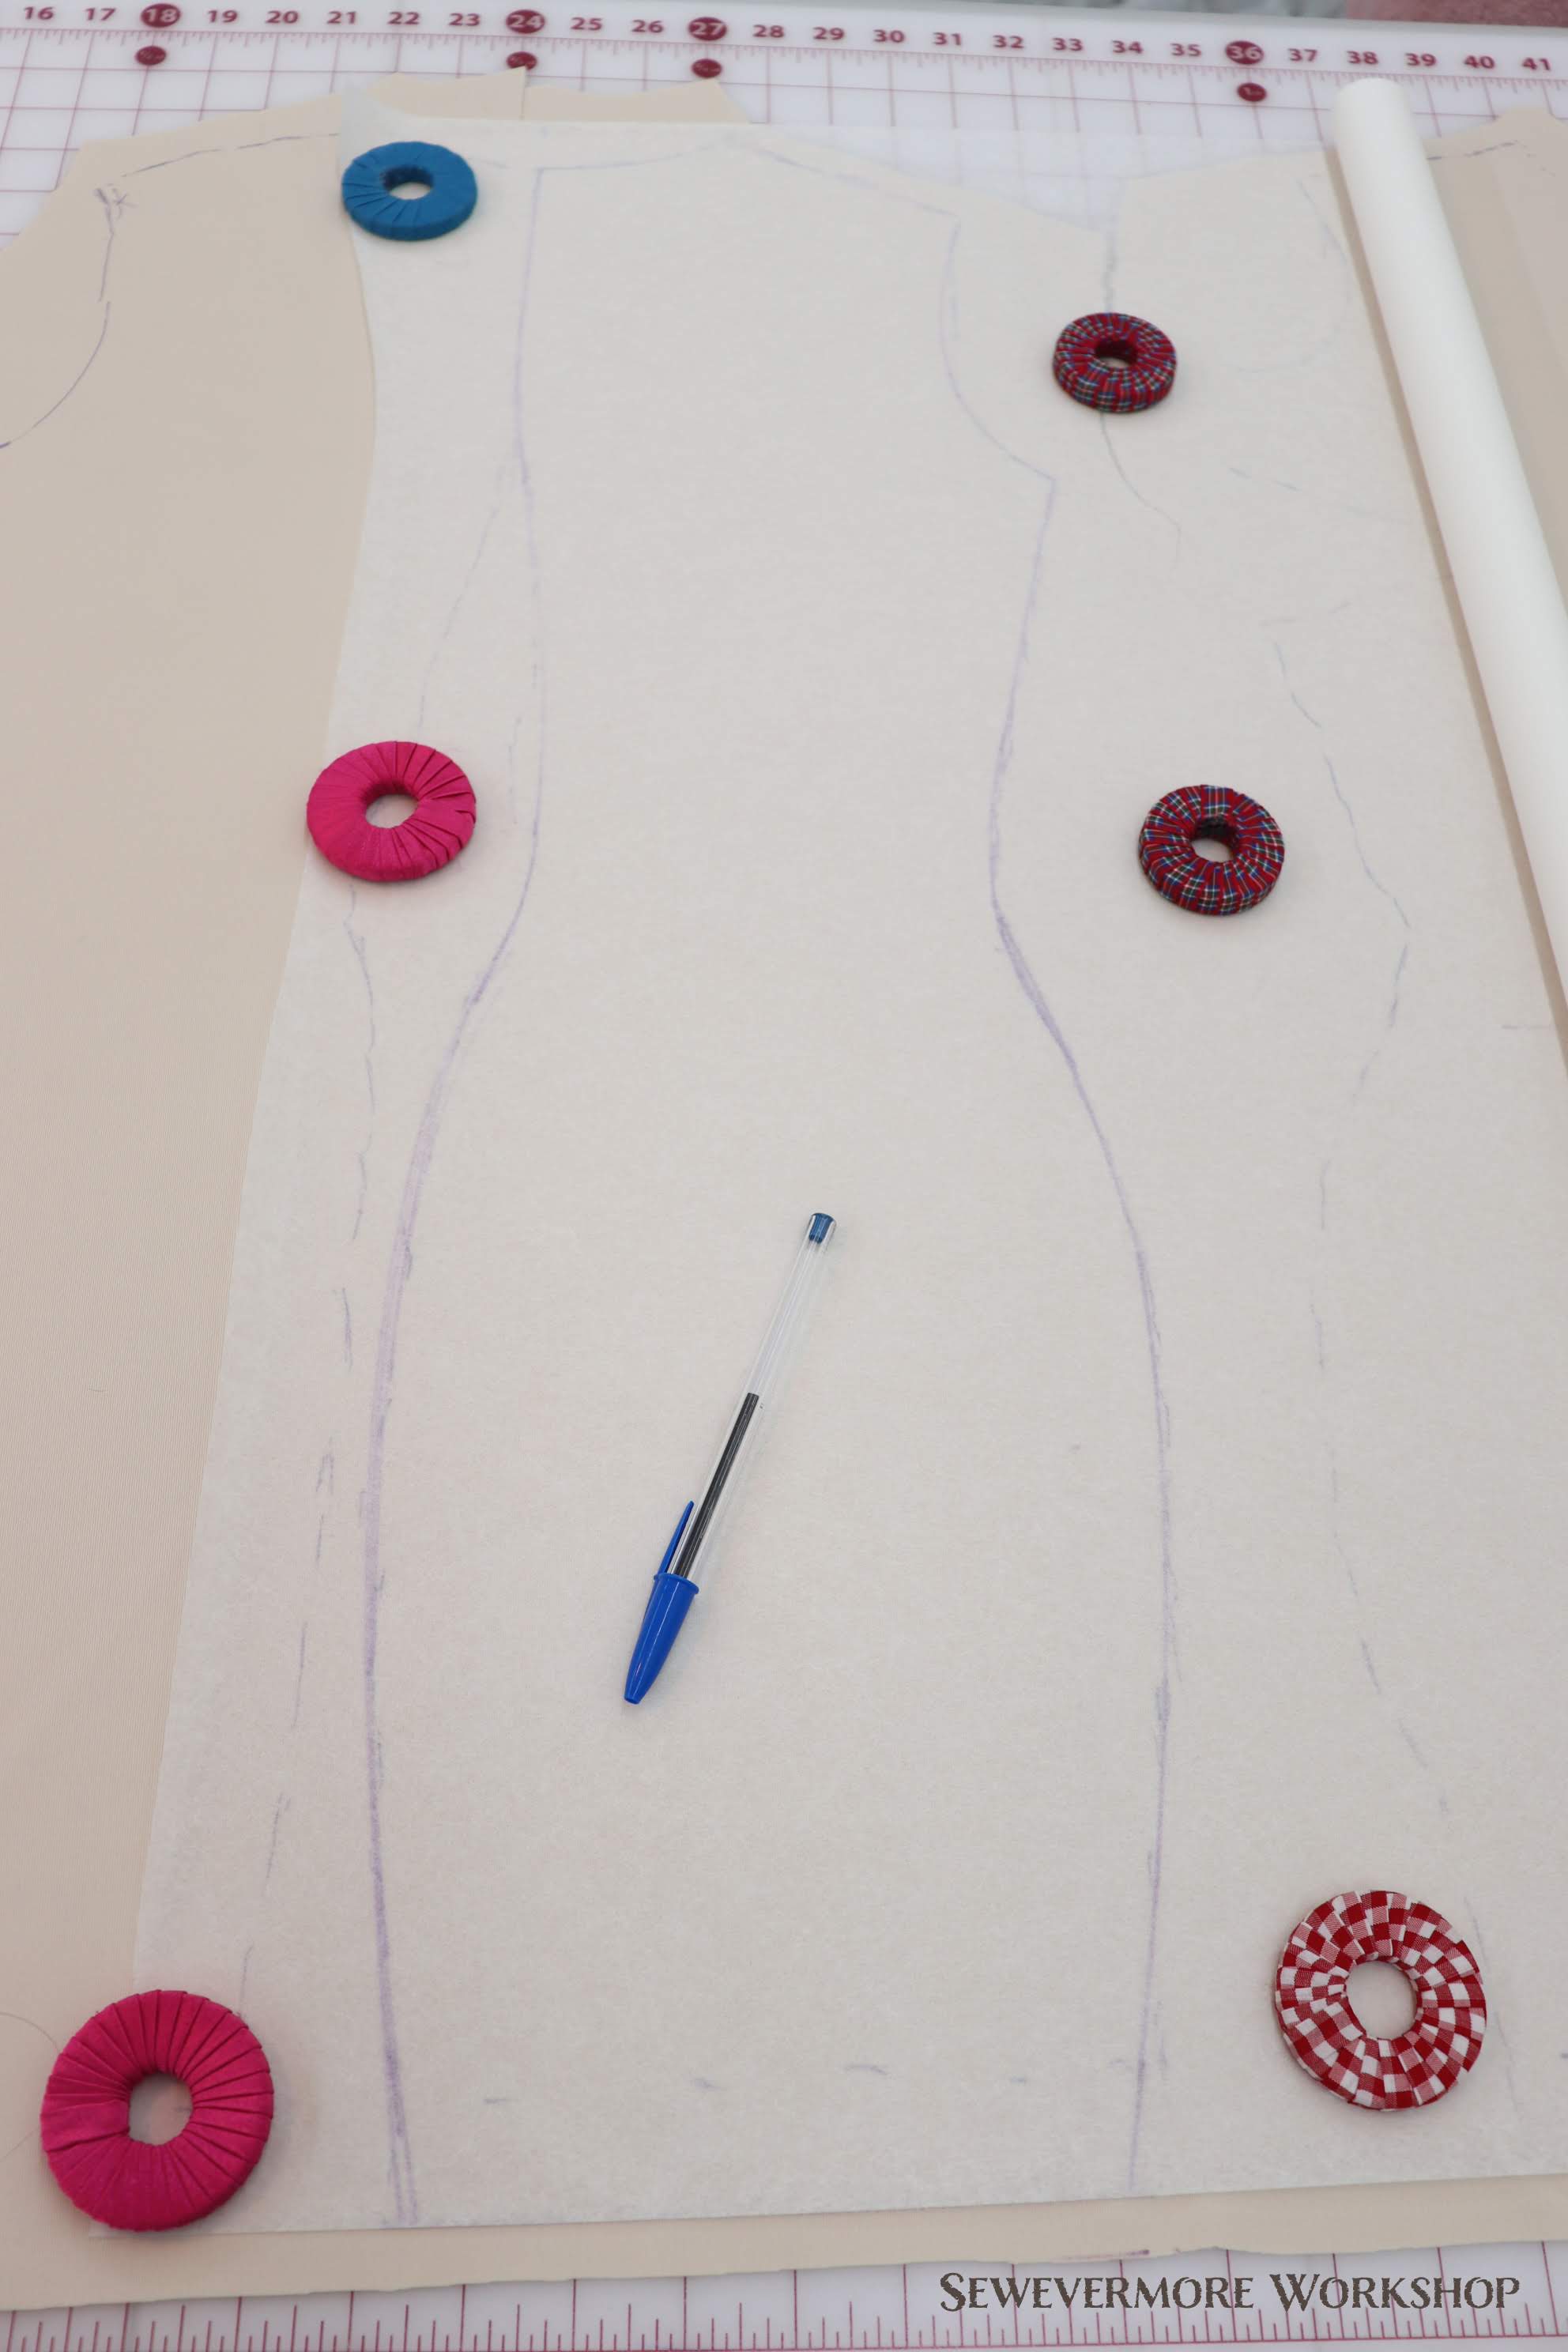
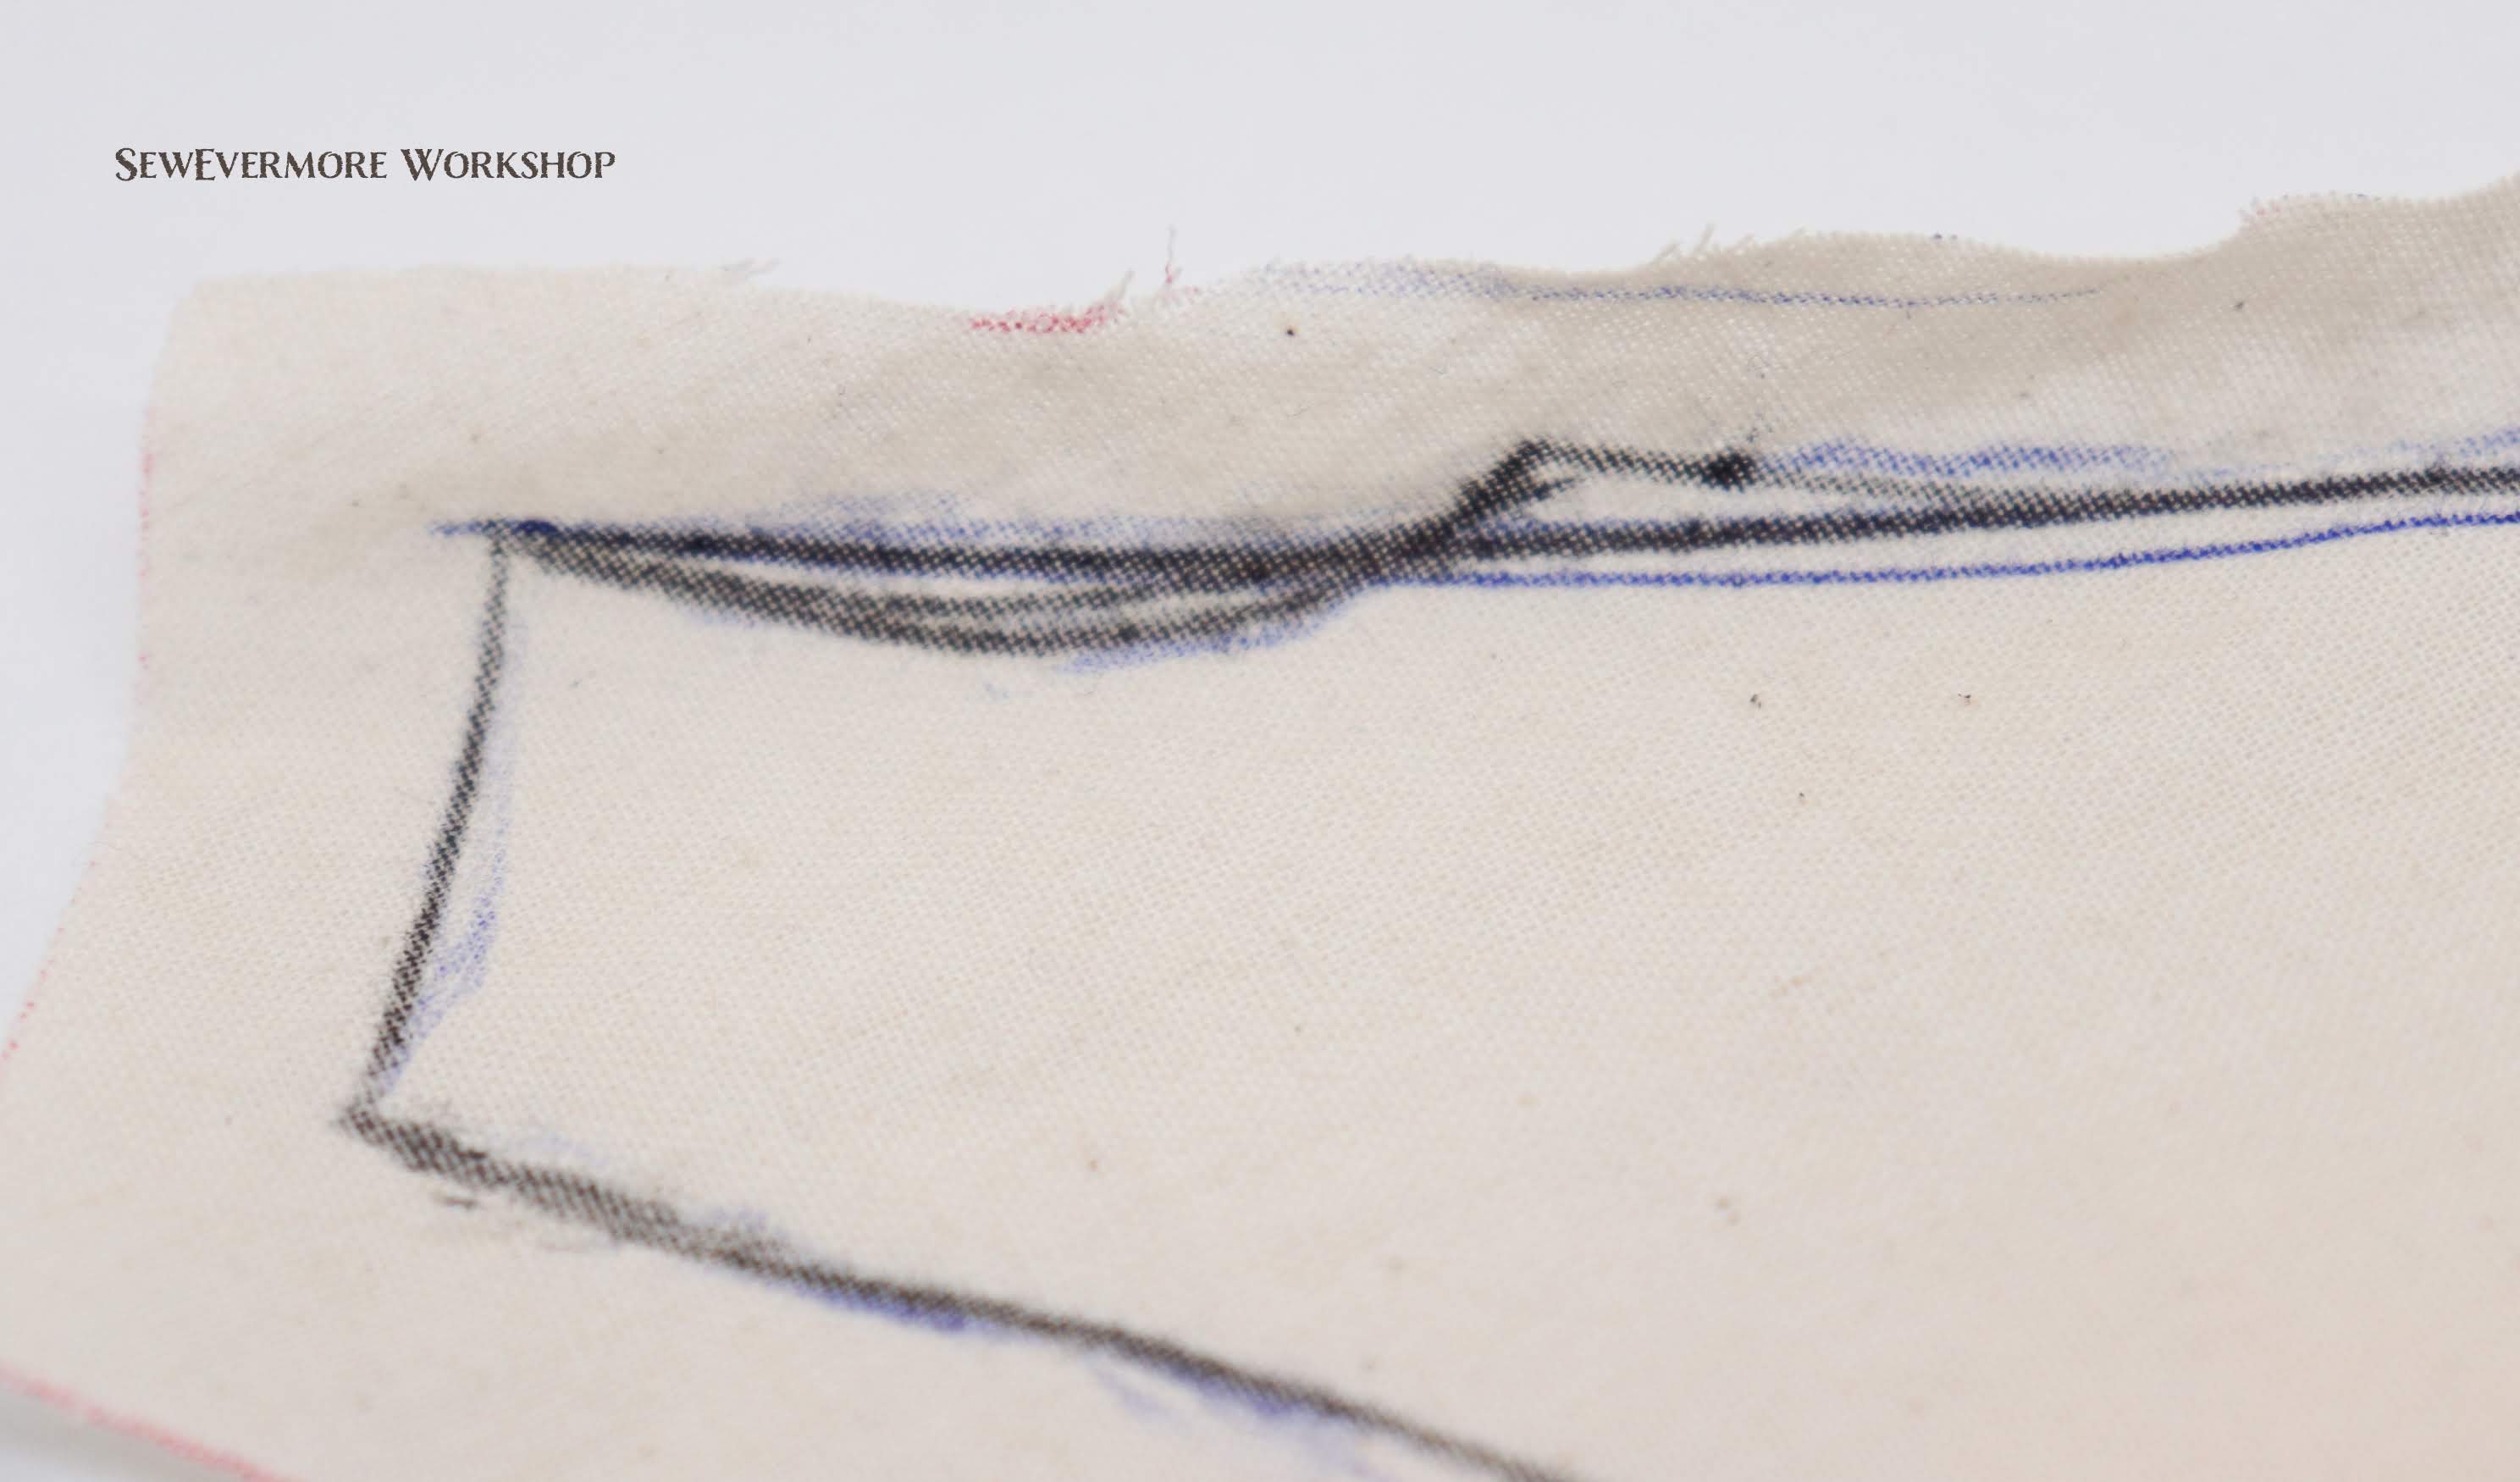
Finally, it is time to remove the muslin! You can clearly see the shape of the bodice pattern when the fabric is removed and laid flat.

The lines that are drawn when tracing the pins are often rough and jagged. You don’t want that on your final pattern. Use design rulers to smooth the lines.

Sometimes the rulers will fit a curve beautifully! And sometimes they don’t. So, don’t force it. If your line looks nothing like the shape of the ruler, go with your line. Just smooth it out.

Once your lines are smooth you can use a ruler to add seam allowances if you like. Sometimes I do this with a ruler on the pattern pieces, and sometimes I will cut my pattern piece on the pin line and add a seam allowance when I cut my fabric. It just depends on how exact you need your pattern and how frequently you plan to use it. Since I usually only use the patterns once it is not always worth it for me to draw out the seam allowances, since I can free hand them pretty accurately on my own. But that is definitely personal preference. If you don’t think you can draw the seam allowance accurately without a ruler, or you plan to use the pattern multiple times, I definitely recommend adding one.
When I add a seam allowance I like to do so with a different colored pen. I usually use a 1/2 inch seam allowance. Below, the seam allowance line is in red. This will be the cut line for my fabric.

We now have a pattern for the Belle Dress Bodice!
- Sewing the Bodice
Now that the pattern is ready it’s time to sew the bodice.
The first step is to prepare your fabric. Make sure that is washed and laundered if applicable. I want the bodice of my dress to act much like a corset. The lining will be duck canvas, and the exterior fabric will be satin. Coutil would probably be a better choice than duck canvas if you can find it and don’t mind the price tag, but I was definitely shopping on a budget and I have found that the canvas works well for me.
Since the lining will be so heavy, the satin needs to be reinforced to add structure. It is worth it to take the time to do this, especially if the satin is really light weight. There are several ways to do this. I chose to use fusible interfacing. I used Pellon SF101. I don’t always care for fusible interfacing. It can pull away from the fabric and sometimes causes puckering. So, if you don’t want to use interfacing, interlining is also a great option.
I’ve made a deadline for myself on this project, so to save time I fused the interfacing to a large piece of the satin prior to cutting out the pieces. You could cut out each piece individually and fuse separately to save on the cost of interfacing if you prefer. My goal with this step was to save time. By fusing first you only have to cut once instead of twice.
Next, I cut out the bodice from both the canvas and the reinforced satin. You can always make a muslin with the pattern prior to cutting out your actual fabric if you want to test the pattern first. (Just FYI, I sometimes give myself a few extra inches at the center back just in case…to account for thickness of fabric, seam allowance error, etc.)

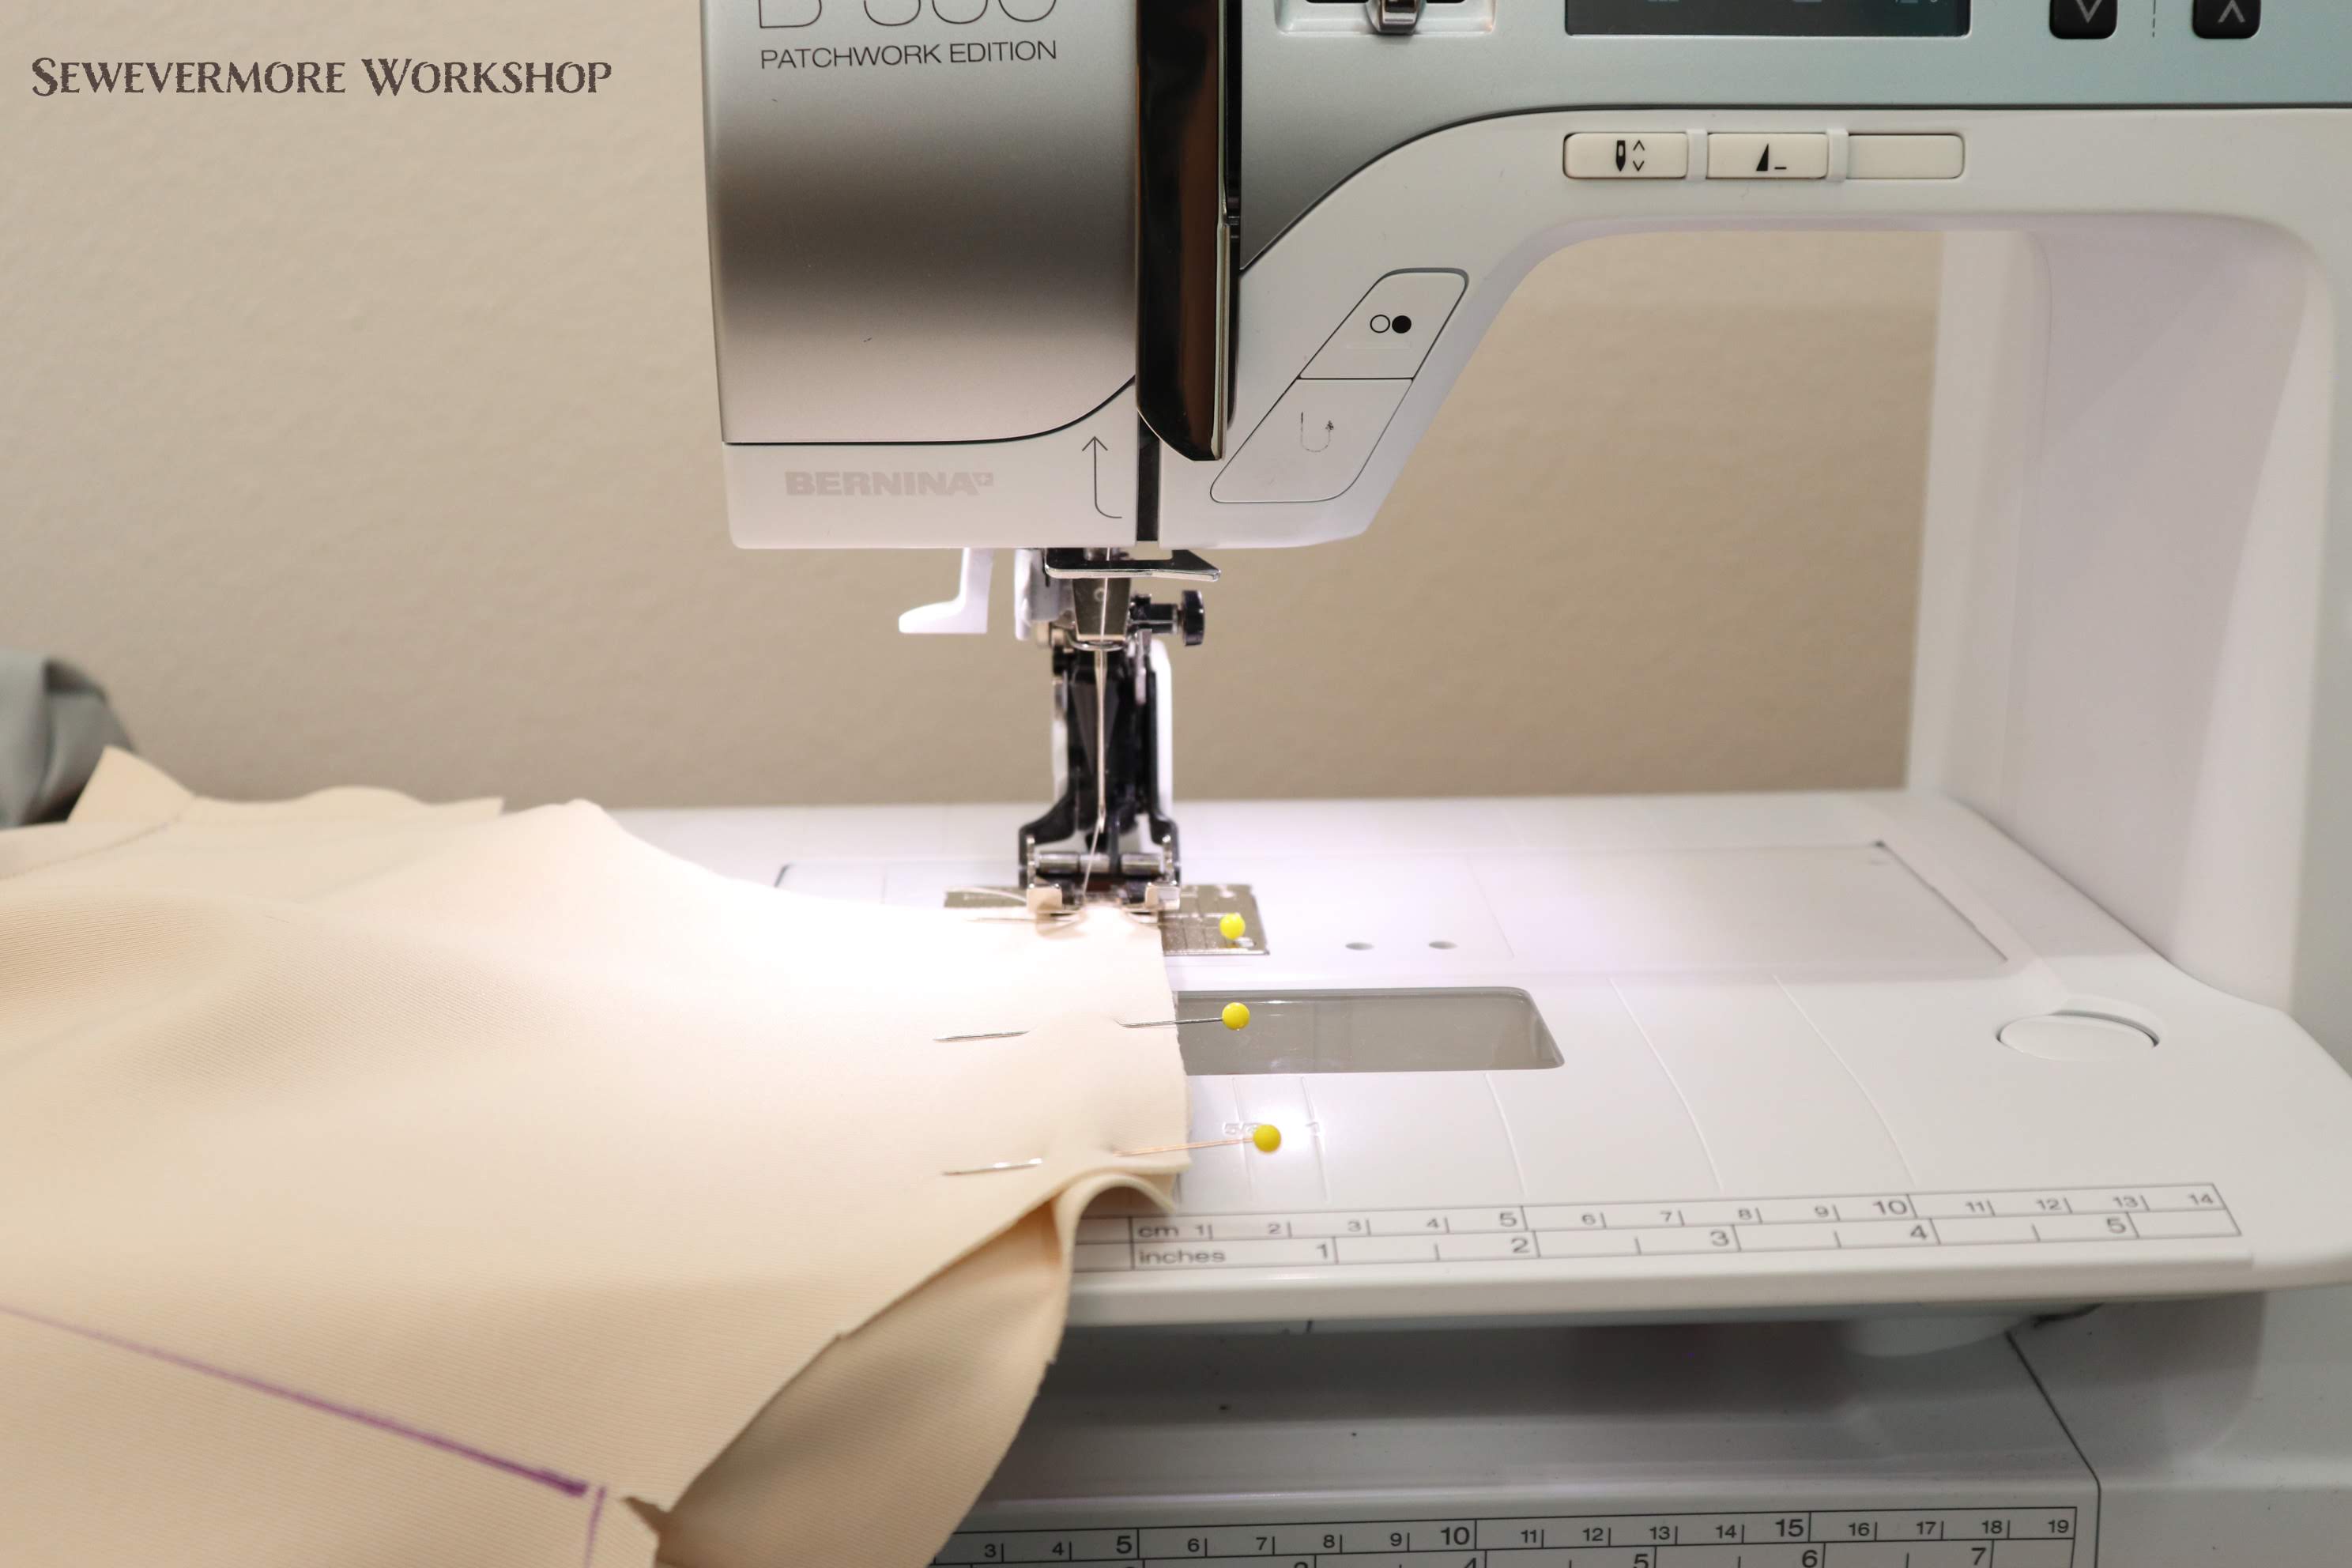
I like to start by sewing the canvas together. I use the canvas to test my pattern.
I sewed each section right sides together with a 1/2 inch seam allowance.
I like to match up the ends and then pin in the middle. Occasionally, in areas with tight curves, I need to clip the edge of the smaller piece in order to fit the fabric. On this pattern, I found that was necessary when aligning the side back to the back piece.

A note on making your own patterns, I have found that there are little discrepancies that occur when making your own patterns. Since I am not a professional pattern maker I encounter things like this frequently. For example, when aligning your pieces recall it is the stitch line, 1/2 inch from the edge (since I used a 1/2 inch seam allowance), that needs to align. Not the corners. This was very visible on the shoulder seams. I have found that if you have a lot of experience using store bought patterns you can predict how edges should be aligned, even if it isn’t cut perfectly.
Also, I occasionally find that I mark the wrong line while drafting my pattern. This could be a section where the fabric was folded, or the pin was in at an odd angle when draping, and for some reason when I connect the lines it ends up an odd shape. This happened on this pattern on the side front piece. There was an indent from the top on the pin line near the shoulder, my brain thinking it was part of the shoulder curve, curved the edge. In reality, the fabric had just been folded, and the line was supposed to be straight. It wasn’t part of the shoulder curve at all. I was able to realize the error when I was pinning the pieces together and corrected it. Why am I telling you this? I just want to point out, that it is okay if things aren’t perfect. We learn from it, and as long was we adjust as we go, things usually work out just fine!
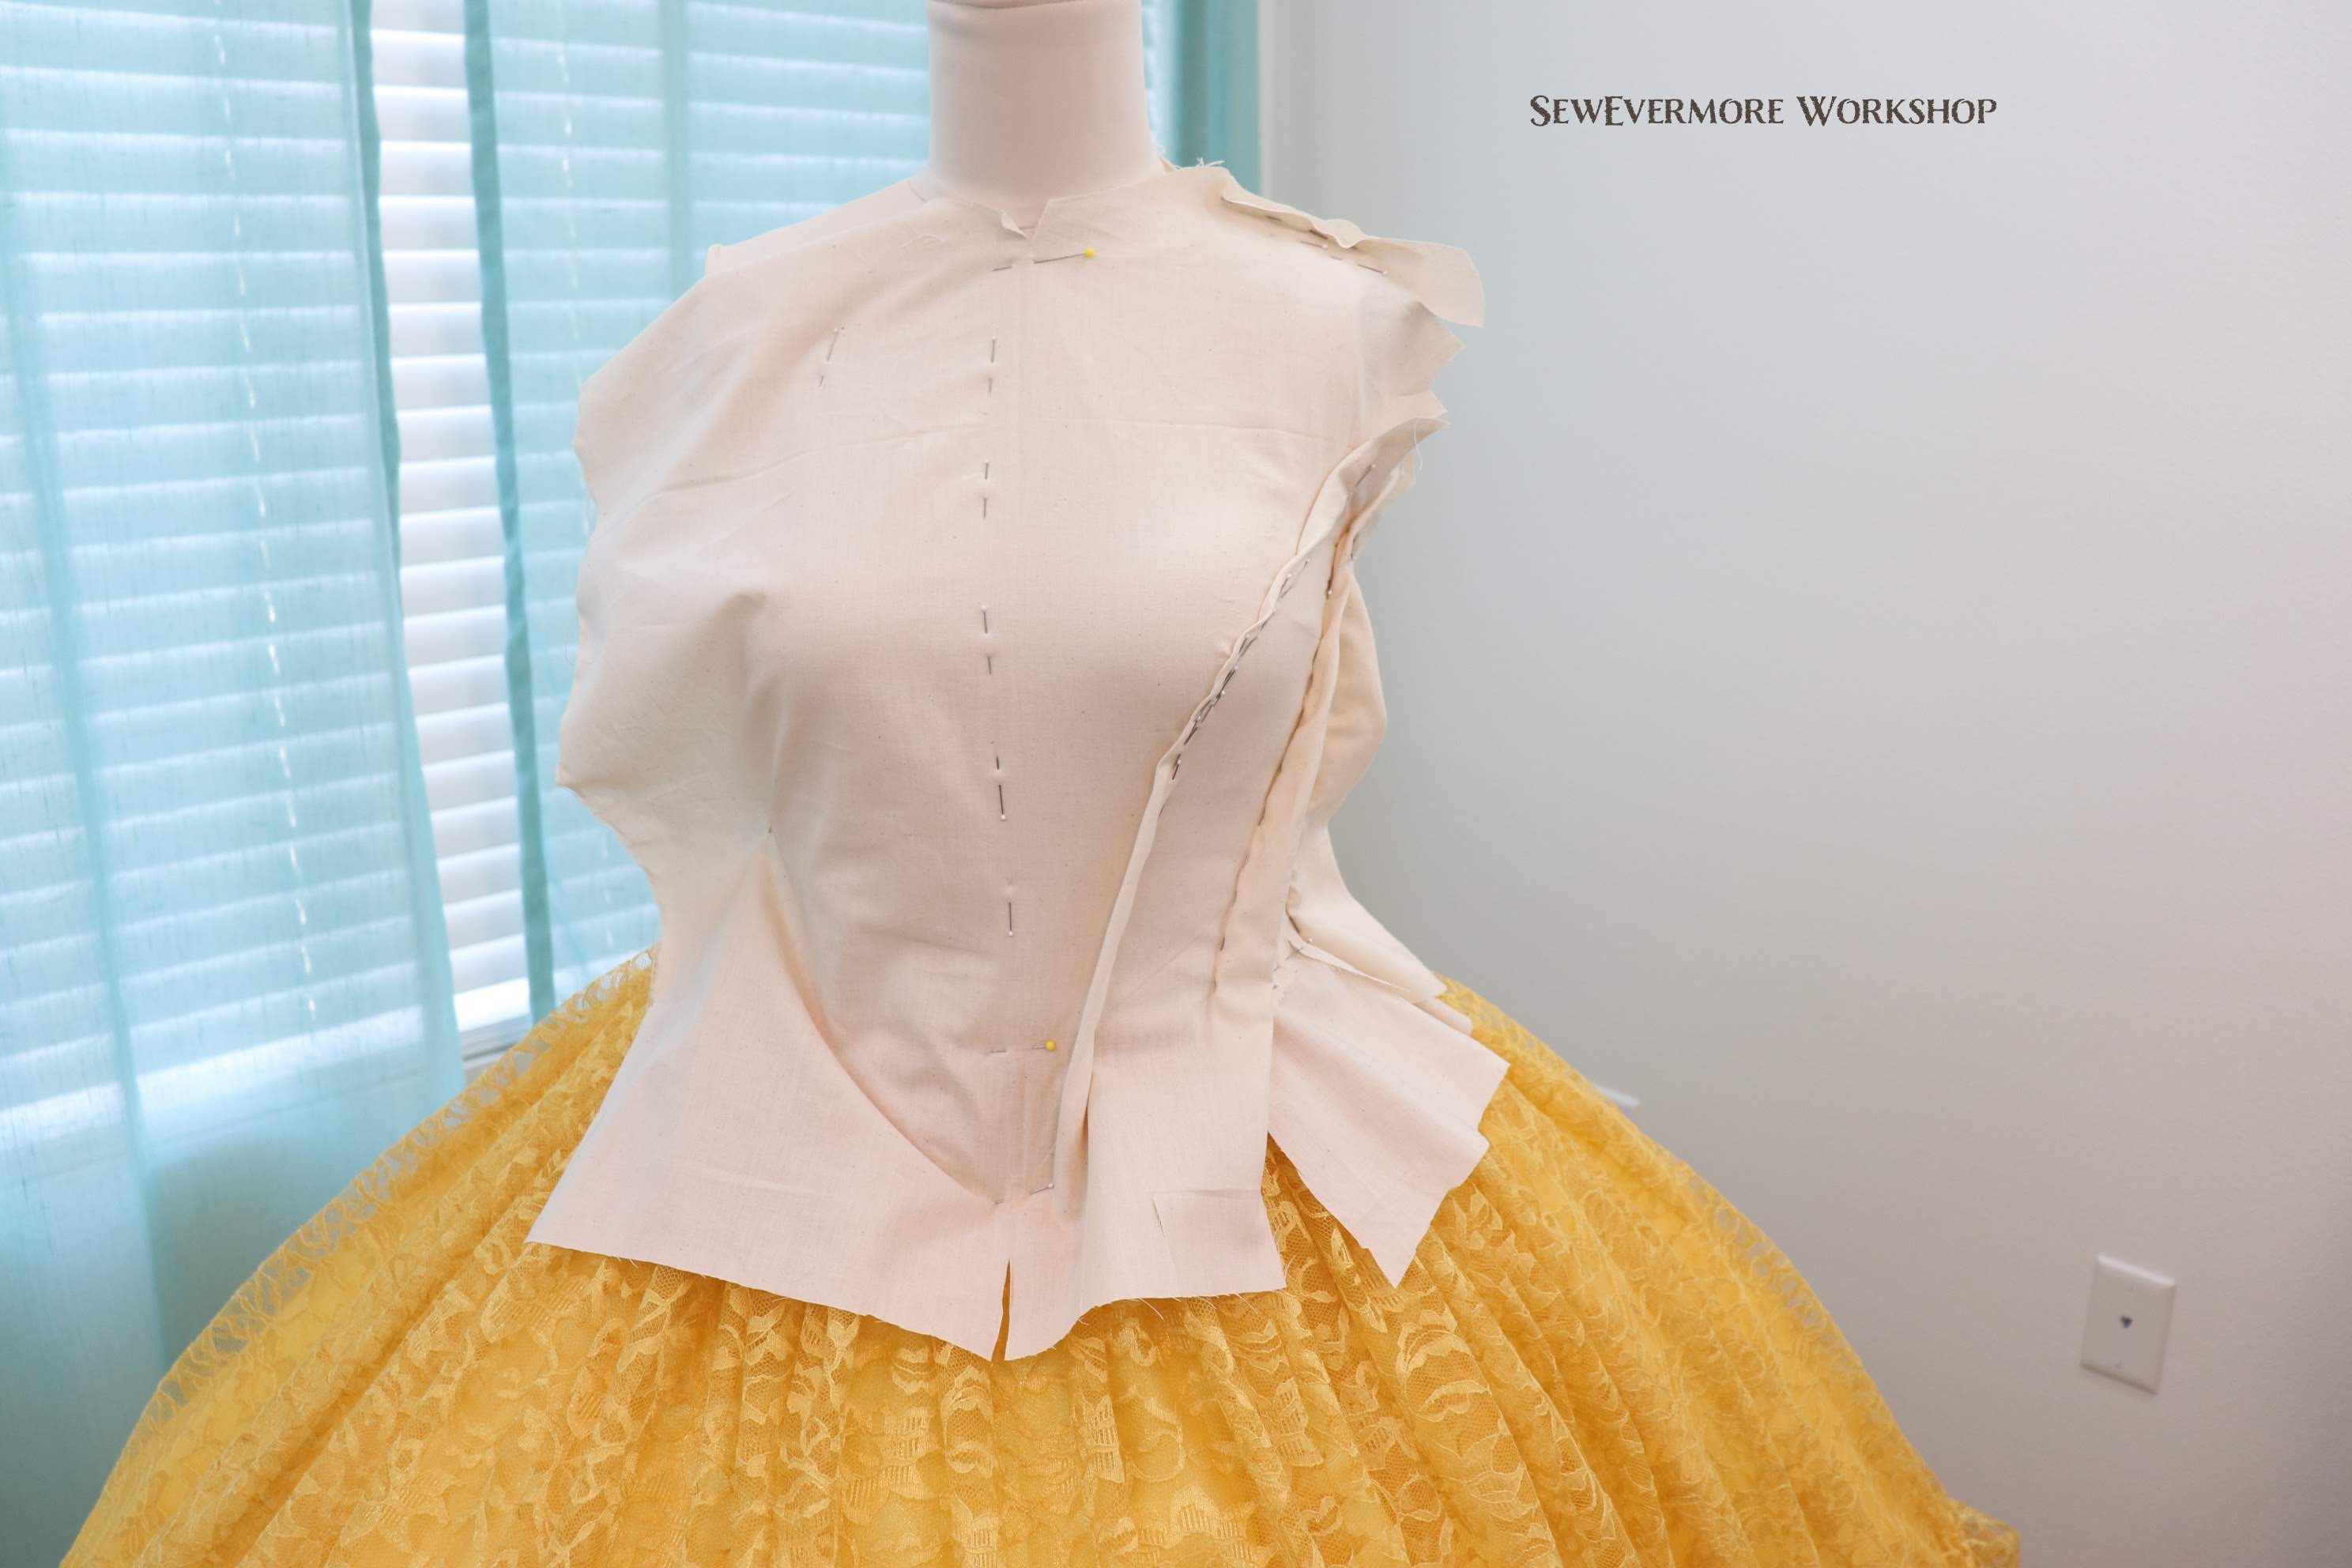
Once the canvas was sewn together I placed it back on the dress form, inside out, so the seams could be adjusted as needed.

I noticed it was a little loose at the bust.

So, I made a slight adjustment. This is also a good time to try it on yourself, or on whoever will be wearing the garment. Since we are not all model perfect like our dress forms it is a good time to make sure it will fit you. (Keep in mind, corset patterns may be a bit small since they are often meant to suck you in.)

When I tried it on myself I noticed that the neck was a bit high, so I may have to adjust that later. I also had to let out the shoulder seams a bit. Just keep in mind, the top, bottom, and armhole seams have not yet been stitched, so the seam allowance is still present.
Next, I sewed together the satin, using the adjustments I had made to the canvas.

It’s still a little rumpled, but it’s a bodice!
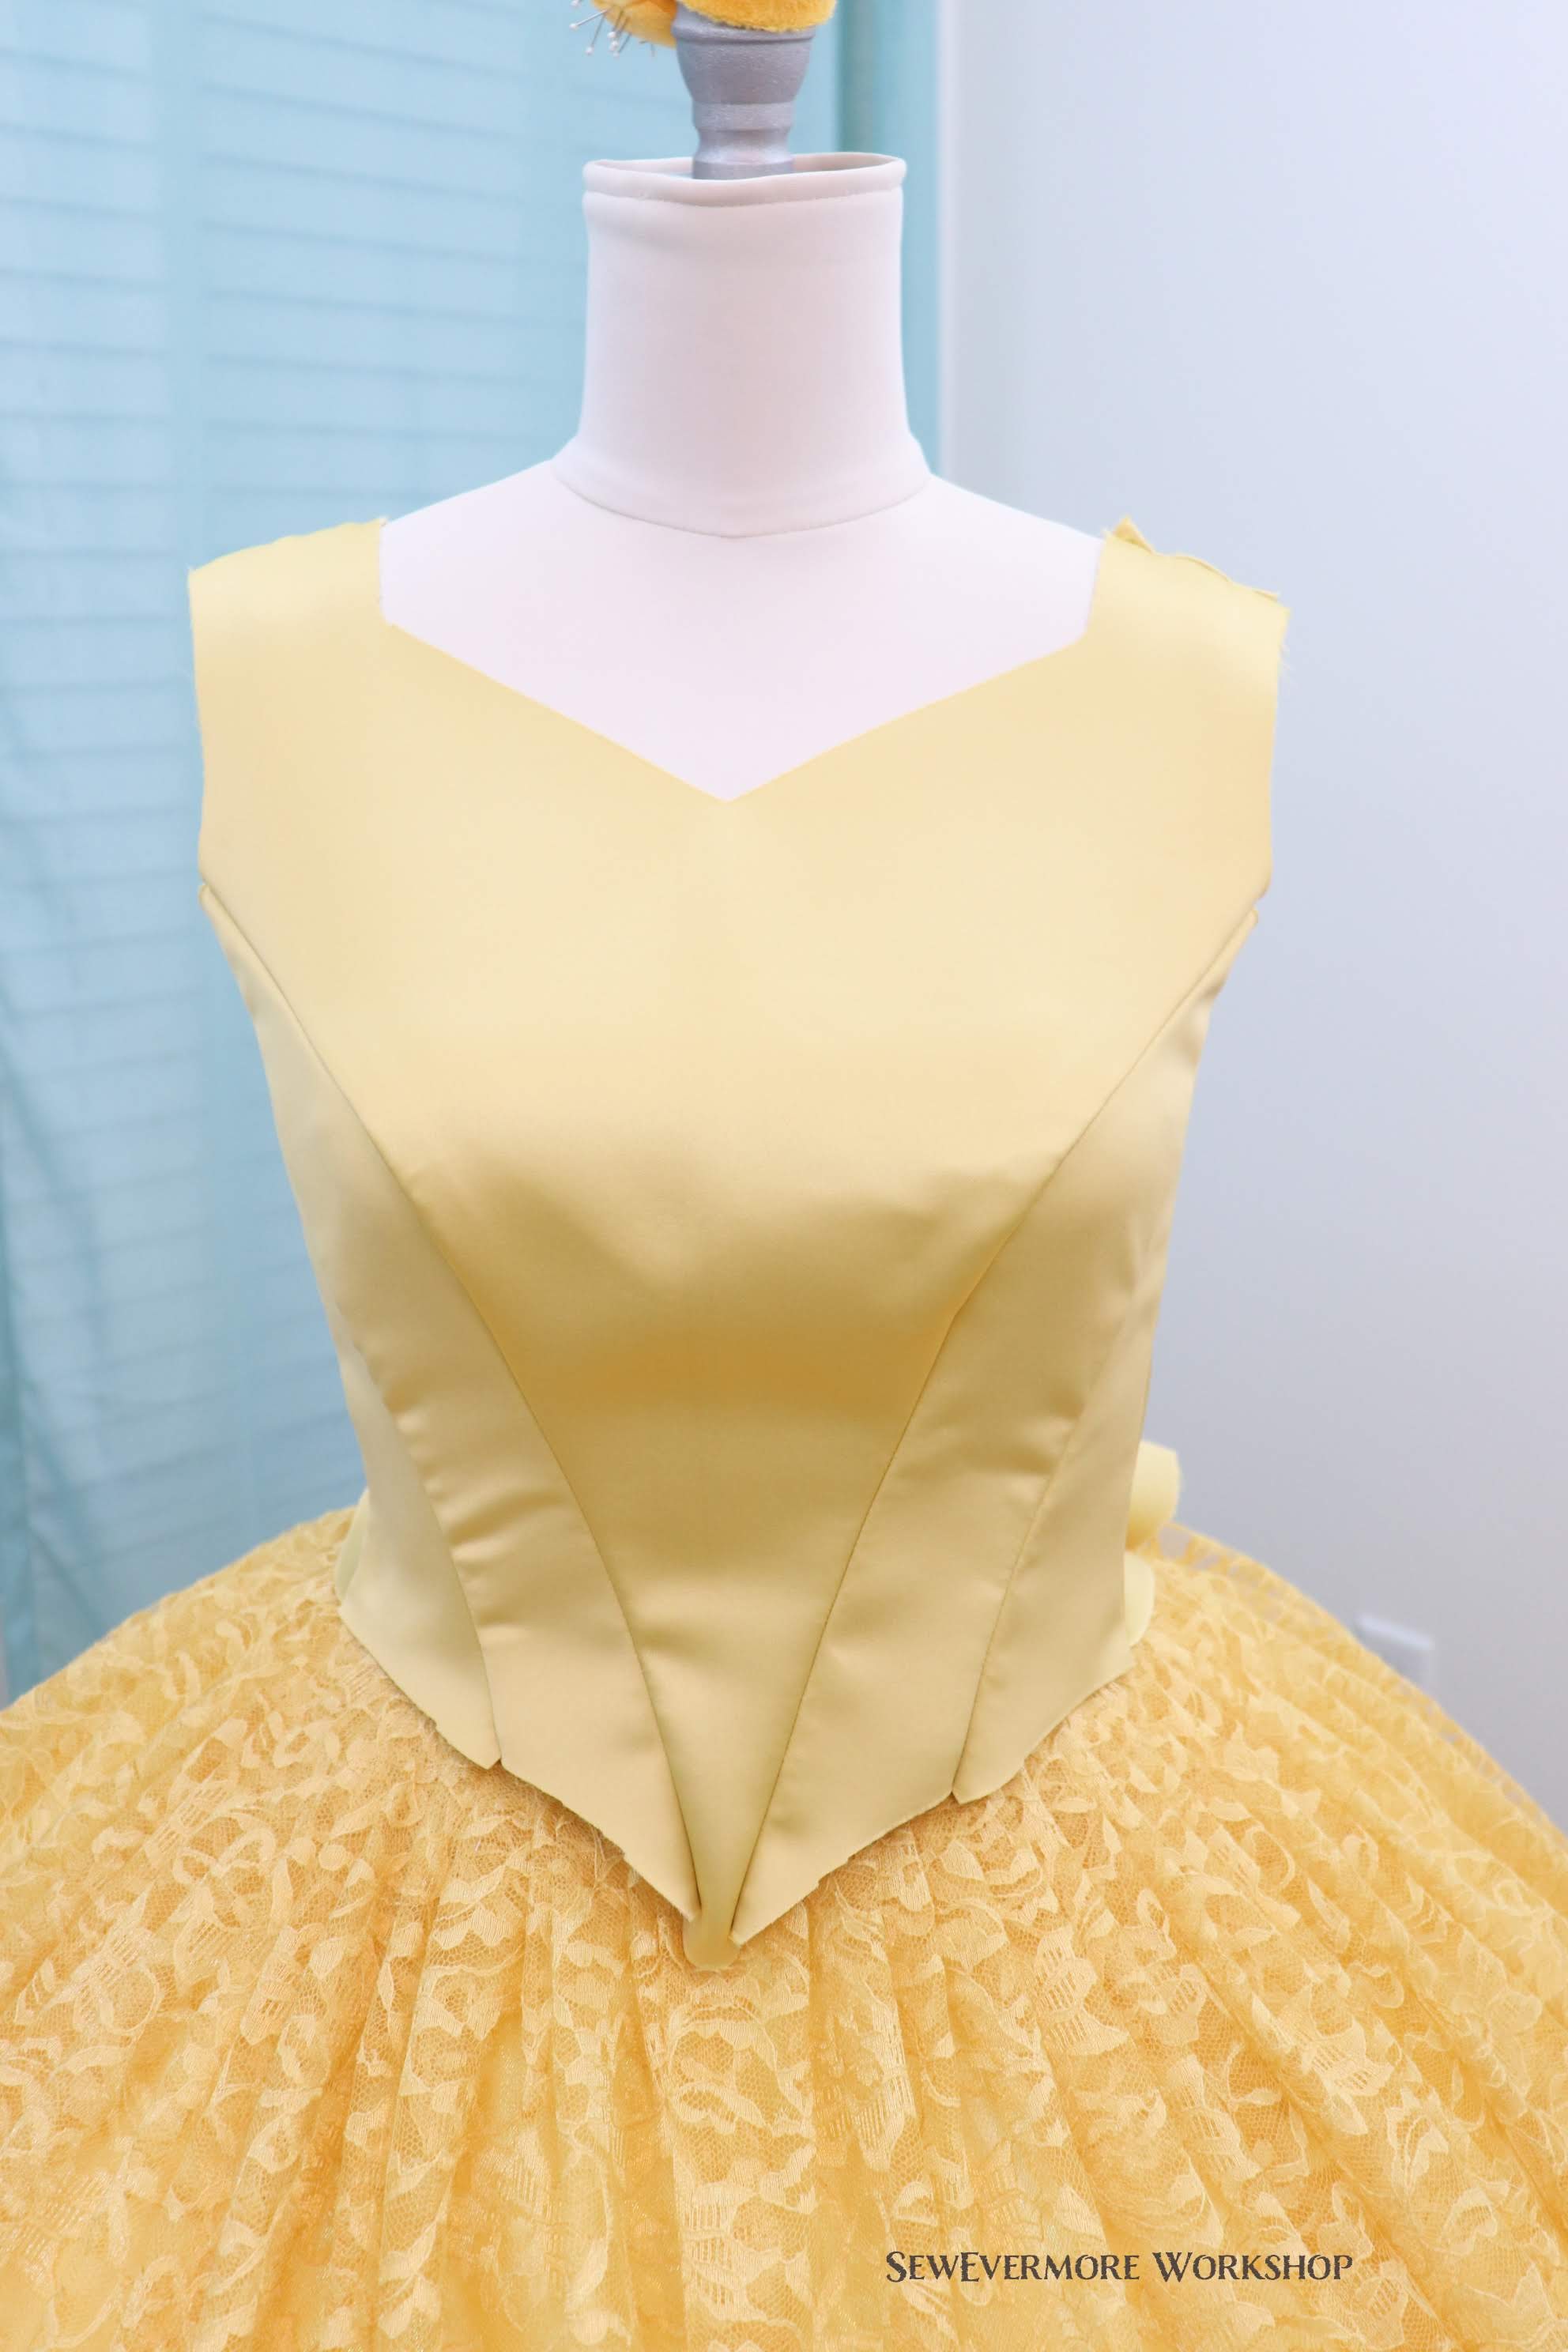
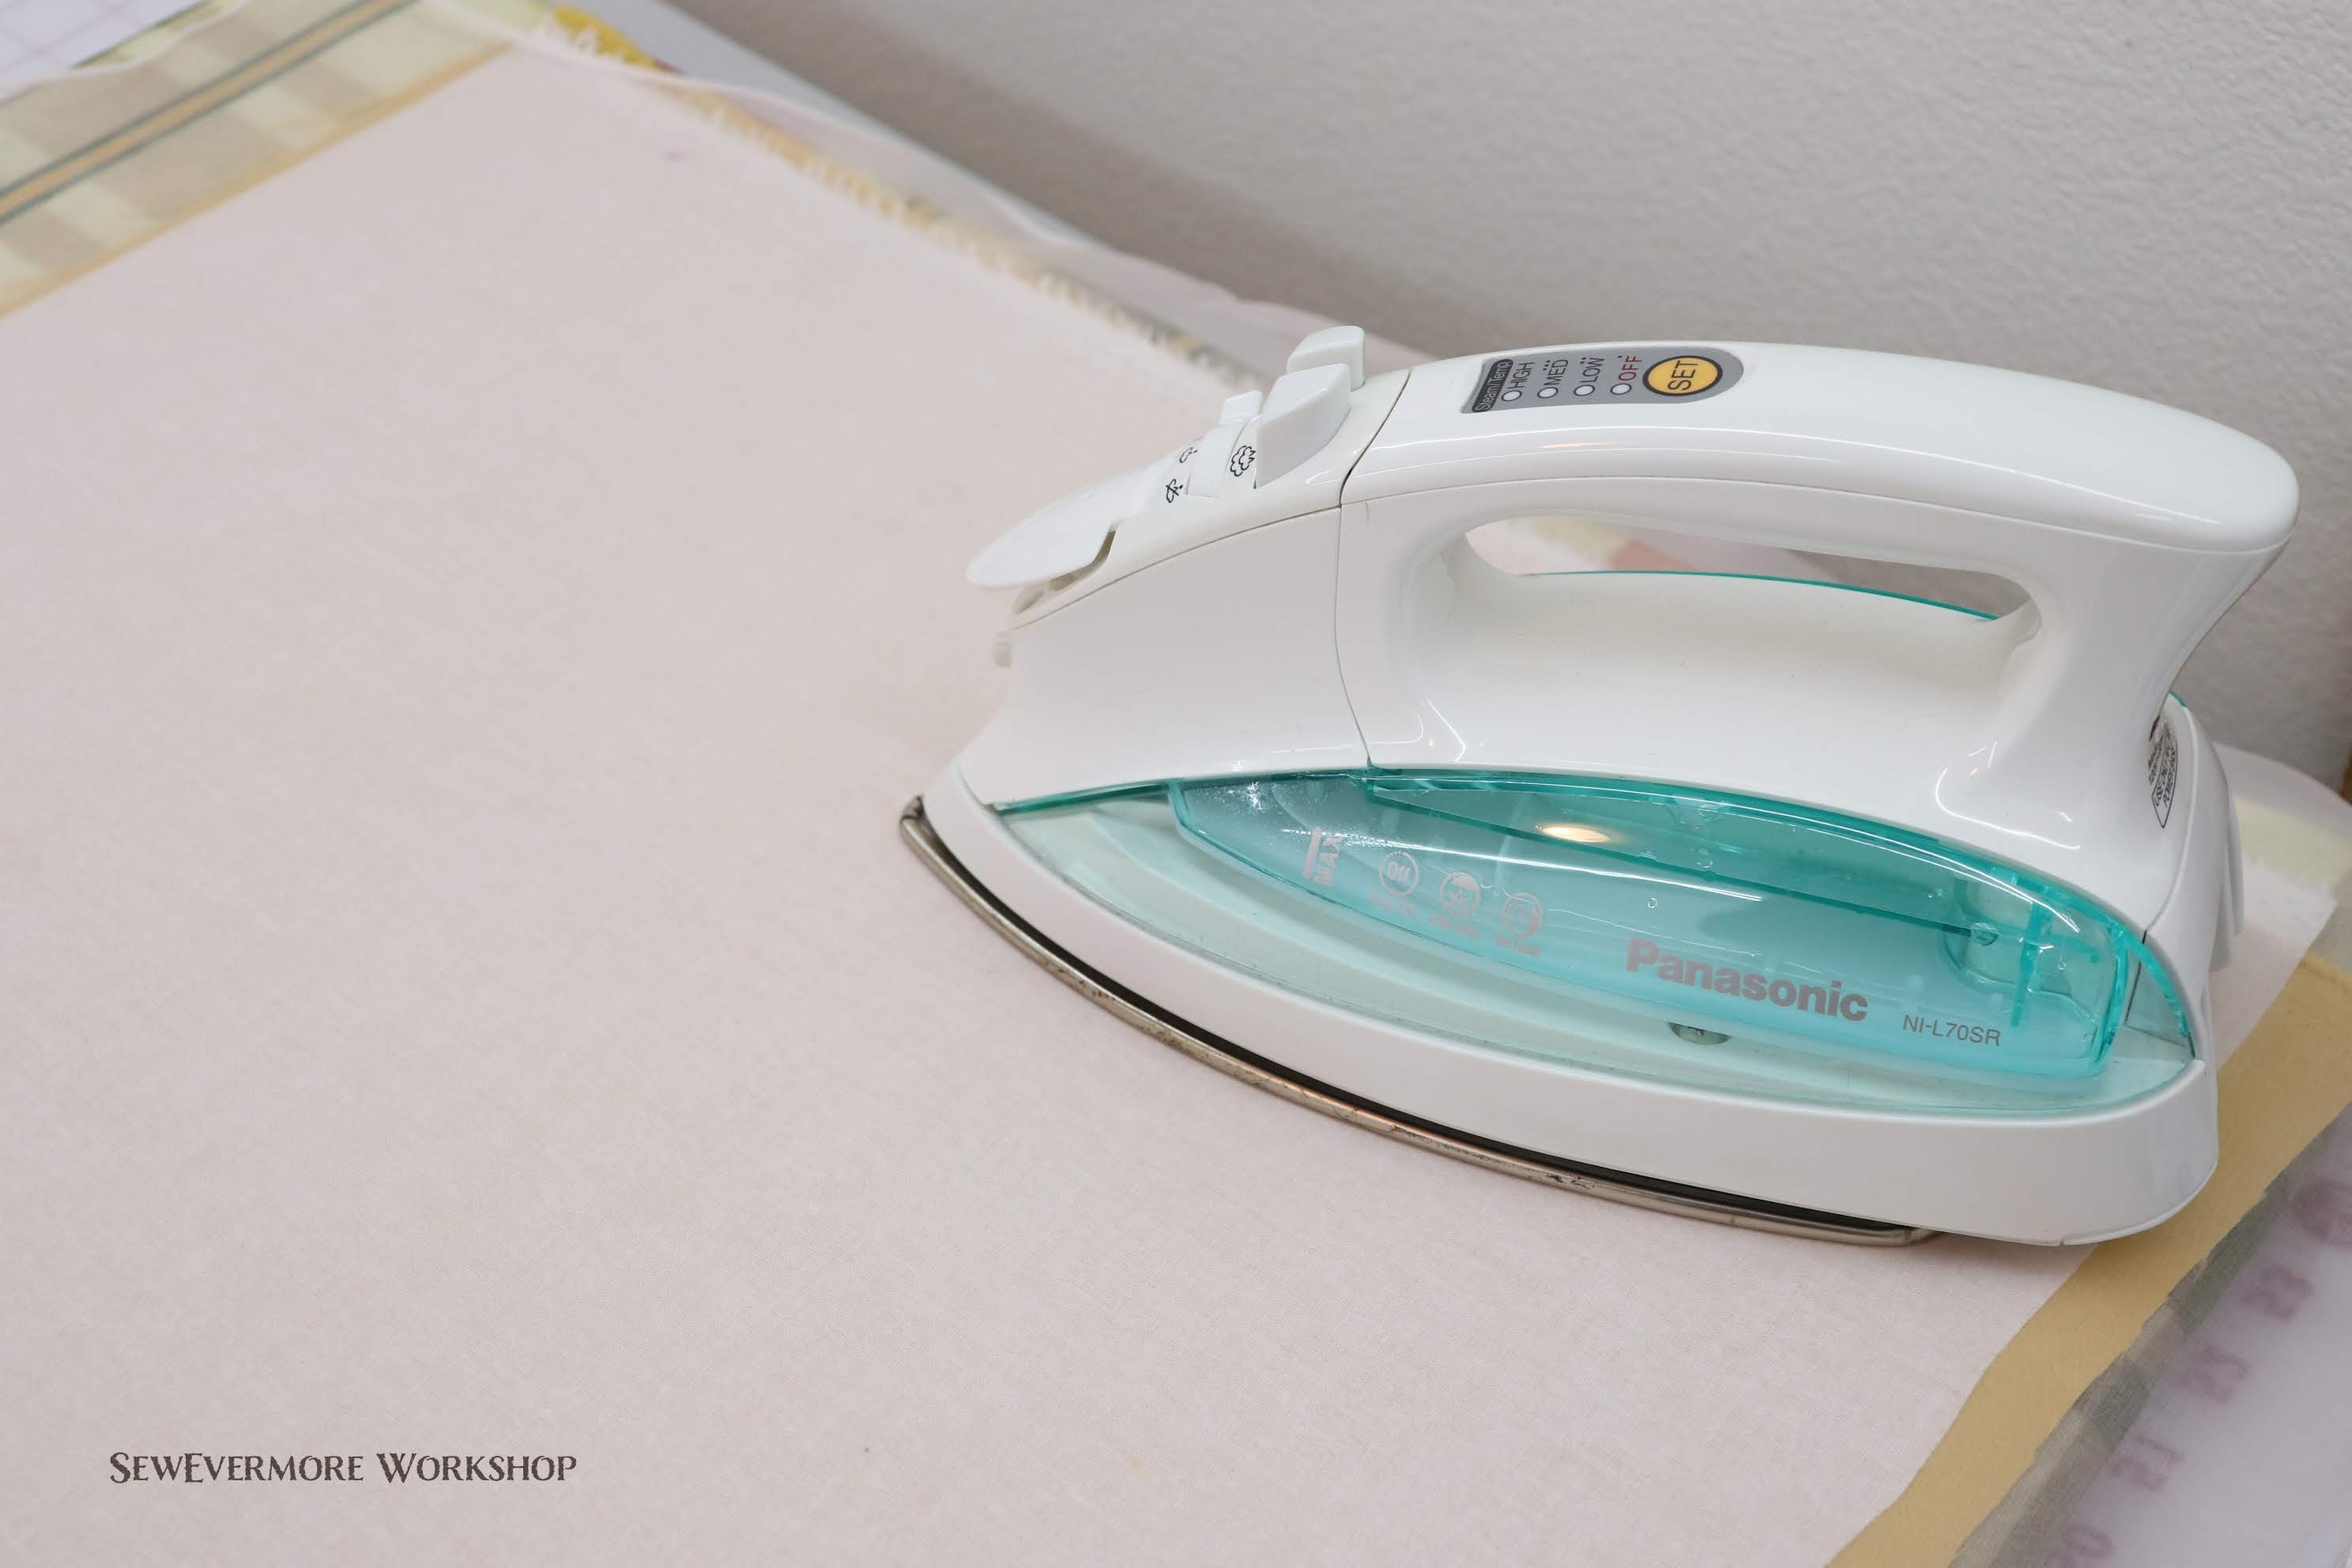
Time for pressing! Pressing makes all the difference in the appearance of your final garment. You’ll probably want to have a pressing ham and press cloth handy. I prefer silk organza press cloths.

I pressed open the seams.
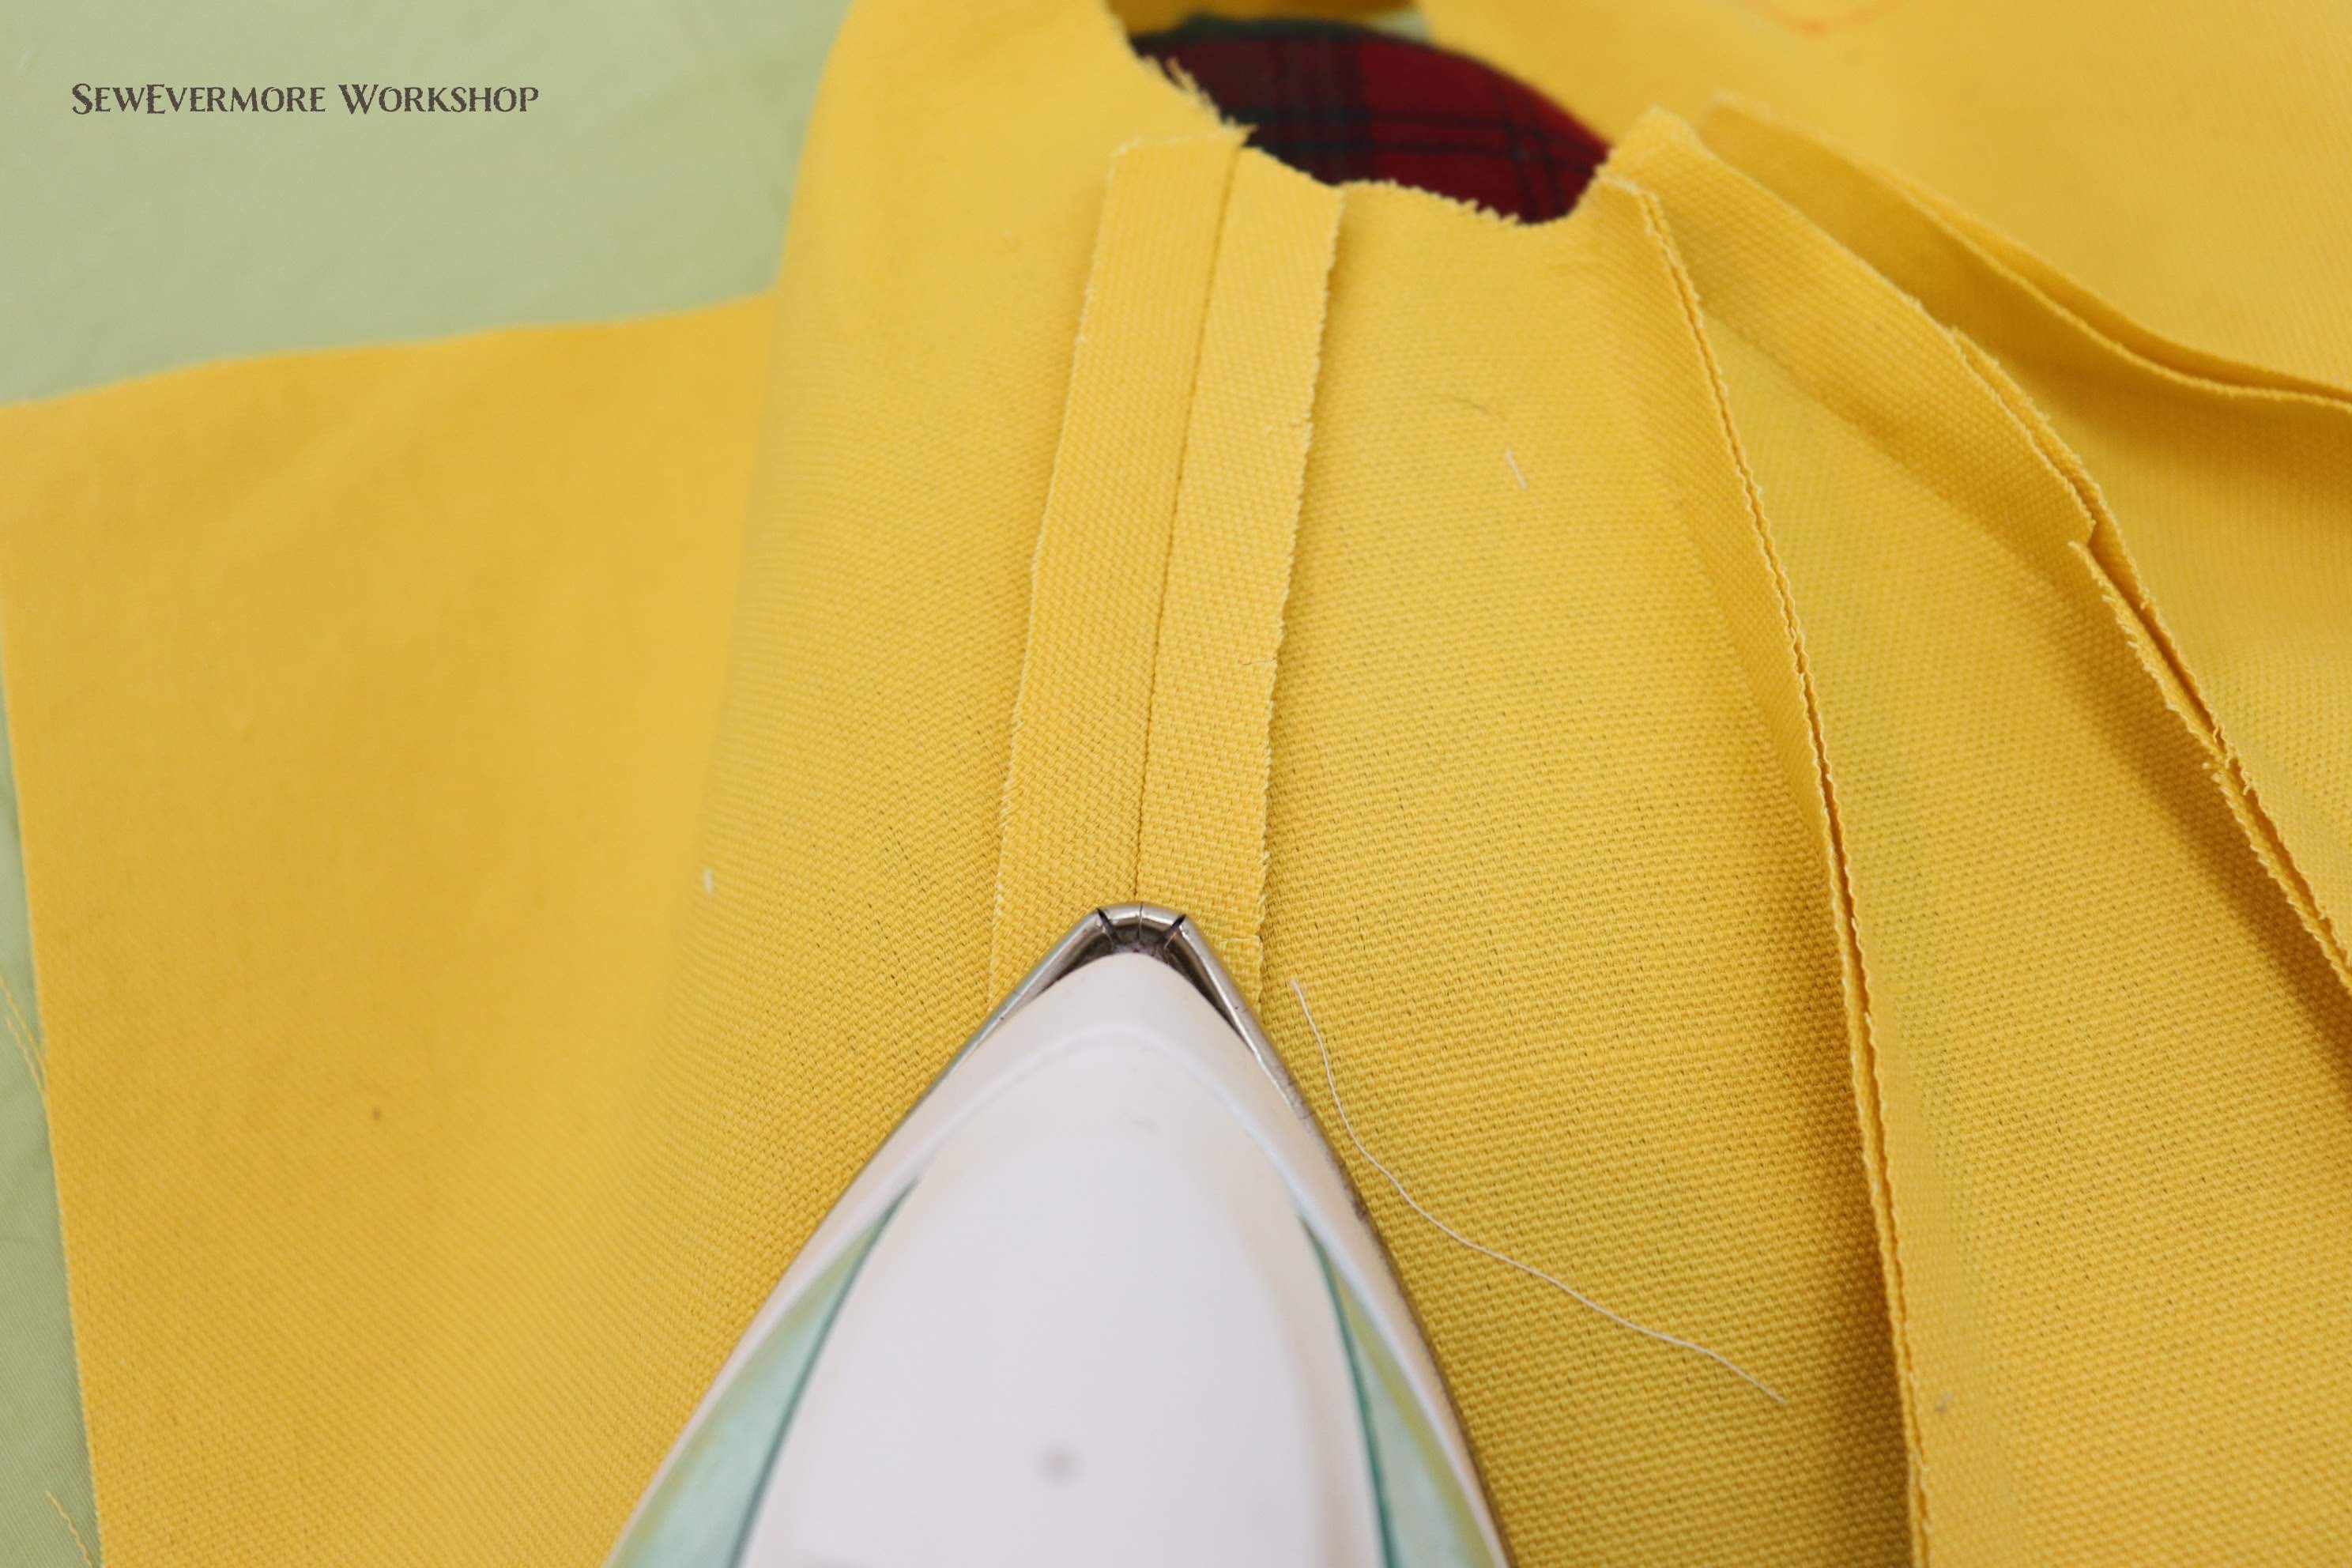
I had to clip the curves of the seam allowance around very rounded places such as the bust. I pressed both the satin and the canvas.
Keep an eye out for my next post, where we will talk about adding boning channels and boning to the bodice.
- Adding the Boning
The first thing you need in order to add boning to a bodice, are casings. You need to have a channel for the bones to slide into. The most common places to add bones are along the seams and at the center back. You can always add more than that depending on how structured you want your bodice.
If you are purchasing your boning you will notice that some types of boning comes in the casing already. You can also buy boning casing separately. I will be making my own using the same duck canvas I used for my lining. Since many of the seams are curved you want to make sure the casings can stretch. So, I cut mine on the bias. This is at a 45 degree angle to the grainline.

I drew my casings 1 1/8 inches (or 9/8 inch) wide. This way they would be slightly wider than my seam allowances.

After cutting them into strips I have plenty of casings.

Next, I pinned the casings over each seam. This is done on the wrong side of the lining fabric, the canvas. That way all of the boning seams are on hidden on the lining and are not visible on the outside of the bodice.

It takes some time to make sure the casings lay flat over very curved sections.

I decided to pin all of my casings at once. This was mostly because my dog was sitting on my lap and didn’t want to move. I have to admit that doing this all at once can make for a prickly experience when sewing. I did get poked a few times. Therefore, if you prefer you can always pin one at a time, and then sew, so you don’t have to worry about all of the pins. You can also simply hold the casing in place adjusting as you sew if you don’t want to pin.
The boning that I will be adding to my corset is 1/4 inch wide. So, I will create a 3/8 inch wide channel to slide it into. This will allow the bone to slide in easily and takes into account the thickness of the metal. Since my casings are 9/8 inches, I will take a 3/8 inch seam allowance on each side leaving the 3/8 inch channel in the middle. It is important to keep an accurate seam allowance. If your seam allowance is too big, your channel will be too small and the bone won’t fit. If your seam allowance is too small, your channel will be too big, and the bone will slide around.
Normally, I sew my casings all of the way to the edge of the fabric. I decided to try something different this time. I started and stopped stitching 1/2 inch from each end. I want to see if trimming the bulk of the casing out of the seam allowance will help with how it lays. I will keep you posted as to which method I prefer after the construction is complete.
Now all of my casings are attached!

I trimmed off the extra edges of the casing that extended beyond the edge of the bodice.
I’m ready to add the boning.
The first thing I did was stitch the top of each channel closed 5/8 inch from the top edge. The seam allowance will be at 1/2 inch so this will provide a bit of a buffer so the boning doesn’t get caught in my seams. The will help when inserting the bones as well, so they don’t slide out.
Then I marked 5/8 inch from the bottom on each channel. This will give me a reference to where the closing seam will be.

Before inserting your boning, you need to determine what type of boning is best for you. Plastic boning is lightweight, flexible, affordable, easy to find, easy to cut, and often comes in the casing. That said, it offers the least amount of structure.
In my bodice I will be using a combination of flat steel boning, the white you see below, and spiral steel boning. I chose the steel boning because of the great structure it provides. The spiral boning is flexible and lays beautifully, but is very supportive. The flat steel, with its inability to bend sideways, provides great straight lines. Both of these types of boning can be purchased on a roll, or in pre-cut lengths. If you plan to cut the boning yourself it helps tremendously if you have proper tools. See my previous post on my Corset making tools if you would like information on what I use. If you choose to purchase pre-cut lengths take the time to measure carefully so all of your bones fit.
I will be using the flat boning for the straight channels. Those at the center back, and the center front. I will use spiral boning for everything else. I laid the boning along the back channel, and trimmed it to the proper length (about 1/8 – 1/4 inch shorter than my channel.) You don’t want it to be too long as you don’t want to accidentally stitch on it, or have it poke through.

If you plan to use a lot of flat boning, I like to use a sharpie to label which casing the bone goes into.

I use a metal file to sand down the sharp corners of the cut boning.

Next, I wrap the very end in PTFE tape to cover the exposed metal end. (I’ve also used a bit of plasti-dip instead of the tape, see my post, but the tape is definitely faster and less messy.)

Then I slide the boning into the appropriate channel.

Up next is the spiral boning. You use metal tips to cover the ends of the spiral boning. I tipped one end of the boning, and then as with the flat boning, I lay it over the channel and trim it to the appropriate length.
Then cap the other end and slide it into the channel.
While the idea of using steel boning can be overwhelming at first, if you have the right tools and patience it is not terribly difficult. With pre-cut boning available the difficulty is not any more difficult than plastic boning. You just have to be careful not to sew over it with your machine. My middle school students have been able to successfully cut and tip their own metal boning. So, it can be done!
- Bodice & Sleeves
Once the boning was inserted into the casings there were just a few more steps to complete. The first thing I did was to stitch across the bottom of each casing with a 5/8 inch seam allowance. This was to make sure that the boning doesn’t fall out and to ensure that it is out of the path of the 1/2 inch seam allowance.
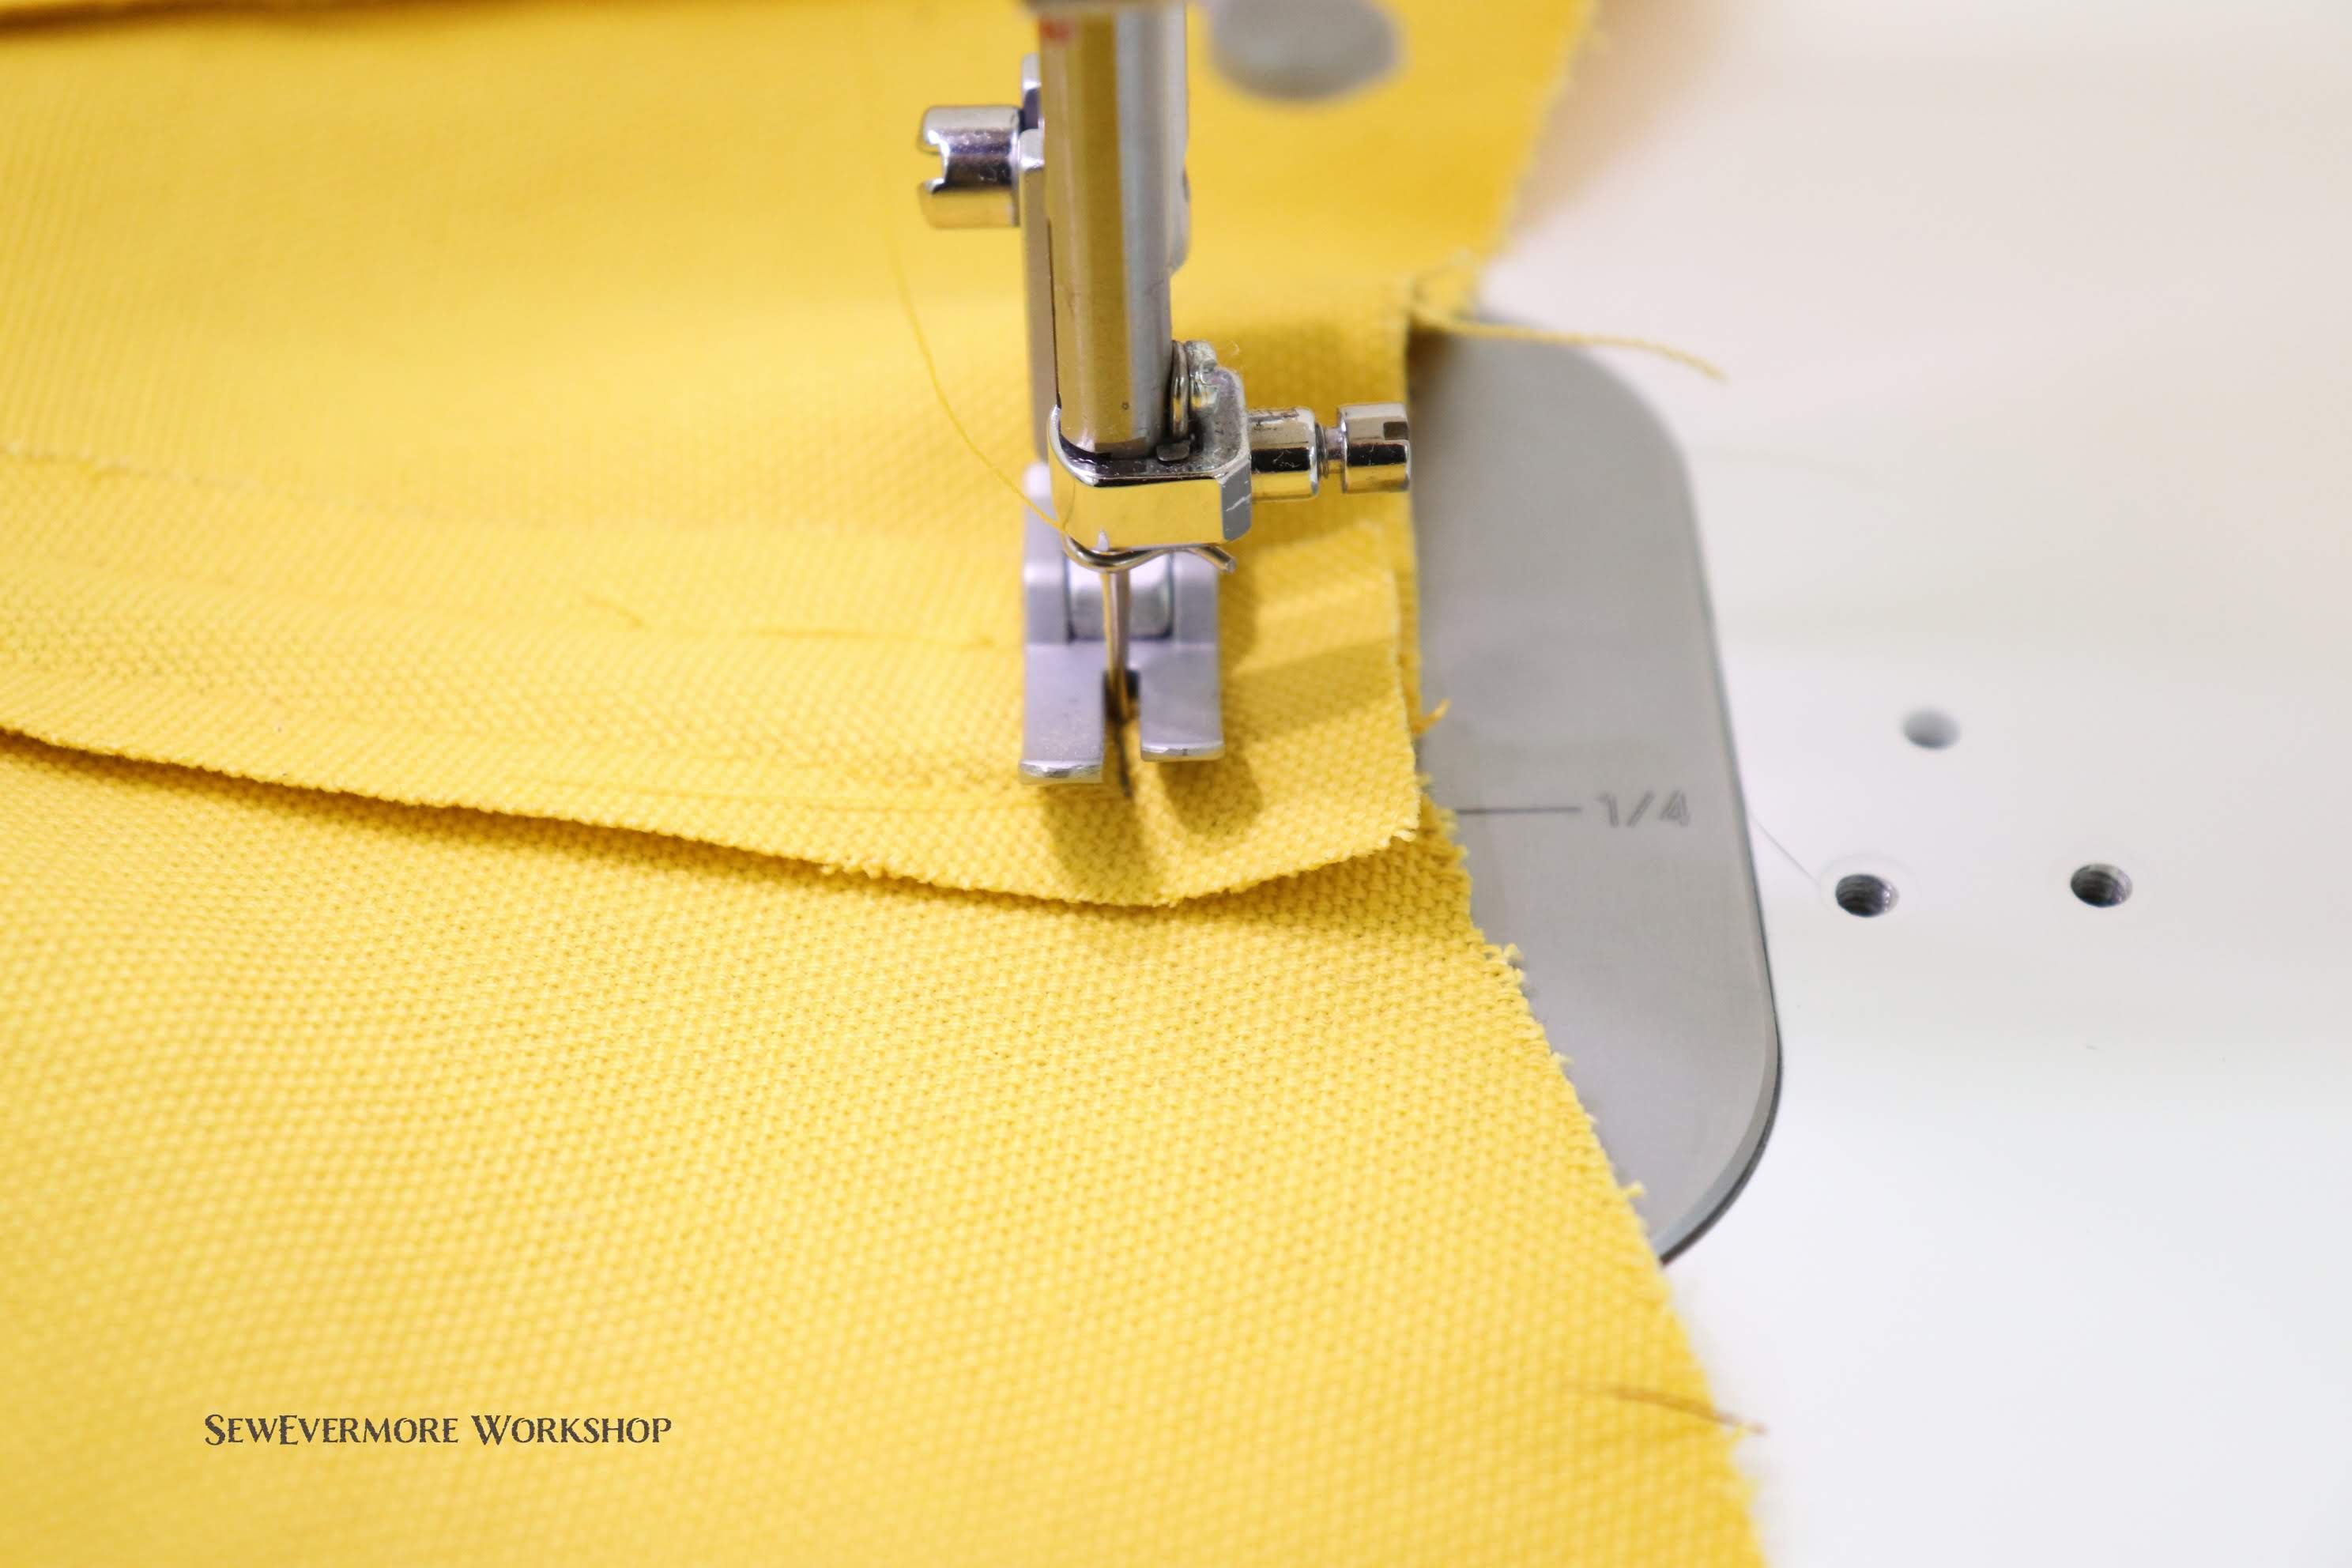
I then noticed that the edges of the casings were sticking out a bit. I decided to try something new and used about a 1/16 inch seam allowance to stitch the sides of the casings to the lining.
I do think this helped the casings (and the seam allowances hidden beneath) to lay flatter. I had to clip the edges of the casing at the bust curve. You can see the before and after pictures below.


I noticed the casings were just a bit visible on the front of the bodice, but I am hoping a good press later will help conceal them.
With the boning and casings in place, it was time to connect the lining to the main fabric. Carefully, aligning seams and edges I pinned all of the way around the bodice connecting the two layers with wrong sides together. (This would be a good time to correct any errors.)

Next, I basted around the edges with a 3/8 inch seam allowance. This is quite a sturdy bodice, and I am pleased with how it turned out.

Next up, adding sleeves. This is a step that a lot of people may skip. Sleeves definitely aren’t necessary, but since this will probably be worn at a school I will be adding sleeves for modesty. They should end up being mostly, if not entirely, covered by the decoration that will be added across the neck line.
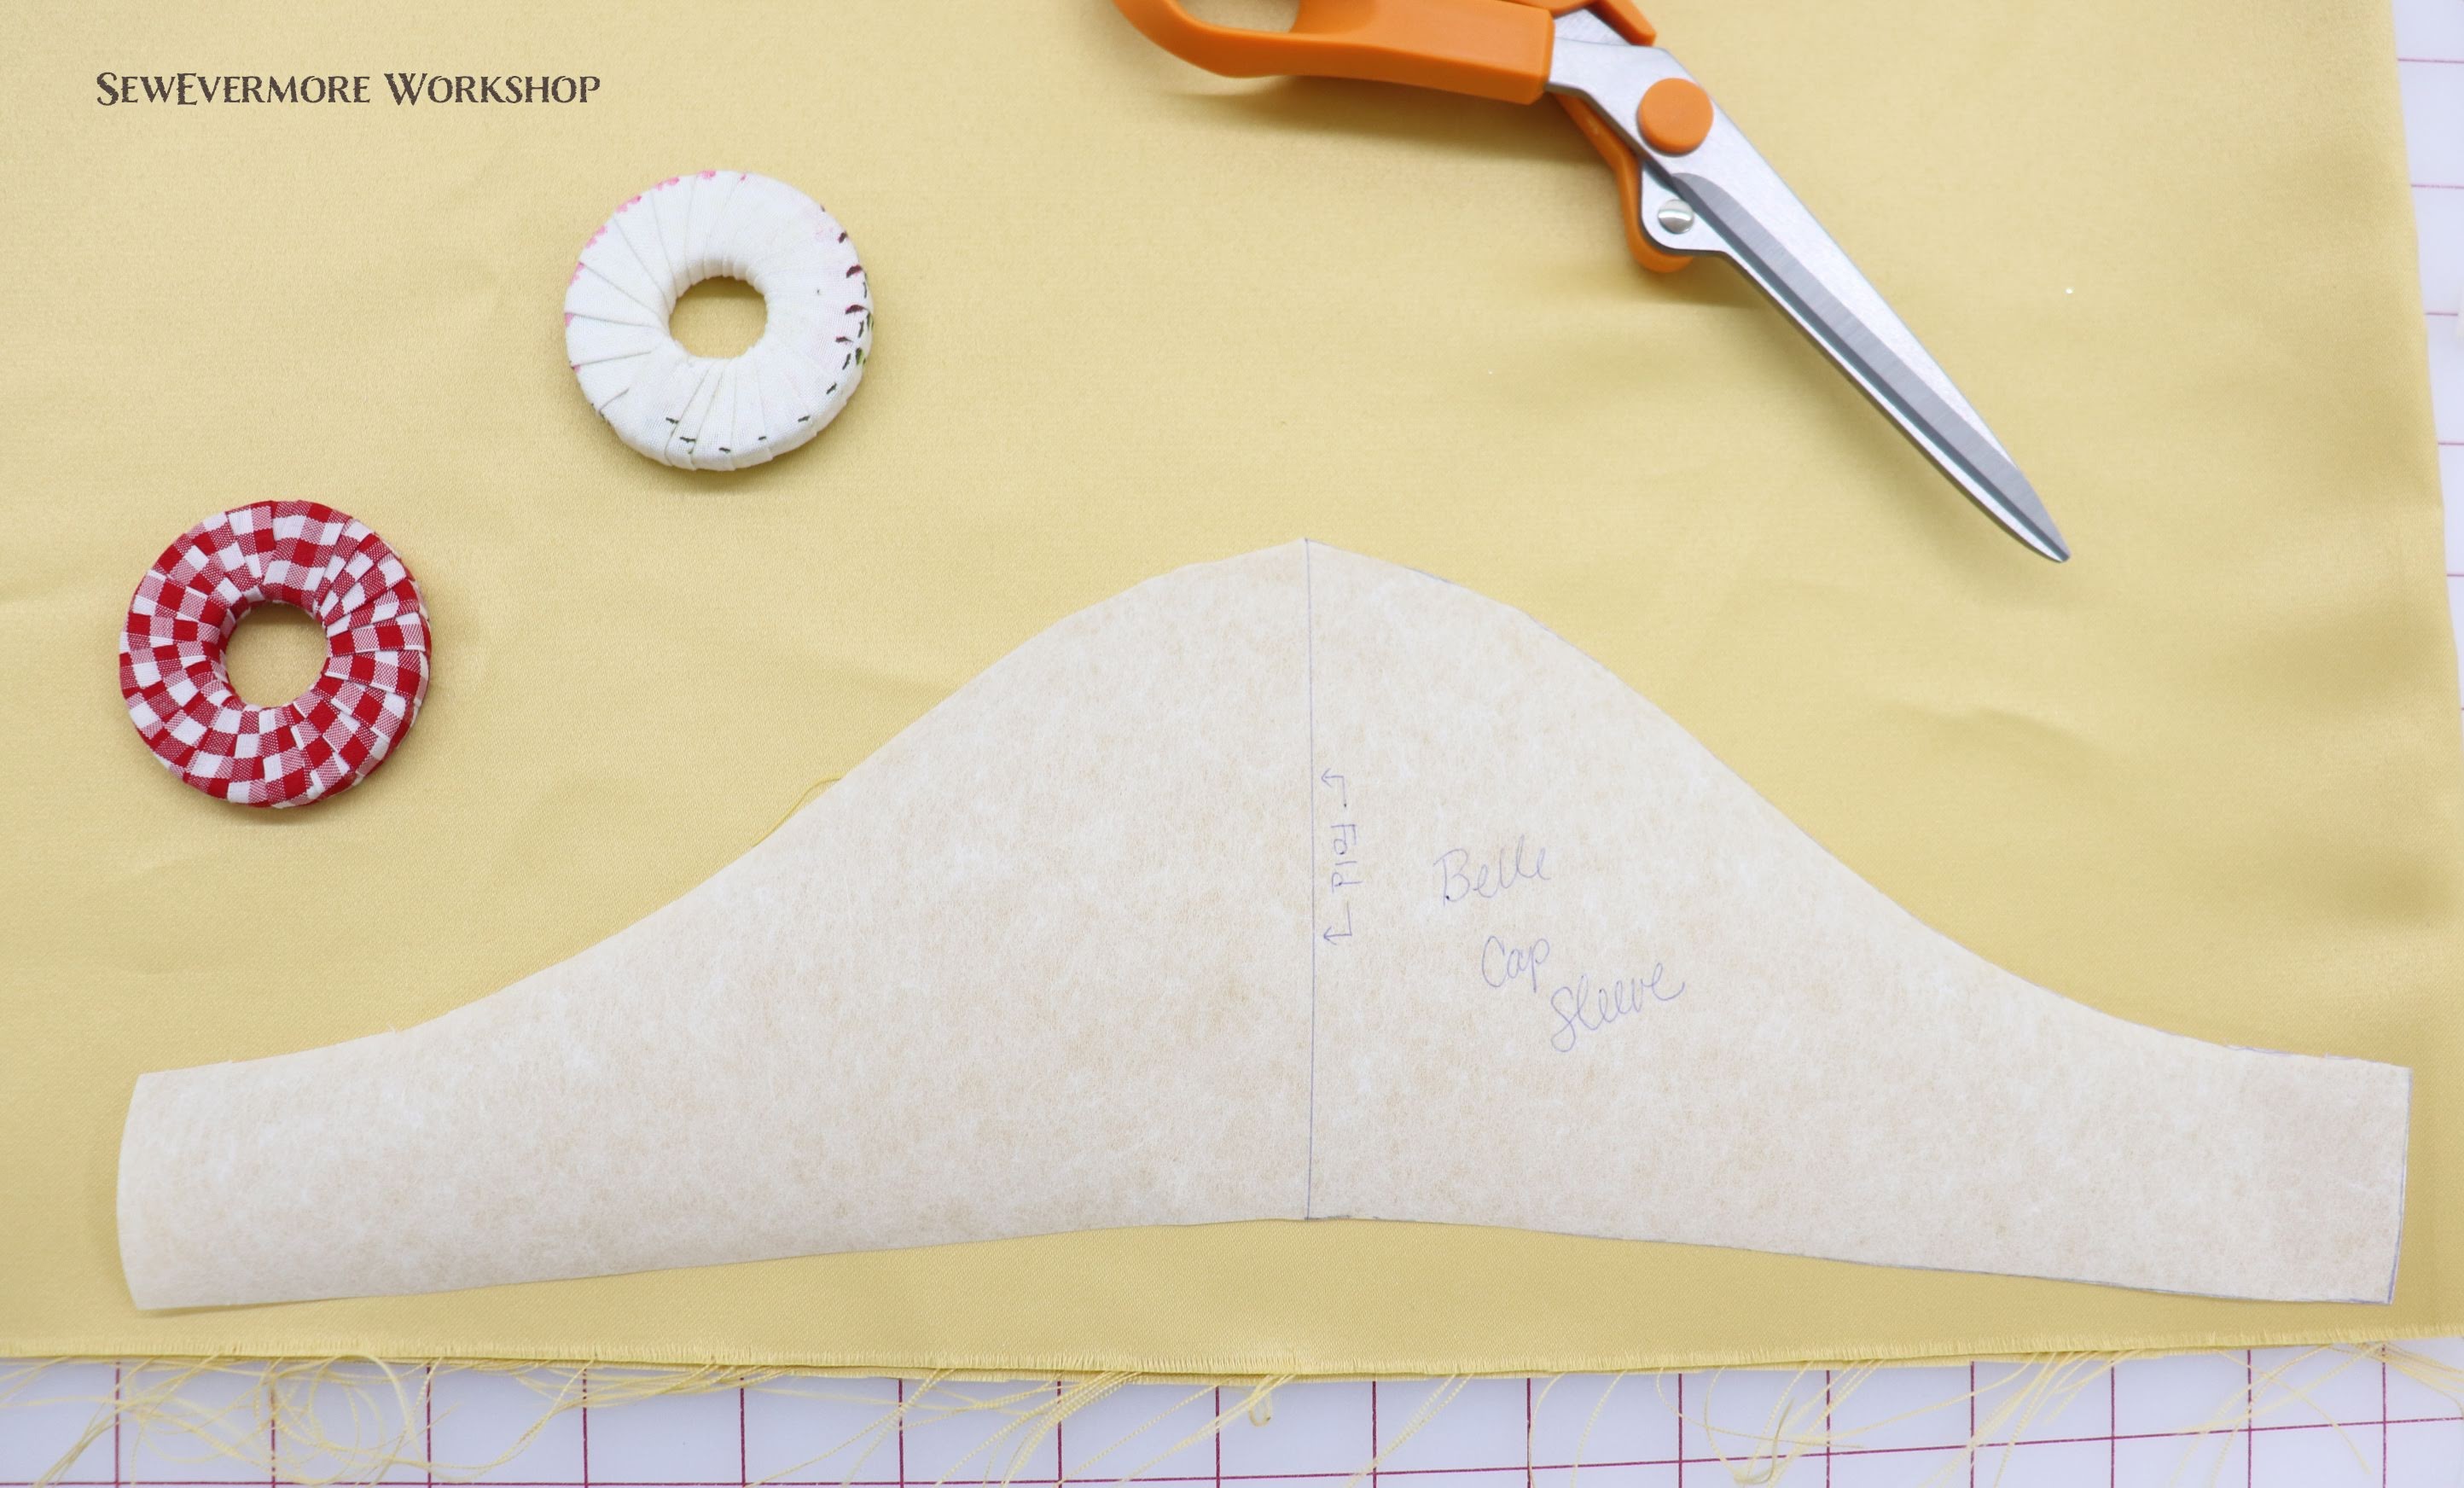
I am not great at draping sleeves, so I started by drafting a simple sleeve pattern. If you are not comfortable drawing your own you can always use a sleeve pattern from another garment pattern. I actually do that all of the time, I’ll go through my store bought patterns and select bits and pieces from different patterns and put them together to create my own unique garment. Before I started draping my own patterns, mix and matching from store bought patterns was my go to method for cosplay.

I pinned it to the bodice to see how it would look.

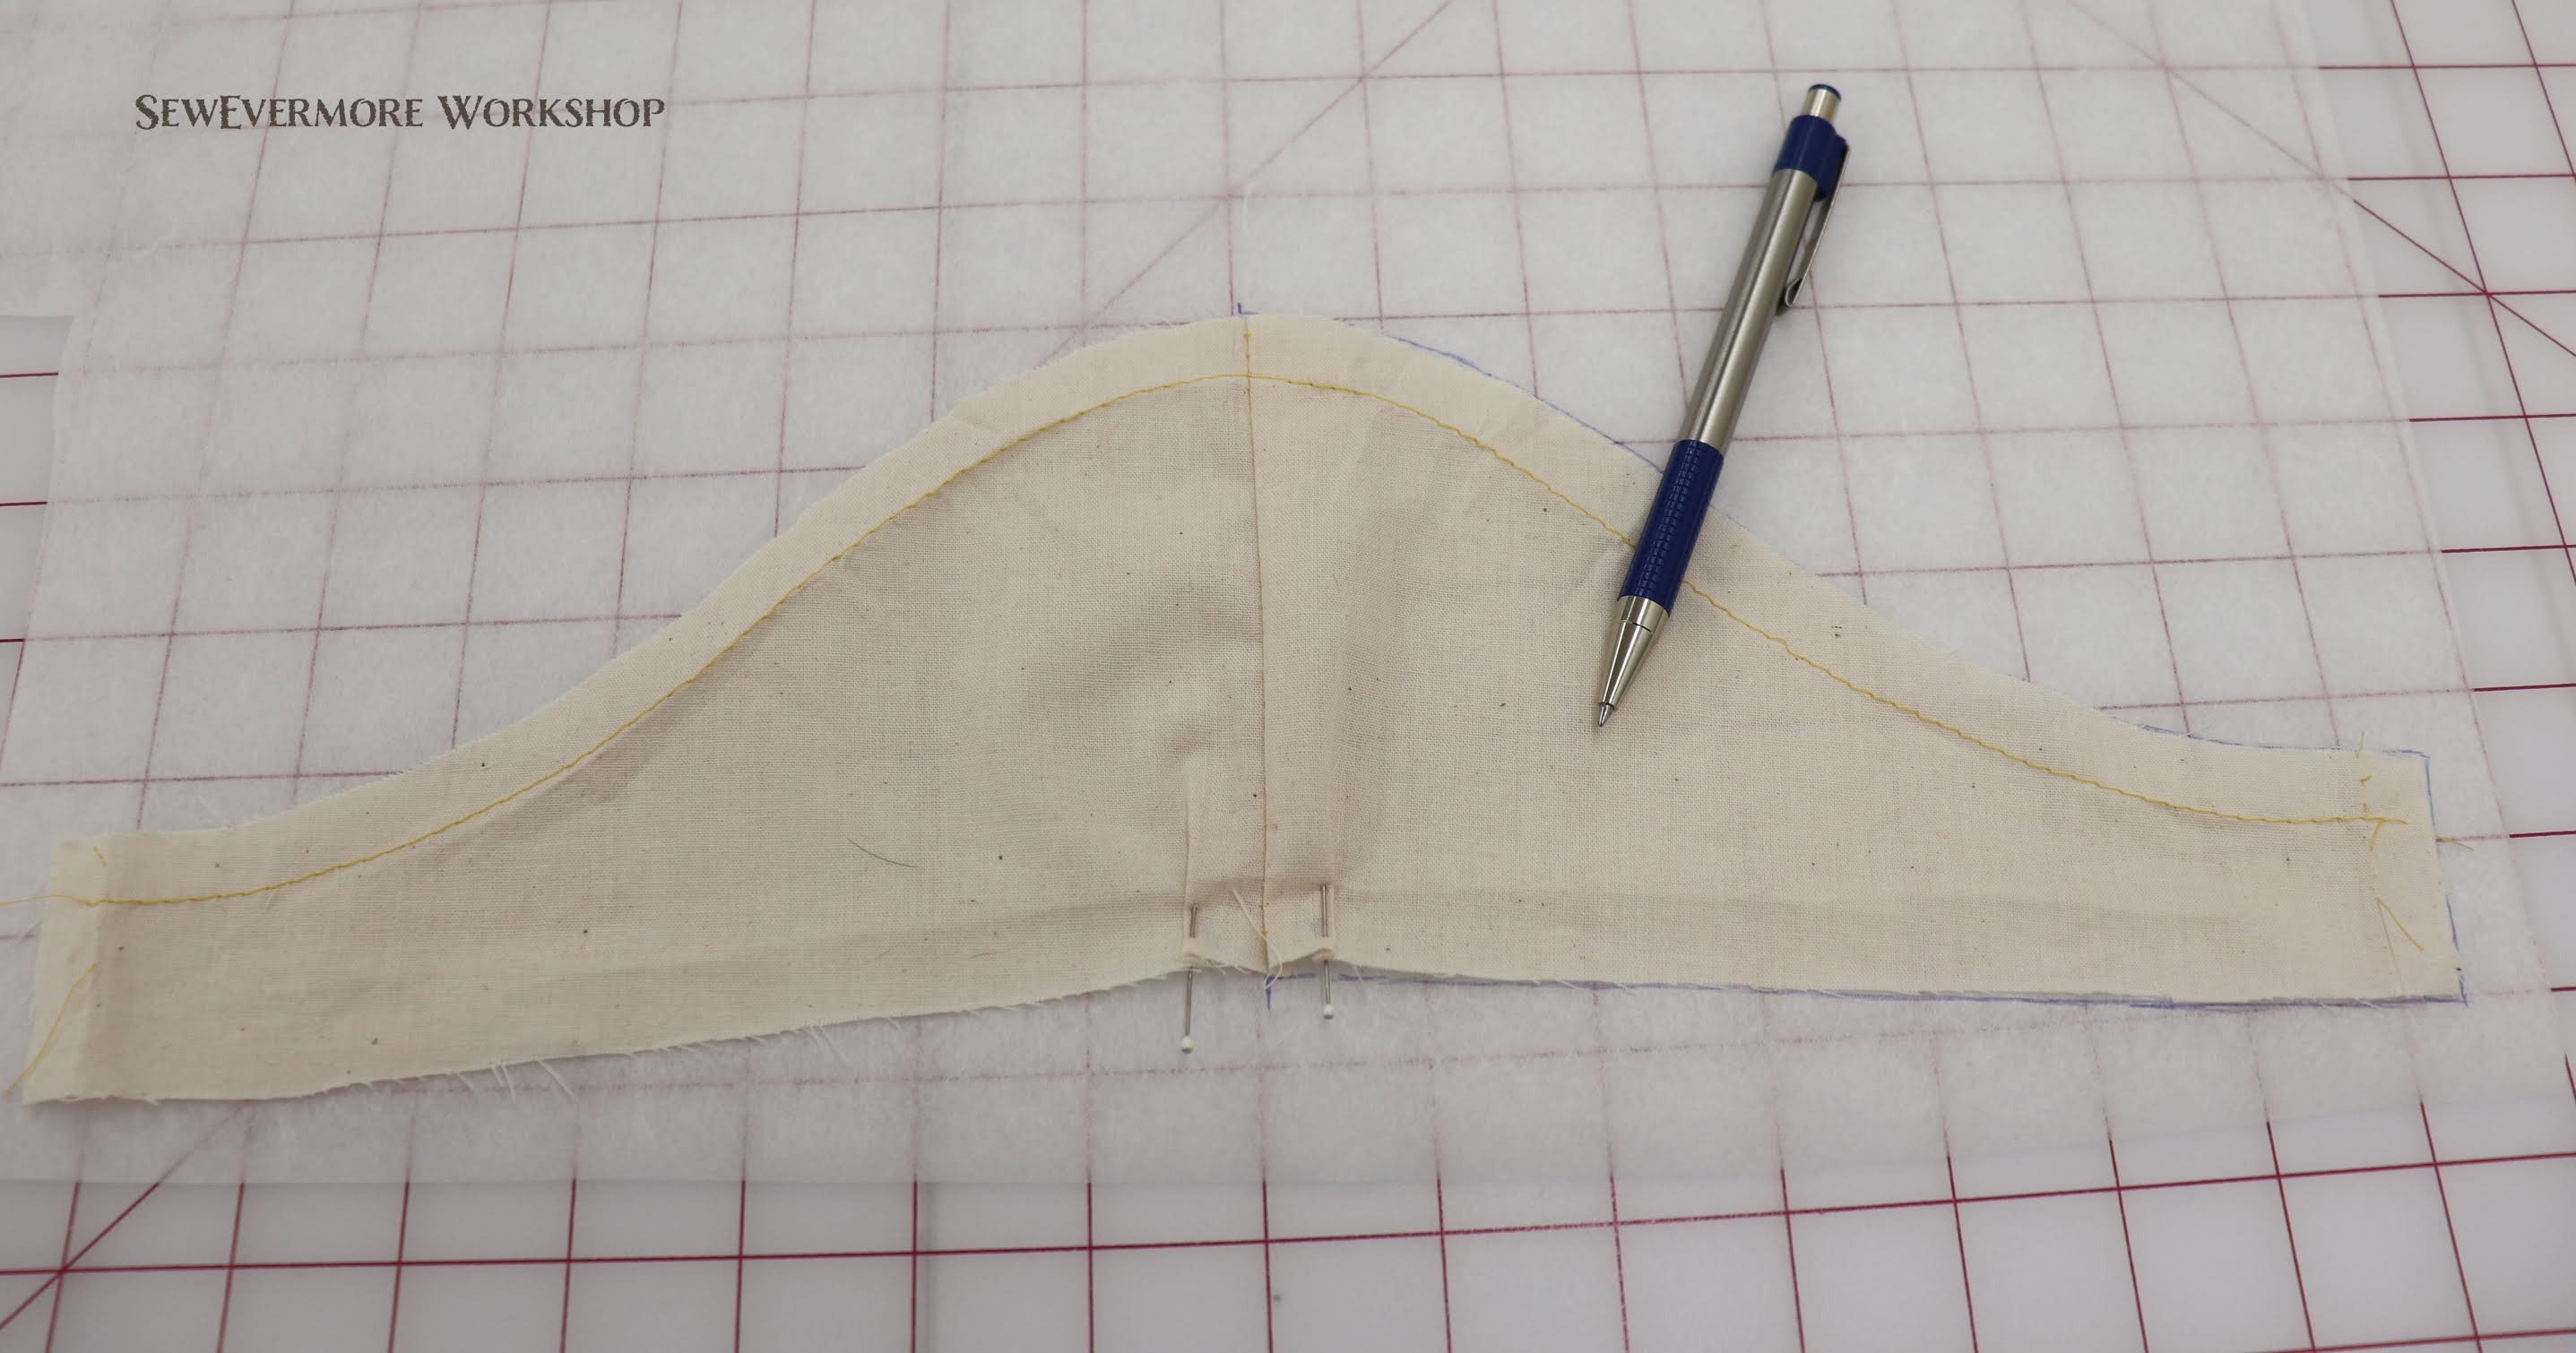
The sleeve was a little fuller and longer than I wanted so I marked out the middle section. Then I stitched it closed, creating a smaller sleeve.


Then I draped it again.


I was much happier with this version. The only thing I didn’t want was the little pleats at the edge. So, keeping those pleats in place I traced a new pattern.
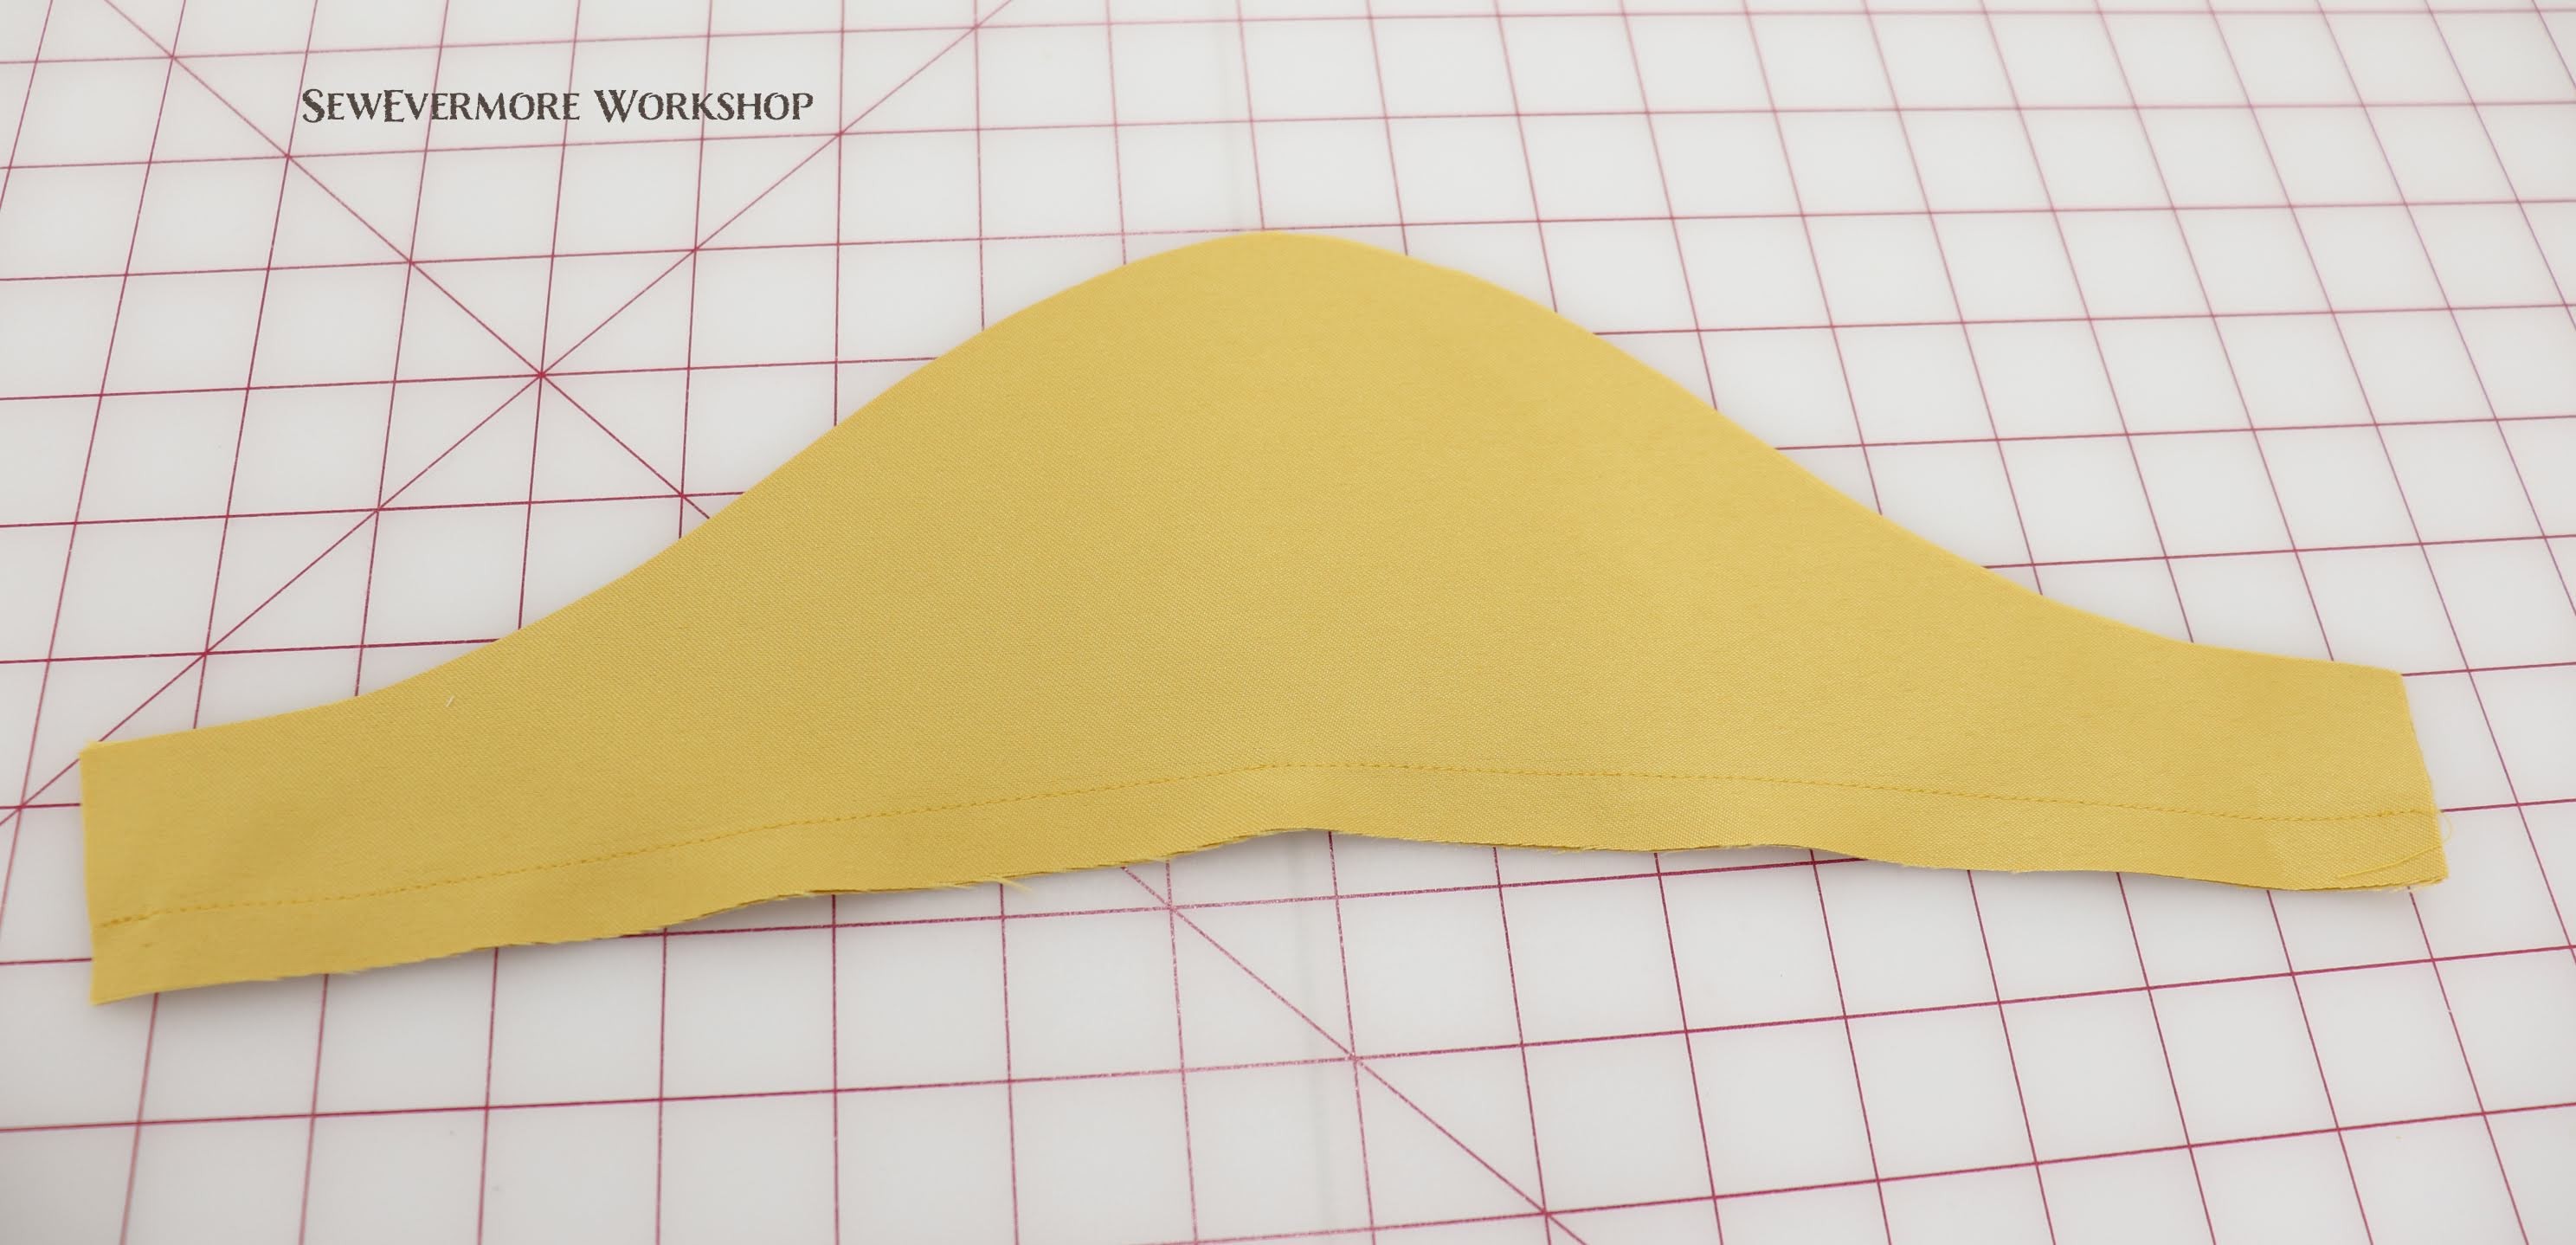
I cut out 4 sleeve pieces from the satin, 2 for the exterior sleeve, and 2 for lining.
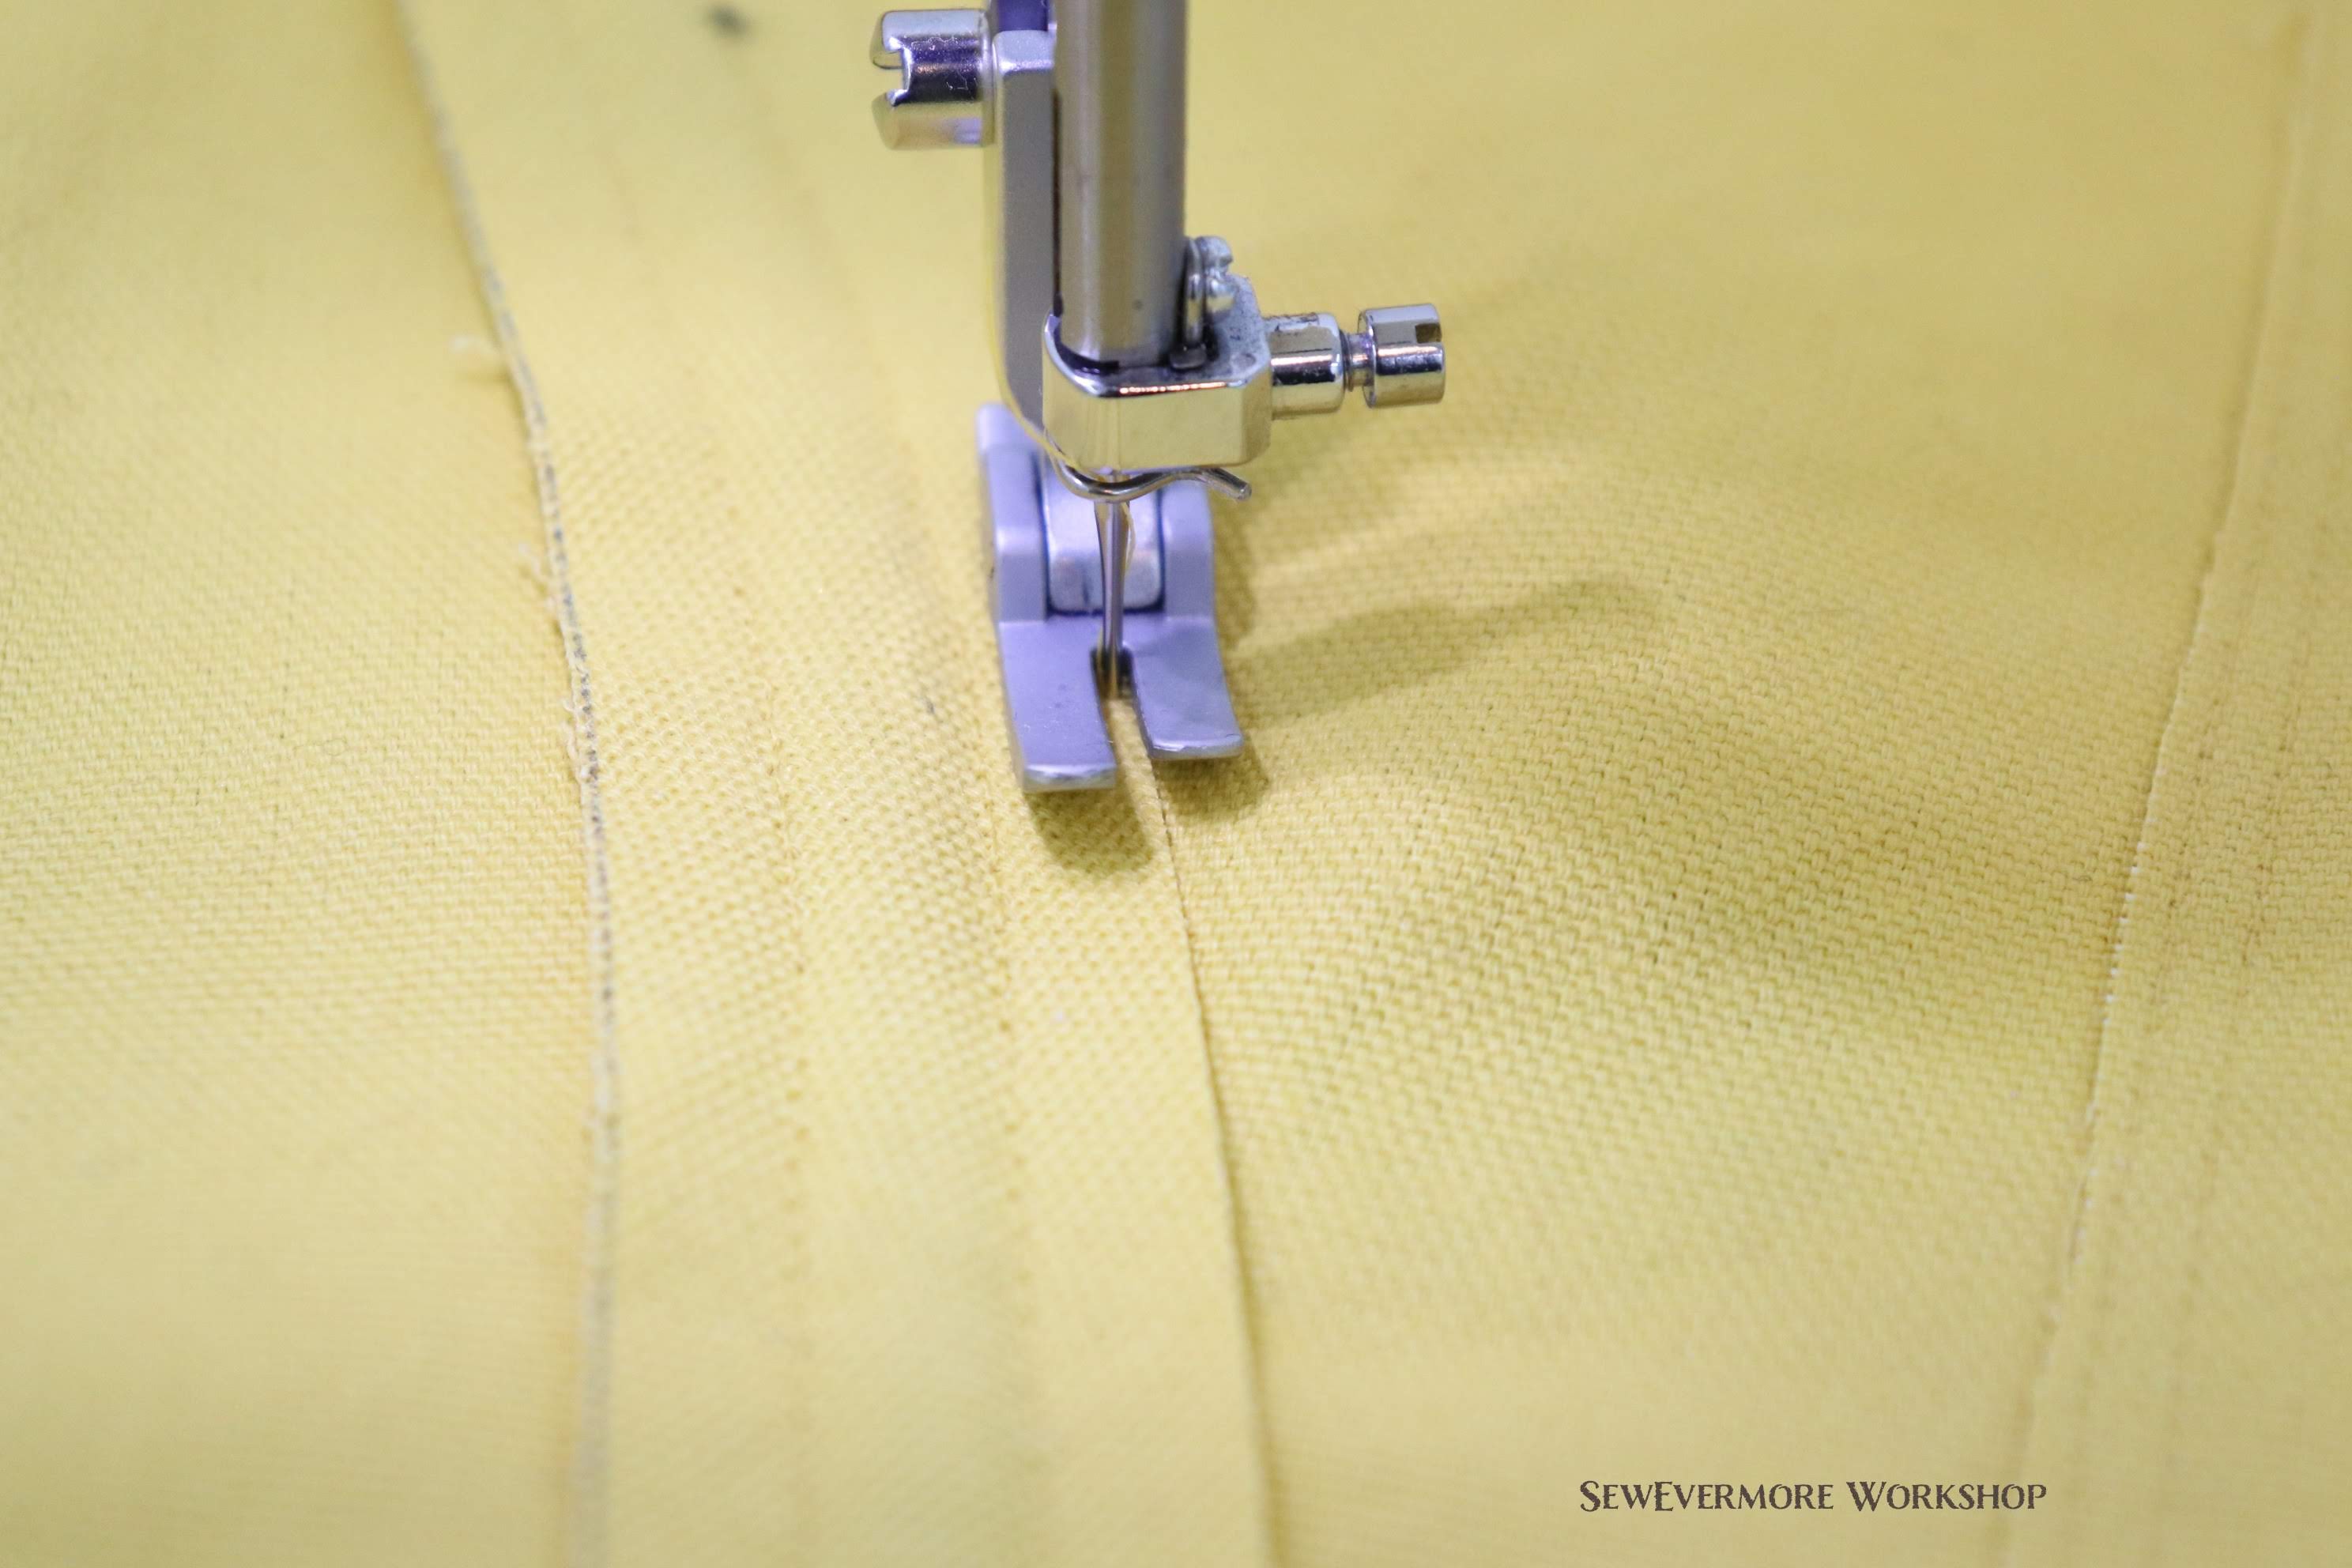
With right sides together, I stitched two of the sleeve pieces together at the bottom.
Next, I pressed the seam allowance toward the lining side and under-stitched it in place.
I folded the sleeve in half and connected them at the under arm.
Then I pressed the seam open and turned the sleeve so the lining was on the inside and the main fabric on the outside, and pressed again. The top edges didn’t line up perfectly due to the thickness of the seam allowance when turning, but they still worked great. So, I basted the top edges in place. Once they were secure I did two rows of gathering stitches along the top curve.


Then, with the sleeves complete, I pinned them to the bodice. I took a lot of time spreading out the ease in the fabric to minimize pleats on the sleeves. I probably could have taken out a bit more of the fullness in the sleeve, but I do like how roomy it is when being worn. I think they will be comfortable.

Then I stitched the sleeves to the bodice. The sleeves are complete!

- Binding the Bodice
With the sleeves attached the bodice is close to finished. Up next, adding binding to conceal the raw edges. Before starting I gave the bodice a good press using a press cloth.

Since I want the binding to be hidden on the inside of the garment, I will be using single fold bias strips. If you want to see the binding, you could use double fold.
I used a fat quarter of the satin fabric and drew lines along the bias 1 5/8 inches apart to make a continuous binding strip.
This yielded a few yards of binding which was just enough.
I placed the binding right side down on the right side of the bodice along all of the edges. This includes neck, hem, and back. You would also do the armholes if you have a sleeveless bodice. (Speaking of the sleeves. If you like you can bind the seam allowances on the sleeves, but this does add extra bulk. You can also trim them and finish with a zigzag stitch. I think this will by my choice on this project.)
I folded it at the corners. I don’t think I would do that again. Instead I would use two strips for the back edges and one for the top and one for the bottom. I think it would be easier.
After stitching the binding in place with a little less than a 1/2 inch seam, I folded it toward the lining side of the bodice, folding the raw edge of the binding over the raw edge of the seam. I whip stitched it in place.
This process is a bit time consuming. It’s a good time to catch up on your Netflix viewing. I clipped the curves and trimmed most of the seams by about 1/8 inch as I did this.
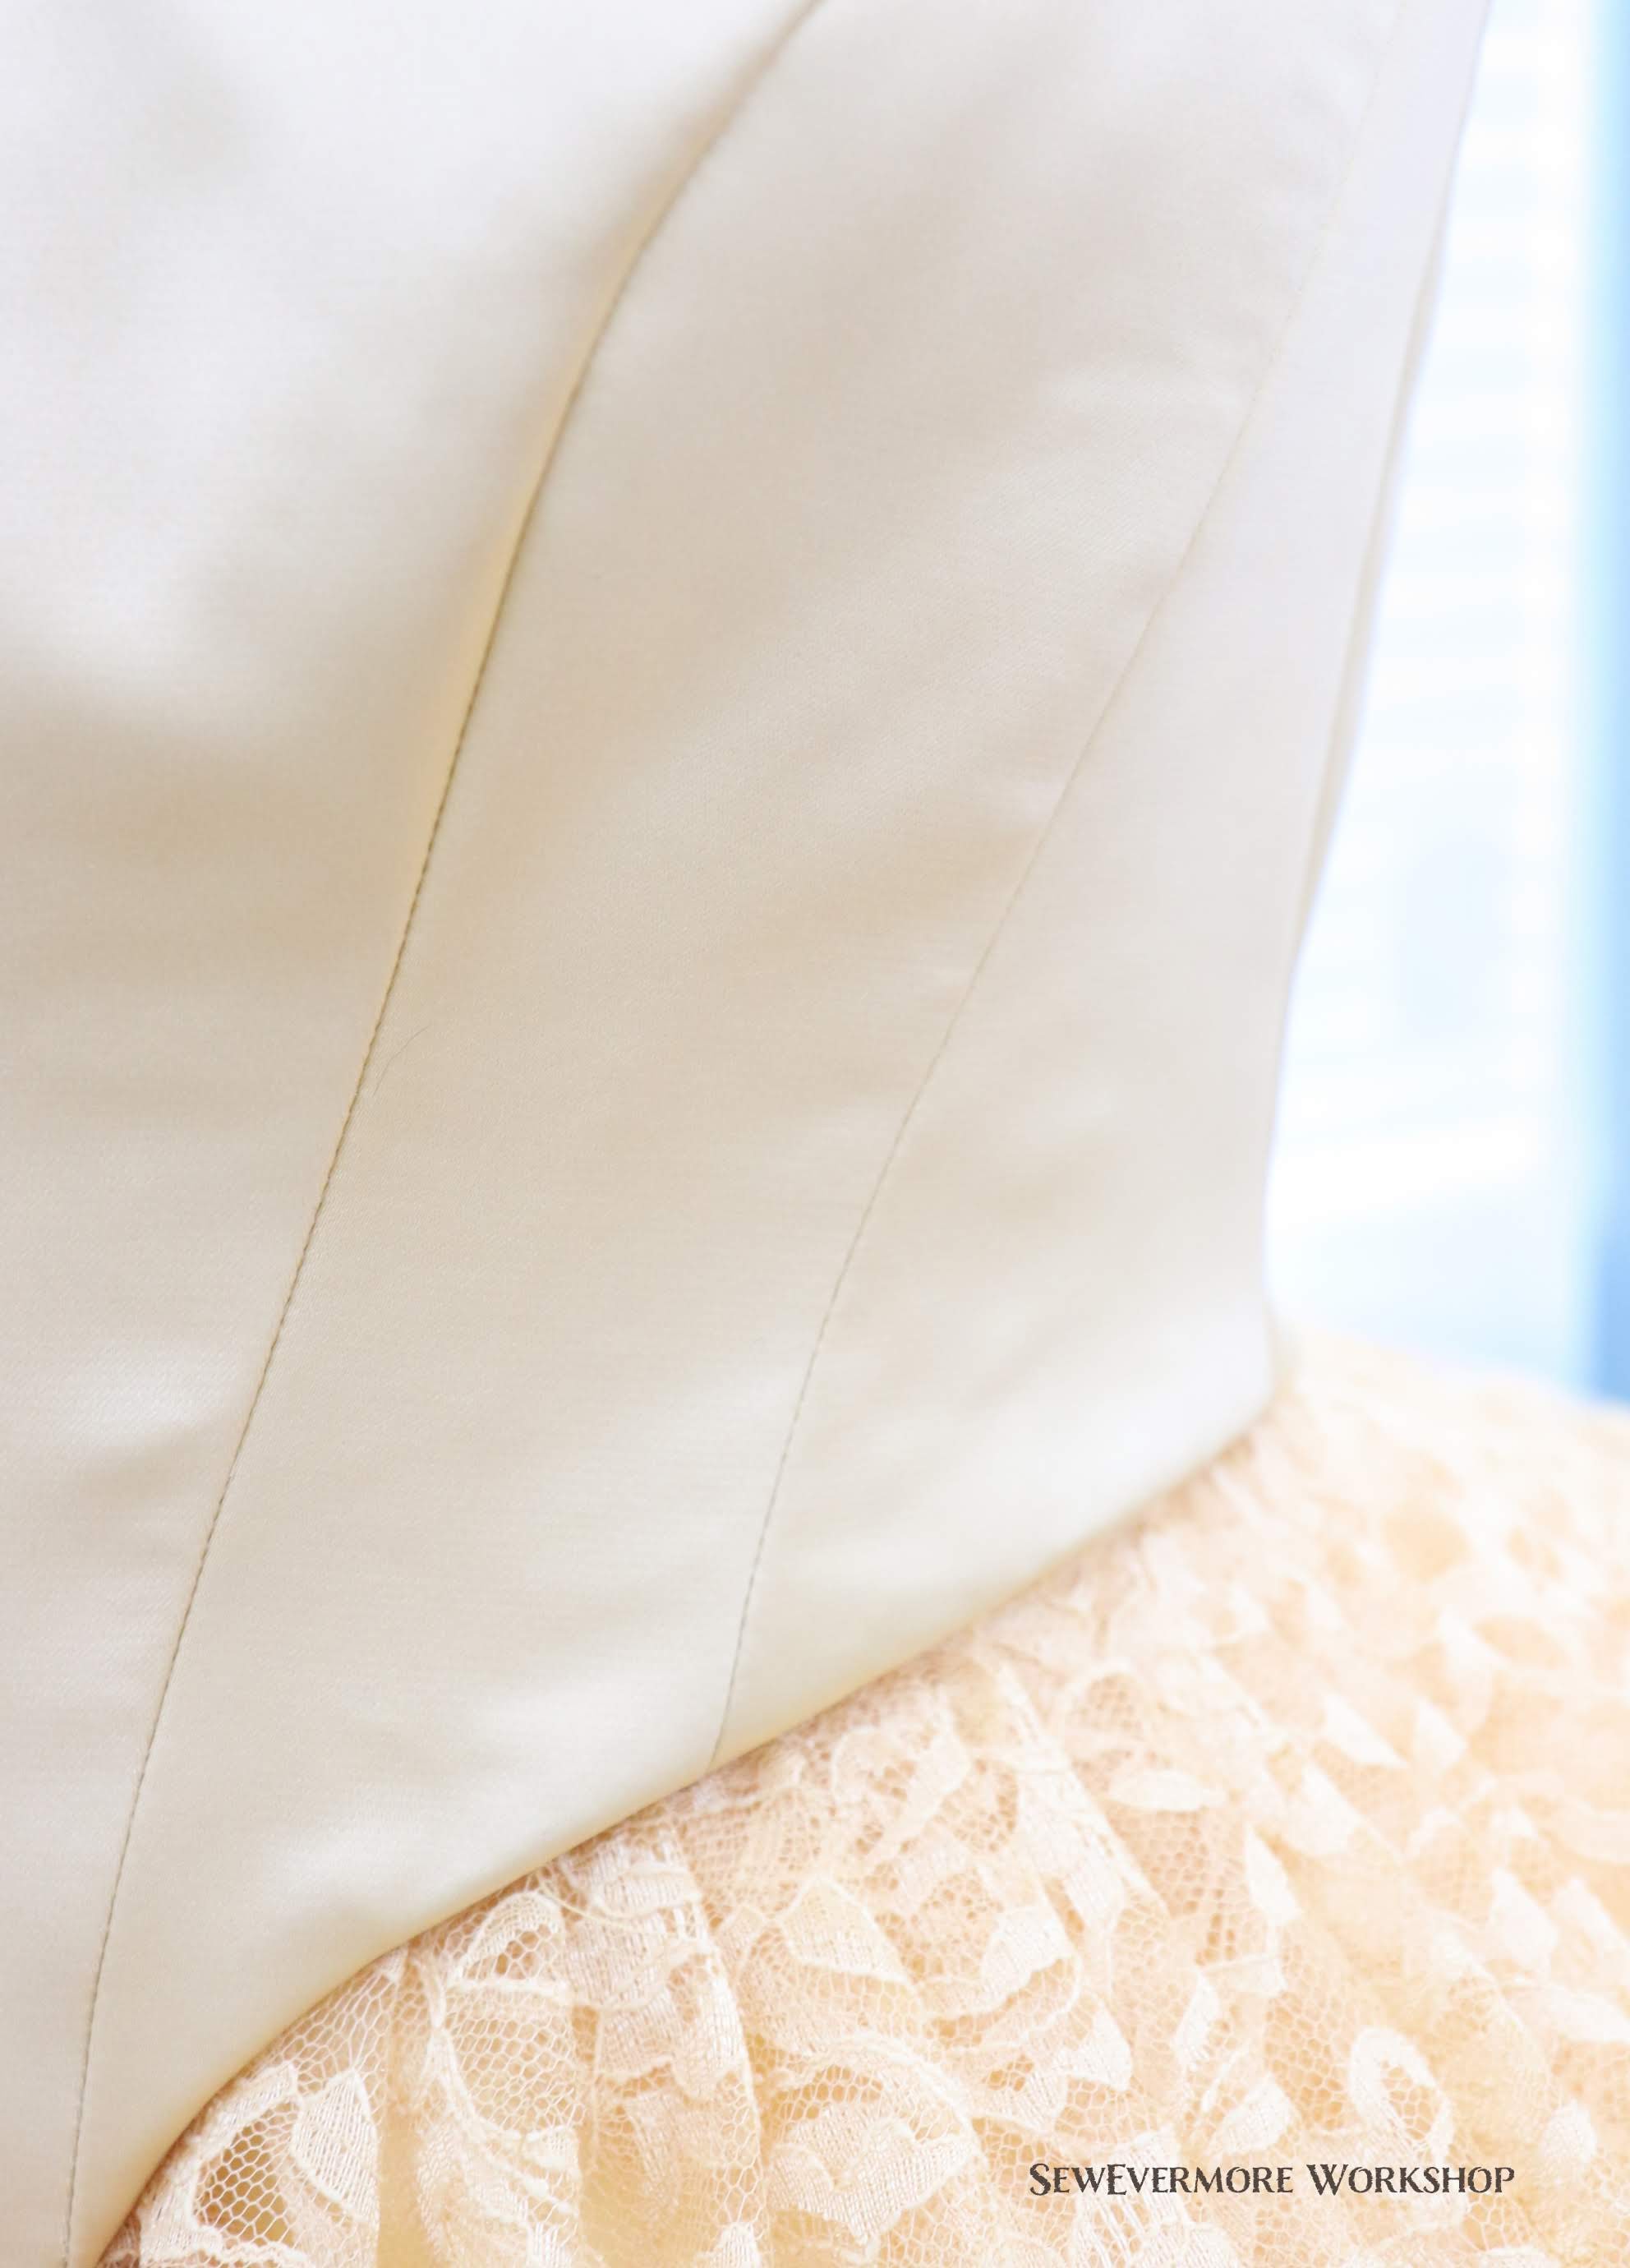
Binding creates a beautiful smooth edge on the right side of the finished bodice. I have found that binding creates a much better result than sewing the lining to the main fabric and flipping it, which I have done with poor results in the past.

Binding really does make a difference in the look of the finished edges.

There are a few wrinkles on the bodice. If I was to make it again I would shorten the side front pieces a bit to help compensate for that. I am hoping that the majority will go away once the grommets have been inserted and the back is laced tightly.
You may notice at this point that the bodice is smaller than expected. This is most likely due to the thickness of the fabric. There are a few simple ways to compensate for this. Plan to add a bit of extra length to the bottom and back, or use a smaller seam allowance. You just have to get to know your fabric and your dress form so you can plan ahead. Making a muslin mock up first is also a good idea if you are using expensive fabric or need an exact fit.

In the end, a gap of 1 – 2 inches in the back usually works just fine for a corset bodice. This allows for a more snug fit if that is what you are going for. It won’t be comfortable, but it will look nice!
What’s next? The majority of the construction is complete we still need to add grommets for lacing, and modesty panels. We also need to complete the waistband, neckline, hem and decoration. It’s coming together quickly now!

This may sound like a strange question, but are all the godets before layer five attached to a single skirt?
LikeLike
Not strange at all! Yes, all of the godet layers of the petticoat, those below layer 5, are attached to a single skirt. The larger godets are simply placed higher up on that skirt, so they cover the previous godets that were attached.
LikeLike
Thank you! I didn’t realize until recently, looking at the yardage you listed, that something was different about the process than others I’d seen. It’s a clever method to cut back on fabric.
LikeLike